This is part II of a three-part series describing a proposed approach for an agile API lifecycle from ideation to production deployment. If you missed part 1 or need a refresher, please take some time to read part I.
This series is coauthored with Nicolas Massé, also a Red Hatter, and it is based on our own real-life experiences from our work with the Red Hat customers we’ve met.
In part I, we explored how ACME Inc. is taking an agile API journey for its new Beer Catalog API, and ACME completed the API ideation, contract design, and sampling stages. Let's go now to mocking.
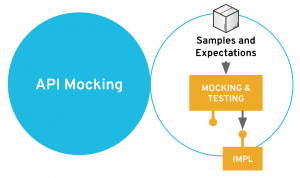
Milestone 3: API Mocks and Ready-to-Use Tests
We took time in part 1 illustrating samples and defining complementary expectations for our API or microservices. Is it all worth it? Yes, definitely. The first reason is because samples and expectations can be helpful documentation allowing you to understand the real-life usages of an API. The second is that we will be able to use them to speed up things and parallelize development. Let’s see how we can do that.
The purpose of this stage is to be able to:
- Transform provided samples into ready-to-use mocks.
- Reuse samples and expectations as a real test suite for future API implementation.
Here again, there’s the “local” versus “team” approaches discussion regarding tooling.
The “local” approach for producing mocks is really easy to set up and use from a developer perspective. It is implemented by many tools such as Hoverfly and WireMock. You can also argue that some development tools are so easy to use that mocking is just a few lines of code. That may be true, but misses two important points, in my opinion.
The first is about the documentation and communication purposes behind mocks. They’re also here to help us understand APIs so they should be largely reachable. The second is about the lifetime of a mock. Mocks managed by developers are very useful for their project scope during integration tests. However, the most useful mocks are those that stay live, ready to use for every consumer that will arise in the coming weeks, months and years.
The “team” approach provides these benefits. Some tools such as Hoverfly Cloud or even Postman mocks allow this team approach. However, we still think there are missing some points, because being SaaS-only solutions, they are devoted to REST APIs only and deal only with the mocking part, not the testing part.
Here again, we propose having a look at Microcks for this stage. Microks is able to live in your data center and take over your REST APIs and your—not so legacy—existing SOAP web services. Microcks also supports testing your API implementation, as explained below.
Back to our ACME use case: the only thing to do in Microcks is to register the URL of the Postman Collection file in your Git repository. Microcks has this concept of a job than can be scheduled or triggered to refresh mocks and expectations definitions within its repository.
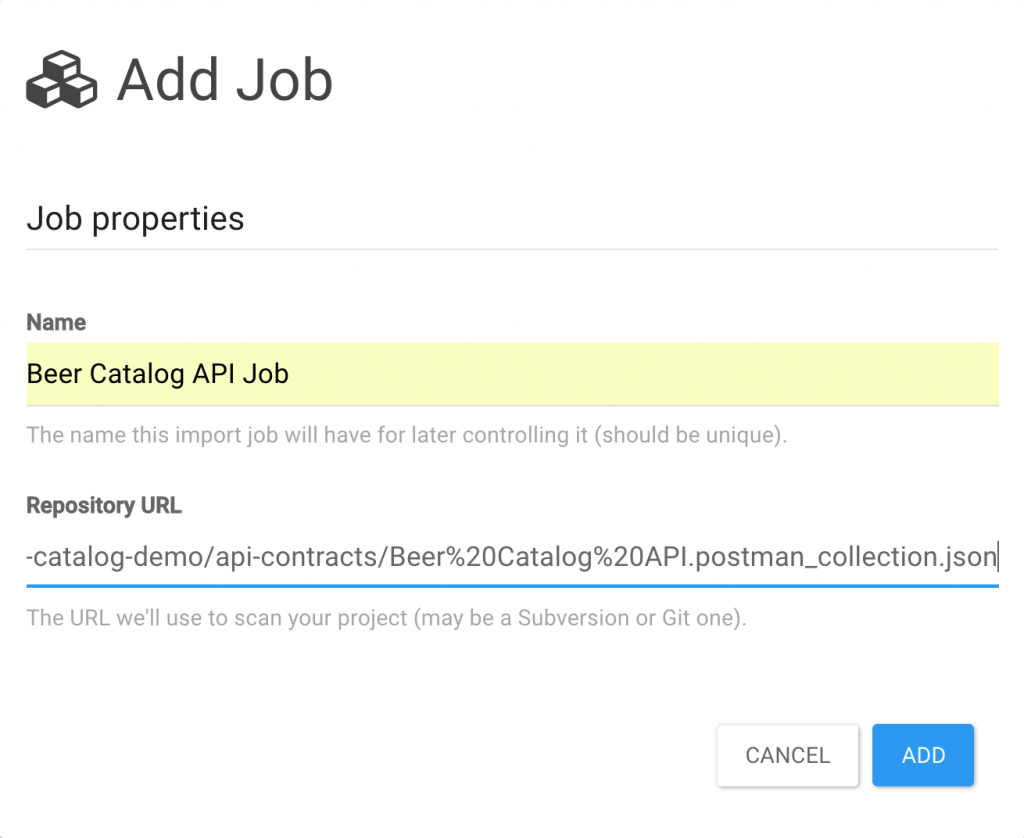
Once the job is created and activated, it scans the specified URL. That way, it is able to discover your API or service definitions. We instantly get a full description of the API and meaningful attached samples. Mocks are deployed instantly and specific endpoints are provided for every new API and its operations.
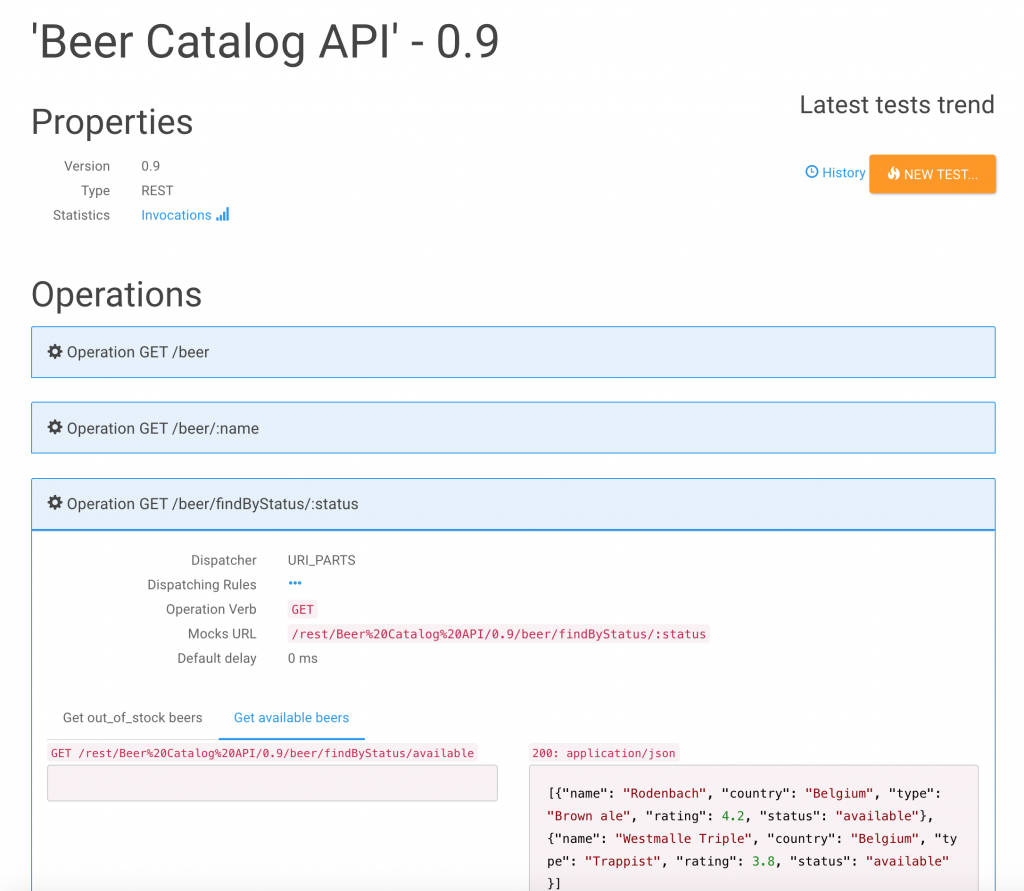
Retrieving the Mocks URL information and appending it to the server base URL, we can now check that we have ready-to-use mocks.
We are able to list all the beers in the catalog—using pagination options.
$ curl 'http://microcks.example.com/rest/Beer%20Catalog%20API/0.9/beer?page=0'                                                  [
    {
        "name": "Rodenbach",
        "country": "Belgium",
        "type": "Brown ale",
        "rating": 4.2,
        "status": "available"
    },
    {
        "name": "Westmalle Triple",
        "country": "Belgium",
        "type": "Trappist",
        "rating": 3.8,
        "status": "available"
    },
    {
        "name": "Weissbier",
        "country": "Germany",
        "type": "Wheat",
        "rating": 4.1,
        "status": "out_of_stock"
    }
]
We can then retrieve only one beer resource using its name:
$ curl 'http://microcks.example.com/rest/Beer%20Catalog%20API/0.9/beer/Weissbier'
{
    "name": "Weissbier",
    "country": "Germany",
    "type": "Wheat",
    "rating": 4.1,
    "status": "out_of_stock"
}
And we can also retrieve only the beers having the available status:
$ curl 'http://microcks.example.com/rest/Beer%20Catalog%20API/0.9/beer/findByStatus/available'
[
    {
        "name": "Rodenbach",
        "country": "Belgium",
        "type": "Brown ale",
        "rating": 4.2,
        "status": "available"
    },
    {
        "name": "Westmalle Triple",
        "country": "Belgium",
        "type": "Trappist",
        "rating": 3.8,
        "status": "available"
    }
]
Notice on the Microcks API details page the orange NEW TEST... button; we will use it in the next stage. We are now ready to start two development streams in parallel:
- The development of the API full implementation
- The development of any of the consumers
Consumers will use the mocks exposed by Microcks to have a taste of future implementation. At next stage, we will focus on API implementation and see how the expectations we set up will be used to test and ensure the implementation is respecting them.
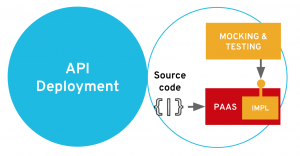
Milestone 4: Developing, Deploying, and Testing
Developing, deploying, and testing is the most obvious stage of this API journey, and you probably already have chosen your stack. However, we think it may be helpful to highlight some requirements of modern application development and deployment.
We can set up the assumption that today, each new application supporting API should be a cloud-ready application. By cloud-ready, we expect that it should have the following properties:
- The ability to adapt dynamically to the load
- A flexible and centralized configuration
- A dependency discovery mechanism
- A native load-balancing mechanism for communicating
- Strong resiliency, monitoring, and observability
- Automatic log and distributed traces collection
All those features should be at hand, integrated into the developer experience. They are the reason why PaaS solutions based on Kubernetes container orchestrator are today the best choice for building and deploying API implementations. The purpose of this stage is to make API deployment fast and repeatable, so that we can test different environments with our expectations.
At this stage, ACME has chosen the Spring Boot framework as its development stack and will deploy it onto OpenShift, the Red Hat PaaS solution based on Kubernetes. Once you get your OpenShift instance ready, we’re going to create a new project for hosting our development environment of the ACME API implementation. This is as simple as executing an oc command, or it can be done through the OpenShift web console:
oc new-project beer-catalog-dev --display-name="Beer Catalog (DEV)"
Having a dedicated project in OpenShift allows it to be isolated (in terms of network, user authorization, and resource consumption) from another project. You can now easily deploy your application, choosing Red Hat OpenJDK 8 from the catalog and filling in the advanced properties.
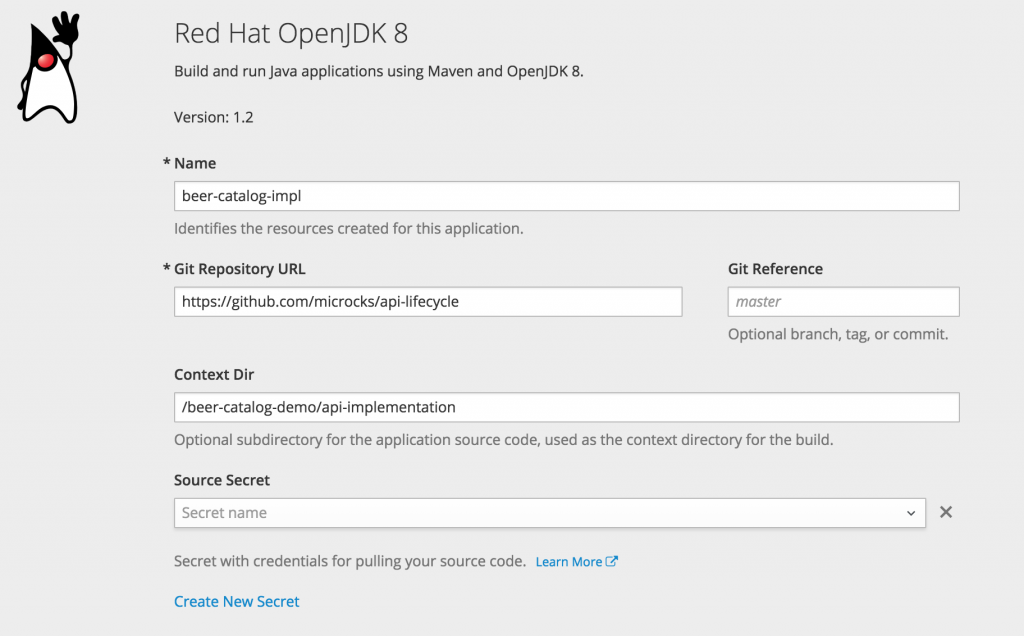
You’ll notice that API implementation is located in a /beer-catalog-demo/api-implementation directory within the https://github.com/microcks/api-lifecycle GitHub repository. Even if OpenShift is running containers at the end, it allows you to simply deploy your application from source code. It is handing to you all the bits and bytes of application build and containerization before the real deployment occurs (this process is called "source to image" in OpenShift).
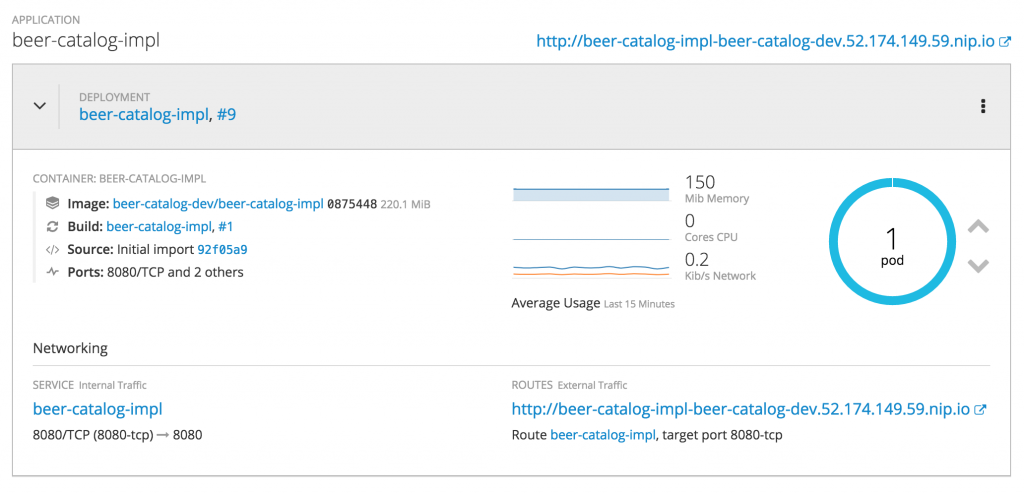
After some minutes, you should have a pod running and all the networking stuff initialized, as shown in the screenshot below:
It is now time to test the ACME implementation of the Beer Catalog API version 0.9 to see if it’s compliant with the defined endpoints and expectations. So let’s get back to Microcks so you can now use the orange NEW TEST… button.
Requesting a new test in Microcks allows you to set up two test properties: the endpoint URL that should be evaluated and the runner (the test strategy) that the test should apply.
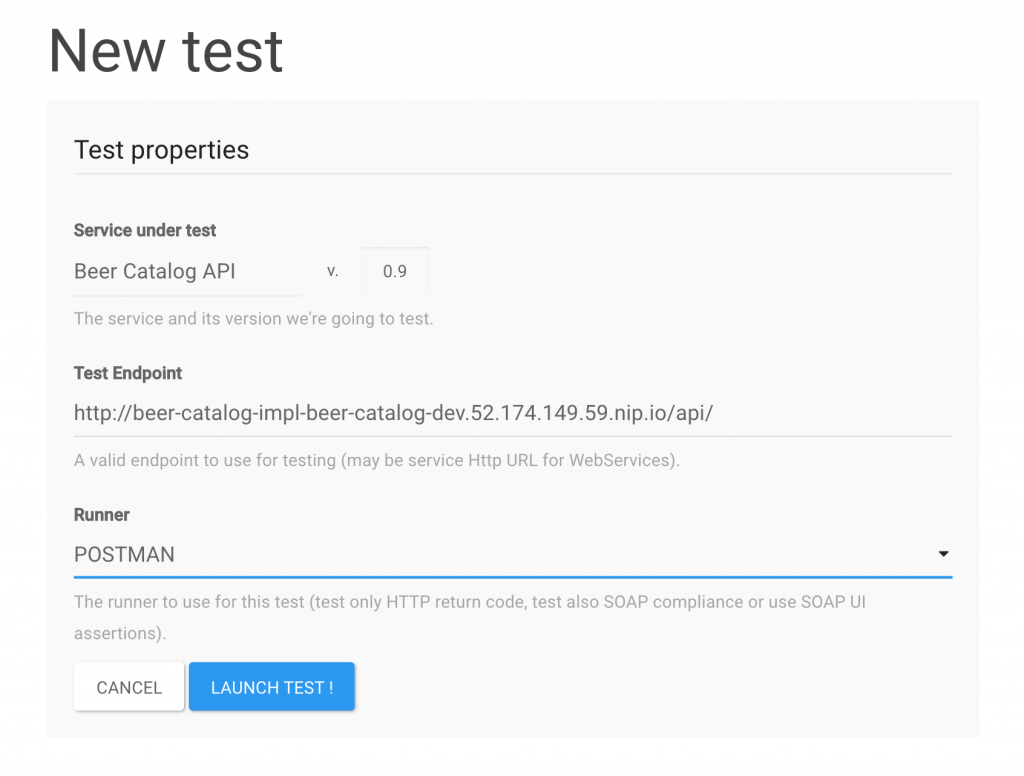
Microcks makes different strategies available out of the box for tests. You can choose testing only the endpoints (that is, a smoke test) up to testing the compliance of response messages from the implementation. The Postman strategy simply reuses the expectations we have set up during the staging phase in Milestone 2.
The test can now be launched. You’ll land on a summary page that will refresh until the test is completely done (success or failure). You can see that in our case, it’s all green, indicating success.
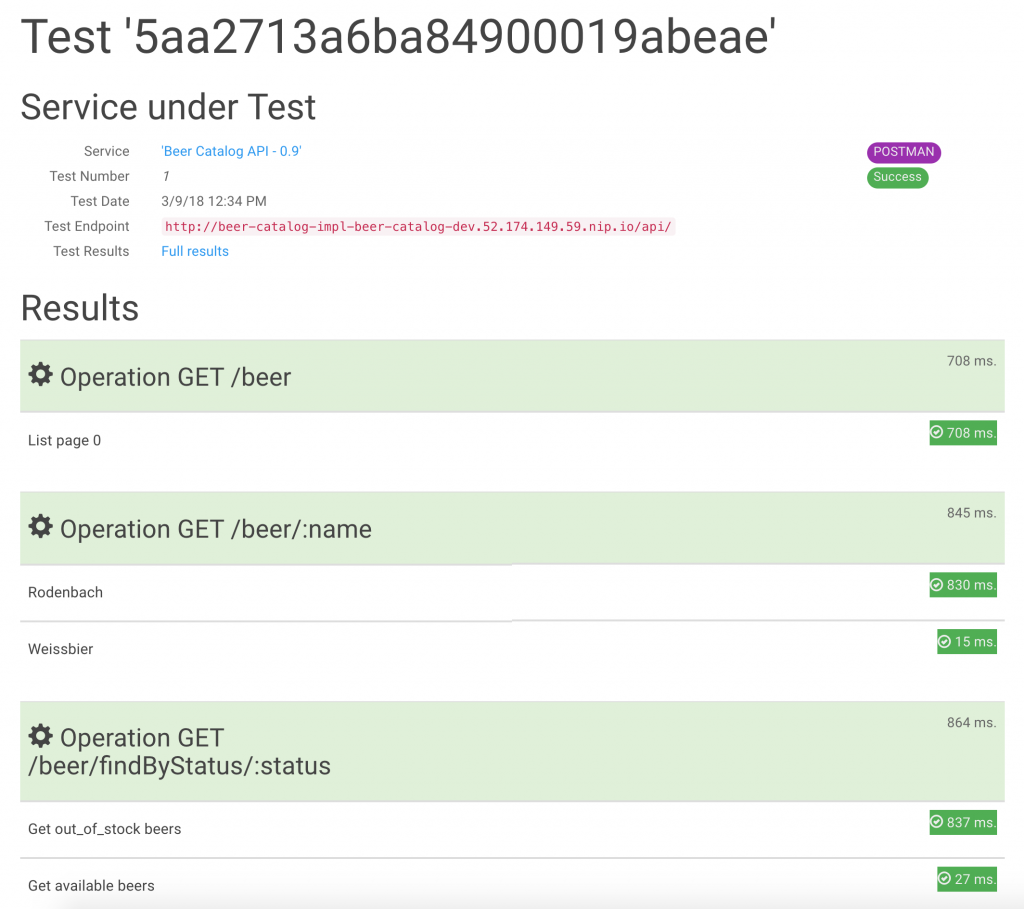
You can then access the detailed full results of the test, which leads you to a page where you can also check and grab the payload and headers exchanged with your tested API implementation.
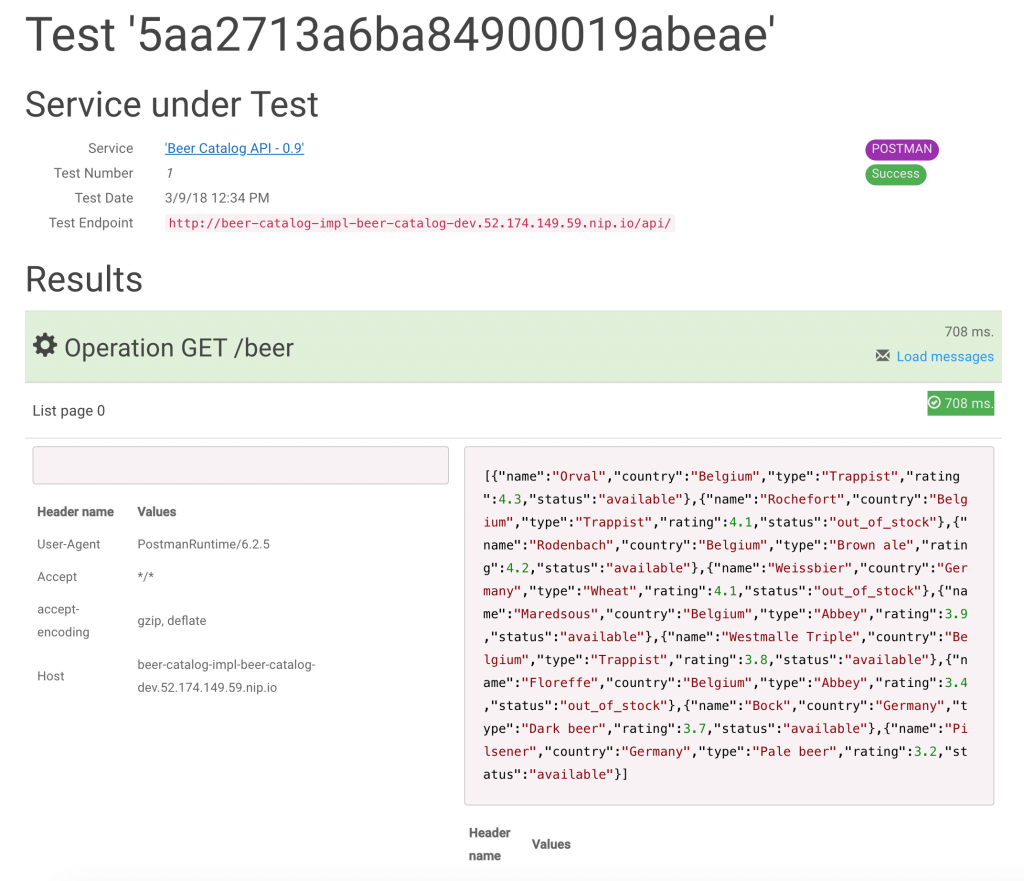
We are now confident in the implementation of ACME's API and can continue the journey.
Milestone 5: Continuous Testing of the API Implementation
Launching the test manually is acceptable one or two times. But it would be really neat to have this done in an automated way. Moreover, you should consider launching new tests automatically from your continuous integration/continuous delivery (CI/CD) pipeline each time you build and deploy a new version of your implementation.
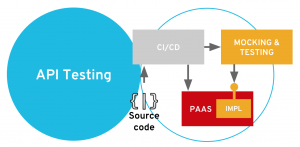
What we achieve in this stage is a seamless integration of the API testing within your automated build, deployment, and delivery flow, as suggested in the schema below:
Luckily, ACME has the right set of tools for doing that. What we are going to set up now is a new production environment for our API implementation. Right next to the beer-catalog-dev environment we created earlier in OpenShift, we are going to create a beer-catalog-prod environment. We’re also going to declare a CI/CD pipeline within OpenShift. This pipeline will automatically connect to Microcks in order to check that the test is OK before deploying into production.
Before starting, let’s review some prerequisite setups and concepts. The CI/CD pipelines in OpenShift are implemented using Jenkins—a de facto standard for managing pipelines. OpenShift provides certified images and templates of Jenkins that you can customize. And we have used that feature to set up a Jenkins instance that embeds the Microcks Jenkins plug-in. Plug-in installation can be done in many way, but we provide a Jenkins master configuration to do that easily. We assume you have set up a jenkins service instance (that has this plug-in) in a dedicated microcks OpenShift project.
Because doing everything by hand is cumbersome and error-prone, we provide a deploy-pipeline.sh script in the GitHub repository. So just execute this script once you are logged on to your OpenShift environment, and you should get a new pipeline definition within your microcks project.
You might just review the configuration of this pipeline before actually starting it so you understand what’s going on. In the Configuration tag of the web console, you’ll find the following description:
node('maven') {
  stage ('buildInDev') {
    openshiftBuild(buildConfig: 'beer-catalog-impl', namespace: 'beer-catalog-dev', showBuildLogs: 'true')
  }
  stage ('deployInDev') {
    openshiftDeploy(namespace: 'beer-catalog-dev', deploymentConfig: 'beer-catalog-impl')
  }
  stage ('testInDev') {
    // Add Microcks test here.
    microcksTest(apiURL: 'http://microcks.example.com/api',
      serviceId: 'Beer Catalog API:0.9',
      testEndpoint: 'http://beer-catalog-impl-beer-catalog-dev.52.174.149.59.nip.io/api/',
      runnerType: 'POSTMAN', verbose: 'true')
  }
  stage ('promoteToProd') {
    openshiftTag(namespace: 'beer-catalog-dev', sourceStream: 'beer-catalog-impl',  sourceTag: 'latest', destinationStream: 'beer-catalog-impl', destinationTag: 'promoteToProd')
  }
  stage ('approval') {
    input 'Do you want to deploy this application in production?'
  }
  stage ('deployToProd') {
    openshiftDeploy(deploymentConfig: 'beer-catalog-impl', namespace: 'beer-catalog-prod')
    openshiftScale(deploymentConfig: 'beer-catalog-impl', namespace: 'beer-catalog-prod', replicaCount: '2')
  }
}
Notice the important part here: it's the microcksTest() directive. That is the Microcks plug-in for Jenkins that just delegates the execution of a new test to the Microcks server using the mentioned apiURL. The new test is about our Beer Catalog API version 0.9 on the development testEndpoint and uses the POSTMAN runnerType. So basically, we found the same arguments as with our earlier manual test.
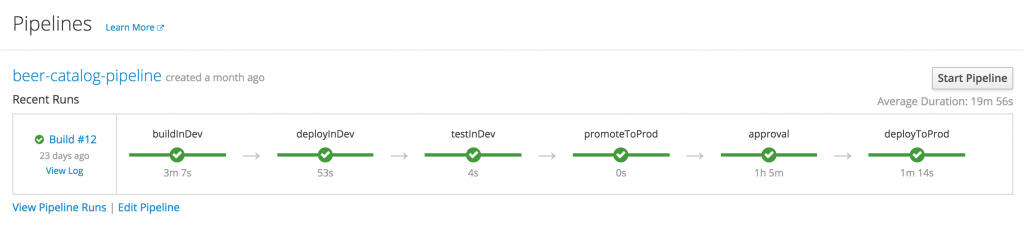
In the pipeline definition, this test will be run after each deployment on the development environment. The success of the test will allow the pipeline to continue and promote the API implementation into production.
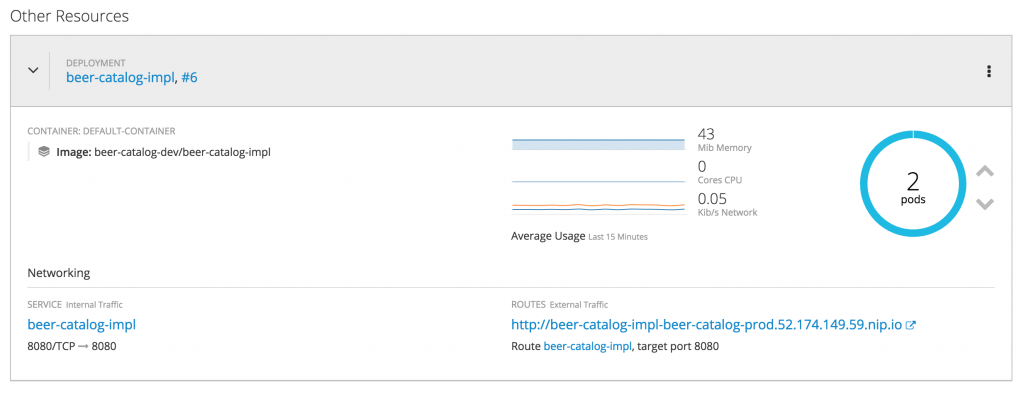
After running the pipeline, you should get the following status on the beer-catalog-prod environment: two replicas of the same application pod.
Key Takeaways
In this part II of the series, we have seen how ACME pursued its API journey through the following three stages:
- API mocks exposition so that future consumers of the API can start earlier their development.
- Development and deployment on a modern container platform for easy deployment. We can then run manual tests to harden the implementation regarding complementary expectations.
- Set up of continuous testing that allows us to reuse the samples and tests in a continuous integration and delivery pipeline.
Stay tuned for part III, in which you will learn how to secure the APIs using API management and much more.
Last updated: April 3, 2023