The following steps will guide you through creating your first project on Red Hat OpenShift Container Platform, which is running inside the Red Hat Container Development Kit on the minishift virtual machine. The project is a Node.js "Hello, World" application that displays the current hit count. A MongoDB database is used to store the hit count. Two pods will be created, one for the Node.js application and another for the database.
The source code for the project is available on GitHub: openshift/nodejs-ex. The OpenShift catalog in CDK has a number of project templates available including this sample Node.js application. For this guide, we will use the template from the OpenShift catalog. You will use the OpenShift web console to build and manage your application.
Note: This guide uses the OpenShift web console to build and manage your application. Alternatively you could use the oc CLI to accomplish the same steps. The following command would create the application pulling the source from GitHub:
$ oc new-app https://github.com/openshift/nodejs-ex
For more information see Creating an Application using the CLI, in the Developer Guide section of the OpenShift documentation.
If you haven't installed CDK, follow these instructions.
Start the CDK/minishift VM:
$ minishift start
Once the VM is up and running, launch the web console in the browser:
$ minishift console
Note: The web console may not launch on some older versions of Safari. You can get the URL to use with a different browser using the following command:
$ minishift console --url
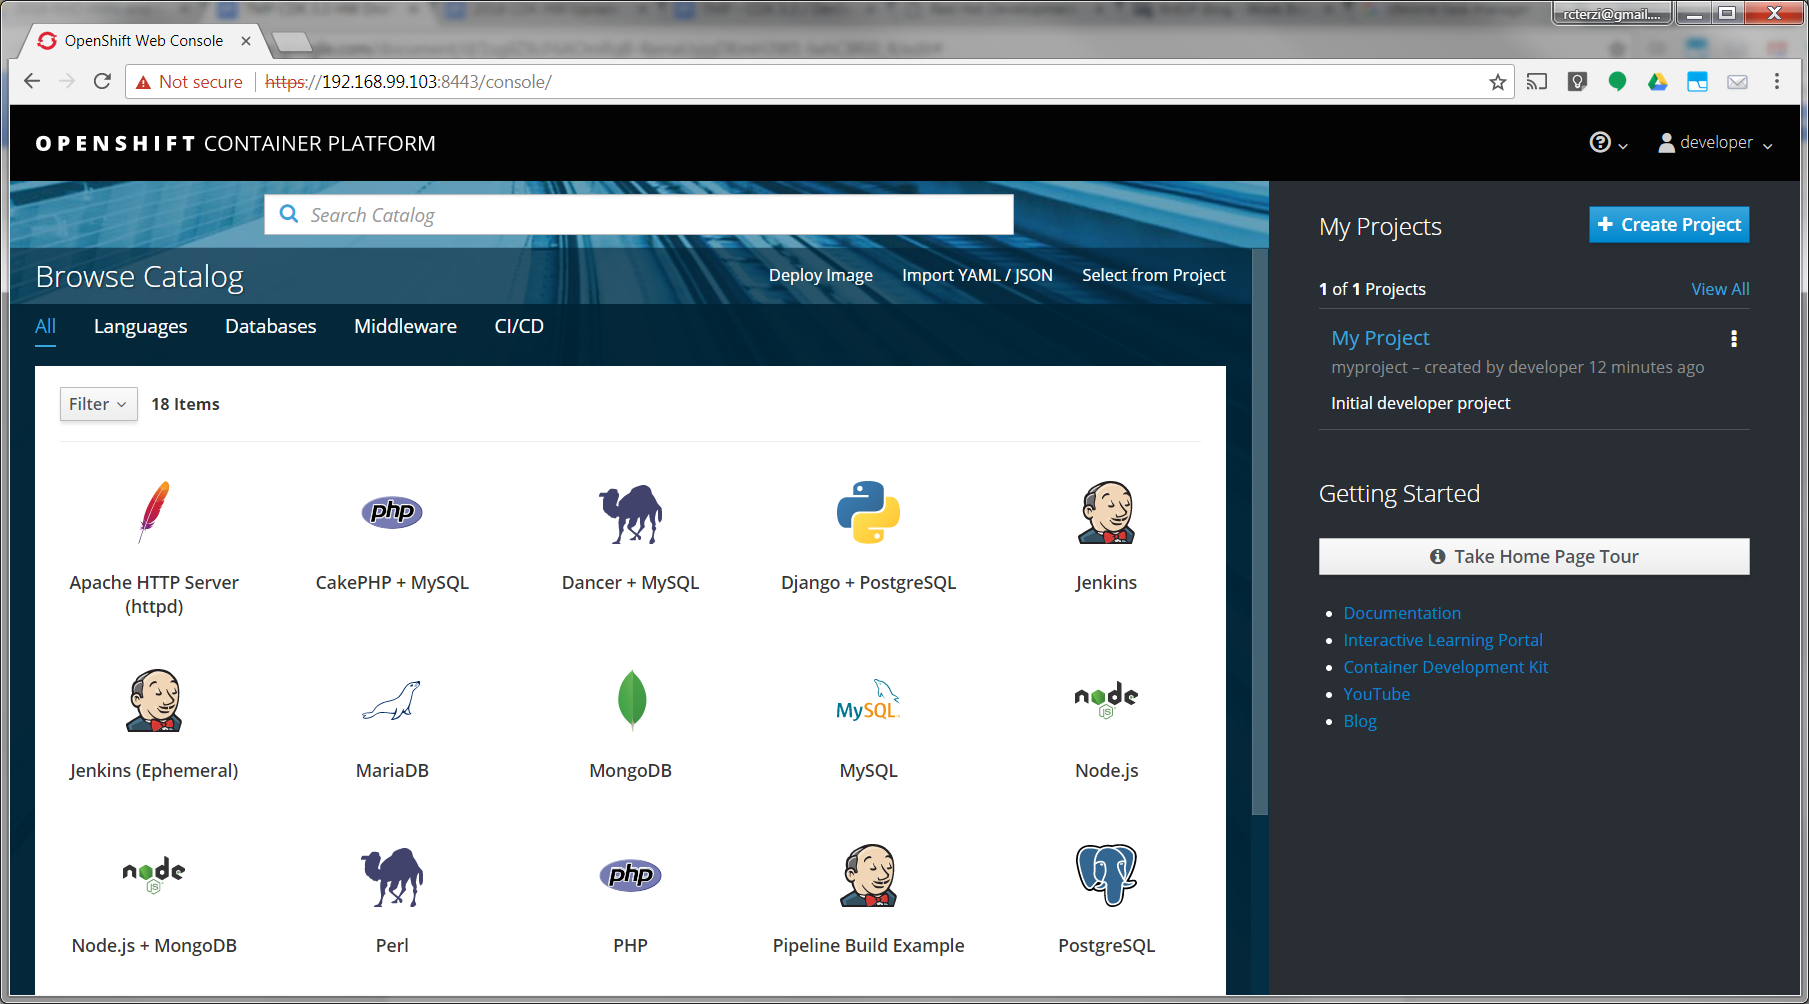
Log into the OpenShift console with developer as the username and any text for the password. A default empty project called My Project has been created for you. Alternatively, you can use the create project button to create a new empty project at any time.
Create the application
Follow these steps to create, build, and deploy the application:
- After logging in you will see a page with the OpenShift catalog of application templates that have been preloaded into CDK.
- Click on the icon labeled Node.js + MongoDB. Then, click Next to view the project configuration information.
- None of the defaults need to be changed, so click Create to create the application. This will create the application and kick off a build. Click Close to dismiss the create dialog box.
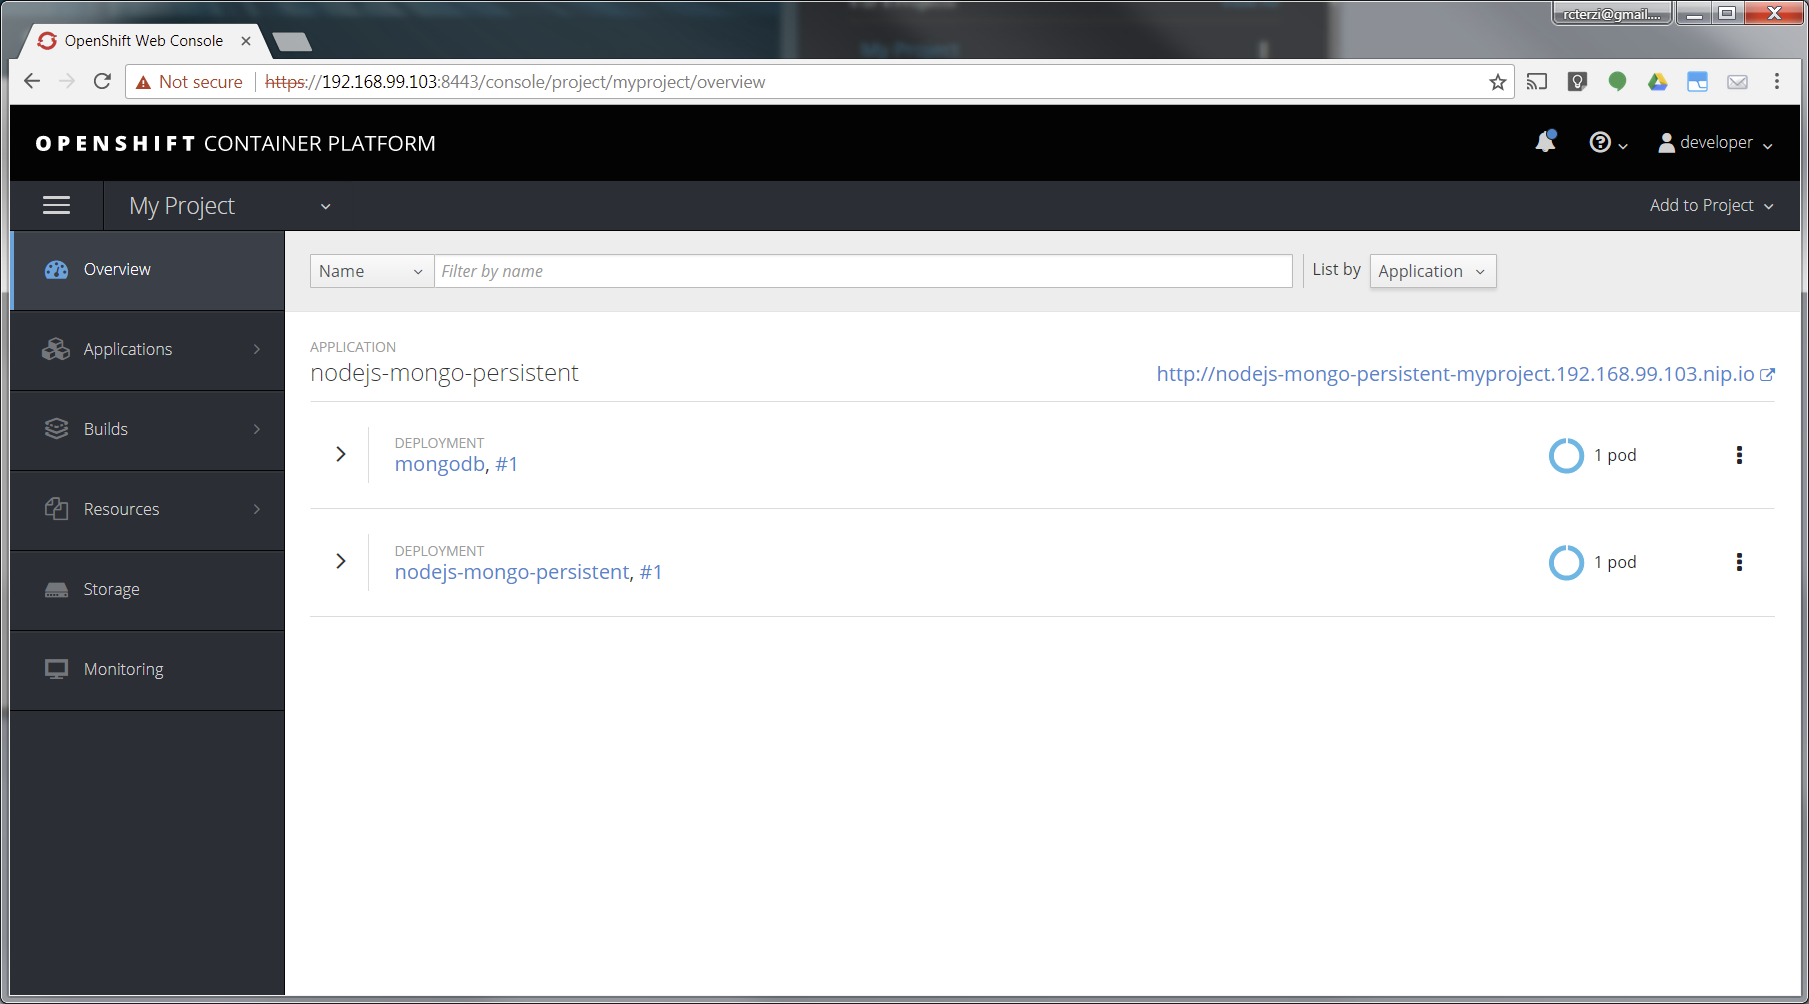
- Go to your project overview page by clicking My Project from the list of projects on the right.
- The application will be automatically built and deployed. You might need to wait for the build to finish.
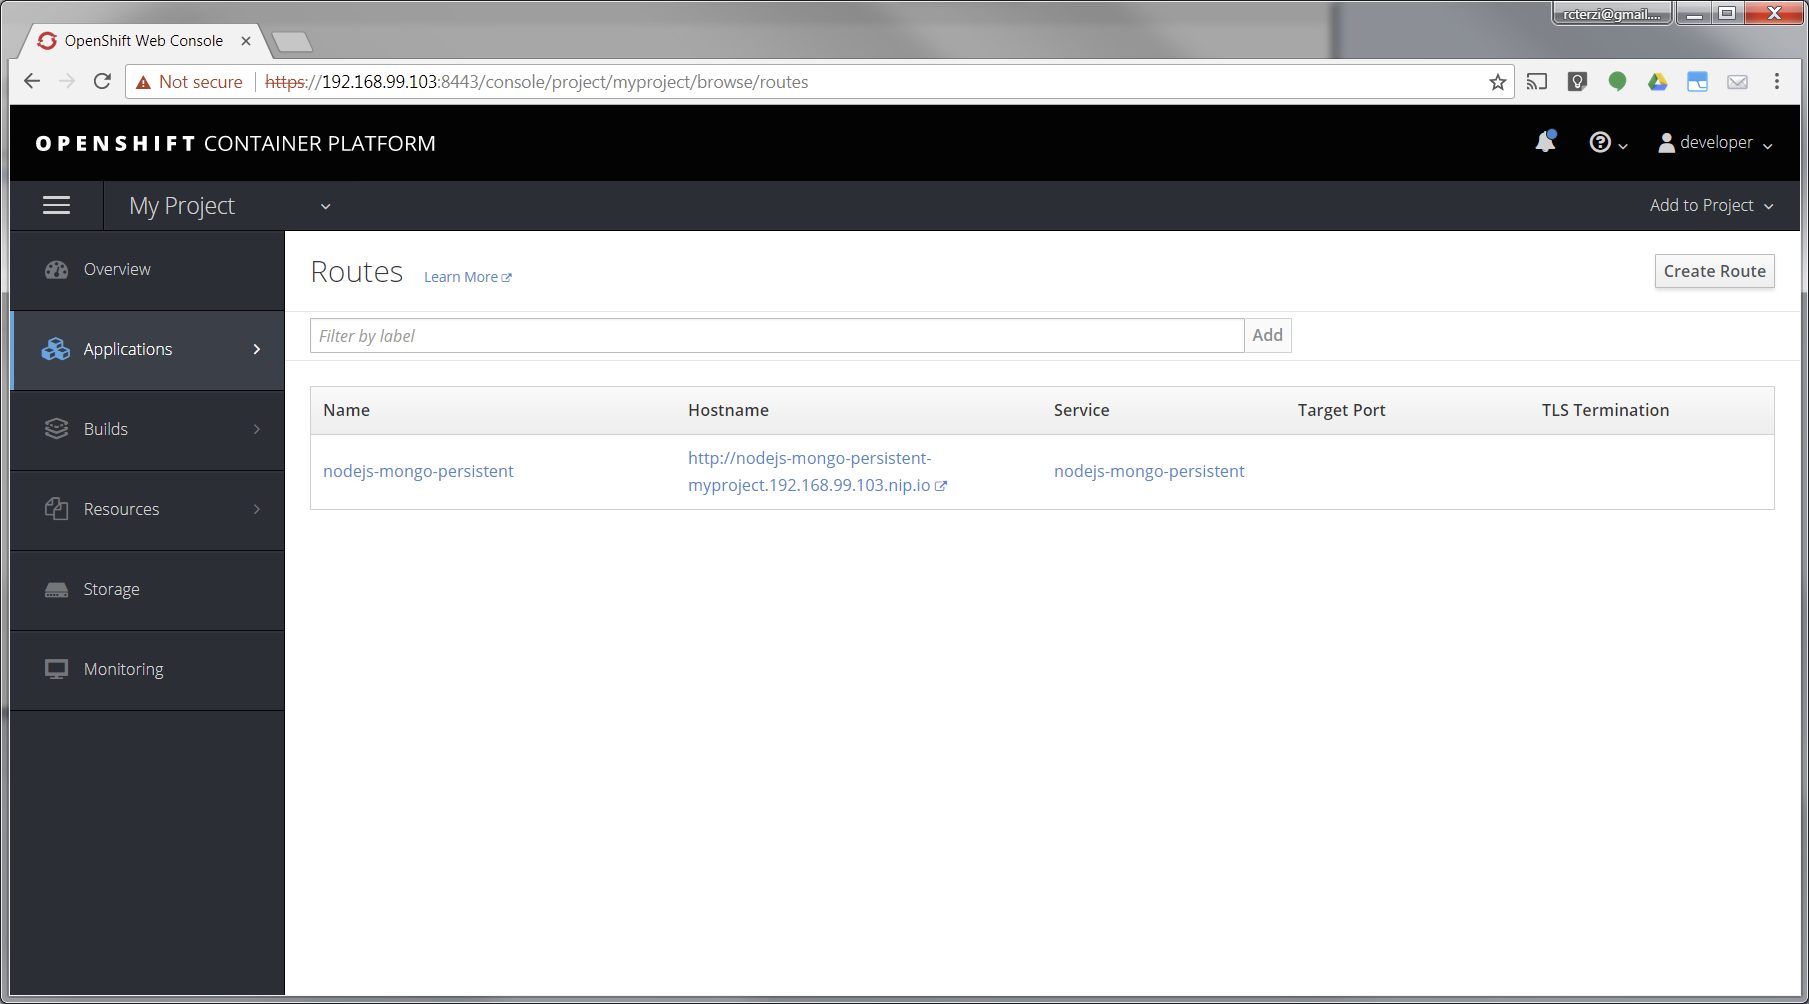
- When the application is finished building and deploying you should see two running pods. Select Applications from the menu on the left. Then select Routes.
- The application template created a route to allow HTTP traffic to the Node.js application pod running inside the OpenShift cluster. Click on the URL in the Hostname column to view your application.
At this point, you’ve successfully built and deployed a Node.js and MongoDB application in containers running on OpenShift on your personal OpenShift cluster. Explore the menus to see the components that were created, view logs, and explore OpenShift.
Where to go next?
- Learn more about CDK from the CDK Getting Started Guide
- If you are new to OpenShift, try the online tutorials at learn.openshift.com
- Read the OpenShift documentation
- Follow the Red Hat Developers Blog for articles on OpenShift, CDK, containers, and many other topics.
Last updated: November 2, 2023


