Retrieval augmented generation (RAG) helps AI models build accurate, up-to-date, and contextually rich language models. RAG improves traditional language models by retrieving relevant information from an external knowledge base before generating a response. This process mitigates issues like hallucination and outdated knowledge.
The inspiration: Building on a foundational concept
Meta AI introduced the concept of retrieval augmented generation in the paper, Retrieval-Augmented Generation for Knowledge-Intensive NLP Tasks. This work demonstrated how to combine a pre-trained language model with a dense passage retriever to generate more informed and factually accurate responses.
Our project extends this foundational research. We focused on building a production-ready MLOps pipeline that puts their core ideas to work. We built a system that implements that framework and improvesd it with modern MLOps tools.
RAG is effective, but it relies on a quality retrieval mechanism. Feature stores, specifically Feast, help solve this problem.
What is Feast?
Feast is an open source feature store that provides a centralized, consistent, and scalable way to manage machine learning features. It acts as a bridge between data sources and ML models, ensuring that the features used for training match those used for inference. This consistency prevents data skew and improves model performance.
Key benefits of Feast include:
- Feature versioning: Track changes to features over time.
- Online/offline consistency: Ensures features are consistent between training and serving.
- Scalability: Handles large volumes of data and feature requests.
- Discoverability: Makes it easy for data scientists to find and reuse features.
Now, imagine coupling the robust feature management capabilities of Feast with the contextual power of RAG. This combination creates highly efficient and intelligent retrieval systems.
Standard RAG implementations often rely on simple vector databases or document stores. While effective, these can lack the contextual metadata that a feature store provides. We wanted to explore how a feature store like Feast could:
- Ingest and manage a knowledge base tailored for RAG.
- Provide diverse search capabilities beyond just vector similarity.
- Integrate with existing RAG frameworks, specifically Hugging Face Transformers.
- Enable language model fine-tuning with contextual features.
Introducing the FeastRAGRetriever: A custom solution
To address these challenges, we developed FeastRAGRetriever, a specialized component that integrates your feature store with RAG processes. This retriever finds relevant features and context to improve the performance of RAG applications.
Here's how our custom solution works.
1. Custom RAG Retriever: FeastRAGRetriever
The FeastRAGRetriever supports various search methods for flexible information retrieval:
- Text-based search: Traditional keyword or phrase matching for direct content lookup.
- Vector-based search: Uses embeddings for semantic similarity searches, finding concepts even if exact keywords aren't present.
- Hybrid search: Combines text and vector-based methods to ensure both precision and recall.
2. Integration with Hugging Face Transformers
We built the FeastRAGRetriever to inherit directly from transformers.RagRetriever. This design choice allows our custom retriever to use the Hugging Face Transformers library, the standard for natural language processing (NLP) models.
Additionally, if you're already using Hugging Face for RAG, FeastRAGRetriever fitsd in with minimal changes.
3. FeastVectorStore class: Querying for RAG
To bridge the gap between Feast and vector-based RAG, we implemented a new FeastVectorStore class. This class queries the feature store for RAG purposes, allowing it to:
- Retrieve vectors: Fetch pre-computed embeddings of your knowledge base stored in Feast.
- Access metadata: Retrieve associated metadata or contextual features alongside the vectors.
- Interface with Milvus: In our implementation, Feast manages the ingestion of our knowledge base into a vector database like Milvus.
FeastVectorStorethen provides the interface to query it.
Fine-tuning a RAG model with Feast
The following example shows the process in action, along with model training with Kubeflow Trainer.
Prerequisites
You need access to a Red Hat OpenShift cluster (version 4.14 or higher) with the following components installed:
- The Red Hat OpenShift AI Operator (version 2.20 or higher) with the dashboard, workbenches, and training operator components enabled.
- Enough worker nodes with supported accelerators, either:
- NVIDIA GPUs (for this tutorial, we recommend Ampere-based or newer GPUs)
- AMD accelerators (for this tutorial, we recommend AMD Instinct MI300X accelerators)
- The Node Feature Discovery Operator to detect hardware features and advertise them on the nodes
- Depending on the accelerators available on your cluster:
- The NVIDIA GPU operator with the appropriate ClusterPolicy, or
- The AMD GPU operator with the appropriate configuration
- A storage provisioner that supports the dynamic provisioning of PersistentVolumeClaims with ReadWriteMany (RWX) access mode and a corresponding StorageClass enabled in OpenShift AI
- A standalone Milvus deployment. See example here.
Note: if your cluster doesn’t have any dynamic provisioners with RWX support, Red Hat recommends Red Hat OpenShift Data Foundation, which is part of Red Hat OpenShift Platform Plus. Alternatively, you may be able to install an in-cluster NFS dynamic provisioner by following these instructions.
Create a workbench
Start by creating a workbench. This workbench is a Jupyter notebook hosted on OpenShift, and you’ll run everything from there.
Access the OpenShift AI dashboard from the navigation menu in the OpenShift web console, as shown in Figure 1.

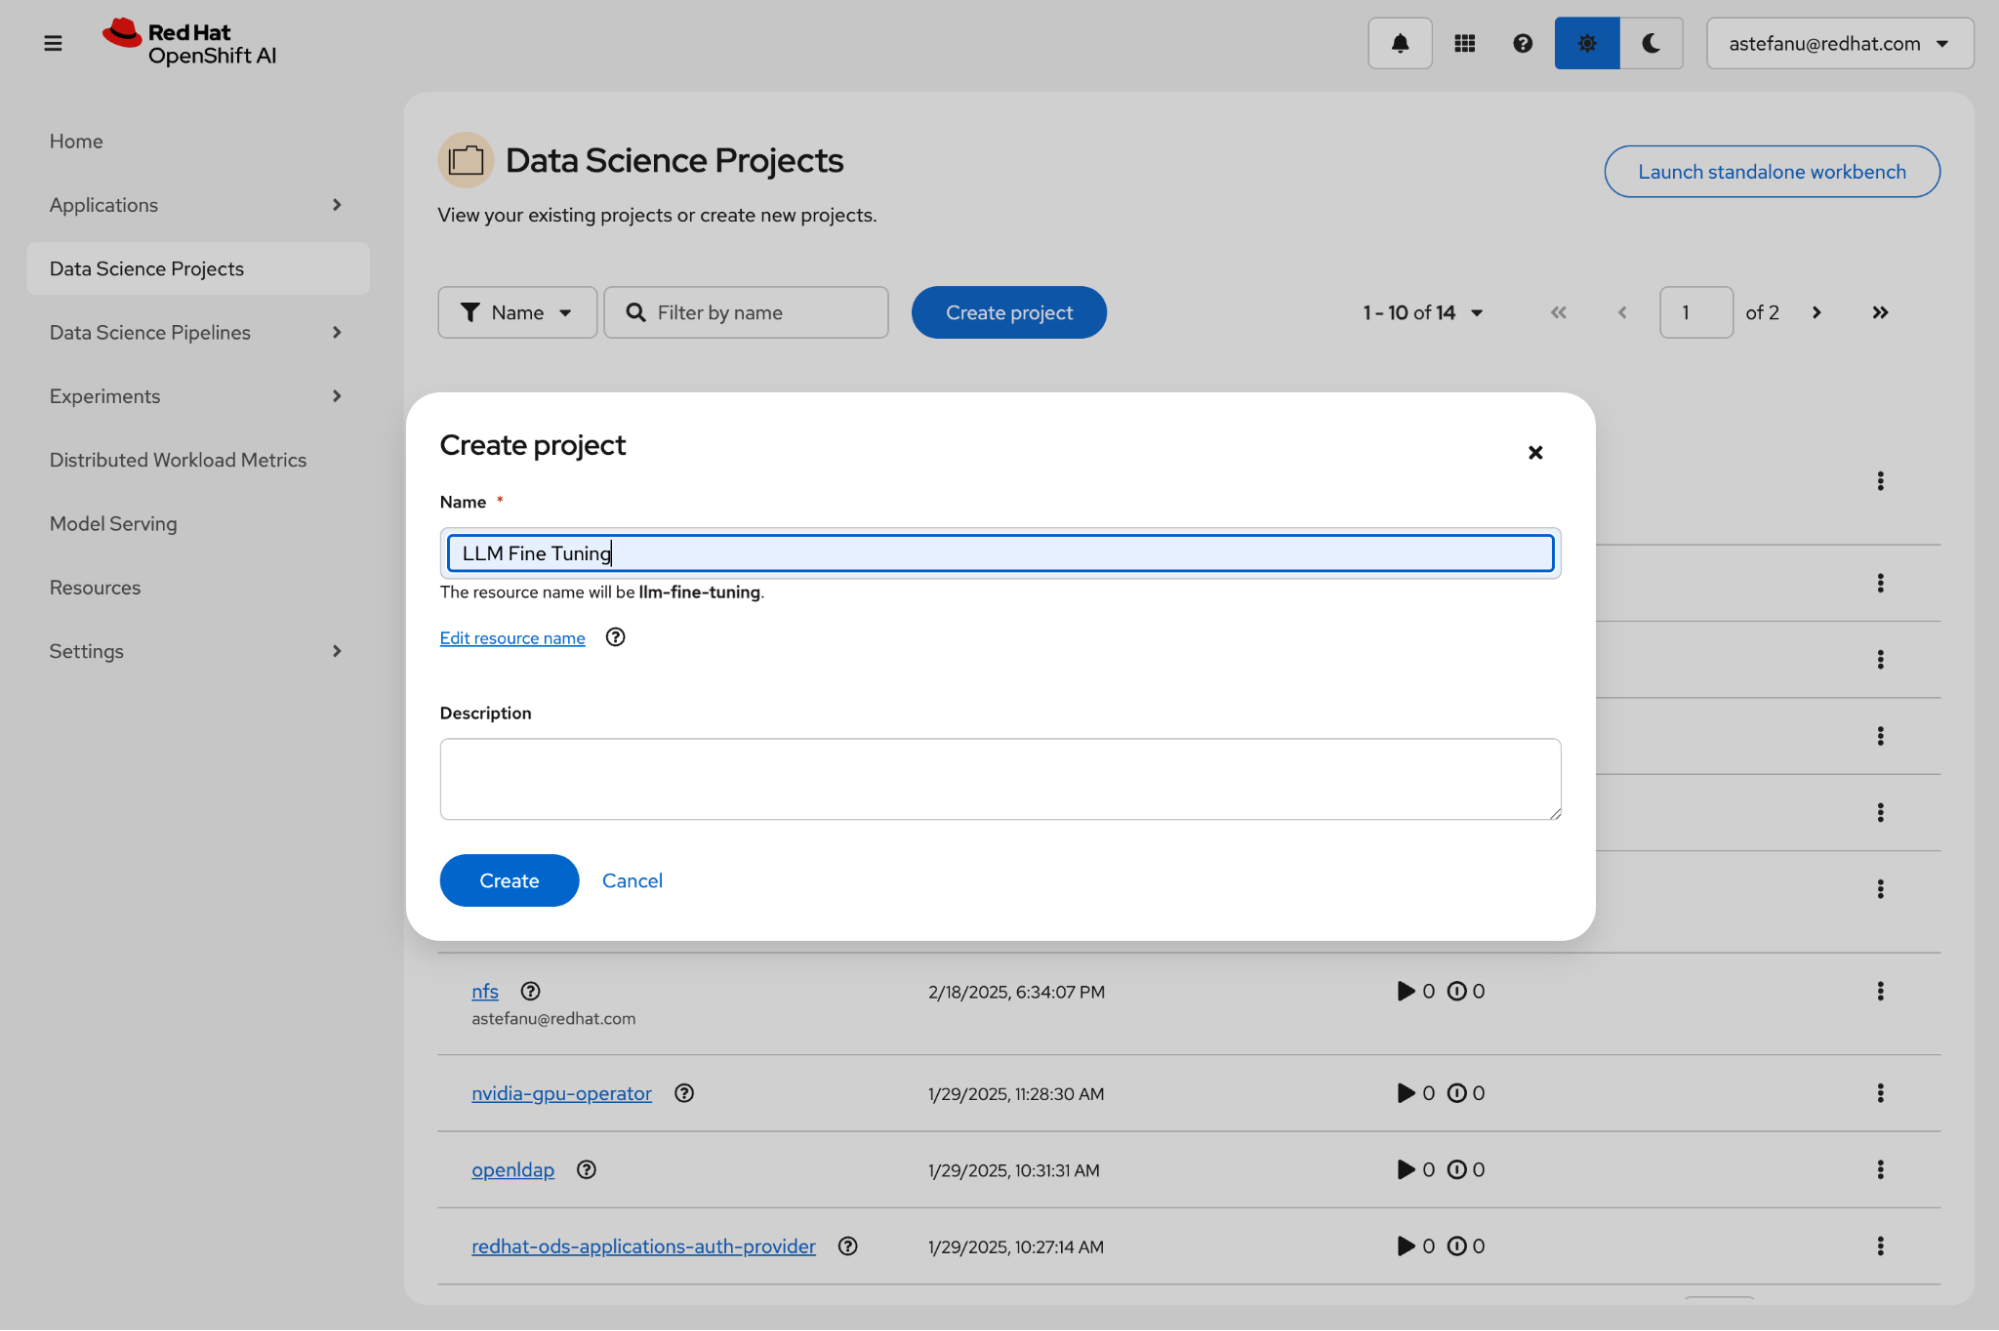
Log in to the dashboard using your credentials, go to Data Science Projects, and create a new project (Figure 2).
After you create your project, click Create a workbench (Figure 3).

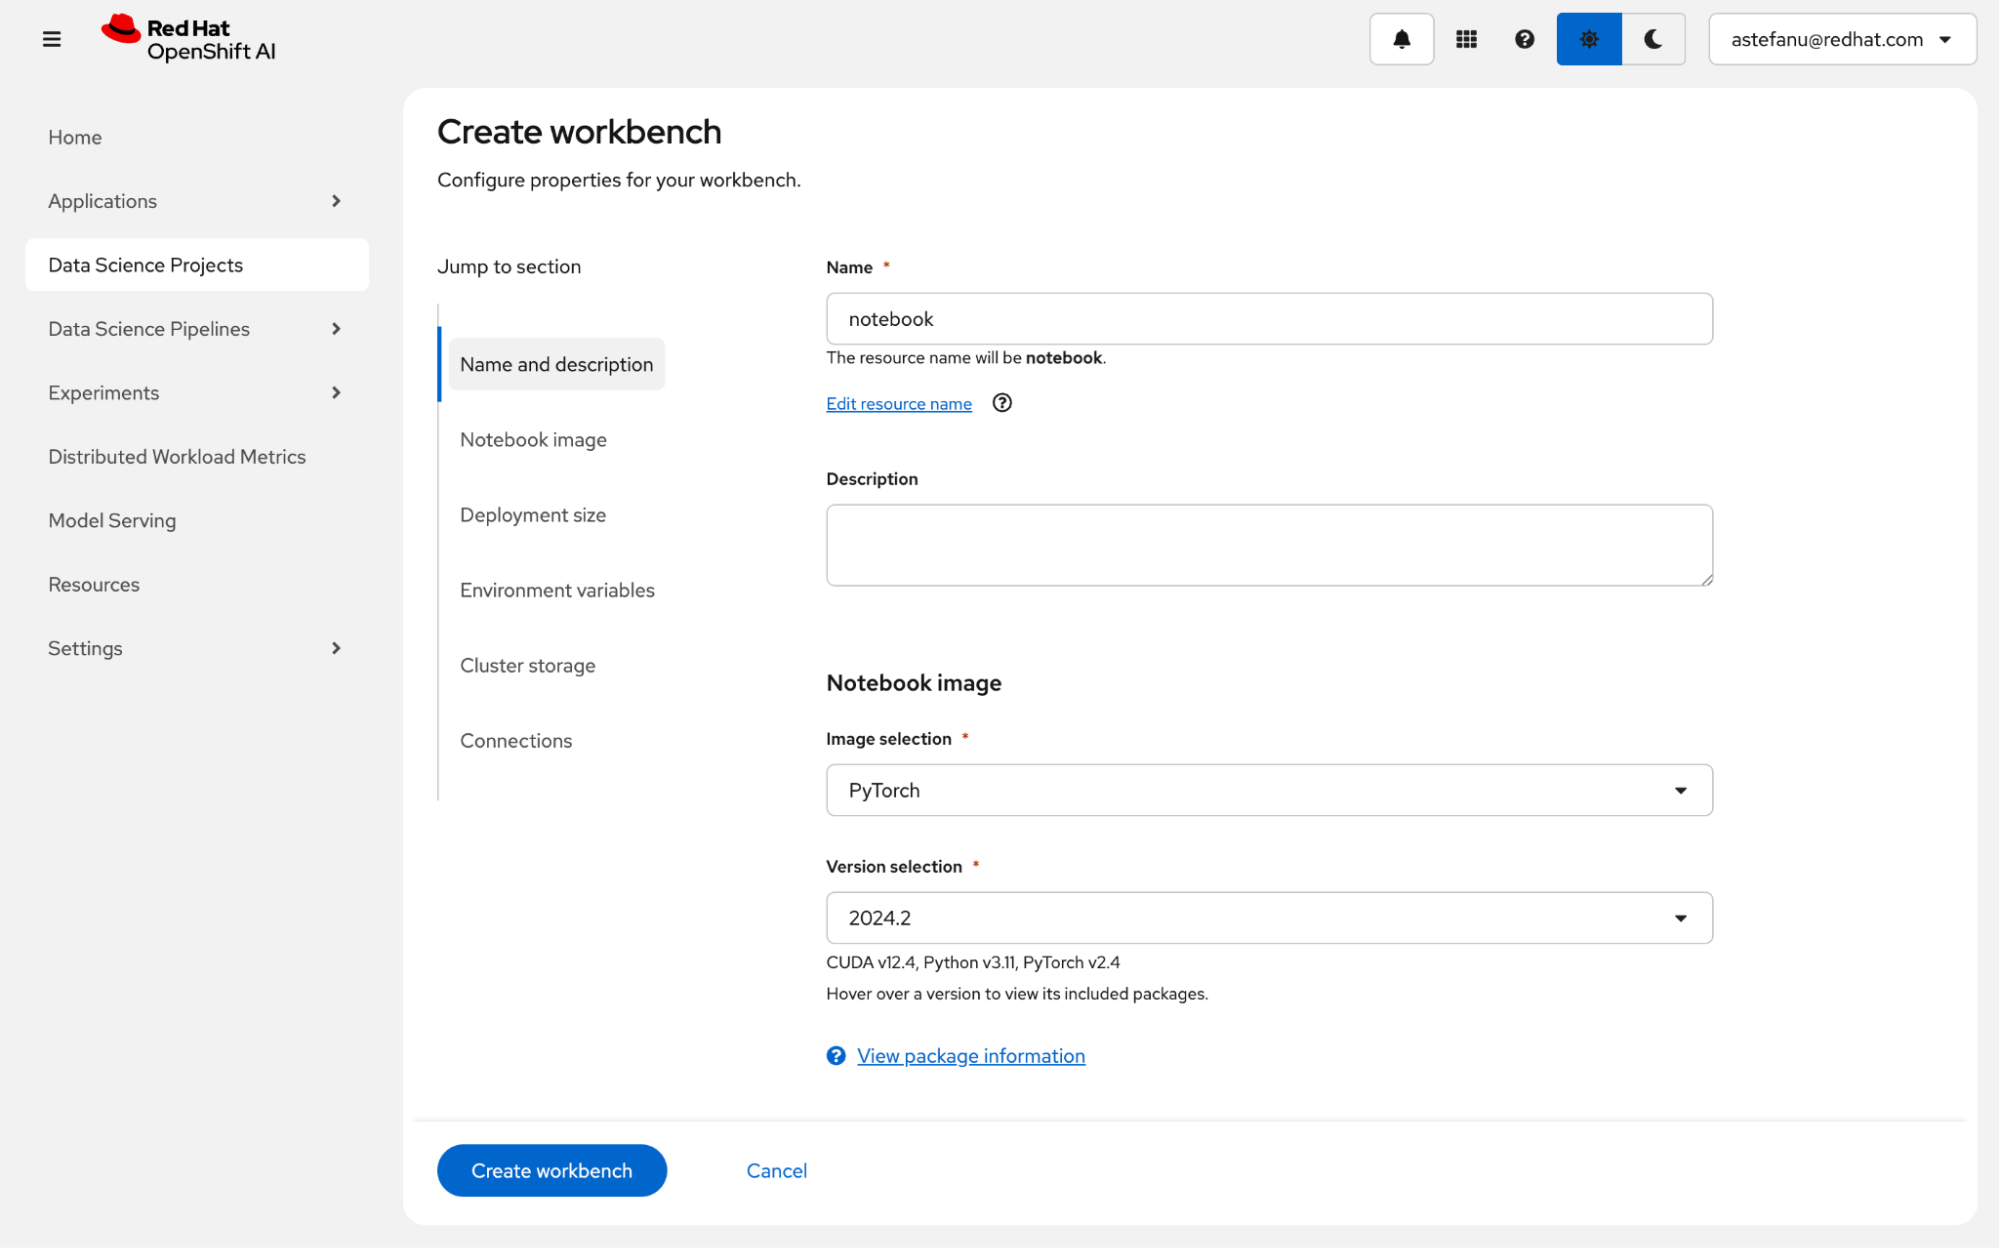
In the workbench creation form, select the PyTorch (for NVIDIA GPU) or the ROCm-PyTorch (for AMD accelerator) container image (Figure 4).
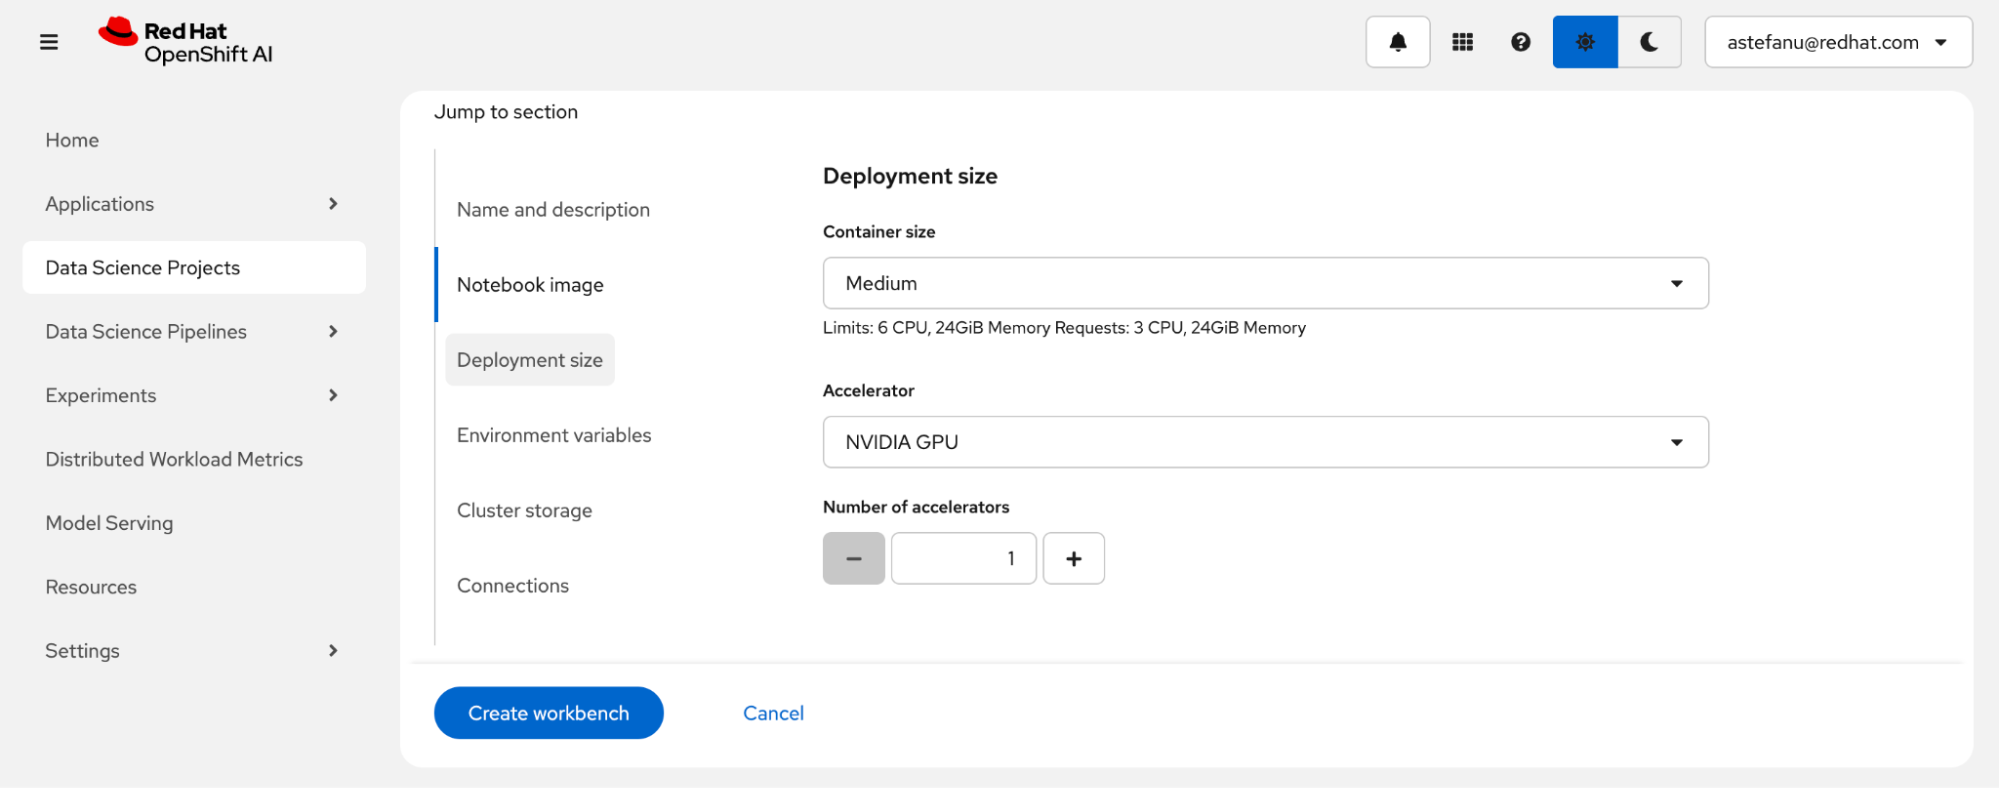
Enter the deployment size (Figure 5). You can add an optional accelerator to run inferences for the fine-tuned model from the notebook.
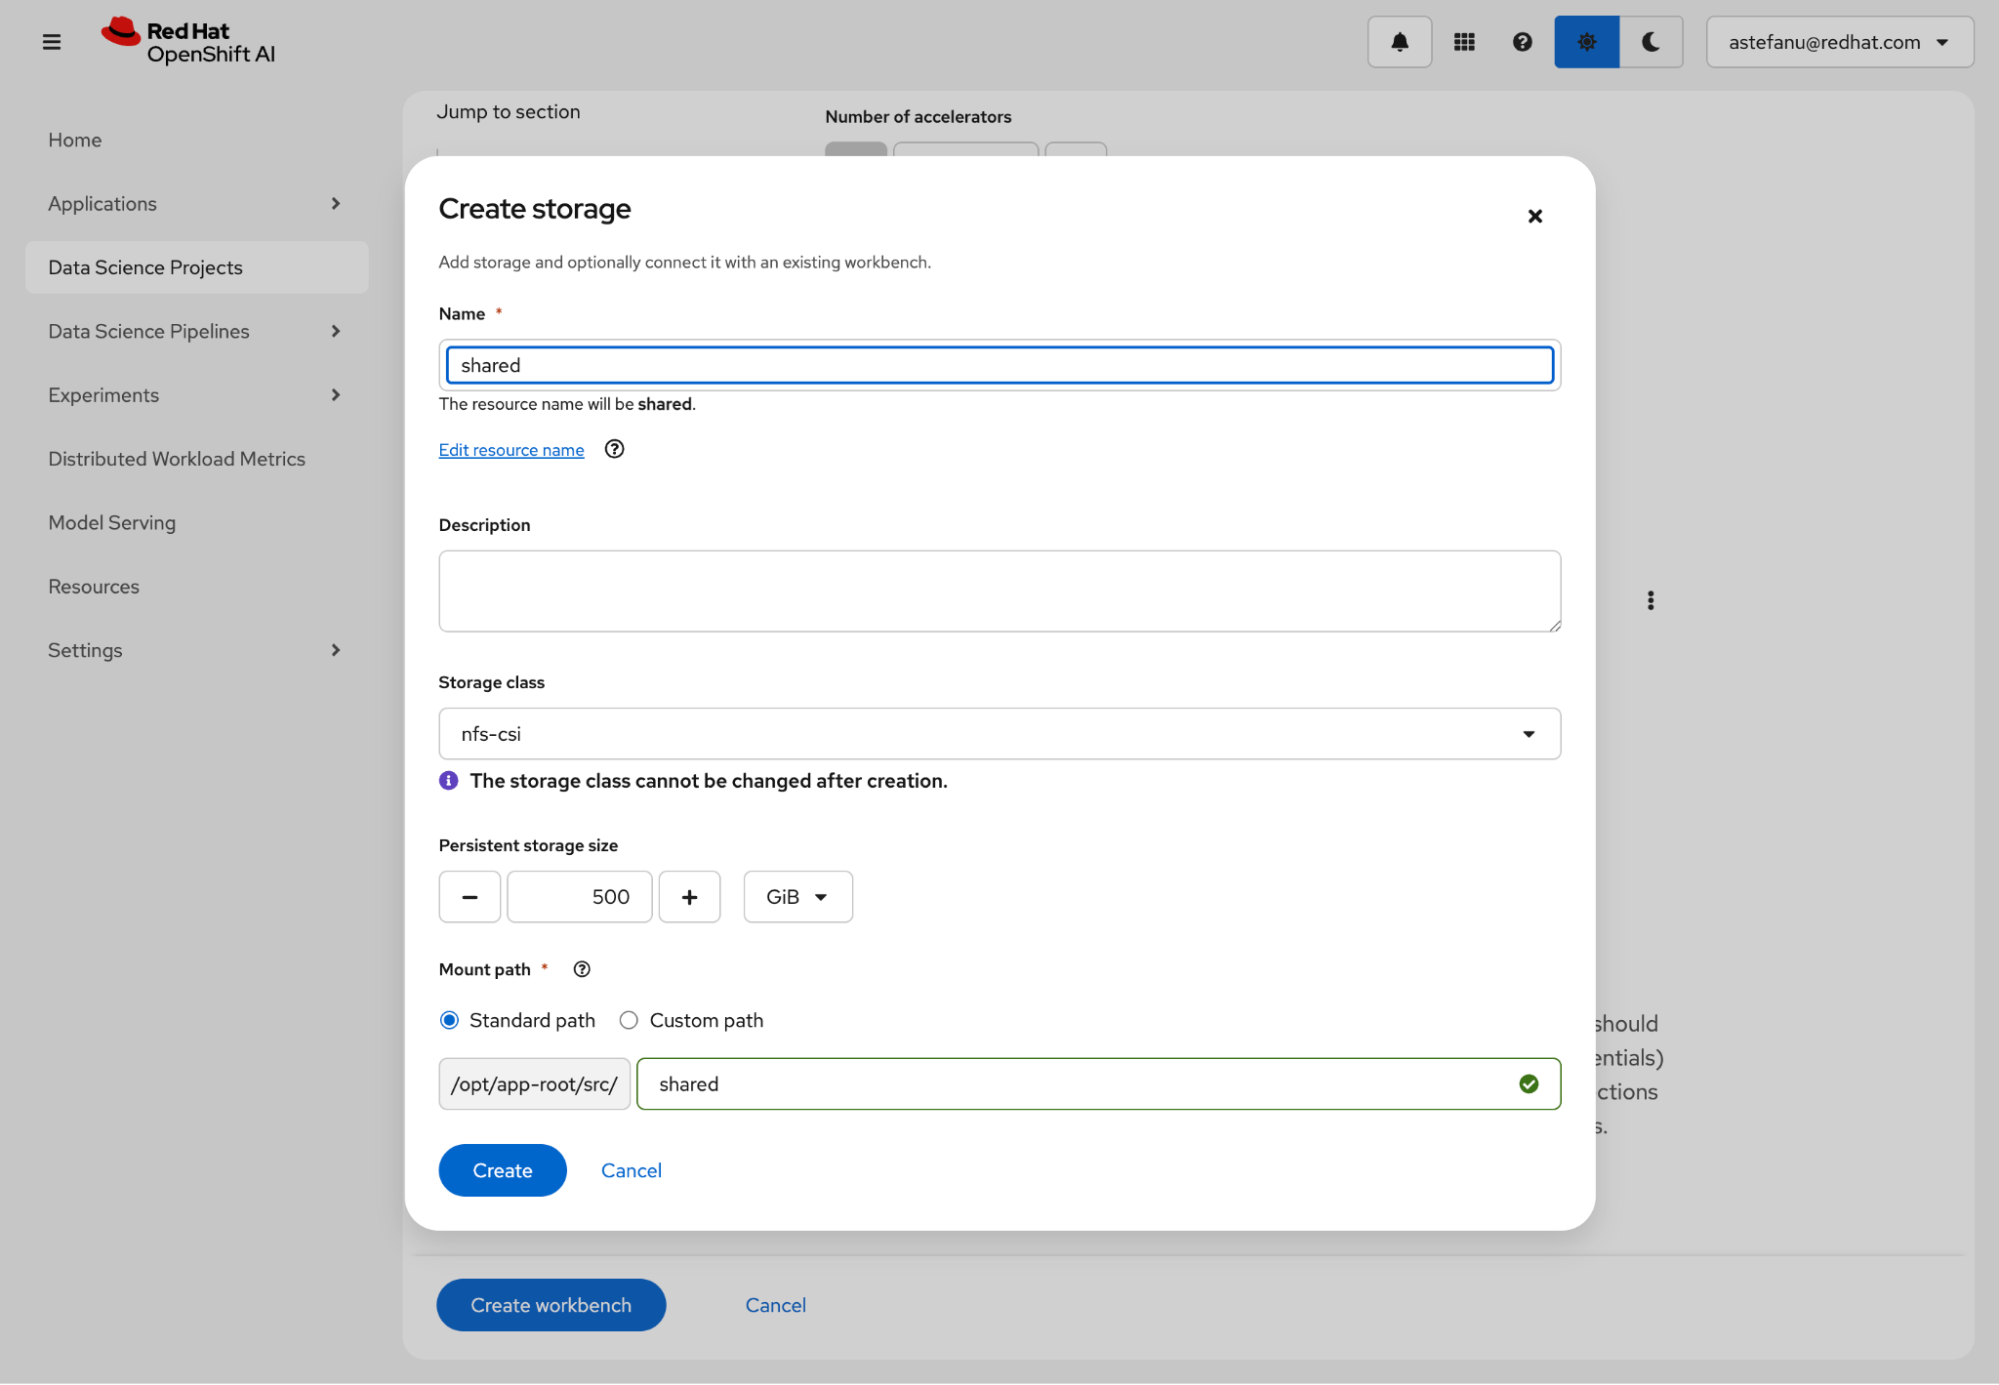
Next, create persistent storage to share between the notebook and the fine-tuning jobs (Figure 6). Make sure to select a storage class that uses a provisioner capable of provisioning PersistentVolumeClaims with ReadWriteMany access mode. Cluster storage of at least 200 GB is recommended.
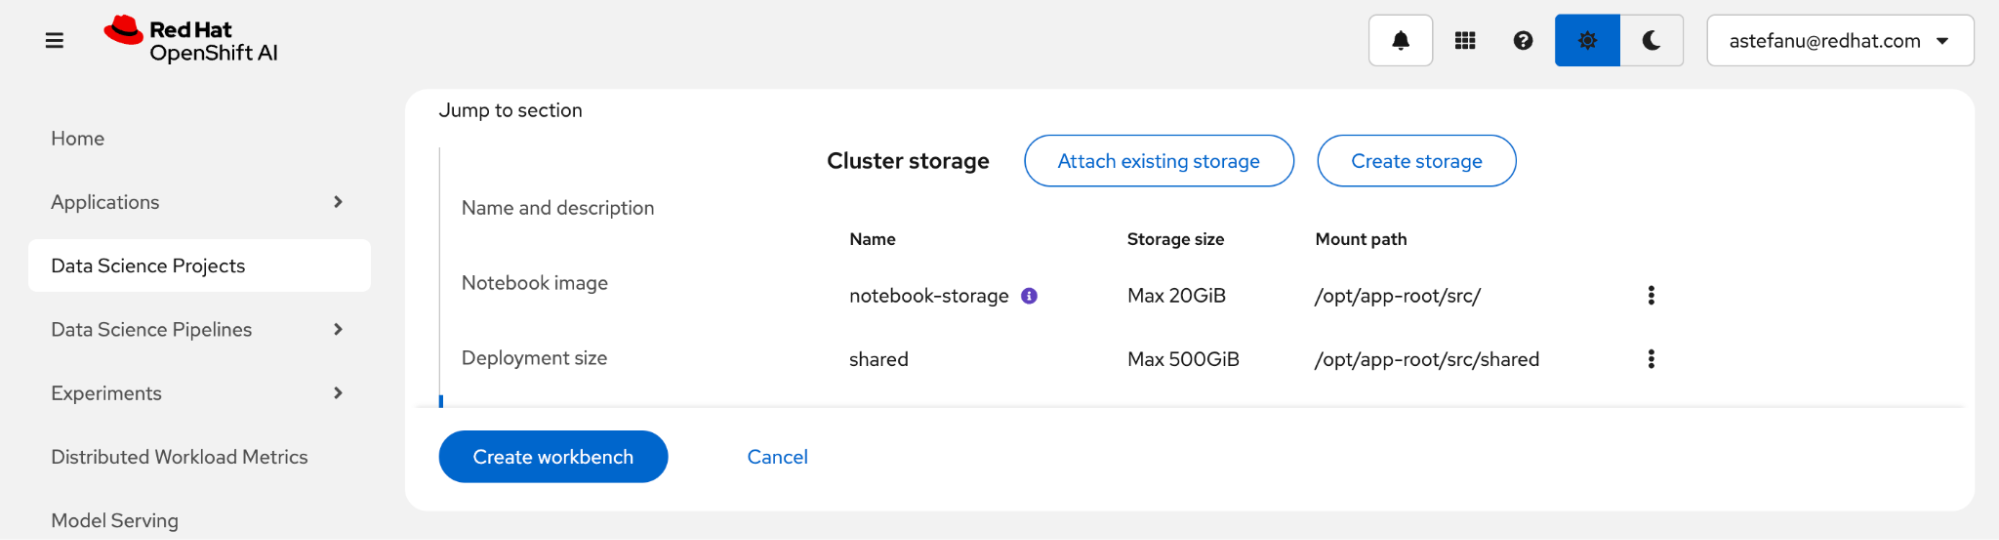
Review the storage configuration and click Create workbench (Figure 7).
From the Workbenches page, click Open when the workbench is ready (Figure 8).
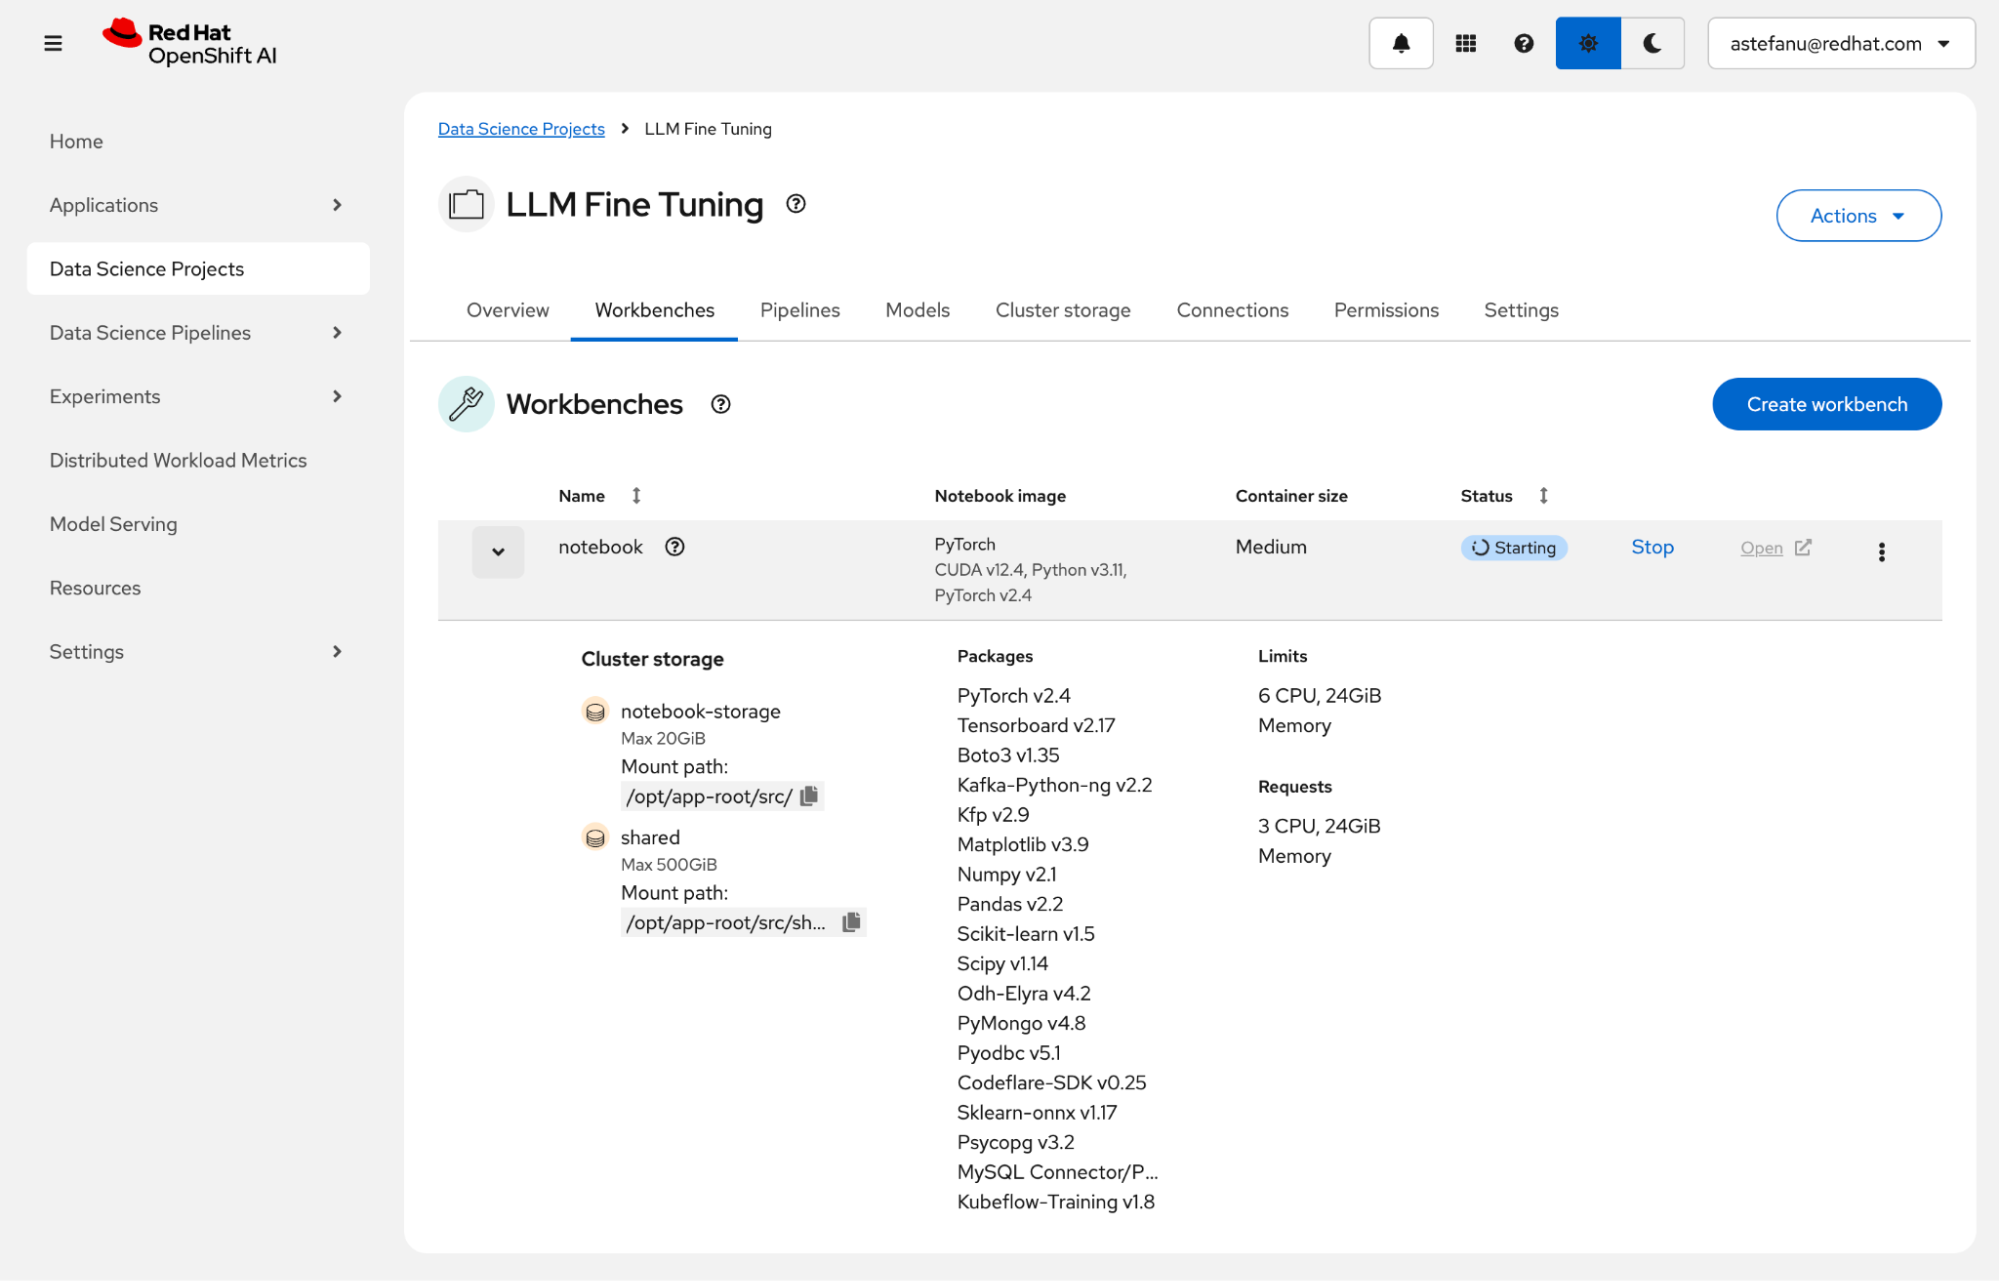
Open the workbench to run the example. The workbench hosts Jupyter notebooks so data scientists can run training and fine-tuning experiments in an environment. It uses the accelerators available on the OpenShift AI platform.
Clone the RAG Feast fine-tuning example
To clone the Fine-Tuning a RAG Model with Feast on OpenShift AI example, select the Git icon in the left column. Paste the https://github.com/opendatahub-io/distributed-workloads.git URL into the text box and click Clone (Figure 9).

To start your own Feast project from scratch, create a feature store instance by following instructions for configuring a feature store.
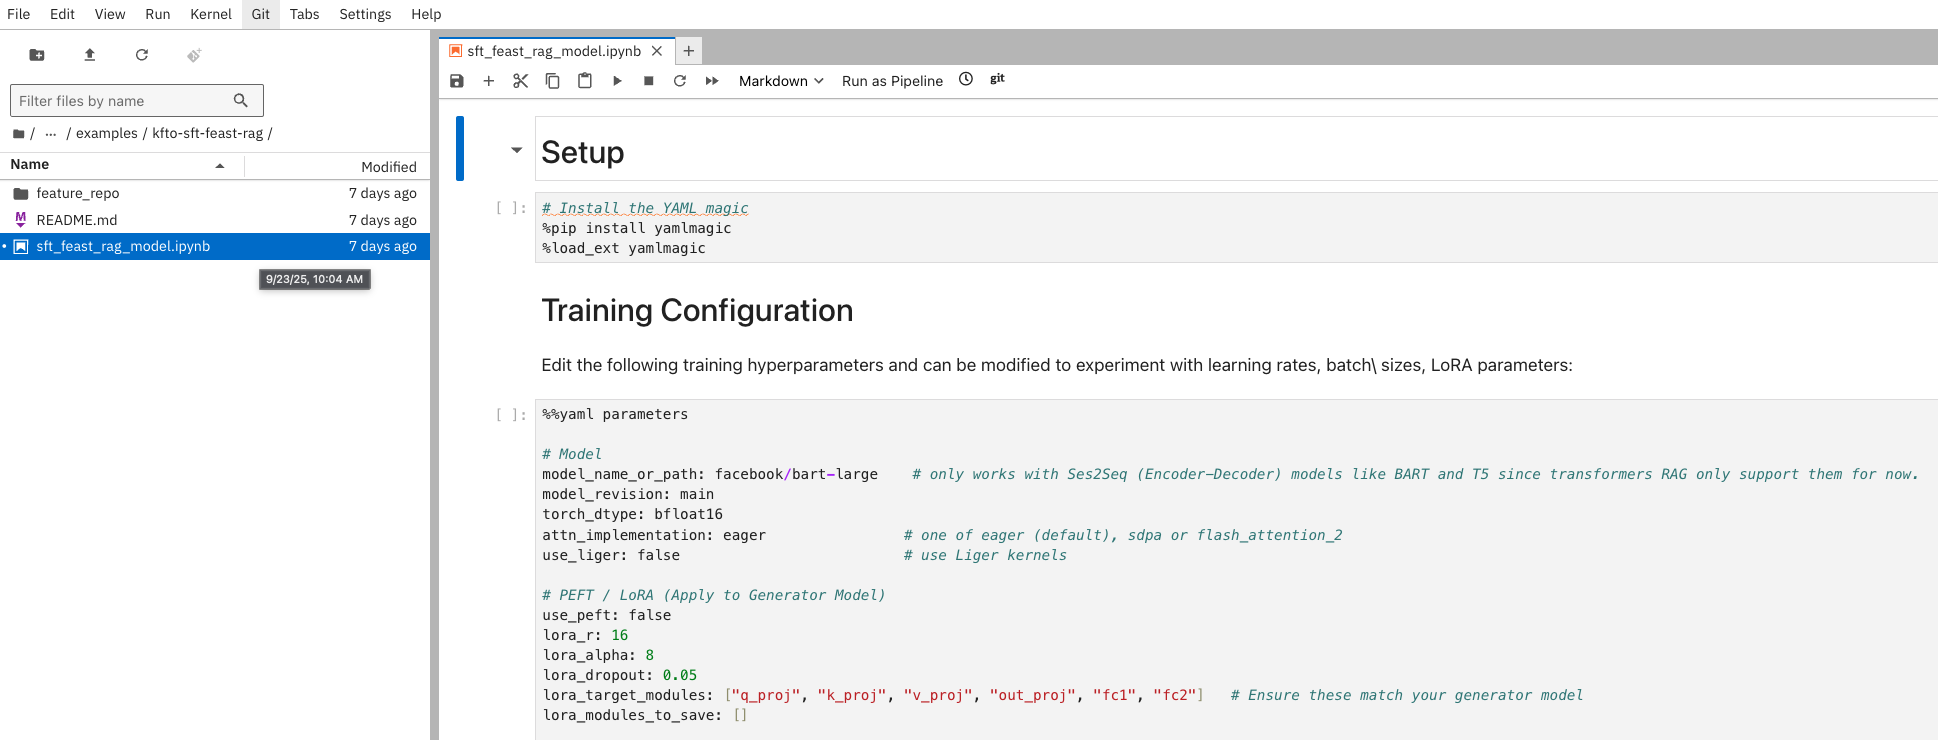
Navigate to the distributed-workloads/examples/kfto-sft-feast-rag directory and open the sft_feast_rag_model.ipynb notebook (Figure 10).
Ingesting the knowledge base with Feast
First, process the knowledge base (for example, documents, articles, FAQs). Chunk the text and generate embeddings. Feast will then ingest this information into a vector database (like Milvus).
The kfto-sft-feast-rag directory contains a feature_repo.subdirectory with two files.
feature_store.yaml contains the project configuration. You can provide Milvus credentials in this file if needed.
project: ragproject
provider: local
registry: data/registry.db
online_store:
  type: milvus
  host: http:// # Insert Milvus route host
  username: # Insert Milvus username if required
  password: # Insert Milvus password if required
  port: 19530
  vector_enabled: true
  embedding_dim: 384
  index_type: FLAT
  metric_type: COSINE
offline_store:
  type: file
entity_key_serialization_version: 3
auth:
    type: no_auth
project_repo.py contains feature definitions for the knowledge base.
from datetime import timedelta

from feast import Entity, FeatureView, Field, FileSource, ValueType
from feast.data_format import ParquetFormat
from feast.types import Array, Float32, String

# Define your entity (primary key for feature lookup)
wiki_passage = Entity(
    name="passage_id",
    join_keys=["passage_id"],
    value_type=ValueType.STRING,
    description="Unique ID of a Wikipedia passage",
)

parquet_file_path = "data/wiki_dpr.parquet"

# Define offline source
wiki_dpr_source = FileSource(
    name="wiki_dpr_source",
    file_format=ParquetFormat(),
    path=parquet_file_path,
    timestamp_field="event_timestamp",
)

# Define the feature view for the Wikipedia passage content
wiki_passage_feature_view = FeatureView(
    name="wiki_passages",
    entities=[wiki_passage],
    ttl=timedelta(days=1),
    schema=[
        Field(
            name="passage_text",
            dtype=String,
            description="Content of the Wikipedia passage",
        ),
        Field(
            name="embedding",
            dtype=Array(Float32),
            description="vectors",
            vector_index=True,
            vector_length=384,
            vector_search_metric="COSINE",
        ),
    ],
    online=True,
    source=wiki_dpr_source,
    description="Content features of Wikipedia passages",
)
Install the required dependencies in the notebook by running the following cells:
# Install the YAML magic
%pip install yamlmagic
%load_ext yamlmagic
Training configuration
Edit the following training hyperparameters to experiment with learning rates, batch sizes, and LoRA parameters:
%%yaml parameters

# Model
model_name_or_path: facebook/bart-large    # only works with Ses2Seq (Encoder-Decoder) models like BART and T5 since transformers RAG only support them for now.
model_revision: main
torch_dtype: bfloat16
attn_implementation: eager                # one of eager (default), sdpa or flash_attention_2
use_liger: false                          # use Liger kernels

# PEFT / LoRA (Apply to Generator Model)
use_peft: false
lora_r: 16
lora_alpha: 8
lora_dropout: 0.05
lora_target_modules: ["q_proj", "k_proj", "v_proj", "out_proj", "fc1", "fc2"]   # Ensure these match your generator model
lora_modules_to_save: []

# QLoRA (BitsAndBytes) (Apply to Generator Model)
load_in_4bit: false                       # use 4 bit precision for the base model (only with LoRA)
load_in_8bit: false                       # use 8 bit precision for the base model (only with LoRA)

# Dataset
dataset_name: facebook/wiki_dpr
dataset_config: main                      # name of the dataset configuration
dataset_train_split: train                # dataset split to use for training (for RAG generated data)
dataset_test_split: test                  # dataset split to use for evaluation (for RAG generated data)
dataset_kwargs:
    add_special_tokens: false               # template with special tokens
    append_concat_token: false              # add additional separator token

# SFT (These parameters will now apply to the RagModel's training)
max_seq_length: 1024                      # max sequence length for model and packing of the dataset
dataset_batch_size: 1000                  # samples to tokenize per batch (for initial data processing)
packing: false                            # Packing is generally not used directly with RagModel training in the same way as SFT

# Training
num_train_epochs: 3                       # number of training epochs
remove_unused_columns: false
label_smoothing_factor: 0.1                # 0.1, 0.0(disable)

per_device_train_batch_size: 1            # Batch size per device during training
per_device_eval_batch_size: 1             # Batch size for evaluation
auto_find_batch_size: false               # find a batch size that fits into memory automatically
eval_strategy: epoch                      # evaluate every epoch

bf16: true                                # use bf16 16-bit (mixed) precision
tf32: true                               # use tf32 precision

learning_rate: 4.0e-6                     # 4.0e-6 Initial learning rate for RAG model training
warmup_steps: 200                         # steps for a linear warmup from 0 to `learning_rate`
lr_scheduler_type: cosine                 # learning rate scheduler (see transformers.SchedulerType)

optim: adamw_torch_fused                  # optimizer (see transformers.OptimizerNames)
max_grad_norm: 1.0                        # max gradient norm
seed: 42

gradient_accumulation_steps: 8            # Increase for smaller per_device_train_batch_size
gradient_checkpointing: false             # use gradient checkpointing to save memory
gradient_checkpointing_kwargs:
    use_reentrant: false

# FSDP
fsdp: "full_shard auto_wrap"              # add offload if not enough GPU memory
fsdp_config:
    activation_checkpointing: true
    cpu_ram_efficient_loading: false
    sync_module_states: true
    use_orig_params: true
    limit_all_gathers: false


# fsdp_transformer_layer_cls_to_wrap: [BertLayer, BartEncoderLayer, BartDecoderLayer]

# Checkpointing
save_strategy: epoch                      # save checkpoint every epoch
save_total_limit: 1                       # limit the total amount of checkpoints
resume_from_checkpoint: true             # load the last checkpoint in output_dir and resume from it

# Logging
log_level: warning                        # logging level (see transformers.logging)
logging_strategy: steps
logging_steps: 1                          # log every N steps
report_to:
- tensorboard                             # report metrics to tensorboard

output_dir: /mnt/shared/fine_tuned_rag_model
Feast setup with Milvus
Install the required dependencies:
%pip install --quiet feast[milvus] sentence-transformers datasets
%pip install bigtree==0.19.2
%pip install marshmallow==3.10.0
Loading Wikipedia dataset
Next, retrieve the data. This example uses a subset of the facebook/wiki_dpr dataset.
from datasets import load_dataset
# load wikipedia dataset - 5% of the training split
dataset = load_dataset(
    "facebook/wiki_dpr",
    "psgs_w100.nq.exact",
    split="train[:5%]",
    with_index=False,
    trust_remote_code=True
)
Chunking Wikipedia dataset
Chunk the dataset to a preset number of characters, which is the maximum supported by Feast. Ensure the chunk only contains whole words so the retrieved context forms sentences without incomplete words.
def chunk_dataset(examples, max_chars=380):
    all_chunks = []
    all_ids = []
    all_titles = []

    for i, text in enumerate(examples['text']): # Iterate over texts in the batch
        words = text.split()
        if not words:
            continue

        current_chunk_words = []
        for word in words:
            # Check if adding the next word exceeds the character limit
            if len(' '.join(current_chunk_words + [word])) > max_chars:
                # If the current chunk is valid, save it
                if current_chunk_words:
                    chunk_text = ' '.join(current_chunk_words)
                    all_chunks.append(chunk_text)
                    all_ids.append(f"{examples['id'][i]}_{len(all_chunks)}") # Unique ID for the chunk
                    all_titles.append(examples['title'][i])
                # Start a new chunk with the current word
                current_chunk_words = [word]
            else:
                current_chunk_words.append(word)

        # Add the last remaining chunk
        if current_chunk_words:
            chunk_text = ' '.join(current_chunk_words)
            all_chunks.append(chunk_text)
            all_ids.append(f"{examples['id'][i]}_{len(all_chunks)}") # Unique ID for the chunk
            all_titles.append(examples['title'][i])

    return {'id': all_ids, 'title': all_titles, 'text': all_chunks}


chunked_dataset = dataset.map(
    chunk_dataset,
    batched=True,
    remove_columns=dataset.column_names,
    num_proc=1
)
Create DPR embeddings
Next, create Dense Passage Retrieval (DPR) embeddings. Load a pre-trained DPR encoder to generate context embeddings for each chunked passage. These embeddings will later be stored in the Feast feature store to query during retrieval.
import torch
from transformers import DPRContextEncoder, DPRContextEncoderTokenizer
import numpy as np
from tqdm import tqdm

# Load DPR Context Encoder model and tokenizer
device = "cuda" if torch.cuda.is_available() else "cpu"

embedding_model_name = "facebook/dpr-ctx_encoder-single-nq-base"
tokenizer = DPRContextEncoderTokenizer.from_pretrained(embedding_model_name)
model = DPRContextEncoder.from_pretrained(embedding_model_name).to(device)

sentences = chunked_dataset["text"]

print(f"Generating DPR embeddings for {len(sentences)} documents...")
all_embeddings = []
with torch.no_grad():
    for i in tqdm(range(0, len(sentences), 16)): # Process in batches
        batch_texts = sentences[i:i+16]
        inputs = tokenizer(batch_texts, return_tensors="pt", padding=True, truncation=True, max_length=512)
        input_ids = inputs["input_ids"].to(device)
        attention_mask = inputs["attention_mask"].to(device)
        embeddings = model(input_ids=input_ids, attention_mask=attention_mask).pooler_output
        all_embeddings.append(embeddings.to(dtype=torch.float32).cpu().numpy())

embeddings = np.vstack(all_embeddings)
print(f"Embeddings generated with shape: {embeddings.shape}")
print(f"Saving generated embeddings and chunked sentences to file...")
np.save("/opt/app-root/src/shared/synthetic_data_cache/embed_data/embeddings.npy", embeddings)
with open("/opt/app-root/src/shared/synthetic_data_cache/embed_data/sentences.txt", "w") as f:
    for sentence in sentences:
        f.write(f"{sentence}\n")

print("saved")
Create Parquet file for Feast offline store
Create a Parquet file using the newly created DPR embeddings:
import numpy as np
import pyarrow as pa
import pyarrow.parquet as pq
import pandas as pd
from datetime import datetime, timezone

embeddings = np.load("/opt/app-root/src/shared/synthetic_data_cache/embed_data/embeddings.npy")
with open("/opt/app-root/src/shared/synthetic_data_cache/embed_data/sentences.txt", "r") as f:
    sentences = [line.strip() for line in f]

batch_size = 256

# Prepare first batch to initialize schema
first_batch_sentences = sentences[:batch_size]
first_batch_embeddings = embeddings[:batch_size]

first_batch_df = pd.DataFrame({
    "passage_id": list(range(batch_size)),
    "passage_text": first_batch_sentences,
    "embedding": pd.Series([embedding.tolist() for embedding in first_batch_embeddings], dtype=object),
    "event_timestamp": [datetime.now(timezone.utc)] * len(first_batch_sentences)
})

print("DataFrame Info:")
print(first_batch_df.head())
print(first_batch_df["embedding"].apply(lambda x: len(x) if isinstance(x, list) else str(type(x))).value_counts())

# Initialize Parquet writer with correct schema
pqwriter = pq.ParquetWriter('feature_repo/wiki_dpr_1perct.parquet', pa.Table.from_pandas(first_batch_df).schema)

# Write first batch
pqwriter.write_table(pa.Table.from_pandas(first_batch_df))

# Continue writing remaining batches
for i in range(batch_size, len(sentences), batch_size):
    batch_sentences = sentences[i:i+batch_size]
    batch_embeddings = embeddings[i:i+batch_size]

    batch_df = pd.DataFrame({
        "passage_id": list(range(i, i + len(batch_sentences))),
        "passage_text": batch_sentences,
        "embedding": pd.Series([embedding.tolist() for embedding in batch_embeddings]),
        "event_timestamp": [datetime.now(timezone.utc)] * len(batch_sentences)
    })

    pqwriter.write_table(pa.Table.from_pandas(batch_df))
    print(f"Wrote {i + len(batch_sentences)} / {len(sentences)} documents...")

pqwriter.close()
print("Saved to wiki_dpr.parquet")
Navigate to the feature_repo and apply the Feast feature repository.
%cd feature_repoApply the Feast feature repository:
!feast applyWriting to Feast online store (Milvus)
Now we want to load the Parquet file into the online store (Milvus via Feast). The Milvus instance serves as the online store for similarity search during retrieval.
import pyarrow.parquet as pq
from feast import FeatureStore
from pymilvus import MilvusException

store = FeatureStore(repo_path=".")
parquet_file = pq.ParquetFile("./wiki_dpr.parquet")
batch_size = 10000

for batch_num, batch in enumerate(parquet_file.iter_batches(batch_size=batch_size), 1):
    batch_df = batch.to_pandas()
    try:
        print(f"Writing batch {batch_num}...")
        store.write_to_online_store(feature_view_name='wiki_passages', df=batch_df)
        print(f"Batch {batch_num} written successfully.")
    except MilvusException as e:
        print(f"Skipping write of batch {batch_num} due to : {e}")

print("All data written to online store.")
Note: The feast materialize command is an alternative way to load data into the online store.
Navigate to the Milvus instance to verify that the embeddings uploaded (Figure 11).

Summary
You have configured a RAG pipeline using Feast, Milvus, and Red Hat OpenShift AI. This architecture combines feature management with the retrieval capabilities required for accurate LLM responses. By hosting these components on OpenShift AI, you establish a consistent pipeline for both training and inference. You can extend this workflow to support additional data sources or integrate with other MLOps tools.
