This article provides a step-by-step guide to deploying and running Red Hat OpenShift AI and Red Hat OpenShift Service Mesh 3 on the same OpenShift cluster. We will outline key deployment practices, such as operator installation, namespace segmentation, and proper labeling. We'll also provide guidance on testing the setup using tools to ensure seamless, non-conflicting operation.
This coexistence on a single OpenShift cluster enables organizations to harness OpenShift Service Mesh 3 traffic management and observability features alongside OpenShift AI's AI/ML capabilities.
OpenShift AI overview
Artificial intelligence has advanced rapidly, becoming a transformative force across industries. As it moves into the mainstream, organizations are actively exploring its potential to drive innovation and efficiency.
To help organizations facilitate their AI journey, Red Hat provides the Red Hat AI portfolio of products, which currently consists of Red Hat Enterprise Linux AI and OpenShift AI. These products help two types of AI users: those who are exploring how generative AI can be used, and organizations who are adopting MLOps, developing models and running them at scale. This applies to generative and predictive AI.
Red Hat OpenShift AI is a comprehensive AI/ML platform that supports the full lifecycle of AI models. It offers AI engineers, data scientists, and developers a powerful environment for training and serving models in both development and production. Building on Red Hat OpenShift extends enterprise-grade DevOps capabilities to the AI lifecycle, ensuring consistency, scalability, and operational efficiency.
OpenShift Service Mesh overview
As your applications evolve into distributed microservices, managing, monitoring, and securing the network communications between those services becomes increasingly complex.
OpenShift Service Mesh manages and secures communication between microservices by providing traffic management, advanced routing, and load balancing. OpenShift Service Mesh also enhances security through features like mutual TLS (mTLS), and offers observability with metrics, logging, and tracing to monitor and troubleshoot applications. For more information, refer to the OpenShift Service Mesh documentation.
As of this writing, the latest release of OpenShift Service Mesh 3.0 is built on Istio 1.24 and Kiali 2.4. This version marks a significant shift from OpenShift Service Mesh 2, introducing a new operator based on the community Sail operator to manage Istio. It also transitions from the Maistra.io distribution to a Red Hat-maintained build of the upstream Istio.io project. This change enables Red Hat to deliver the latest stable Istio features more quickly while continuing to provide enterprise-grade support.
The previous major release, OpenShift Service Mesh 2.x, remains supported, with version 2.6.7 being the latest as of this article’s publication. While OSSM 2.x offers similar functionality to version 3.0, it features a different architecture and relies on distinct APIs. Some existing applications may still depend on these APIs, making continued support for OSSM 2.x important for backward compatibility.
OpenShift AI incompatibility with OpenShift Service Mesh 3
OpenShift AI currently depends on OpenShift Service Mesh 2.x and is not yet compatible with OpenShift Service Mesh 3. However, many organizations may still wish to adopt OpenShift Service Mesh 3 for their general application workloads while running OpenShift AI in the same cluster. The good news is that this coexistence is entirely achievable with the proper planning and configuration. Explore the Red Hat OpenShift AI supported configurations.
Now that we’ve set the stage, we will show you how to successfully deploy OpenShift AI and OpenShift Service Mesh 3 (OSSM 3) on the same OpenShift cluster.
OpenShift AI requirements
To provision a data science cluster using the DataScienceCluster custom resource, the primary entry point for deploying OpenShift AI, install these three operators:
- Red Hat OpenShift AI
- Red Hat OpenShift Serverless
- Red Hat OpenShift Service Mesh 2
These operators work together to create and manage the core components required for OpenShift AI to function. Once you have installed all three operators, you can create a DataScienceCluster resource, which leverages these operators to automatically provision the necessary OpenShift Service Mesh 2 components and namespaces it needs to function. This includes a ServiceMeshControlPlane named data-science-smcp, deployed in the DataScienceCluster-created istio-system namespace.
OpenShift AI also configures OpenShift Service Mesh 2 by creating a ServiceMeshMemberRoll for the control plane, which instructs the mesh to manage the following namespaces created by OpenShift AI:
- knative-serving
- rhoai-model-registries
OpenShift Service Mesh 2 creates and relies on the following Custom Resource Definitions (CRDs):
- ServiceMeshControlPlane
- ServiceMeshMemberRoll
- ServiceMeshMember
These CRDs are specific to OpenShift Service Mesh 2 and are not available in OpenShift Service Mesh 3. Additionally, version 2 automatically provisions ingress and egress gateways using the OpenShift Route resource, which differs from the OpenShift Service Mesh 3 gateway configuration model.
A similar but different approach
OpenShift Service Mesh 3 introduces a different approach to control plane management.
In OpenShift Service Mesh 3, the control plane is defined by the Istio custom resource. By default, it manages all namespaces across the cluster. However, you can restrict this scope by using the discoverySelectors field, which allows you to limit mesh management to specific namespaces based on label selectors.
The following is an example using discoverySelectors in OpenShift Service Mesh 3. In this example, the Istio control plane only manages namespaces that include the istio-discovery=enabled label.
apiVersion: sailoperator.io/v1
kind: Istio
metadata:
  name: default
spec:
  namespace: istio-system-3
  values:
    meshConfig:
      ...
      discoverySelectors:
        - matchLabels:
            istio-discovery: enabled
The following is a sample namespace with matching labels:
apiVersion: v1
kind: Namespace
metadata:
  labels:
    istio-discovery: enabled
    istio-injection: enabled
  name: my-namespace
Note: The istio-injection=enabled label instructs OpenShift Service Mesh 3 to automatically inject the envoy sidecar proxy into pods deployed within the namespace.
OpenShift Service Mesh 3 also takes a different approach to configuring ingress and egress gateways compared to OpenShift Service Mesh 2, but those details are beyond the scope of this article.
What’s important to note is that, with thoughtful planning, both versions of OpenShift Service Mesh can coexist within the same cluster, each serving distinct use cases without conflict.
How to plan for coexistence
OpenShift AI automatically creates the istio-system namespace, which cannot be changed. This is where it deploys the ServiceMeshControlPlane and other core OpenShift Service Mesh 2 resources.
For OpenShift Service Mesh 3, you must specify a separate namespace for its control plane like istio-system-3 rather than the namespace istio-system created by OpenShift AI.
When deploying the OpenShift Service Mesh 3 control plane using the Istio CRD, use the discoverySelectors field to restrict which namespaces it manages. This ensures OpenShift Service Mesh 3 only operates in explicitly labeled namespaces, avoiding overlap with OpenShift Service Mesh 2.
The discoverySelectors field supports Kubernetes label selectors using either matchLabels (for direct matches) or matchExpressions (for more advanced logic).
For example, you can restrict OpenShift Service Mesh 3 to namespaces labeled istio-discovery=enabled.
Testing and validation
If you have access to an OpenShift cluster where you can test OpenShift AI and OpenShift Service Mesh 3 running side-by-side, follow these steps to validate the setup:
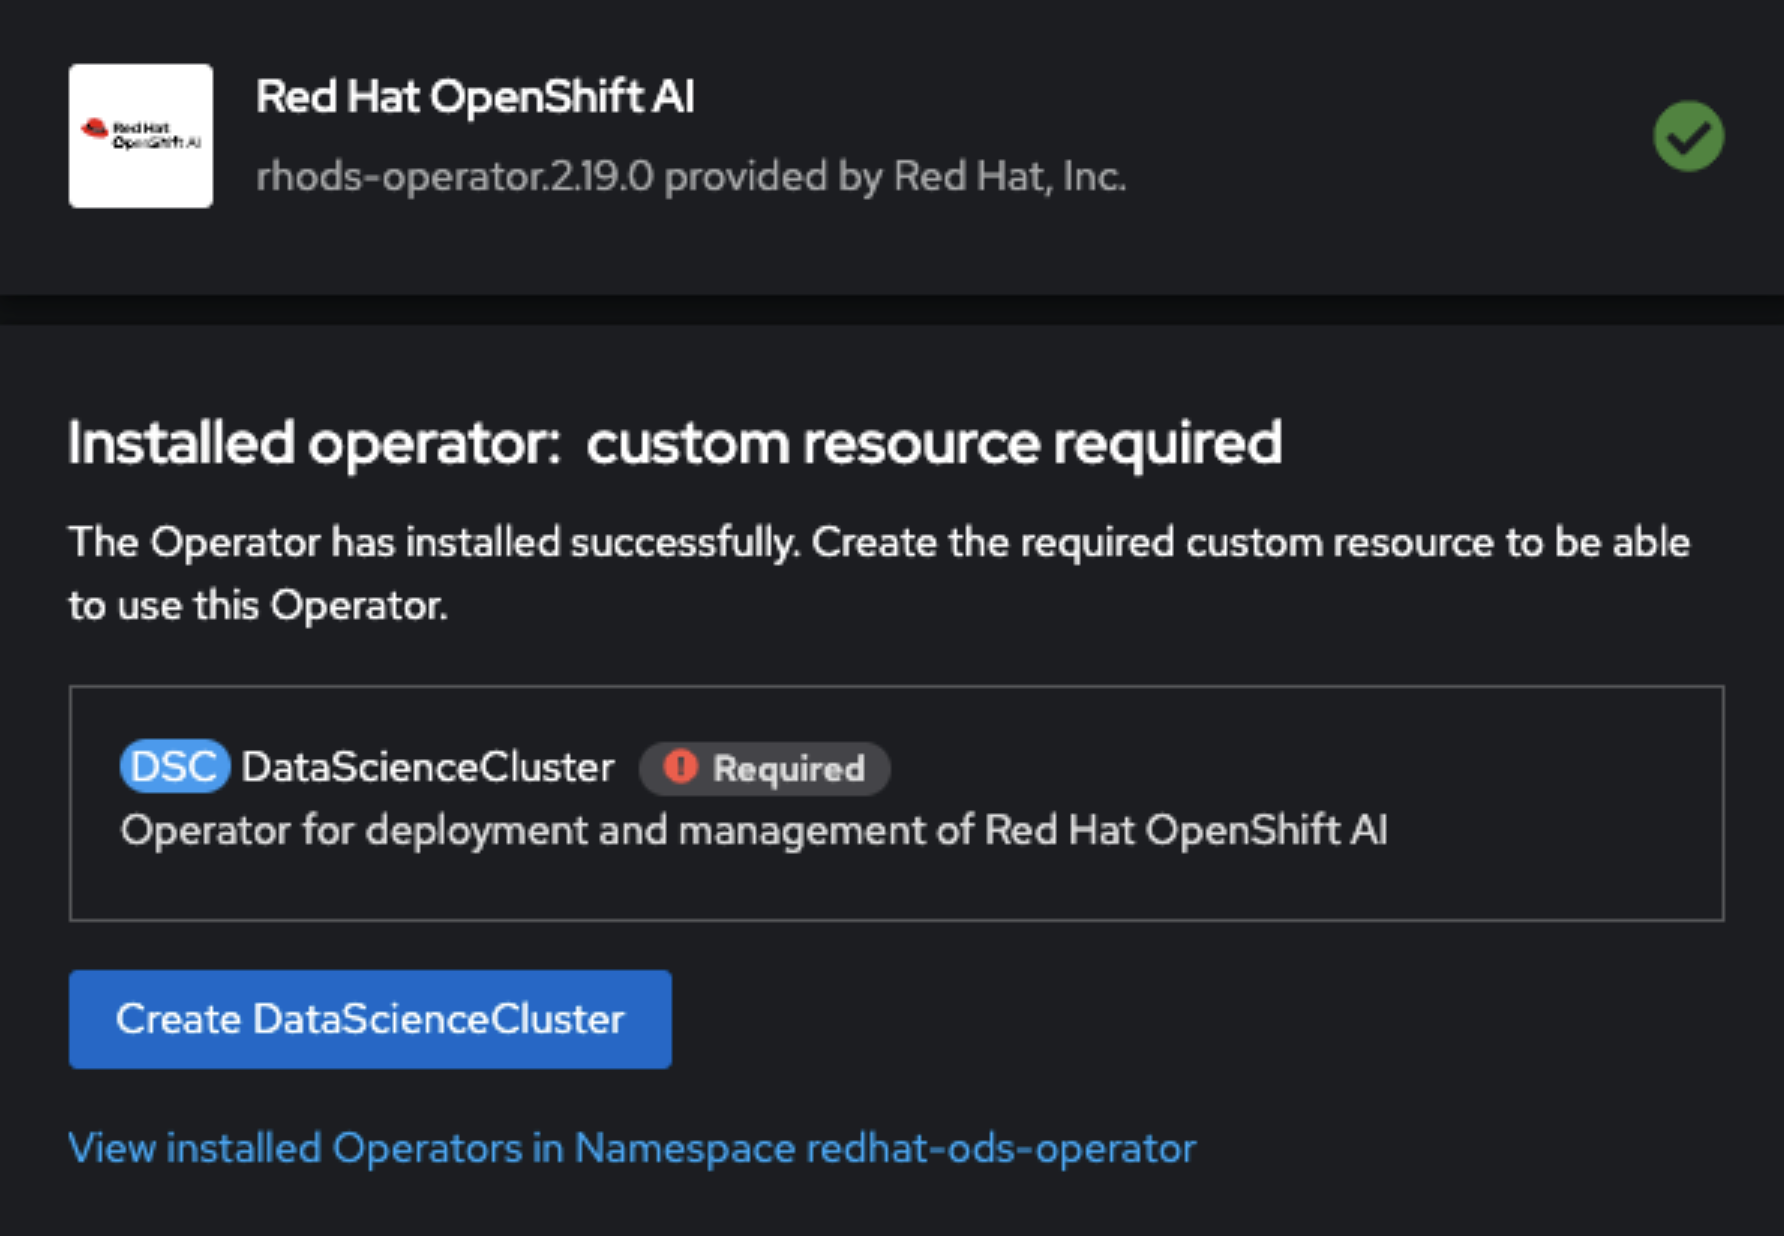
1. Install OpenShift AI via OperatorHub in the OpenShift Web Console
Install the following operators:
- Red Hat OpenShift Serverless
- Red Hat OpenShift Service Mesh 2
- Red Hat OpenShift AI
Once you have successfully installed the OpenShift AI operator, the console will prompt you to create a DataScienceCluster. As the Figure 1 shows, click the Create DataScienceCluster button and proceed with the default configuration to instantiate the cluster and its supporting resources.
2. Validate OpenShift AI
- Log into the OpenShift AI dashboard.
- Create a test data science project.
- Add a Workbench and, optionally, other components like a model server or data connection.
- Launch the Workbench and verify that:
- The environment starts without errors.
- You can run a sample notebook or script inside the Workbench.
3. Install OpenShift Service Mesh 3
OpenShift Service Mesh 3 requires a combination of OperatorHub installations and CLI-based provisioning.
Using the OpenShift Web Console, install the following operators:
- Red Hat OpenShift Service Mesh 3
- Kiali Operator
- Red Hat build of OpenTelemetry
- Tempo Operator
Once you install these operators, you’ll complete the provisioning steps using the OpenShift CLI.
Clone the OSSM 3 quickstart repository.
A quickstart GitHub repository is available to help automate OSSM 3 setup with sample applications. Make sure to use the rhoai-cluster branch.
git clone https://github.com/bugbiteme/ossm-3-demo.git
cd ossm-3-demo
git checkout rhoai-cluster
Example output:
Cloning into 'ossm-3-demo'...
remote: Enumerating objects: 117, done.
...
Switched to a new branch 'rhoai-cluster'
Log in to the OpenShift cluster with your token and API endpoint:
oc login --token=sha256xxxx --server=https://api.xxx.com:6443
...
Logged into "https://api.xxx:6443" as "admin" using the token provided.
You have access to 86 projects...
Install the Kubernetes Gateway API (optional for OSSM 3 Ingress).
If not already installed, apply the Gateway API CRDs:
oc get crd gateways.gateway.networking.k8s.io &> /dev/null || { oc kustomize "github.com/kubernetes-sigs/gateway-api/config/crd?ref=v1.0.0" | oc apply -f -; }Run the installation script to deploy OpenShift Service Mesh 3.
Provision the OSSM 3 Service Mesh and sample applications by executing:
sh install_ossm3_demo.shSample output highlights:
Installing Minio for Tempo...
Installing TempoCR...
Installing OpenTelemetryCollector...
Installing OSSM3...
Installing IstioCR...
Installing Kiali...
Installing Bookinfo...
...
Ingress route for Bookinfo: http://istio-ingressgateway-istio-ingress.apps.xxxx.com/productpage
Kiali route: https://kiali-istio-system-3.apps.xxxx.com
Tip: After installation, visit the Kiali dashboard (via the Kiali route) to validate the deployment and monitor service mesh traffic.
Testing with a sample application
Once the OSSM 3 installation script completes, you can validate the setup using the deployed bookinfo sample application.
You can follow the output URL from the script to access the Kiali dashboard, where you can explore traffic flows, service health, and telemetry data for the Bookinfo app (Figure 2).

Note: Kiali provides cluster-wide observability by default, but can be configured to scope visibility to specific namespaces using the discovery_selectors field in its configuration.
This is a great way to confirm that OSSM 3 is functioning correctly, side-by-side with OpenShift AI and Service Mesh 2, without interfering with RHOAI-managed namespaces. Learn more about how to configure discovery_selectors with Kiali.
Summary
Running Red Hat OpenShift AI and OpenShift Service Mesh 3 on the same OpenShift cluster empowers organizations to take advantage of OpenShift Service Mesh 3’s advanced traffic management, security, and observability features for general application workloads while also leveraging the OpenShift AI robust AI/ML platform for data science and model lifecycle management.
This coexistence is achievable with thoughtful planning. By isolating the OpenShift Service Mesh 3 control plane in a separate namespace and using discoverySelectors to limit its scope to specific application namespaces, you can ensure that it operates independently of the OpenShift Service Mesh 2 resources required by RHOAI.
Successful deployment hinges on a few key practices:
- Installing the necessary operators for OpenShift AI and OpenShift Service Mesh 3.
- Defining clear namespace boundaries.
- Applying correct labels to control service mesh membership and sidecar injection.
The testing and validation steps, including Kiali and the bookinfo sample app deployment, offer a hands-on way to confirm that both service meshes are functioning as expected without interfering with one another.
For deeper insights and step-by-step instructions, consult the official Red Hat documentation for OpenShift AI and OpenShift Service Mesh. These resources provide comprehensive guidance to help you confidently implement this dual-service mesh architecture.
