Red Hat Enterprise Linux (RHEL) offers a development and troubleshooting tool called Toolbx. It was first added to RHEL as a technical preview, but was later blessed as production ready in versions 8.8 and 9.2. This article provides a high level introduction to Toolbx, describing how it supports modern development and troubleshooting workflows with pointers to some lower level details.
What is Toolbx?
Toolbx is a tool for Linux, which allows the use of interactive command line environments for software development and troubleshooting the host operating system, without having to install software on the host. It is built on top of Podman and other standard container technologies from Open Container Initiative (OCI).
Every additional piece of software that’s installed on a production machine can disturb the deployment environments for the workloads and make them vulnerable to bugs in the software. For example, RPM packages can run arbitrary scripts during installation, upgrades and removal that can alter the host in unexpected ways that are hard to debug.
Toolbx solves this problem by providing a fully mutable container within which one can install their favorite development and troubleshooting tools, editors, and SDKs. For example, it’s possible to do yum install ansible without affecting the base operating system.
Sometimes, software developers and system administrators want to try out different operating system distributions and versions. This could be either because a software project or troubleshooting tool requires a specific version of a specific distribution, or because one wants to check how a certain piece of software behaves on a different distribution and version.
Virtual machines (VMs) used to be the usual solution for these situations, but VMs can be resource intensive and slow to set up. Toolbx offers a cheaper and quicker alternative as long as one doesn't need to use a different kernel than the host operating system.
The Toolbx environment is based on an OCI image. On Red Hat Enterprise Linux it defaults to the toolbox image from registry.access.redhat.com. This image is used to create a Toolbx container that offers the interactive command line environment.
Getting started
Toolbx can be used by installing the toolbox package with DNF in the usual way. One can then create a Toolbx container:
[rishi@rhel ~]$ toolbox create
Image required to create toolbox container.
Download registry.access.redhat.com/ubi9/toolbox:latest (288.6MB)? [y/N]: y
Created container: rhel-toolbox-latest
Enter with: toolbox enter
[rishi@rhel ~]$
On a Red Hat Enterprise Linux host, this will create a container called rhel-toolbox-latest. On a Fedora 40 host, it will create one called fedora-toolbox-40, and so on.
The Toolbx container can be used by entering it:
[rishi@rhel ~]$ toolbox enter
⬢[rishi@toolbox ~]$
It presents an interactive command line environment which should look and feel just like the one on the host operating system, other than the hexagon in front of the prompt.
Once a Toolbx container is no longer needed, it can be removed:
[rishi@rhel ~]$ toolbox rm rhel-toolbox-latest
[rishi@rhel ~]$
Common use cases
Toolbx isn’t your average constrained container tool. It really shines as an interactive command line environment that can be used just like the usual Linux CLI on the host operating system that most people are familiar with. Toolbx environments have seamless access to the user’s home directory, the Wayland and X11 sockets, networking (including Avahi), removable devices (like USB sticks), systemd journal, SSH agent, D-Bus, ulimits, /dev and the udev database, and more.
The toolbox enter command is designed to be used both standalone and as the default shell in a terminal emulation application, if so desired.
Development
One of the primary goals of Toolbx is to help with software development, and it tries to cater to a wide range of use cases.
Toolbx is perfect for hacking on command line tools like compilers and debuggers like GCC and GDB, container tools like Flatpak and Podman, and libraries like GStreamer and GTK.
The development environment can be set up inside the container in the same way as on the host operating system. The project environment will no longer clash with the host OS, nor will it be limited to a single OS version. Testing against a different OS' user space is only a matter of creating a different Toolbx container.
Toolbx really shines on the desktop. The same principles mentioned above apply when building desktop applications, both when using classical development environments with Emacs and Vim, or graphical integrated development environments.
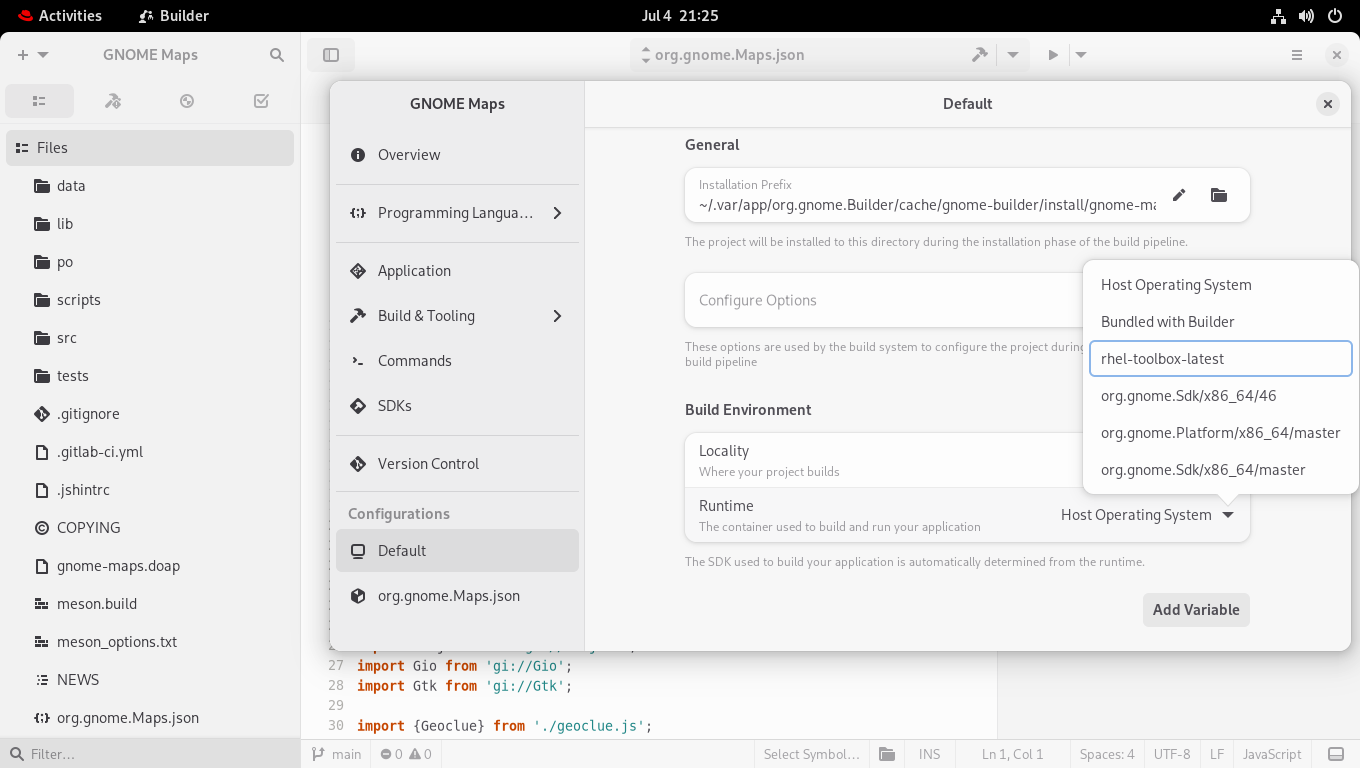
Builder, the integrated development environment for GNOME, has integrated Toolbx in a way that allows developing and testing desktop applications literally at the push of a button. The application is built, run, and tested against the development tools and software development kits installed inside a specific Toolbx container. See Figure 1.
Toolbx environments can be used to develop web applications too. It's used to create its own website, and it’s the recommended way to make changes to it.
Toolbx also supports developing operating system components like GNOME Shell and Pipewire.
Developing GNOME Shell used to be quite cumbersome, and satisfying the dependencies was a chore. The Shell developers have streamlined their workflow using Toolbx considerably. Builder allows running GNOME Shell in nested mode as if it was an application, considerably streamlining the development and testing workflow.
Developing operating system components can require running a full Wayland session with systemd-logind and udev. It’s possible to do that from inside a Toolbx container.
Below we detail how a full GNOME session can be run from inside a Toolbx container on a Red Hat Enterprise Linux host.
Note:
This example requires a version of Mutter that supports the XDG_SESSION_ID environment variable, which is not the case in Red Hat Enterprise Linux 9.4. This shouldn't be a problem for developers because they would be compiling from source code, and not restricted to the official RHEL binaries. To keep this example short and simple, a Fedora 40 Toolbx container created with toolbox create --distro fedora --release 40 is used.
Use ctrl+alt+f<n> to switch to a Linux console and log in. Then:
[rishi@rhel ~]$ export XDG_CURRENT_DESKTOP=GNOME
[rishi@rhel ~]$ toolbox enter fedora-toolbox-40
⬢[rishi@toolbox ~]$ sudo dnf install flatpak gnome-backgrounds gnome-shell
⬢[rishi@toolbox ~]$ dbus-run-session gnome-shell --wayland
This will bring up a full GNOME session running from inside the Toolbx container on the RHEL host. See Figure 2.
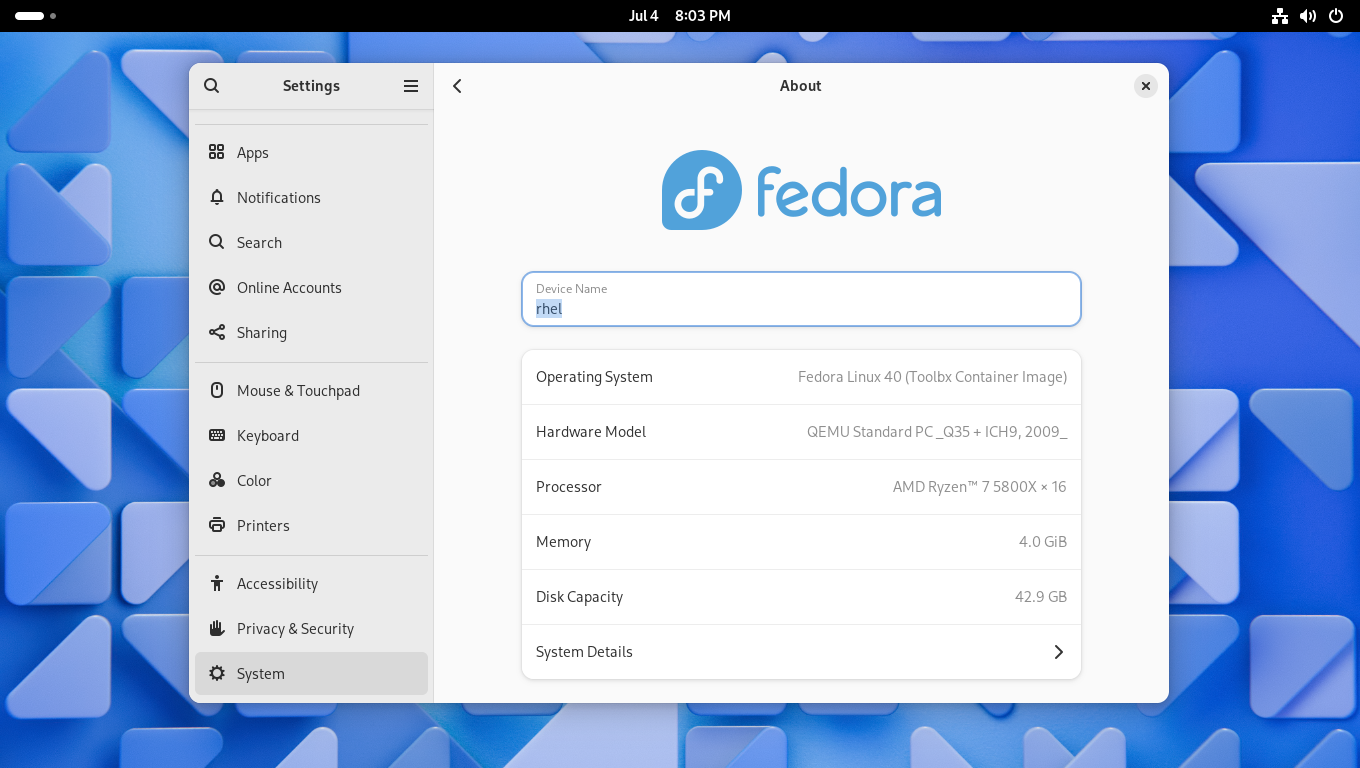
Note that GNOME picks up the device name from the RHEL host operating system, even though it's a Fedora container.
Troubleshooting
Another important goal of Toolbx is to help troubleshoot the host operating system or network without installing any extra tools on the host. It’s possible to use the toolbox(1) command as root on the host OS to create environments for performing privileged operations on the host.
Toolbx is perfect for using Nmap to scan IP addresses and ports in a network, including TCP SYN scans with the -sS option that requires root access to the host operating system:
[root@rhel ~]# toolbox enter
⬢[root@toolbox ~]# nmap -sS scanme.nmap.org
Starting Nmap 7.93 ( https://nmap.org ) at 2024-03-04 17:09 CET
Nmap scan report for scanme.nmap.org (45.33.32.156)
Host is up (0.22s latency).
Other addresses for scanme.nmap.org (not scanned): 2600:3c01::f03c:91ff:fe18:bb2f
Not shown: 992 closed tcp ports (reset)
PORT      STATE    SERVICE
22/tcp    open     ssh
80/tcp    open     http
135/tcp   filtered msrpc
139/tcp   filtered netbios-ssn
179/tcp   filtered bgp
445/tcp   filtered microsoft-ds
9929/tcp  open     nping-echo
31337/tcp open     Elite
Nmap done: 1 IP address (1 host up) scanned in 6.03 seconds
⬢[root@toolbox ~]#
Similarly, Toolbx can be used to look at the logs for all processes running on the host with journalctl(1), including those with elevated privileges.
Custom images
It's possible to change the OCI image used to create the Toolbx environments. One option is to use the distro command line and configuration file options to select a different built-in image. The other is to create a custom Toolbx image from a Containerfile or an existing Toolbx container.
The Toolbx documentation covers the topic of custom images in great detail.
Further reading
Learn more about Toolbx in the documentation. It comes with an exhaustive manual complete with examples that covers each command and the configuration file. The Toolbx website contains a rich assortment of interesting information that's worth going through for both newcomers and seasoned practitioners alike.