In Active Directory Federation Services (AD FS) terminology, Red Hat build of Keycloak will be set up as a Resource Federation Server and AD FS as an Account Federation Server. This means that users will reside in Active Directory (AD) on Windows Server, while the protected web app will reside within the realm protected by Red Hat build of Keycloak on Red Hat OpenShift. With this, we want AD FS to authenticate users to give them access to web apps on OpenShift. Hence, when a user with an account in AD tries to access a web app on OpenShift, the user will be redirected to Red Hat build of Keycloak where they can choose to authenticate with AD FS. The user doesn't need to have an account in Red Hat build of Keycloak or in OpenShift for this to work.
In Red Hat build of Keycloak terminology, we will configure a SAML 2.0 Identity Broker where AD FS will be configured as a SAML 2.0 Identity Provider (IdP). Furthermore, in AD FS Red Hat build of Keycloak will be configured as a Relying Party.
Prerequisites
In order to run the example in this article, you need to have the following set up beforehand.
A Windows Server with the following roles:
Active Directory Domain Services
Active Directory Federation Services
Certificate Authority
Public DNS record with internet access
In this article, I'm using Windows Server 2022 Datacenter Azure Edition.
An OpenShift cluster with the Red Hat build of Keycloak Operator installed. In this article I'm using Red Hat build of Keycloak 24 on OpenShift 4.15.
Set up TLS certificates
Since Red Hat build of Keycloak and AD FS will need to reach each other securely over TLS, I'm setting up mutual TLS trust between Red Hat build of Keycloak and my Windows Server. Also, since I'm using self-signed certificates in this article, I will import the certificate for AD FS into the truststore of Red Hat build of Keycloak and also import the certificate for Red Hat build of Keycloak as a trusted certificate in Windows Server using the MMC Certificate snap-in. This is for demo purposes only and not intended for production use.
First, I create a TLS certificate for AD FS using my Windows Server Certificate Authority and the MMC Certificate snap-in. In this example I'm setting the following properties (Figure 1).
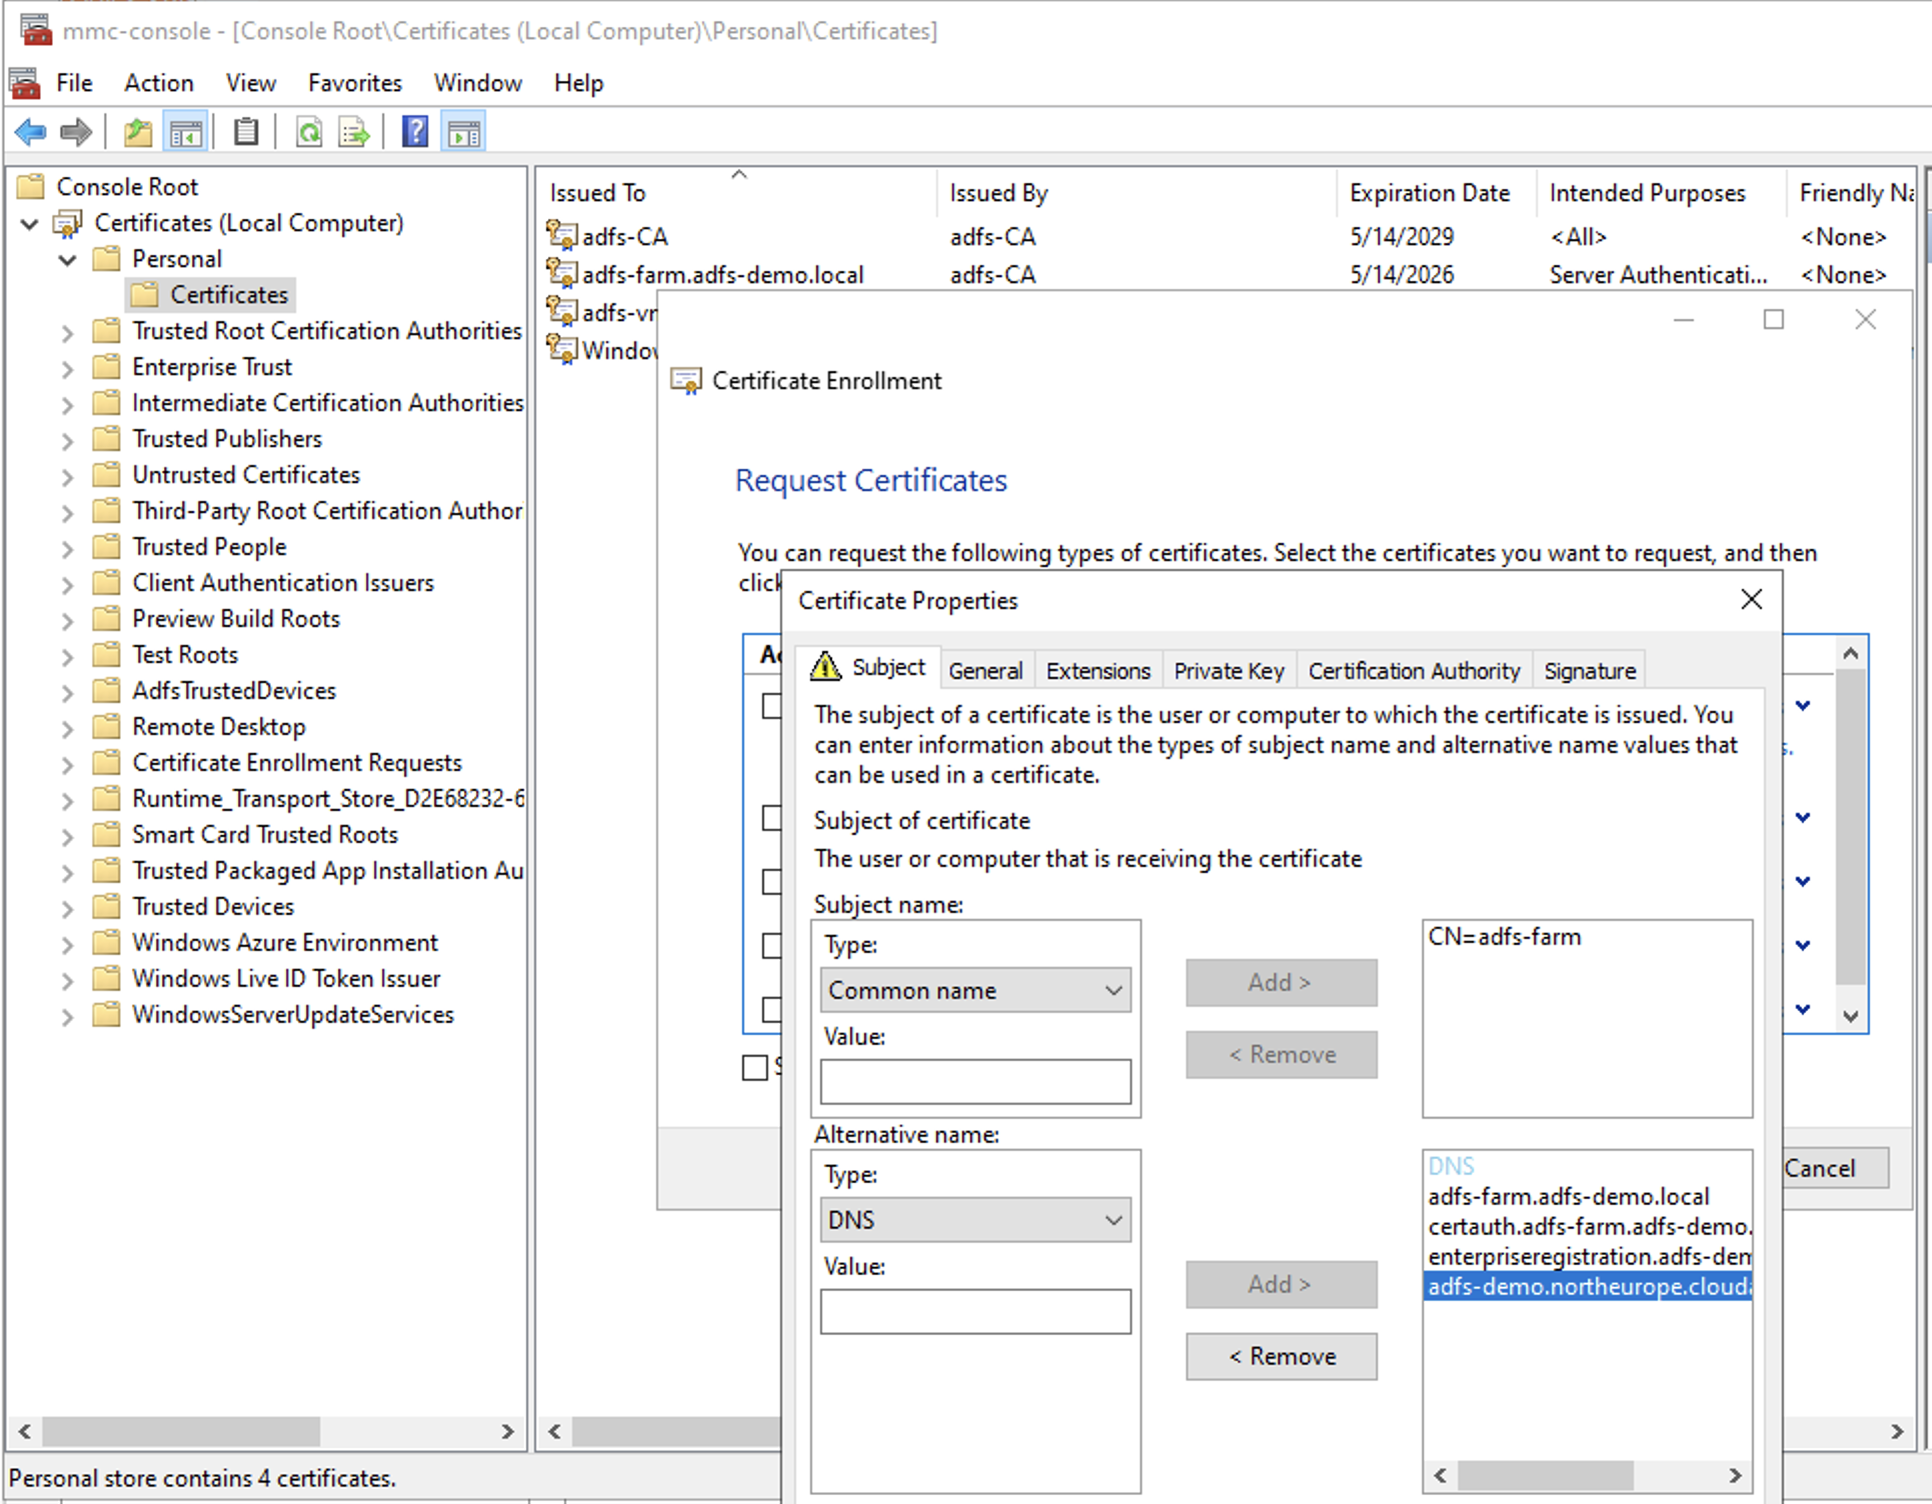
In Figure 1, I'm using the host name adfs-farm, configured in my local DNS as Common Name, and also adding Subject Alternative Names:
adfs-farm.adfs-demo.local(local AD FS DNS name)certauth.adfs-farm.adfs-demo.local(AD FS user certificate hostname)enterpriseregistration.adfs-demo.local(UPN suffix registration name)adfs-demo.northeurope.cloudapp.azure.com(public AD FS DNS entry)
The first SAN is the local hostname and domain of my Windows Server while the last one is the public DNS entry allowing clients to reach my AD FS instance over the internet.
Then, I'm using the MMC Certificate snap-in to export the TLS certificate I've previously issued for AD FS using the Certificate Authority on Windows Server. I will also export the private key. The format used is PKCS#12 and the filename used in this example is adfs-cert.pfx.
On my local workstation, the certificate is then converted to PEM as follows:
% openssl pkcs12 -in adfs-cert.pfx -out adfs-cert.pem -clcerts -nokeys% openssl pkcs12 -in adfs-cert.pfx -out adfs-key.pem -nocerts -nodes After that, I will create a TLS secret in OpenShift in my Red Hat build of Keycloak namespace:
% oc new-project rhbk% oc create secret tls adfs-tls-secret --cert adfs-cert.pem --key adfs-key.pemNext, I will create a TLS secret for Red Hat build of Keycloak:
% openssl req -verbose -subj '/CN=keycloak' -addext subjectAltName=DNS:rhbk-keycloak.apps.cluster-qtbgp.dynamic.redhatworkshops.io -newkey rsa:2048 -nodes -keyout keycloak-key.pem -x509 -days 365 -out keycloak-cert.pem% oc create secret tls keycloak-tls-secret --cert keycloak-cert.pem --key keycloak-key.pemNotice that the subjectAltName is set to the route of my Red Hat build of Keycloak instance on OpenShift. You should change this to match the route to your Red Hat build of Keycloak instance.
You can create the Red Hat build of Keycloak instance using the Keycloak CR. You can use the following repo to deploy PostgreSQL and Red Hat build of Keycloak on OpenShift using the Red Hat build of Keycloak Operator: https://github.com/torbjorndahlen/keycloak-adfs.
% oc apply -f postgres/postgres.yml% oc create secret generic keycloak-db-secret --from-literal=username=keycloak --from-literal=password=keycloak% oc apply -f keycloak/keycloak.ymlRemember to change the hostname of Red Hat build of Keycloak in the CR to the name of your instance.
In order to set up trust between Red Hat build of Keycloak and AD FS I will copy the keycloak-cert.pem file used for the TLS secret to Windows Server. Then use MMC Certificate snap-in to import the certificate (Figure 2).
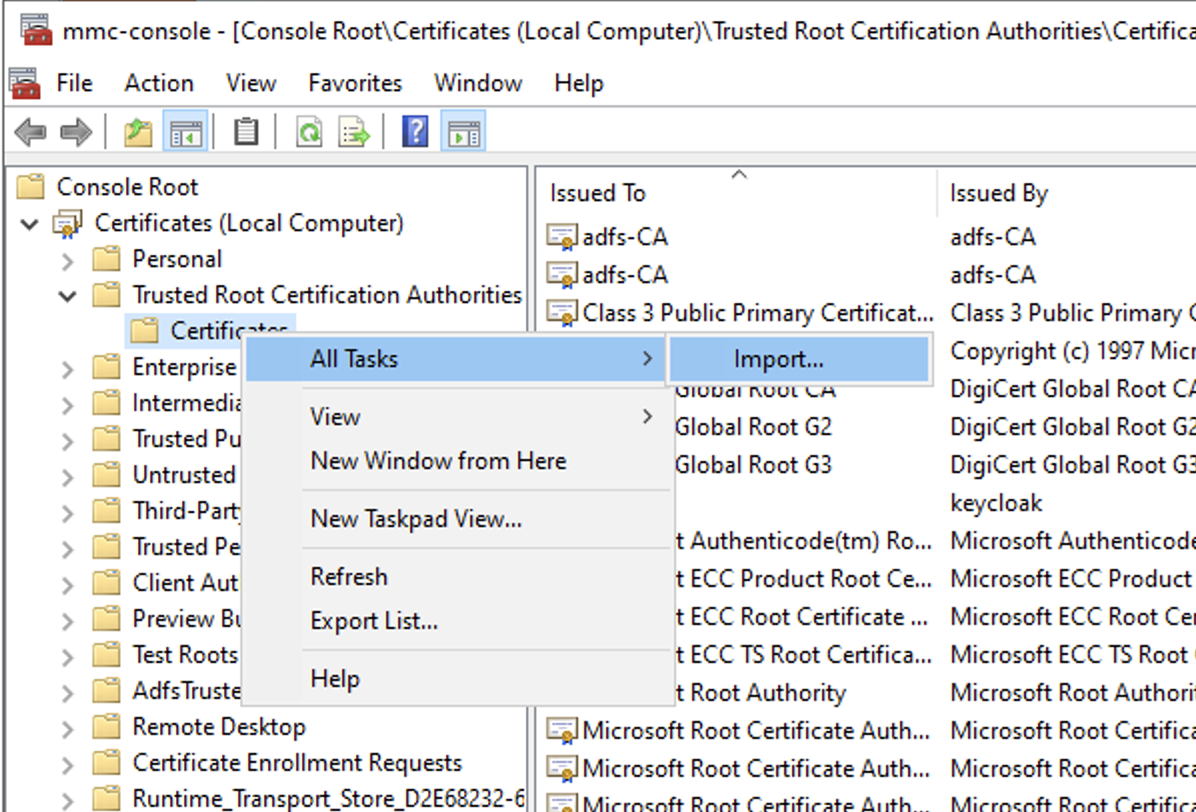
In Figure 2 I'm using the MMC Certificate snap-in to import the file containing the TLS certificate for Red Hat build of Keycloak under Trusted Root CAs.
Now there is mutual TLS certificate trust between Windows Server and my Red Hat build of Keycloak instance to HTTPS can be used both ways.
Configure Red Hat build of Keycloak as Identity Broker
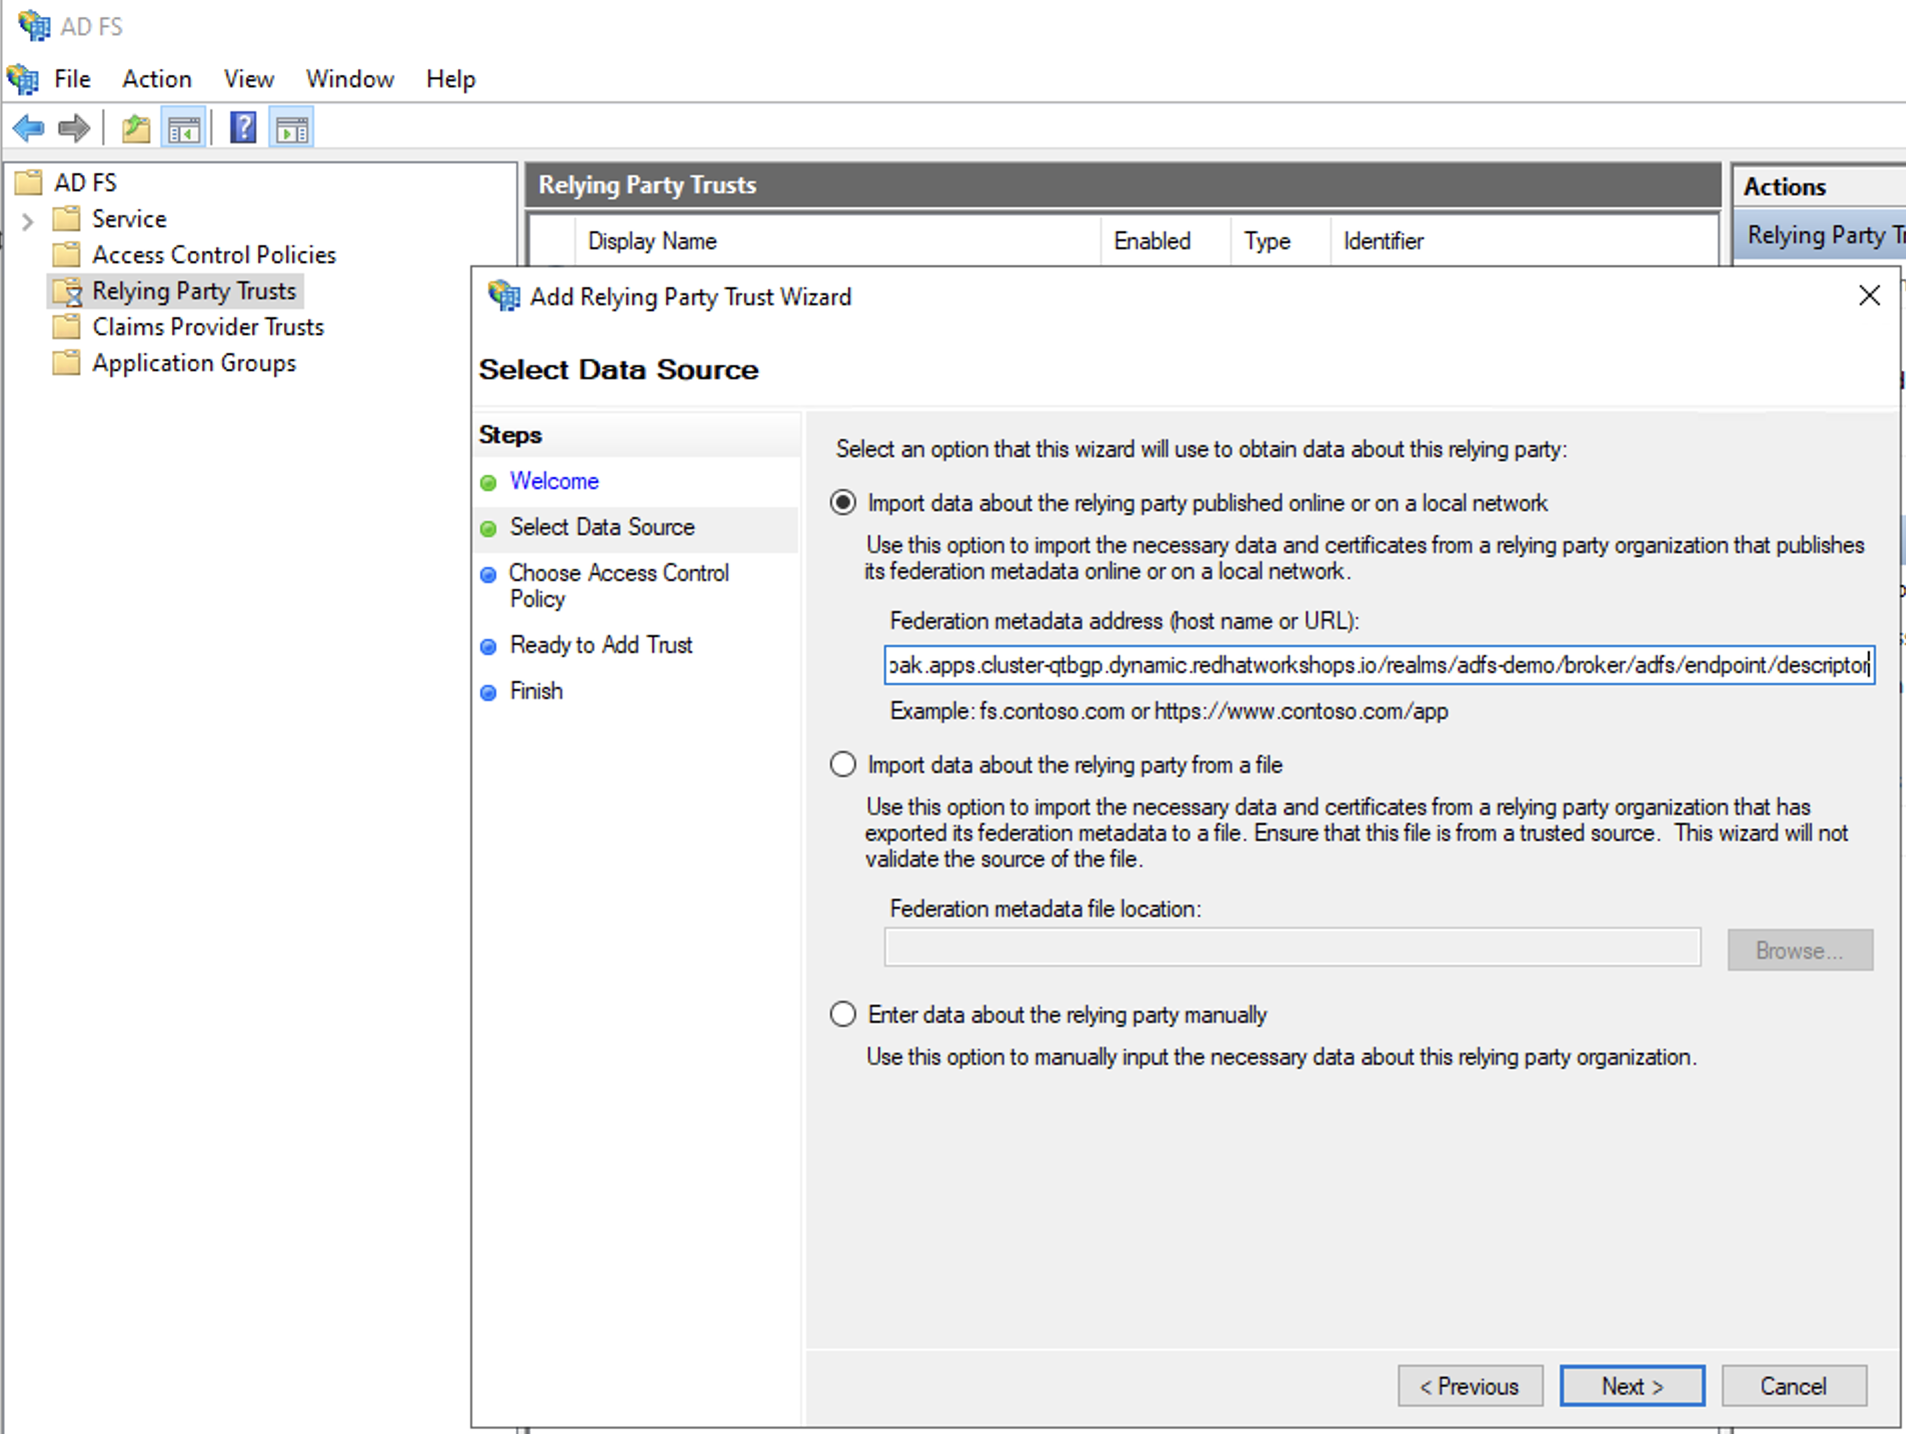
As the next step, I will use the Identity Brokering menu in Red Hat build of Keycloak to configure AD FS as my SAML 2.0 IdP (Figure 3).
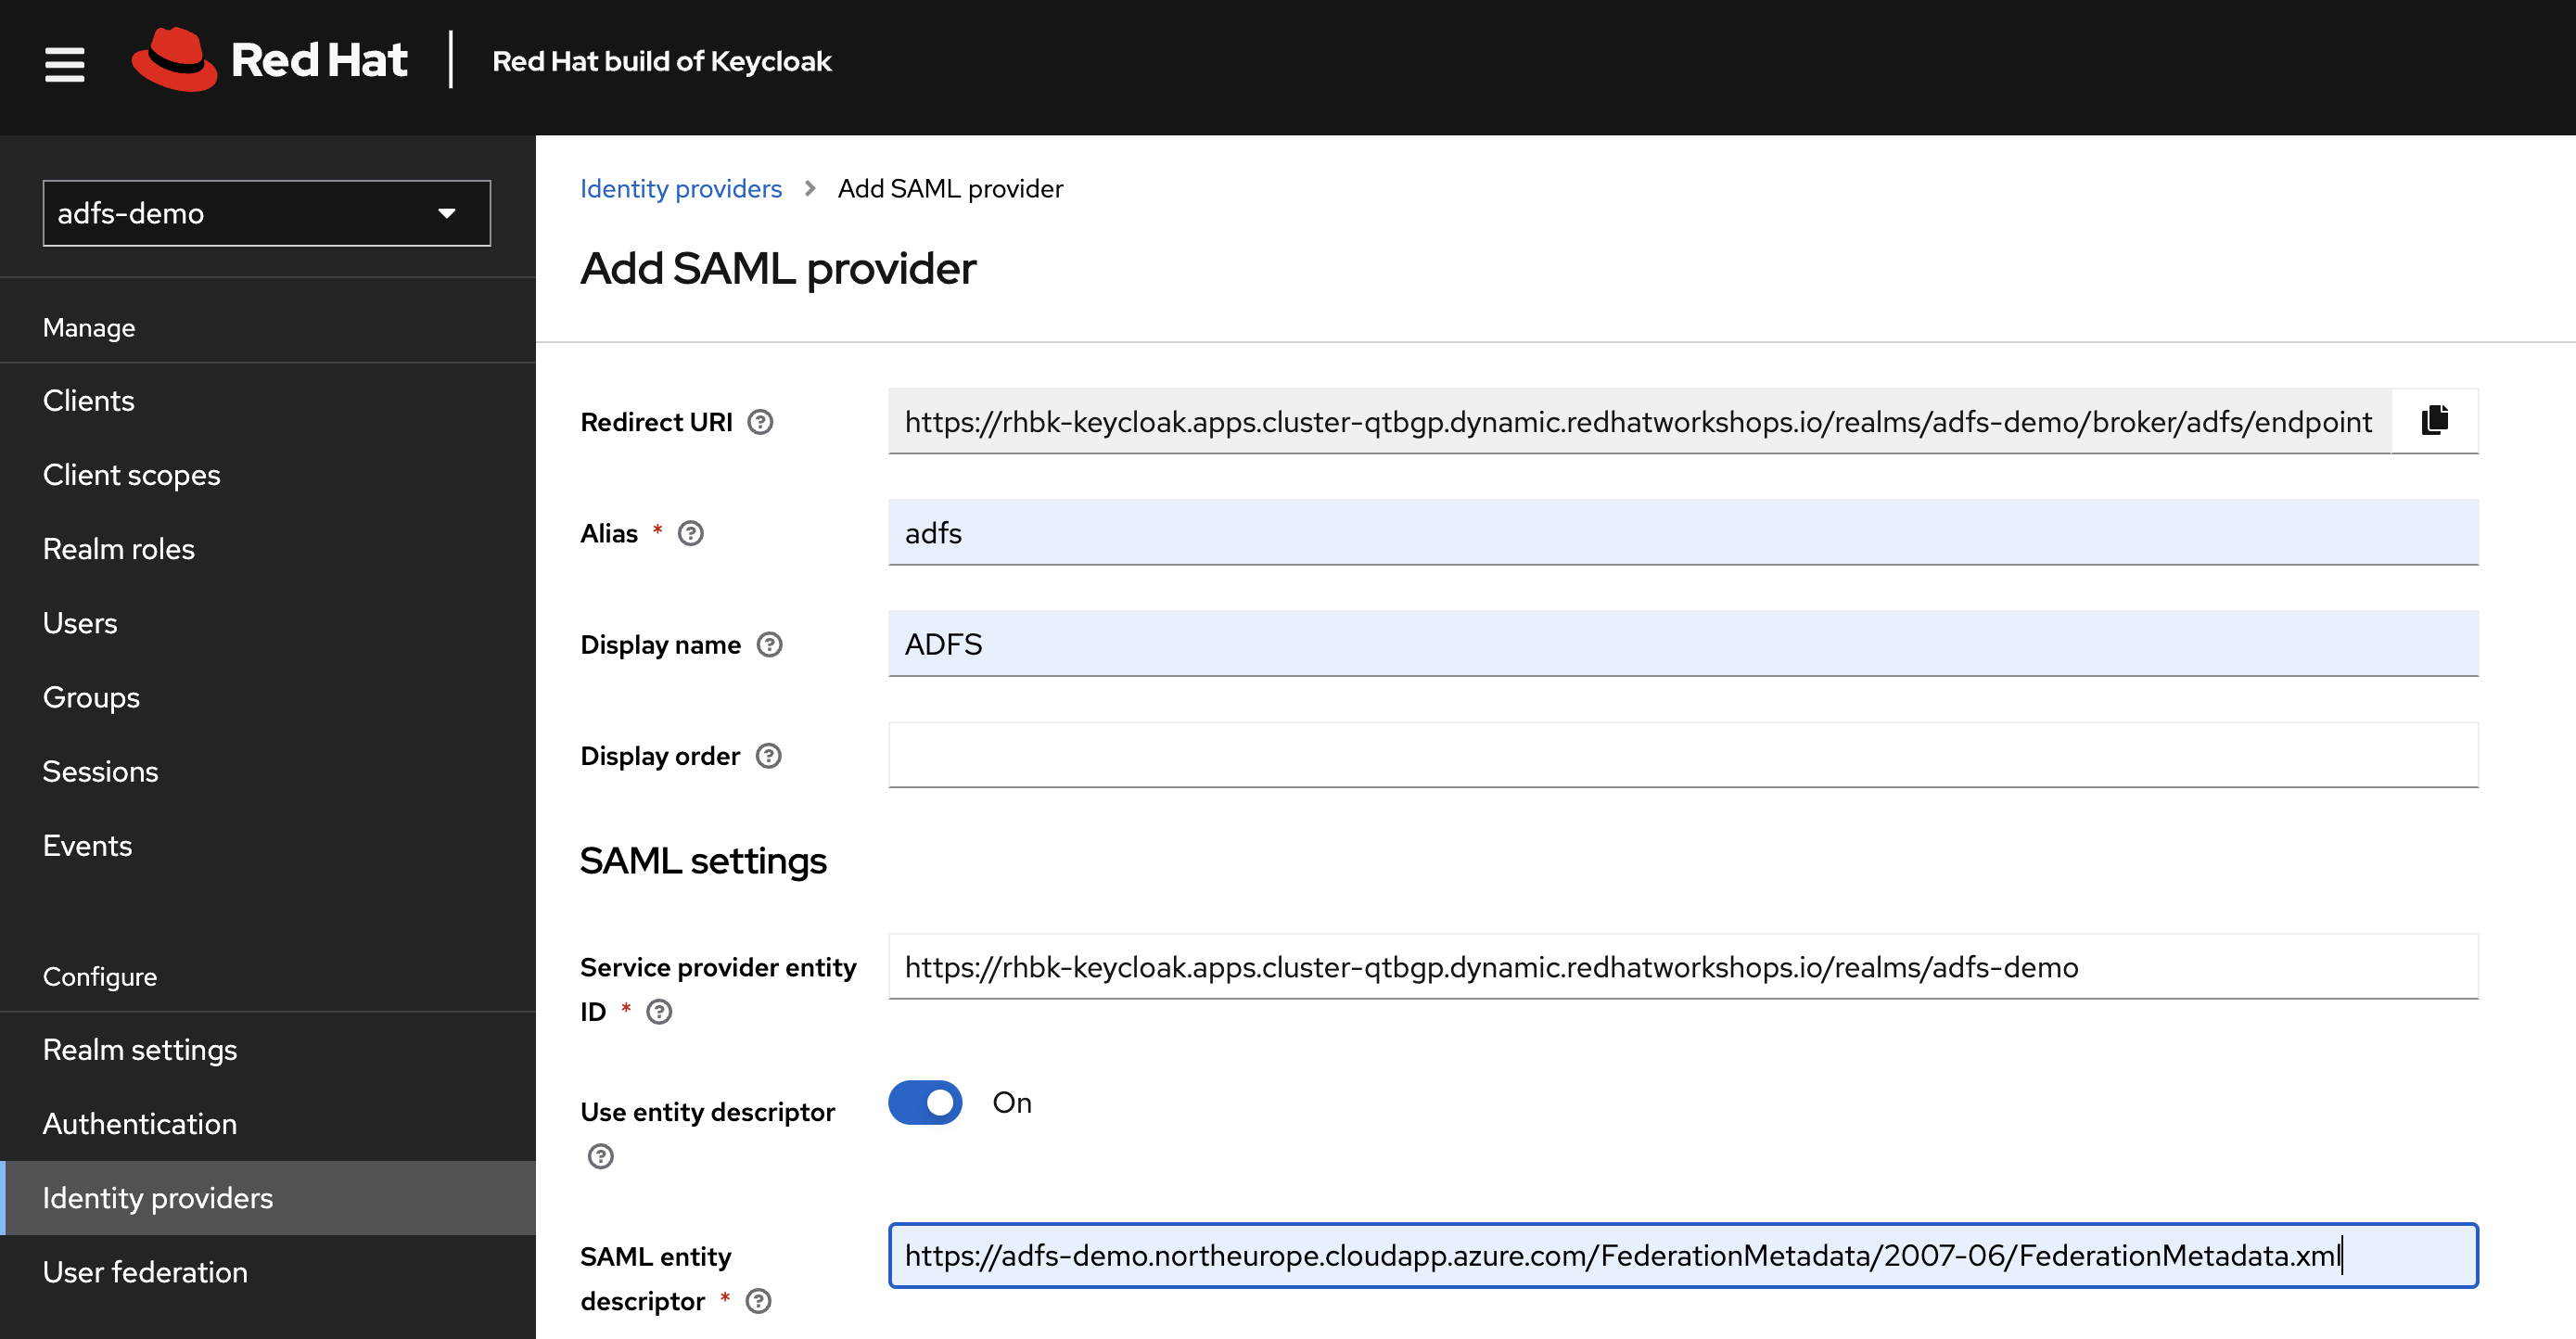
In Figure 3, notice the URL to the SAML entity descriptor. The /FederationMetadata/2007-06/FederationMetadata.xml endpoint is provided by AD FS and is preceded with the public DNS entry of my Windows Server. From there, Red Hat build of Keycloak will read the configuration required to set up AD FS as IdP.
Next, I will configure the Name ID policy format. A corresponding claims mapping rule will be set up in AD FS later. See Figure 4.
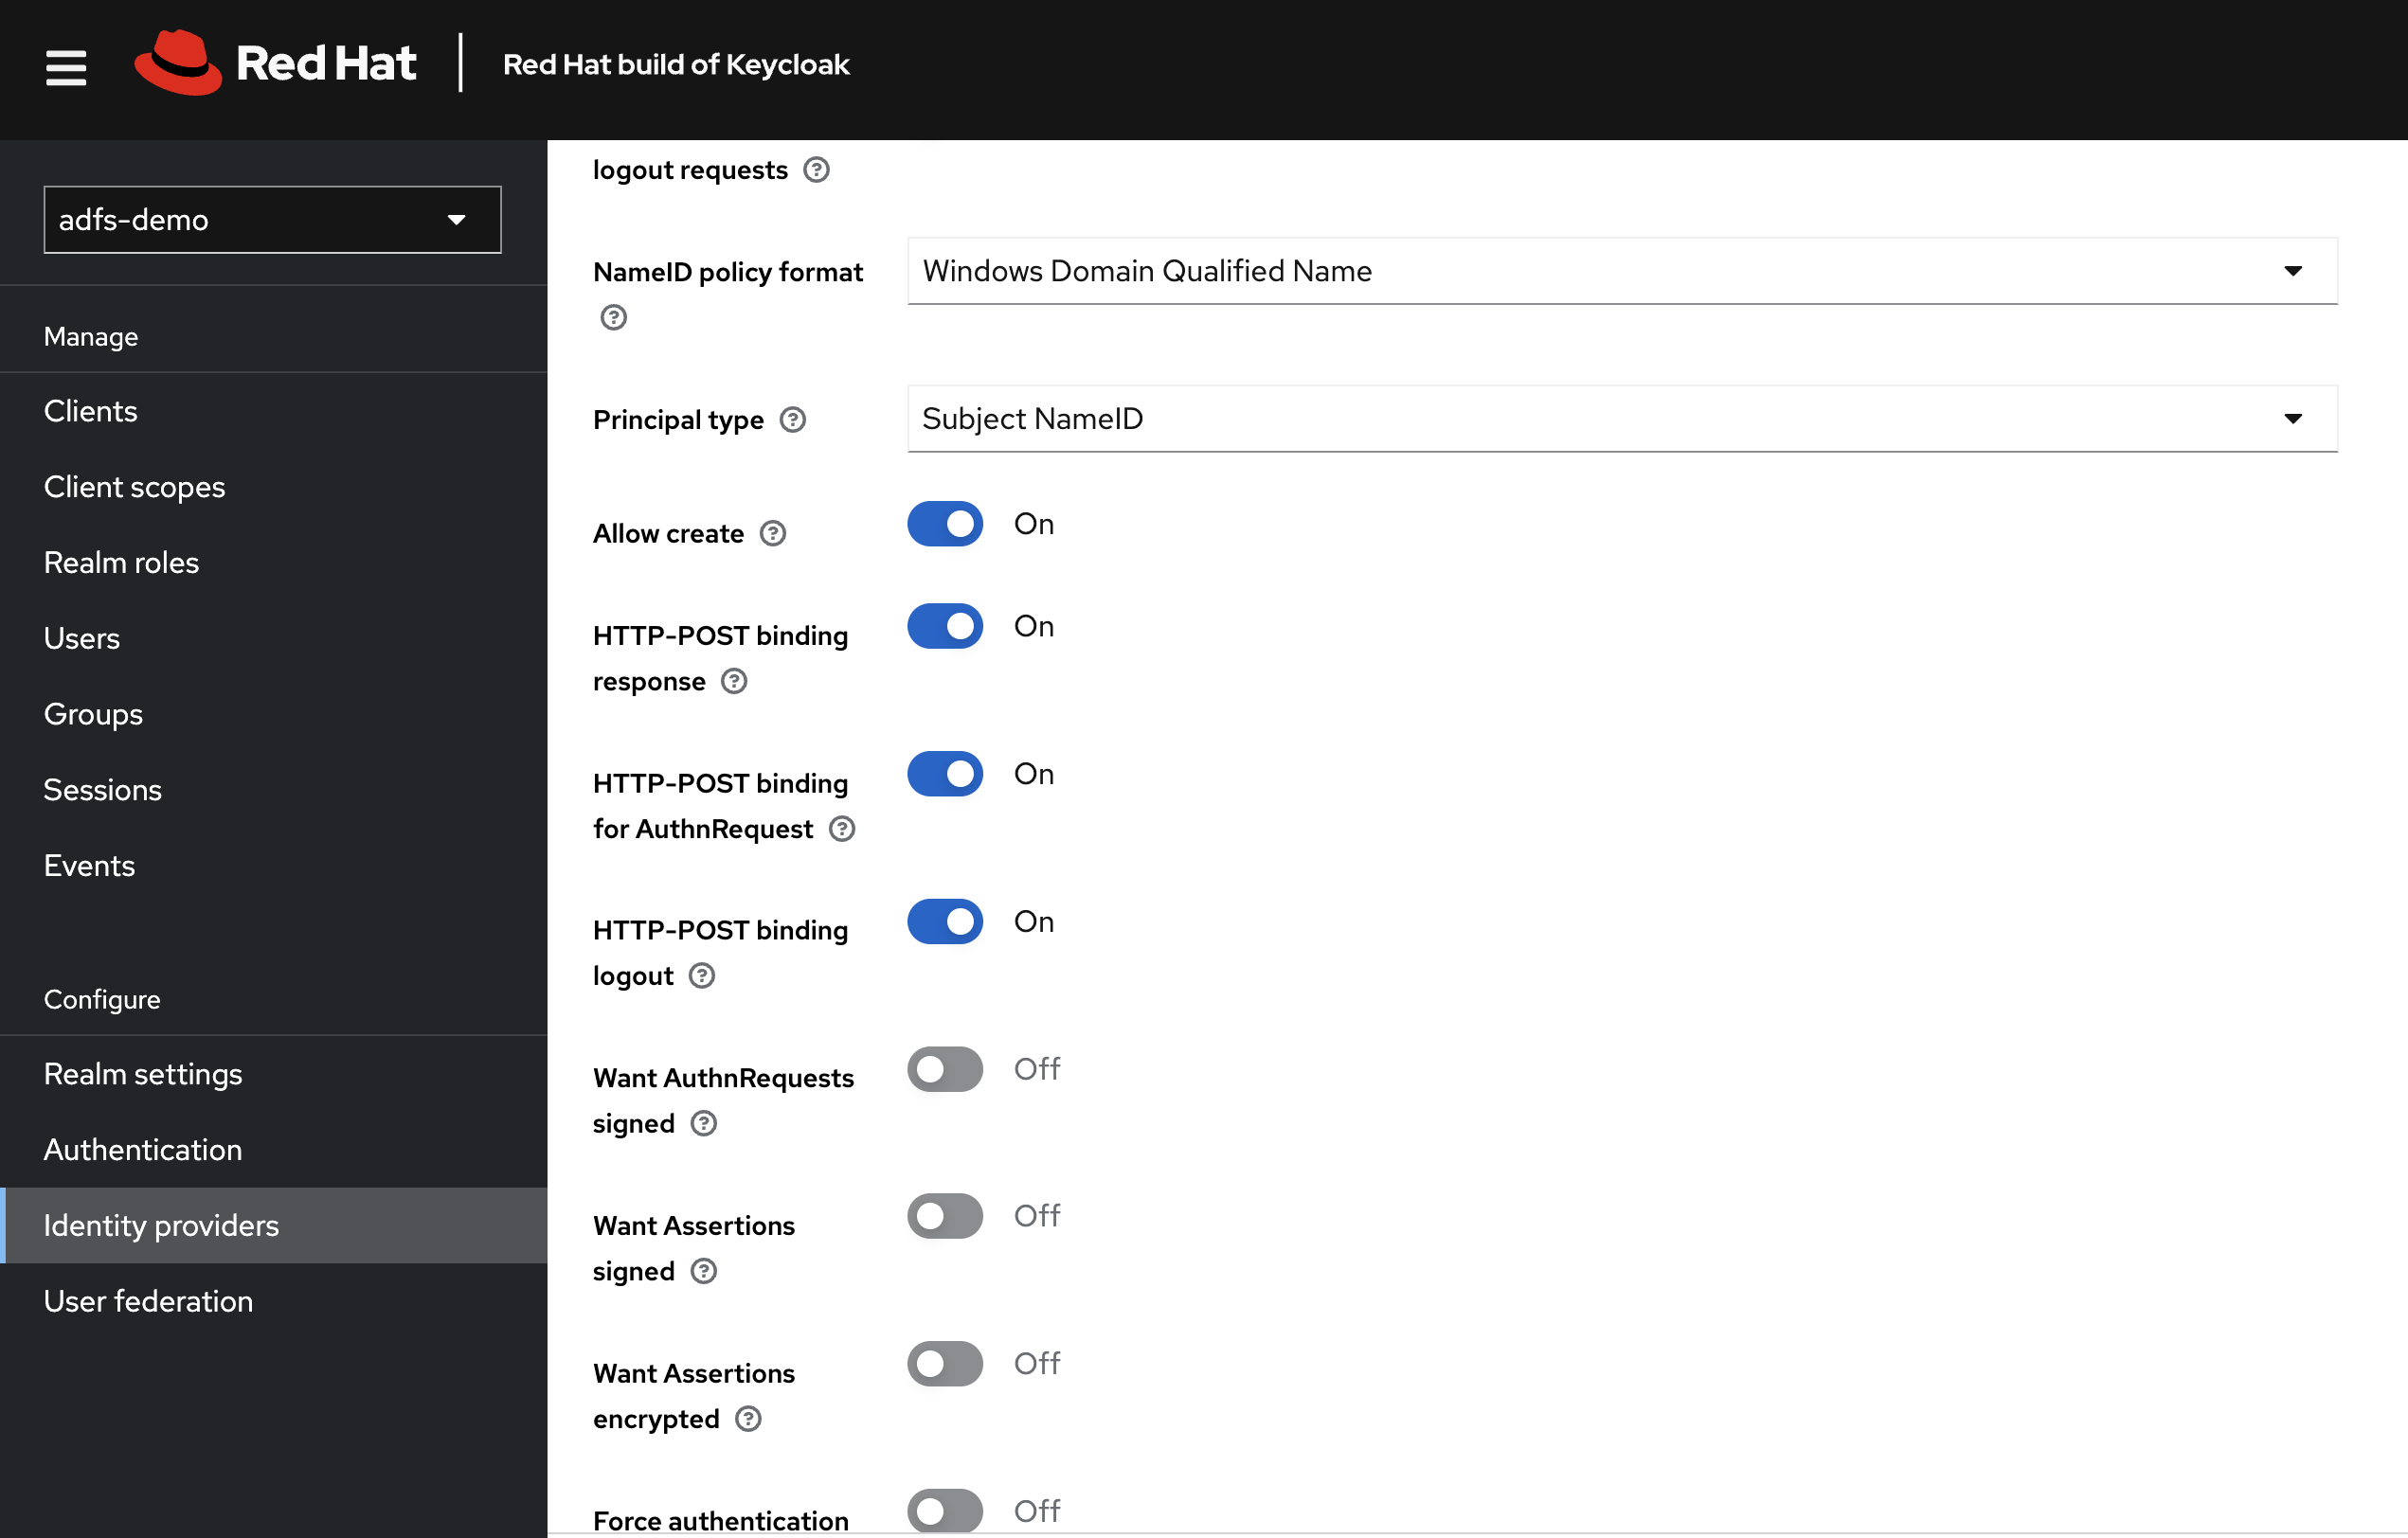
In Figure 4 I have set the Name ID policy format to Windows Domain Qualified Name, and the Principal type to Subject NameID.
When created, the AD FS IdP configuration page will contain a SAML 2.0 Service Provider metadata URL that will be used to set up Red Hat build of Keycloak as Relying Party in the next step.
I'm also setting up a Mapper to transform the username coming from AD FS (Figure 5).

In Figure 5, I've used the default Username mapper to transform incoming usernames from AD FS to a format that is accepted by Red Hat build of Keycloak. e.g., ADFS-DEMO\alice is transformed to adfs.adfs-demoalice.
In the AD FS Relying Party snap-in I will set up Red Hat build of Keycloak as a Claims Aware Relying Party (Figure 6).
In Figure 6, I'm entering the SAML 2.0 Service Provider metadata URL from the Identity Broker configuration page in Red Hat build of Keycloak as source where AD FS can import information about my Red Hat build of Keycloak Relying Party.
As the final step I will set up a Claims Transformation rule for incoming claims from Red Hat build of Keycloak, as shown in Figure 7.
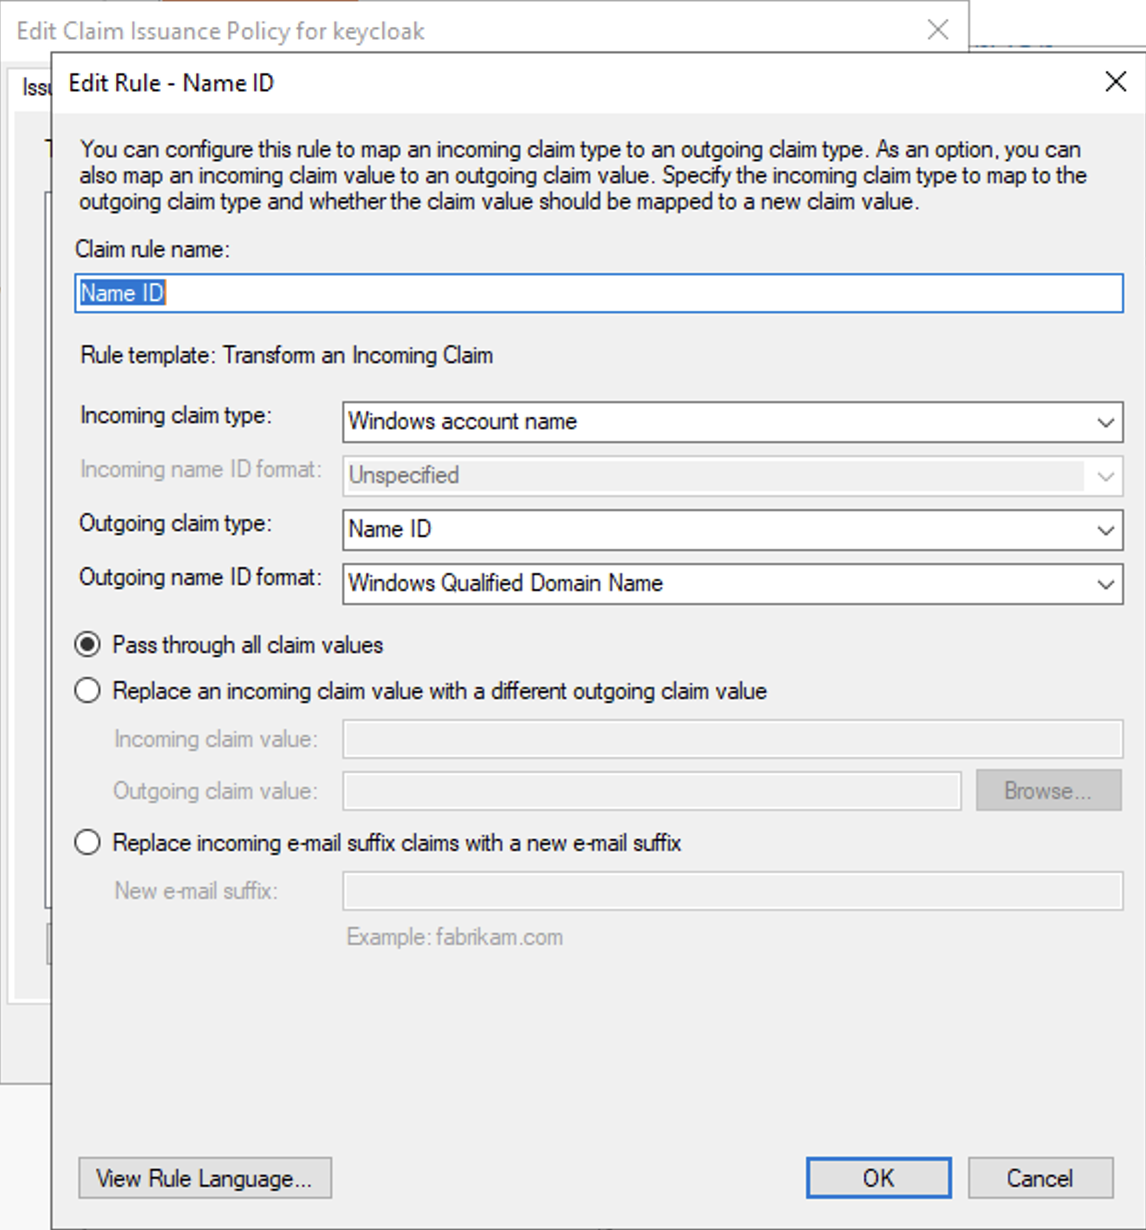
In Figure 7, I've created a claims transformation rule that will rewrite a Windows account name, e.g., alice@dfs-demo.local into a Windows Qualified Domain name, e.g., ADFS-DEMO\alice.
With this configuration done, a user could use their AD credentials to authenticate to a resource protected by Red Hat build of Keycloak.
Test the integration
To test the integration I've created a user, Alice, in AD (Figure 8).
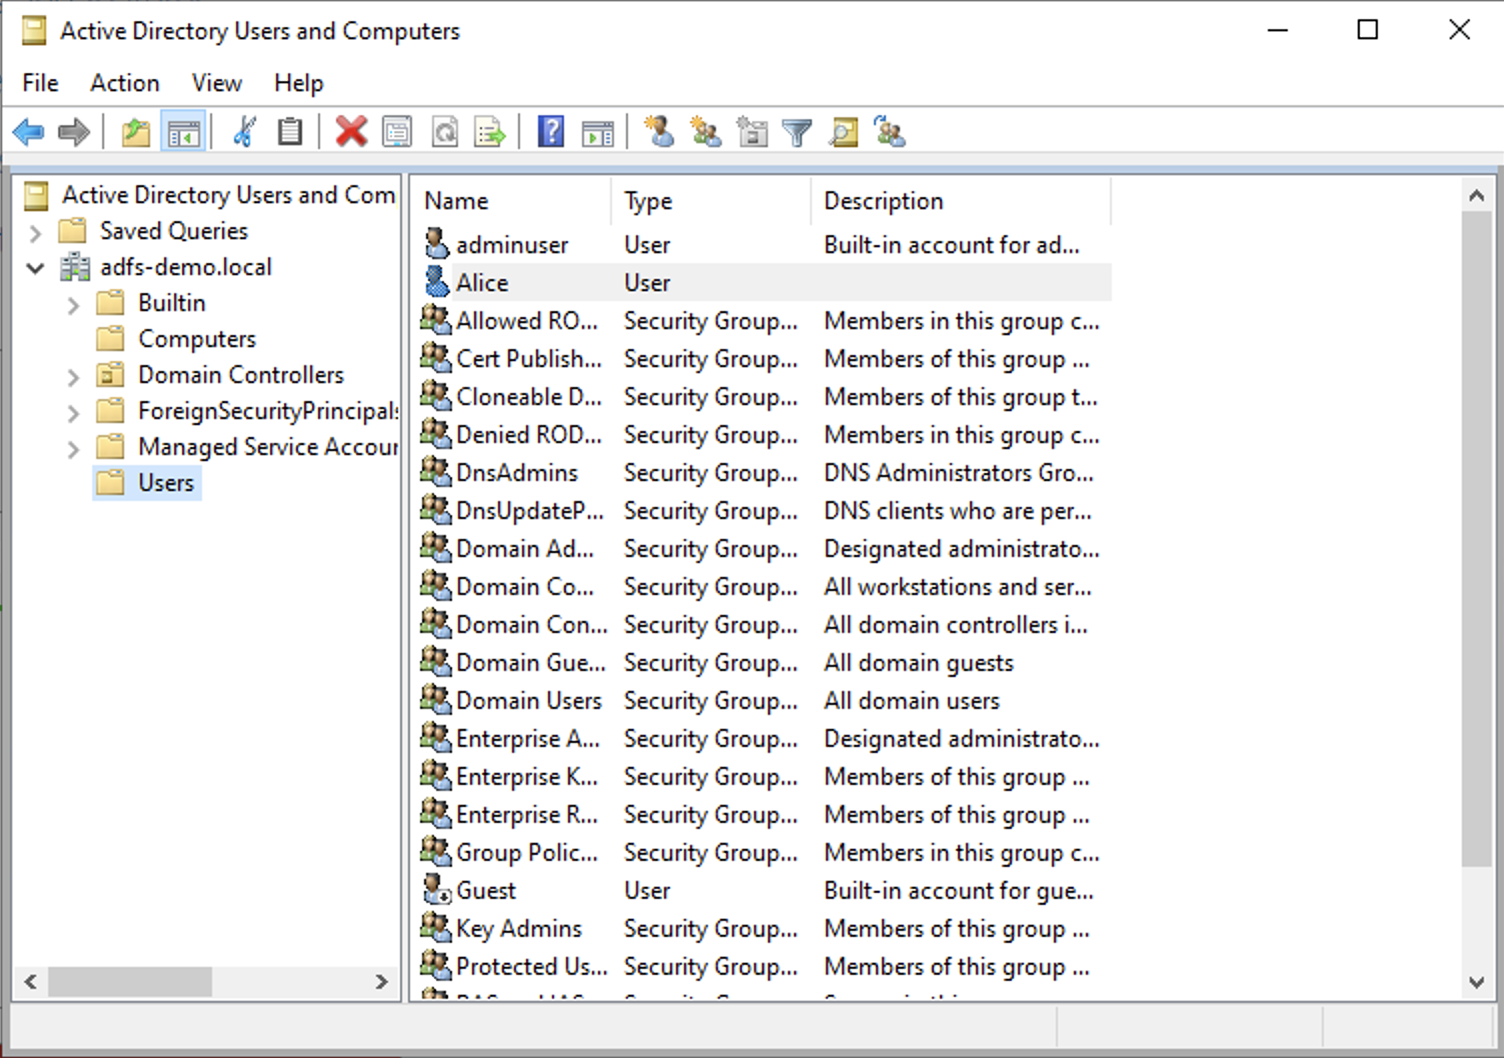
In Figure 8, I've created a user called Alice. This user will try to access the built in account page in Red Hat build of Keycloak using her AD credentials (Figure 8).
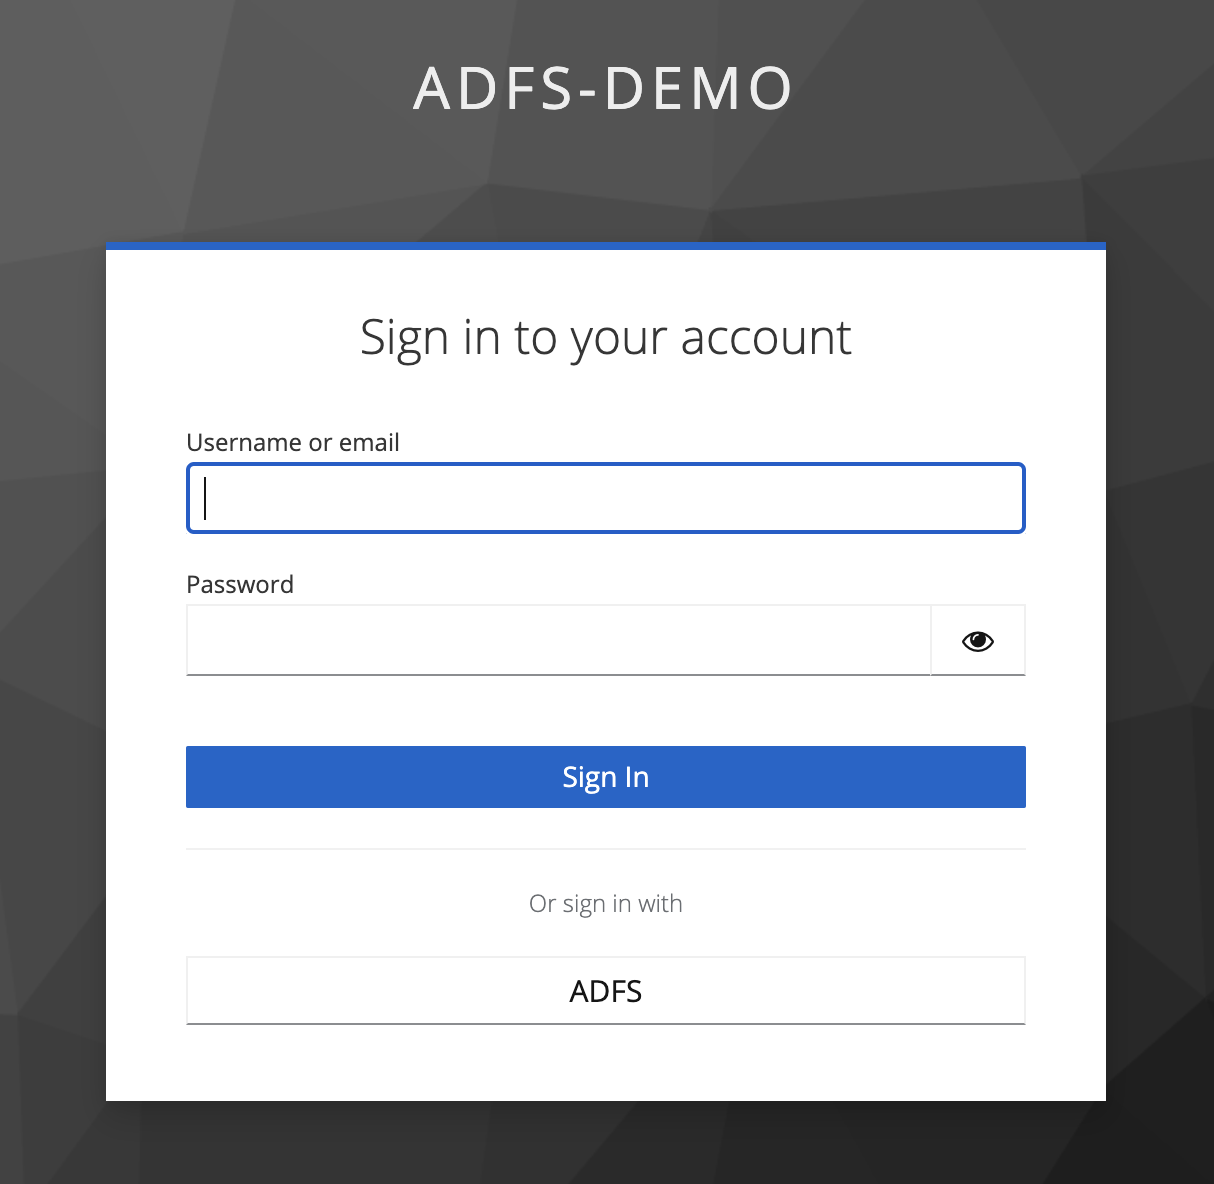
Then, the user is redirected to the login page provided by Red Hat build of Keycloak (Figure 9).
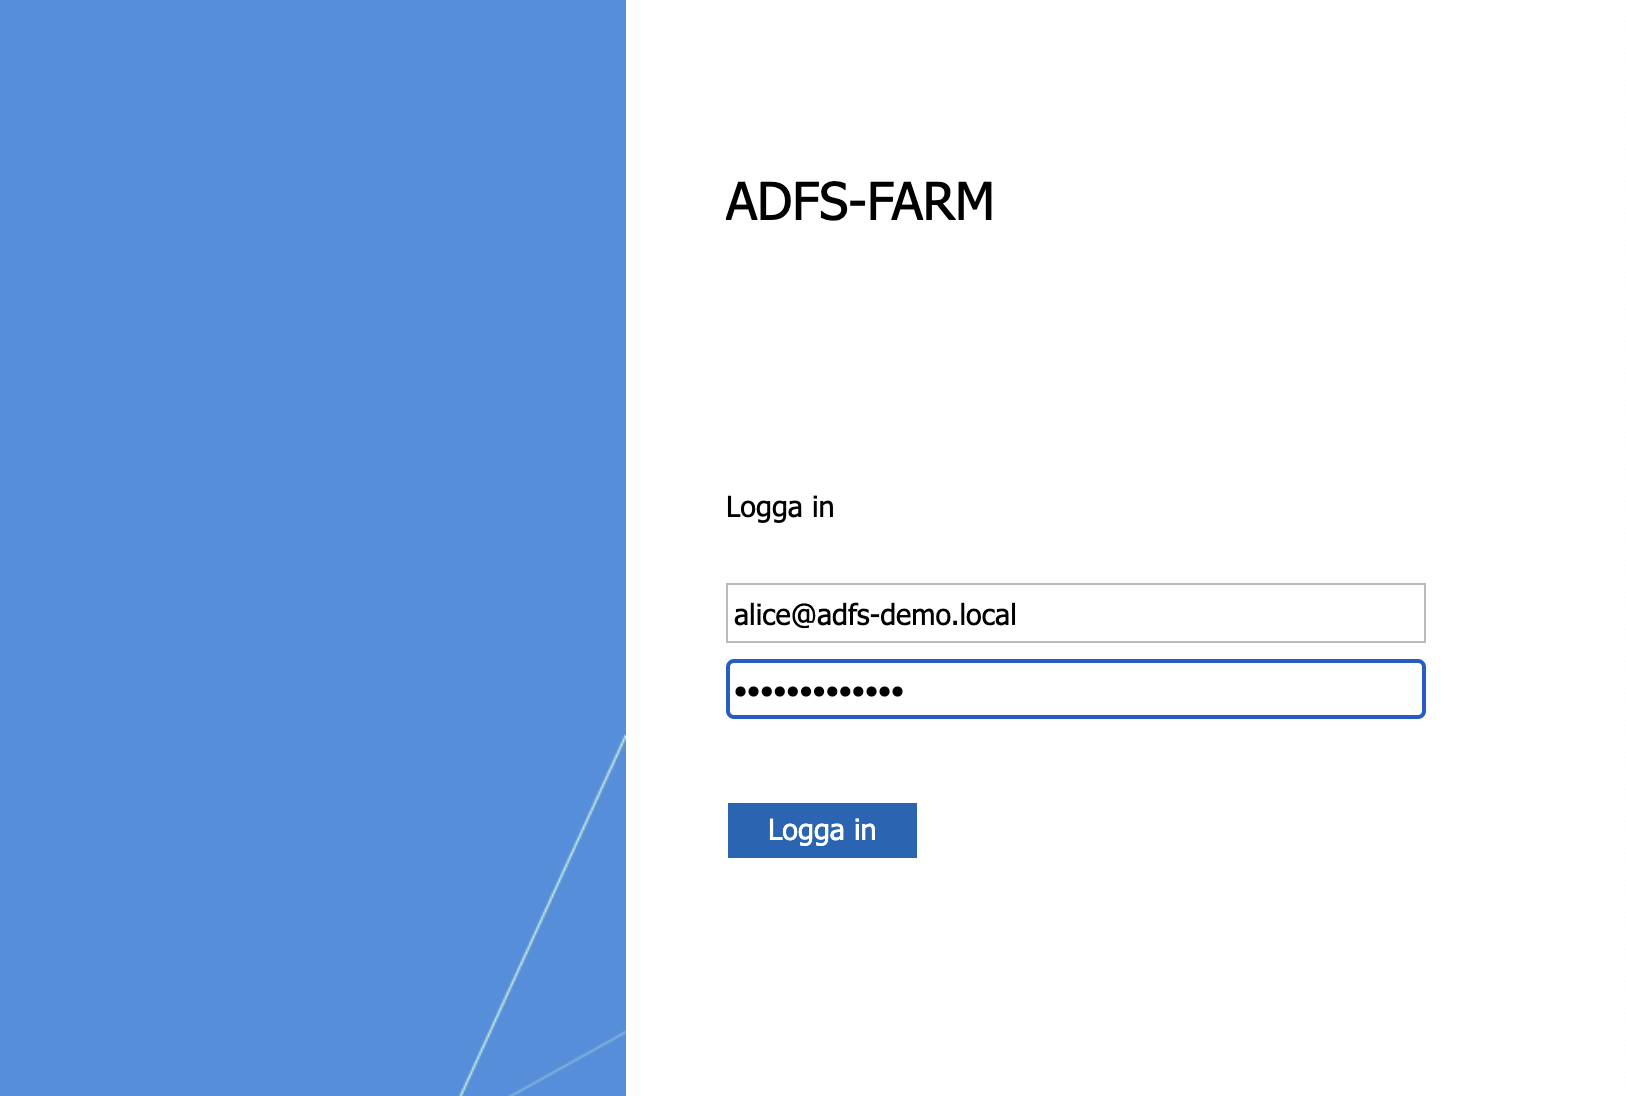
In Figure 10, the user is redirected to AD FS to present her credentials (Figure 10).
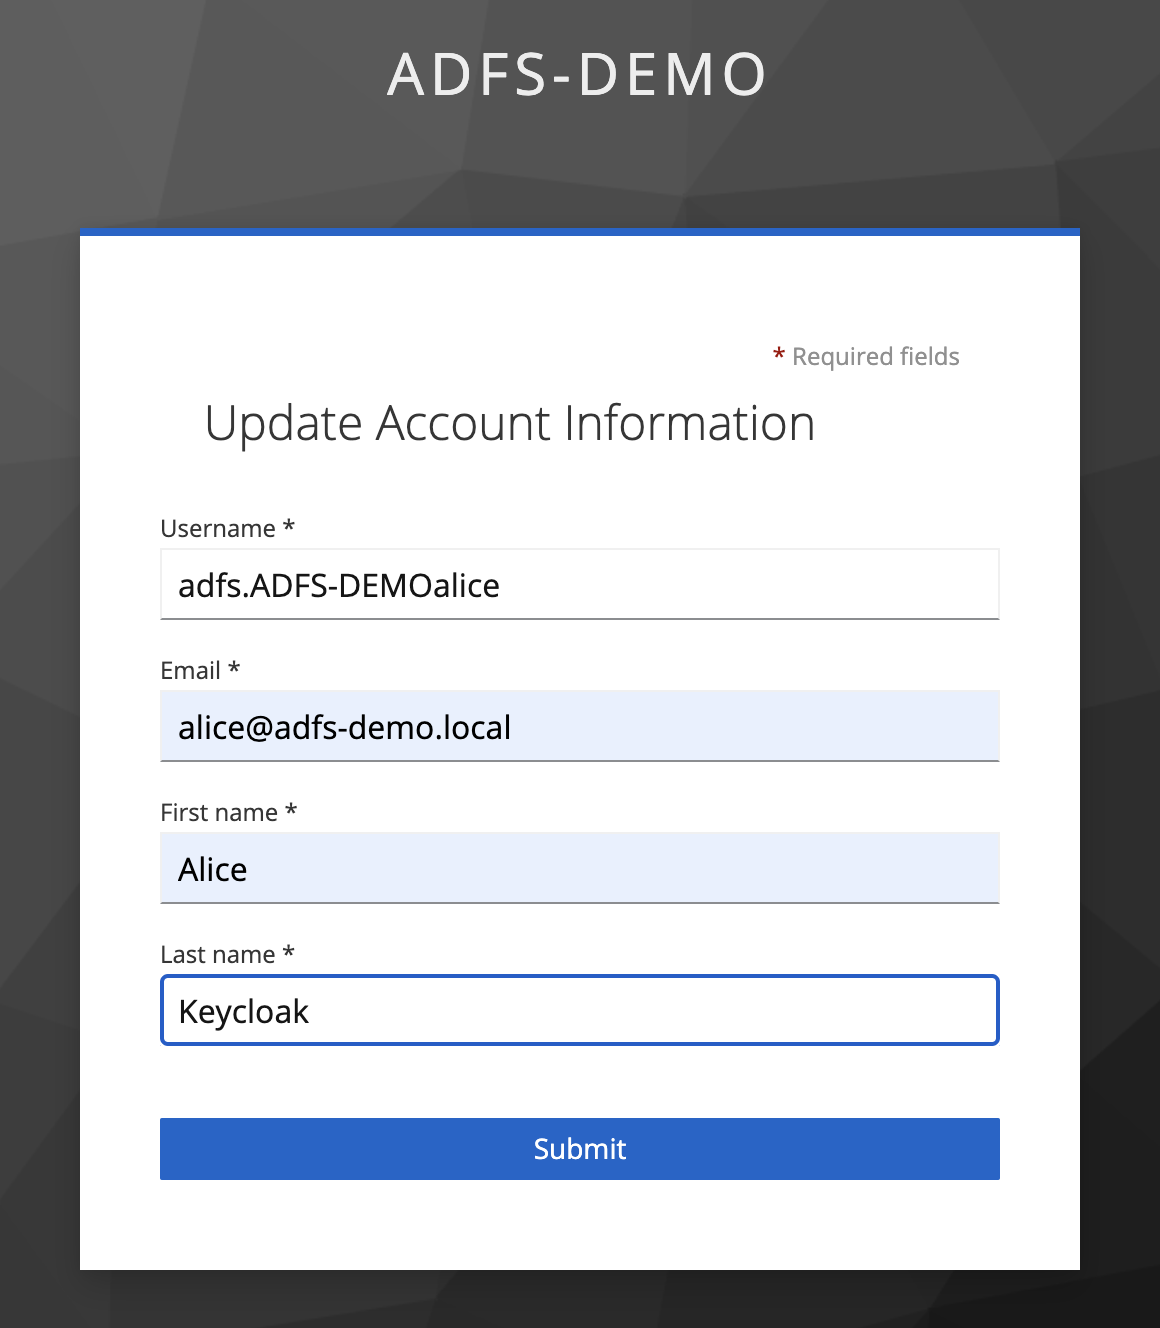
The user is presented with the Update Account Information page before being redirected to the account page (Figure 11).
Summary
In this article I have demonstrated how to integrate Red Hat build of Keycloak with AD FS, allowing users having their accounts in AD to access resources on OpenShift protected by Red Hat build of Keycloak. Red Hat build of Keycloak contains built-in Identity Brokering to connect Service Providers with external Identity Providers. The Identity Broker creates a relationship with an external Identity Provider, such as AD FS to use the provider’s user identities to access the services exposed for example on OpenShift.
