Standard Backstage deployments statically compile plug-ins into the application. Red Hat Developer Hub is the first Backstage distribution to offer support for dynamic plug-ins, meaning you can add plug-ins to an existing instance without recompiling the underlying Backstage application. Plug-ins are vital to the success and adoption of your internal developer portal. While Red Hat Developer Hub provides essential plug-ins out of the box, it’s often necessary to extend the portal with plug-ins of your own. This article will provide you with the knowledge and tools required to bundle and install your plug-ins and existing upstream plug-ins in a format compatible with Red Hat Developer Hub.
If you prefer to watch and follow along, the following video demonstrates the steps outlined in this article.
The benefits of dynamic plug-ins
Utilizing dynamic plug-ins provides the following benefits to platform engineering teams, as outlined in this article:
- Immutable by design: Reduces config drift, boosts security, aligns with Twelve-Factor App principles.
- Flexible and customizable: Add or change features easily without modifying core code.
- Easy plug-in management: Updating a config file requires no rebuilds or complex installs.
- Scalable and maintainable: Modular design allows independent updates and less maintenance.
- Faster innovation: Quickly test and deliver new features.
The dynamic plug-in system allows you to install, configure, and load plug-ins at runtime without changing or rebuilding the application, requiring only a restart. You can load these plug-ins from npm, tarballs, or OCI compliant container images.
Backstage supports frontend and backend plug-ins to facilitate customization of your internal developer portal. Developer Hub can load these plug-ins dynamically. To achieve this, Red Hat has been working in the Backstage community to add support for dynamically loaded backend plug-ins. Additionally we’ve been working with the community on a Backstage Enhancement Proposal (BEP) for dynamic frontend plug-ins.
With dynamic plug-ins, instead of modifying the Backstage application itself to add a plug-in, you create a dynamic-plugins.yaml file to specify the plug-ins that Developer Hub will install and enable at startup. Here’s an example that loads a fictional plug-in named plugin-name distributed in a container image at quay.io/account-name/image-name:
plugins:
  - package: oci://quay.io/account-name/image-name:tag!plugin-name
    disabled: false
    pluginConfig: {}
Note
We have omitted the pluginConfig for brevity (explained later).
Packaging a dynamic plug-in
Building a plug-in from scratch is beyond the scope of this article, so we will demonstrate how to package and install dynamic plug-ins using an existing Backstage Community plug-in that isn’t included in Developer Hub’s pre-installed dynamic plug-ins: the Entity Feedback plug-in. You can apply these same steps to your own plug-ins.
Prerequisites:
- With Red Hat Developer Hub v1.7, you can deploy an instance using: Red Hat Developer Hub on Developer Sandbox for a hosted version and the rhdh-local project for a local environment.
- Node.js v22 (consider nvm.sh for managing Node.js versions)
- Git CLI
- jq CLI
- Podman or Docker CLI
- Quay.io account (or your preferred container image registry)
Plug-in version compatibility
Before diving in, confirm the version of Developer Hub you’re using since this reveals information about the Backstage version we’re targeting.
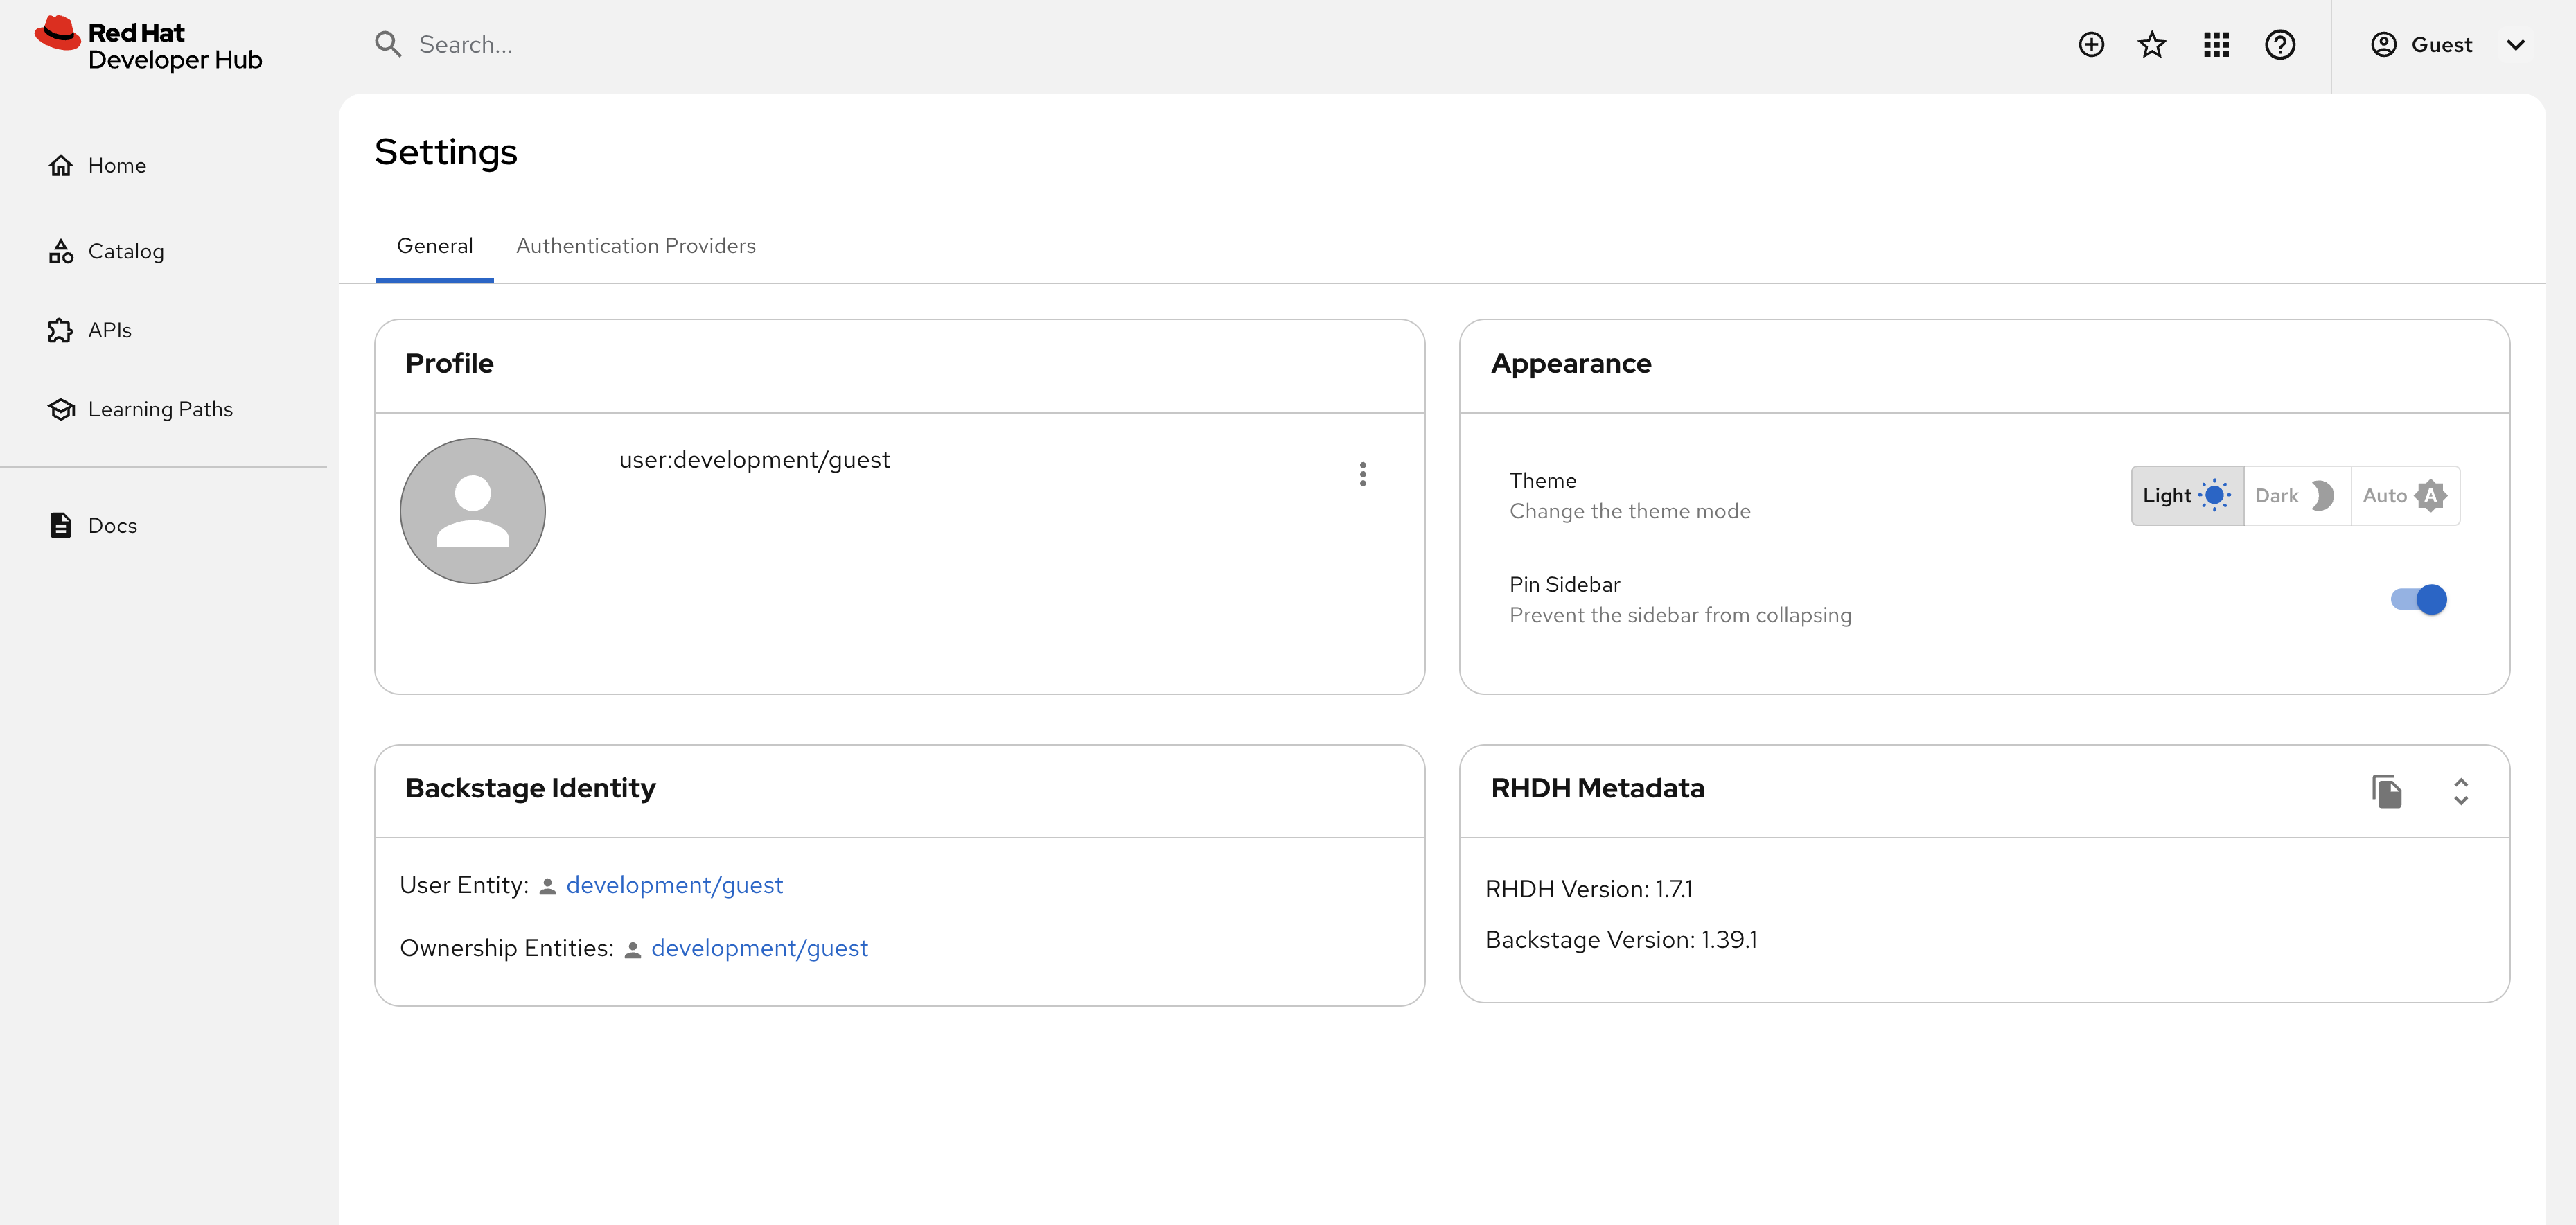
Open your instance of Red Hat Developer Hub, click your username in the top right corner, and visit the settings screen. Metadata that includes the Backstage version is the displayed bottom right corner. Figure 1 shows the settings screen for Red Hat Developer Hub 1.7.1.

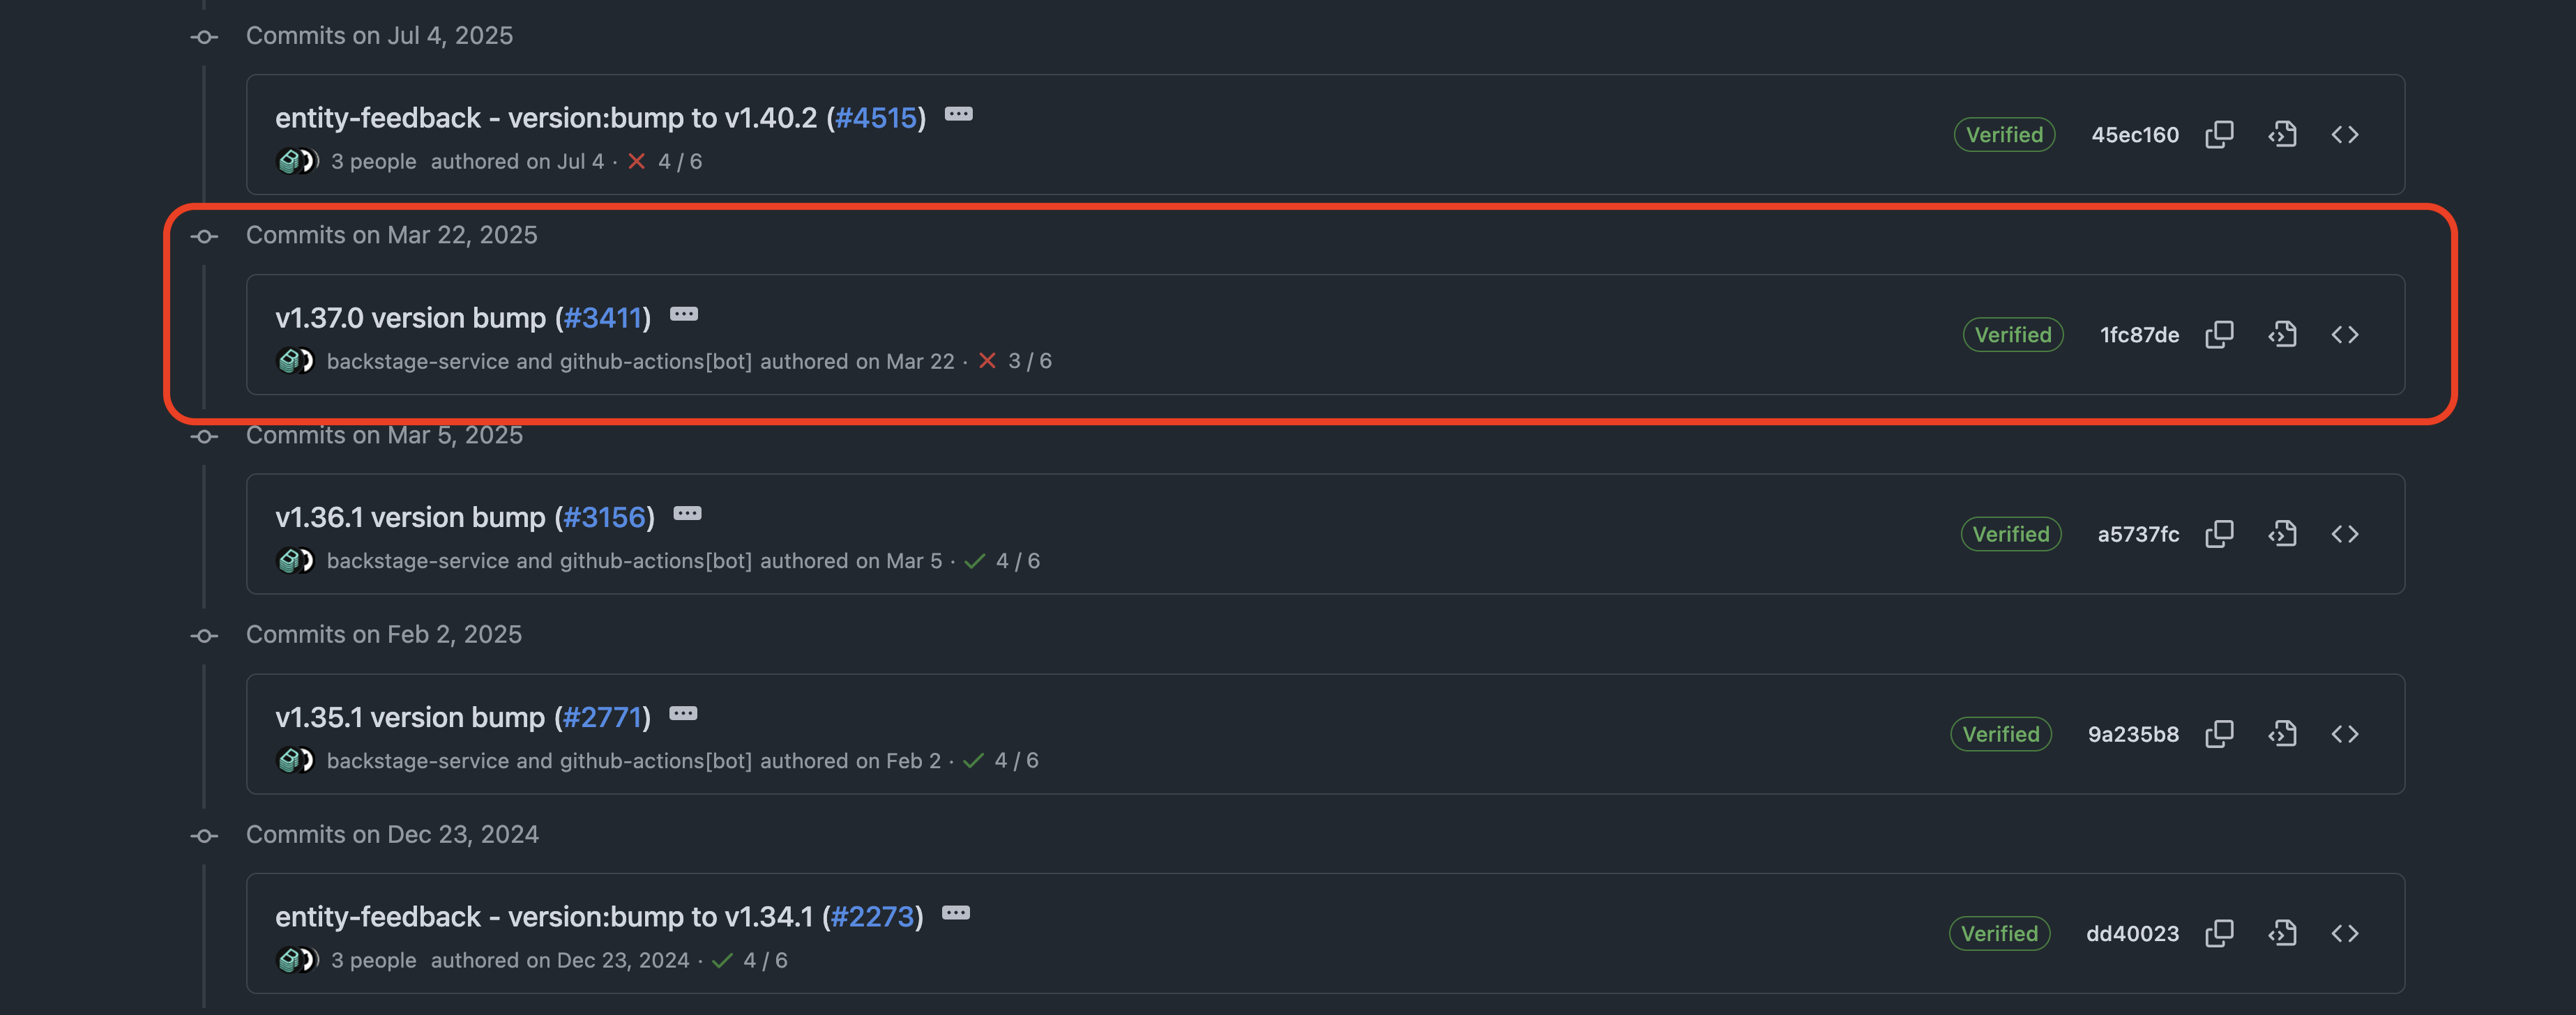
The Backstage version is a critical piece of information. We want to ensure that our plug-in is targeting this version of Backstage, or the closest version possible to improve compatibility. Looking at the history of the backstage.json file for the entity feedback plugin (Figure 2), we can see that the commit 1fc87de is closest to our Backstage version of 1.39.1, without going above it. Let’s use that.

Building the Backstage plug-ins
Get started by cloning the source code for the entity feedback plug-in and checking out the appropriate commit:
git clone https://github.com/backstage/community-plugins.git
cd community-plugins
git checkout 1fc87de500e4e1dd43b2a21eda2bb2edbd346a2a
Next, prepare your environment to build the plug-in. Enable Yarn in your Node.js v22 installation:
corepack enable yarnInstall the dependencies, compile the code, and build the plug-ins:
cd workspaces/entity-feedback
yarn
yarn tsc
yarn build:all
At this point, with upstream Backstage, you’d publish the built plug-ins to npm or an npm-compatible registry. However, we’re building this plug-in to support Developer Hub loading it dynamically, so we’ll skip the npm publish step. Instead, we’ll package the plug-in for dynamic loading and publish it as a container image on Quay.io.
Build the dynamic plug-in container images
You can start by preparing the frontend portion of the entity feedback plug-in using the Red Hat Developer Hub CLI. The following command will take the built plug-in files in the dist folder generated by the yarn build:all command, and create a new dist-scalprum folder that contains the necessary configuration and source files to enable dynamic loading.
cd plugins/entity-feedback
npx @red-hat-developer-hub/cli@latest plugin export
When this command packages a frontend plug-in, it uses a default Scalprum configuration if one isn’t found. The scalprum configuration is used to specify the plug-in entry point and exports, and then build a dist-scalprum folder that contains the dynamic plug-in. The following shows a default scalprum configuration; however, you can add a scalprum key to your plug-in’s package.json file to set custom values if necessary.
{
  "name": "backstage-community.plugin-entity-feedback",
  "exposedModules": {
    "PluginRoot": "./src/index.ts"
  }
}
Take a look inside the dist-dynamic/dist-scalprum folder to find a plugin-manifest.json that Developer Hub uses to load the plug-in.
cat dist-dynamic/dist-scalprum/plugin-manifest.json

{
  "name": "backstage-community.plugin-entity-feedback",
  "version": "0.6.0",
  "extensions": [],
  "registrationMethod": "callback",
  "baseURL": "auto",
  "loadScripts": [
    "backstage-community.plugin-entity-feedback.fd691533c03cb52c30ac.js"
  ],
  "buildHash": "fd691533c03cb52c30acbb5a80197c9d"
}
Finally, package the plug-in into a container image and publish it to Quay.io or your preferred container registry. Make sure to replace QUAY_USER with your username.
export QUAY_USER=replace-with-your-username
export PLUGIN_NAME=entity-feedback-plugin
export VERSION=$(cat package.json | jq .version -r)

npx @red-hat-developer-hub/cli@latest plugin package \
  --tag quay.io/$QUAY_USER/$PLUGIN_NAME:$VERSION

podman login quay.io
podman push quay.io/$QUAY_USER/$PLUGIN_NAME:$VERSION
Now repeat the same steps for the backend plug-in. You’ll notice that Scalprum is not required for backend plug-ins, and it generates a dist-dynamic folder instead of a dist-scalprum folder:
cd ../entity-feedback-backend/
npx @red-hat-developer-hub/cli@latest plugin export


export QUAY_USER=replace-with-your-username
export PLUGIN_NAME=entity-feedback-plugin-backend
export VERSION=$(cat package.json | jq .version -r)

npx @red-hat-developer-hub/cli@latest plugin package \
  --tag quay.io/$QUAY_USER/$PLUGIN_NAME:$VERSION

podman push quay.io/$QUAY_USER/$PLUGIN_NAME:$VERSION
Those commands result in two container images published to your container registry. Figure 3 shows the container images in my Quay account.

Add the plug-ins to Developer Hub
At this point, your plug-ins are ready to add to Developer Hub. When you use the plug-in package command from the Developer Hub CLI it prints values that you must add to the dynamic-plugins.yaml file to load your plug-in. The entries should resemble the following example.
plugins:
  - package: oci://quay.io/evanshortiss/entity-feedback-plugin:0.6.0!backstage-community-plugin-entity-feedback
    disabled: false

  - package: oci://quay.io/evanshortiss/entity-feedback-plugin-backend:0.7.1!backstage-community-plugin-entity-feedback-backend
    disabled: false
Warning
Make sure your container images are publicly accessible, or that you’ve configured a pull secret in your environment. A pull secret provides Red Hat Developer Hub with credentials to pull your plug-in container images from a container registry. This example assumes you've made the container images publicly accessible.
Before proceeding, there’s one additional configuration required. Remember the pluginConfig shown earlier? The entity feedback plug-in frontend needs to specify how to add it to the Red Hat Developer Hub UI using the pluginConfig. Add the following configuration to the frontend entity-feedback-plugin. Don’t worry if the plug-in configuration feels unintuitive. It’s explained in the next section.
- package: oci://quay.io/evanshortiss/entity-feedback-plugin:0.6.0!backstage-community-plugin-entity-feedback
  disabled: false
  pluginConfig:
    dynamicPlugins:
      frontend:
        backstage-community.plugin-entity-feedback:
          entityTabs:
            - mountPoint: entity.page.feedback
              path: /feedback
              title: Feedback
          mountPoints:
            - config:
                layout:
                  gridColumn: 1 / -1
              importName: StarredRatingButtons
              mountPoint: entity.page.feedback/cards
            - config:
                layout:
                  gridColumn: 1 / -1
              importName: EntityFeedbackResponseContent
              mountPoint: entity.page.feedback/cards
            - config:
                layout:
                  gridColumnEnd:
                    lg: span 6
                    md: span 6
                    xs: span 6
              importName: StarredRatingButtons
              mountPoint: entity.page.overview/cards
Once this configuration is in place, redeploy your instance of Developer Hub to install the plug-ins.
Test the dynamic plug-ins
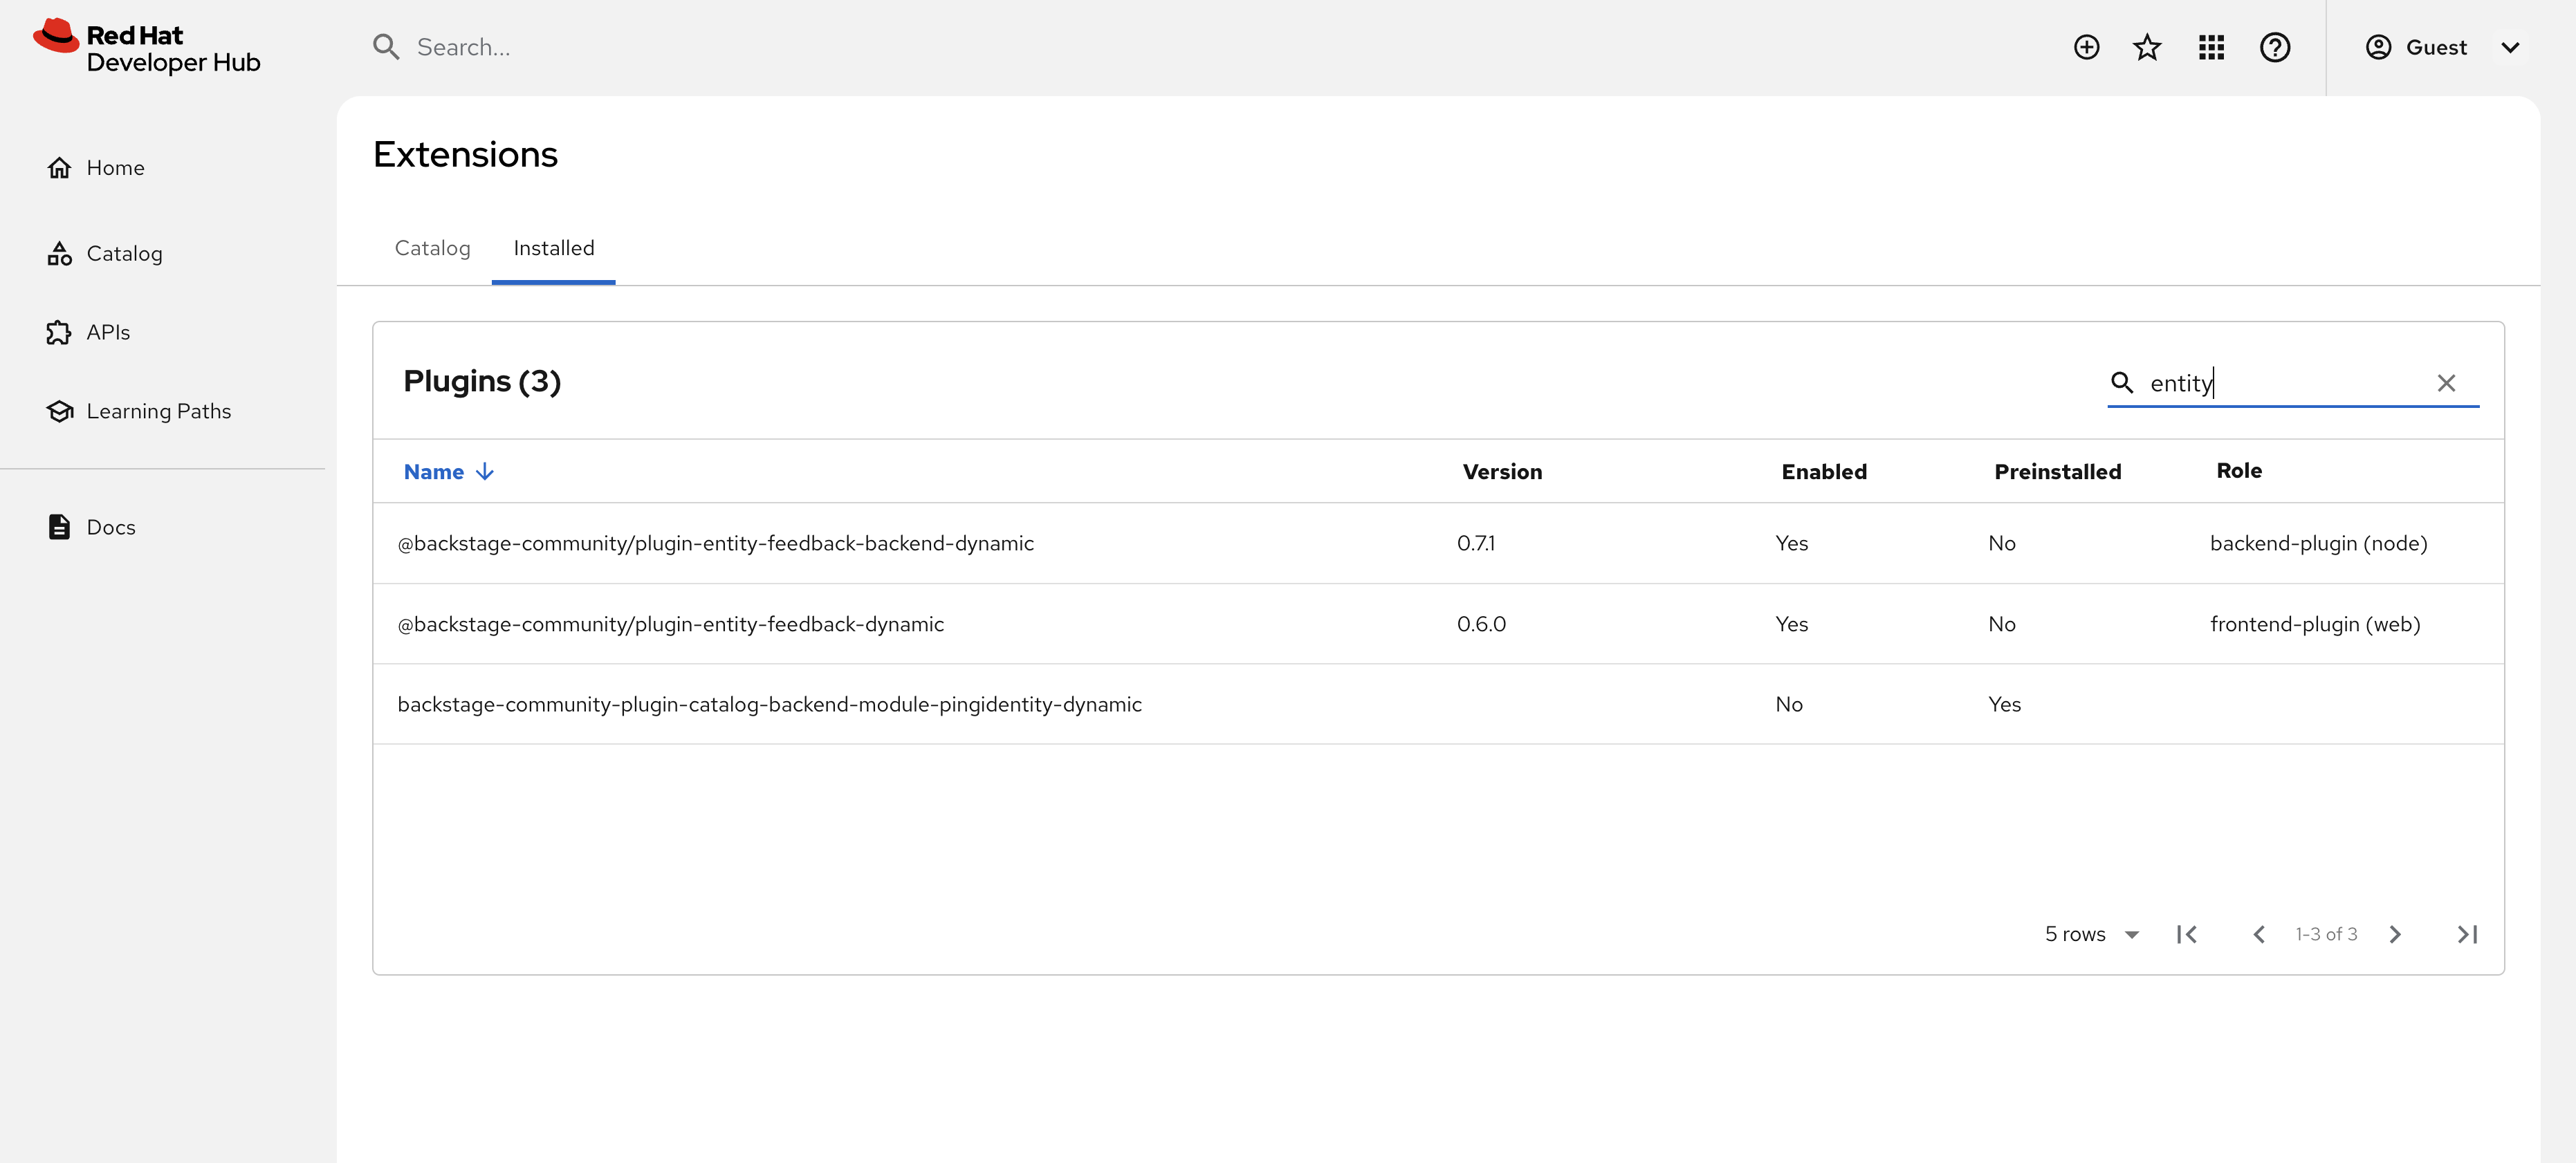
Once your new instance of Developer Hub has started, you can check that your plug-ins are installed and enabled by visiting the Administration > Extensions screen and searching for “entity” on the Installed tab. Your plug-ins should be listed, as shown in Figure 4.

The pluginConfig shown earlier isn’t necessarily intuitive, so let’s break it down and observe the resulting UI changes. We defined a configuration for our backstage-community.plugin-entity-feedback plugin. Recall this name from the previously generated plugin-manifest.json file.
The configuration uses an entityTabs array to define a new tab named “Feedback” on the entity overview screen in Developer Hub. The mountPoints array then defines three separate configurations to mount React Components exposed by the plug-in:
- Add the
StarredRatingButtonscomponent to the new feedback tab defined inentityTabs. - Similar to the
StarredRatingButtons, mount theEntityFeedbackResponseContenton the feedback tab. - Add the
StarredRatingButtonsto the default overview tab for each entity.
Figure 5 shows the new overview tab and the StarredRatingButtons added to it.

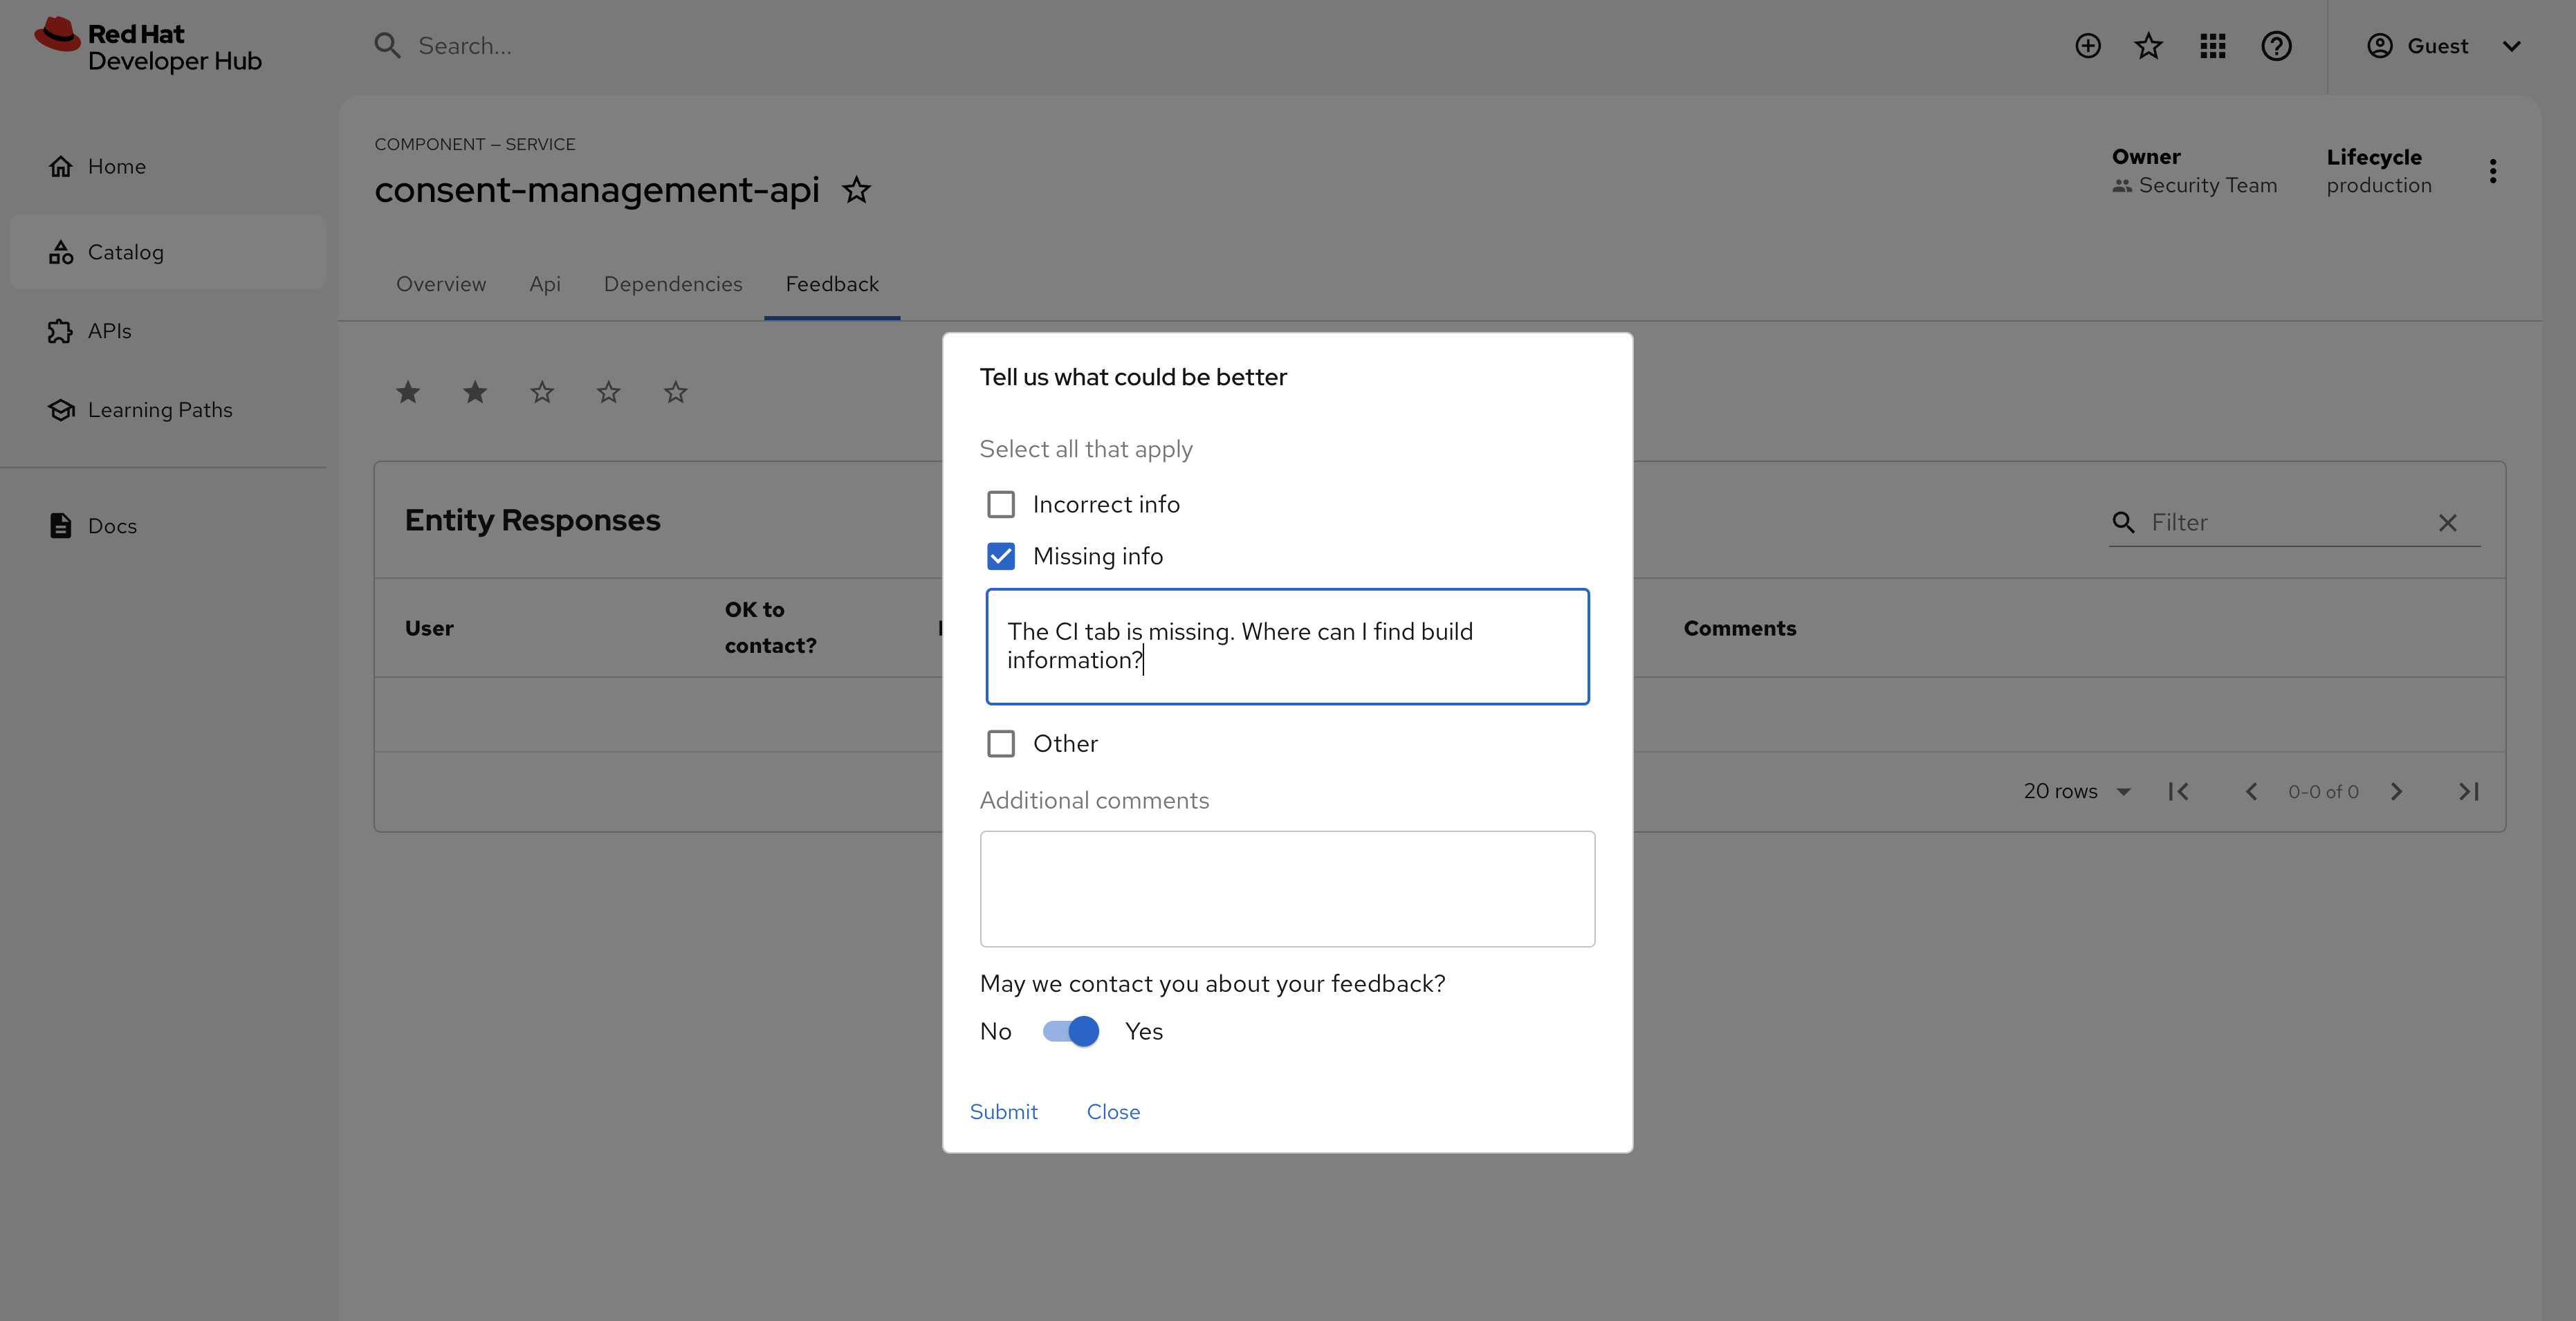
When a user clicks on the new feedback tab, they’ll see the StarredRatingButtons and the EntityFeedbackResponseContent. Selecting a low star rating prompts the user to provide feedback, as seen in Figure 6.
Note
The user-provided feedback is not saved if you’re logged in as the guest user.

Each plug-in works differently, so you’ll need to check an individual plug-in’s documentation to understand the exported components mounted in the Developer Hub UI.
Wrap up
The Red Hat Developer Hub CLI simplifies the process of preparing your Backstage plug-ins for use with Red Hat Developer Hub’s dynamic plug-ins system. Doing so decouples the plug-in development lifecycle from the Developer Hub. This enables faster plug-in development and innovation, provides platform teams with a more flexible and easily customizable internal developer portal, and allows plug-in updates independent of the underlying platform.
Try it out for yourself by deploying Red Hat Developer Hub on Developer Sandbox in just 5 minutes.
This article provided an introduction to the dynamic plug-ins system, but it’s not possible to provide exhaustive coverage of all capabilities in one place. Use the following resources to dive deeper into the capabilities offered by dynamic plug-ins:
Stan Lewis, an engineer at Red Hat has created a comprehensive tutorial demonstrating how to create a new plug-in from scratch. You can find it at gashcrumb/dynamic-plugins-getting-started on GitHub.
Another repository created by Stan, gashcrumb/simple-test-components, demonstrates additional features, such as loading Custom Field Extensions or adding new items to the sidebar navigation in Developer Hub.
Our official documentation includes a guide similar to this article. Refer to the Third-party plugins in Red Hat Developer Hub for official guidance on building dynamic plug-ins. Additionally, Installing third-party plugins in Red Hat Developer Hub describes the process for adding plugins to Developer Hub.
