In the mid-2010s, Netflix and Google detailed how they saved costs while scaling their software infrastructure’s components to meet rising demands. Since then, most engineers have embraced this microservices architecture. Microservices help divide a single monolithic application into small units, each acting as a service to deliver specific functions.
For companies transitioning from on-premise software to a hybrid cloud infrastructure, refactoring the application from a monolith into microservices offers several advantages. The microservice architecture isolates services, allowing companies to loosely coupled software components. This flexibility enables deploying and running specific services on premise or in the cloud as part of a hybrid setup. Consequently, companies can keep personal information on premise to comply with regulations while simultaneously scaling customer-facing services in the cloud to meet demand.
This tutorial will demonstrate how to break down Pedal, , a monolithic e-commerce applicationinto microservices. The Java application manages bicycle sales and includes features for employees to create an account and post bikes for sale for customers to make purchases. In general, the following are the steps that should fit most applications:
- Identify Microservices
- Refactor the application
- Deploy microservices
- Use Red Hat OpenShift Virtualization for the services/apps that cannot be broken down right away
Prerequisites
To follow along, you’ll need to have:
- Basic understanding of the Java™ programming language
- Java 17 installed to be able to run Java applications
- Quarkus CLI installed
- Visual Studio Code with the Language Support for Java™ by Red Hat and the Quarkus extensions. You can use another code editor, but it’s recommended to use Visual Studio Code for Quarkus. As such, we use Visual Studio Code in this demonstration.
- Podman Desktop installed and running to help Quarkus to build your application automatically as you build and save your changes
For installing the required prerequisites based on your operating system, you can refer to this page.
Identify microservices
The first step to refactoring your monolith into microservices is identifying the application’s components to isolate into independent services. Following the single-responsibility microservice design principle, each service should handle a specific feature or function.
The Pedal application’s technology stack comprises Java Code, SQL Server, Postgres, and Thymeleaf. The application contains controllers and modules for employees to authenticate and create or update the bikes for sale.
Pedal’s microservice architecture requires at least the following services:
- A User service to handle customer and employee registration
- An Auth service to handle employee and customer authentication
- A Bike service to handle create, read, update, and delete (CRUD) operations related to bike data
- An Order service to handle bike orders
- A Payment service to process customer payments through a third-party payment processor
The following section demonstrates how to create two of these services: Bike and User. You’ll use similar techniques to make the rest.
Refactor the application
As we refactor the Pedal app into small services, we’ve chosen the following technologies. Let’s understand a bit more about the choices
- Quarkus to generate the boilerplate Java projects for this demonstration. Quarkus offers great developers joy with live reload, quick startup times, low memory footprint. It is also container first, unifies Imperative and Reactive programming paradigms. With support for the latest standards and best of the breed libraries, Quarkus is very well capable of building and managing Pedal’s requirements.
- Red Hat Service Interconnect to connect the services, we use Red Hat Service Interconnect. It allows disparate services to communicate as one regardless of their environment.
First, execute the Git command below to clone the monolith Pedal application from its GitHub repository. You can manually download it from the repository if you don’t have the Git command-line interface (CLI):
git clone https://github.com/redhat-developer-demos/pedal-traditional
Then, launch Visual Studio Code. You’ll build the microservices using the Pedal app’s existing code.
Creating the User service
- Generate the application
- Prepare your environment
- Configuring the database
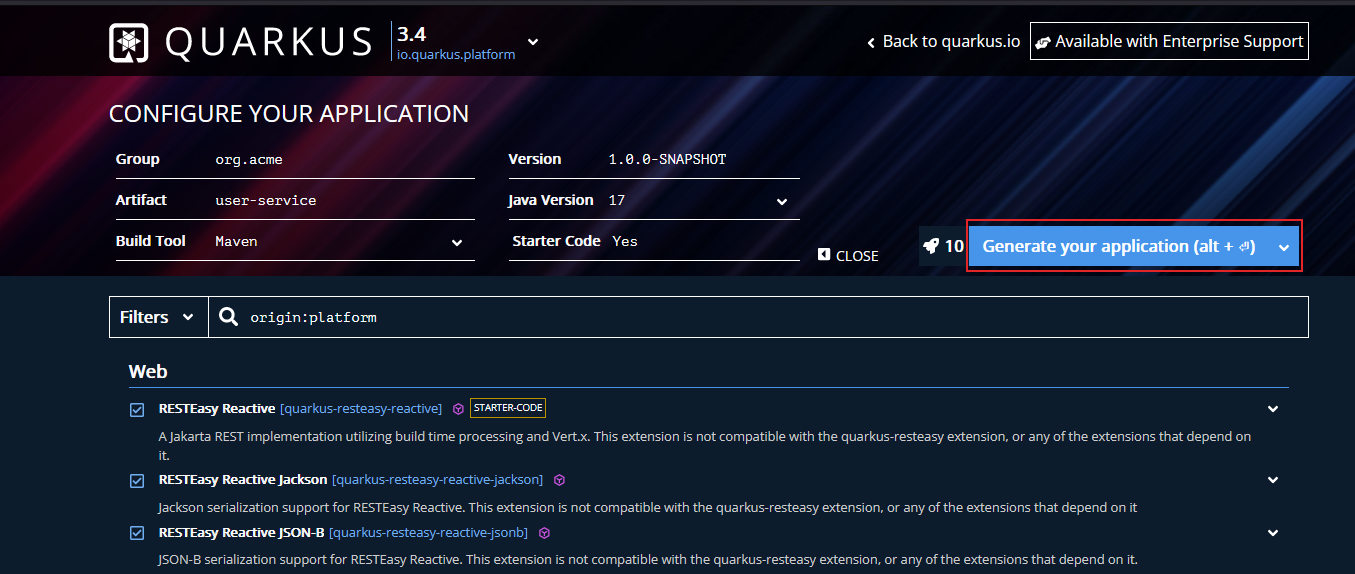
Open the Quarkus Application Generator to generate a Java project. Change the Artifact to user-service. Keep the other default settings and add the following new dependencies:
- RESTEasy Reactive: Used to create highly performant, non-blocking REST endpoints in microservices, which is essential for handling numerous simultaneous requests efficiently.
- RESTEasy Reactive JSON-B: This dependency is used for binding JSON data to Java objects (JSON-B) in a reactive way, allowing efficient JSON data processing in RESTEasy Reactive services.
- RESTEasy Reactive Jackson: It provides JSON processing capabilities using the Jackson library, offering an alternative to JSON-B for developers familiar with Jackson's data-binding features in RESTEasy Reactive services.
- RESTEasy Reactive REST Client: This is used for creating reactive web clients within microservices, enabling non-blocking, asynchronous communication with other services, which is crucial for microservices architecture.
- REST Client Reactive JSON-B: It integrates JSON-B with REST Client Reactive, allowing developers to perform JSON serialization and deserialization in a reactive manner for client-service communication.
- REST Client Reactive Jackson: Similar to REST Client Reactive JSON-B, this dependency uses Jackson for JSON processing in a reactive web client, catering to preferences or existing standards in microservice communication.
- Container Image Jib: Jib is used for building optimized Docker and OCI container images for Java applications, including microservices, without needing a Dockerfile, thereby streamlining the containerization process.
- Hibernate ORM: Provides a framework for mapping an object-oriented domain model to a relational database, which is key in microservices that need to interact with databases while maintaining a domain-driven design.
- JDBC Driver-PostgreSQL: This driver enables Java applications to connect to a PostgreSQL database, necessary for microservices that require data persistence or retrieval from a PostgreSQL database.
- Hibernate ORM With Panache: This simplifies Hibernate ORM usage, reducing boilerplate code and making it easier to write database operations, thereby accelerating development in microservices interacting with databases.
- SmallRye OpenAPI: Used for generating OpenAPI specifications for microservices, enabling clear documentation and client generation, which is critical for service discovery and integration in a microservices architecture.
Click Generate your application to be able to download the application.
In your preferred directory, create a parent folder called Microservices. Copy the unzipped user-service application in the Microservices folder and open the new project to your code editor.
Before we jump into running the application, ensure that you have Podman running. This is needed to let Quarkus build the application images. You can download and install Podman Desktop from https://podman-desktop.io/.
To test if the application works based on the generated boiler template, run the following command in the root of your project:
quarkus dev
Navigate to http://localhost:8080/hello. A message reading “Hello from RESTEasy Reactive” should be displayed in the browser.
Setting up the Database
Open the src/main/resources/ application.properties file within the new Java project to specify the Java Persistence API (JPA) data source and the other for loading Swagger:
# DATABASE CONFIGURATION
quarkus.datasource.db-kind=postgresql
quarkus.hibernate-orm.database.generation=drop-and-create

# SWAGGER
quarkus.smallrye-openapi.path=/openapi
These configurations set up the Java application to use PostgreSQL as the database. The database strategy is set to drop and create, which means the database will be dropped and recreated upon every restart. Use this command to list running containers:
podman psYou should see a postgres container running the database and testcontainers/ryuk container which orchestrates the services.

Next, create a User.java file within the /src/main/java/org/acme/User/Service package using the following code from the Pedal application:
package org.acme.user.service;
# TODO: Refer to imports in code from repository
@Entity
@Table(name = "service_user")
public class User extends PanacheEntity {
@Column(name = "fullname")
private String fullname;
@Column(name = "username")
private String username;
@Column(name = "email")
private String email;
@Column(name = "date_created")
private Date dateCreated;
@Column(name = "password")
private String password;
@Column(name = "user_role")
private String userRole;
The code block above contains the JPA entity for a user within the service. Do not provide the @Id, getters, or setters since Panache takes care of that.
Now, create a UserRepository.java file within the /src/main/java/org/acme/User/Service package to create a repository for retrieving users based on their username with your User entity. Add the code below to the UserRepository.java file:
package org.acme.user.service;

# TODO: Refer to imports in code from repository

@ApplicationScoped
public class UserRepository implements PanacheRepository<User> {

public Optional<User> findUserByUsername(String username) {
        return find("username", username).singleResultOptional();
}

public List<User> getAllUsers() {
        return listAll();
}

public Optional<User> getUserById(Long id) {
        return findByIdOptional(id);
}

@Transactional
public User createUser(User user) {
     persist(user);
     return user;
}
}
Create a UserService.java file with the following code to contain the application’s entity mapping:
package org.acme.user.service;

# TODO: Refer to imports in code from repository

@ApplicationScoped
public class UserService {

	@Inject
	UserRepository userRepository;

	public List<User> getAllUsers() {
     	return userRepository.getAllUsers();
	}

	public Optional<User> getUserById(Long id) {
     	return userRepository.getUserById(id);
	}

	public User createUser(User user) {
     	return userRepository.createUser(user);
	}
}
Next, create a UserResource.java file within the /src/main/java/org/acme/User/Service package to define the API routes within the User service.
Add the following code to the UserResource.java file to define three endpoints for creating, retrieving, and fetching a specific user through the microservice:
package org.acme.user.service;

# TODO: Refer to imports in code from repository

@Path("/api/users")
@Produces(MediaType.APPLICATION_JSON)
@Consumes(MediaType.APPLICATION_JSON)
public class UserResource {

	@Inject
	UserService userService;

	@GET
	public List<User> getAllUsers() {
     	return userService.getAllUsers();
	}

	@GET
	@Path("/{id}")
	public User getUserById(@PathParam("id") Long id) {
     	java.util.Optional<User> user = userService.getUserById(id);
     	if (user.isPresent()) {
         	return user.get();
     	} else {
         	throw new NotFoundException("User with ID " + id + " not found");
     	}
	}

	@POST
	public User createUser(User user) {
     	return userService.createUser(user);
	}
}
In the repository, there’s an import.sql file with User data inserts. To initialize this data for use in your application, add the command below to the application.properties file:
quarkus.hibernate-orm.sql-load-script=import.sql
The command specifies the location of the SQL file to be executed when JPA initializes the database.
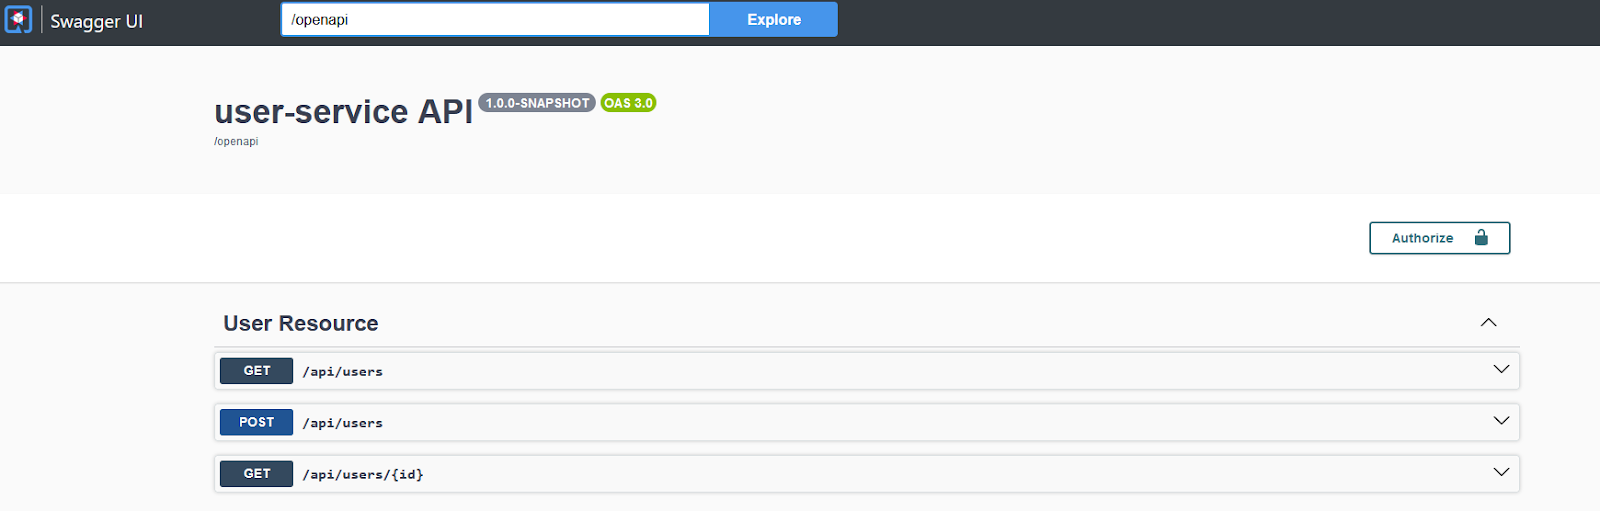
Finally, navigate to http://localhost:8080/q/swagger-ui/ to try your User service endpoints:
Creating the pedal-bike-service
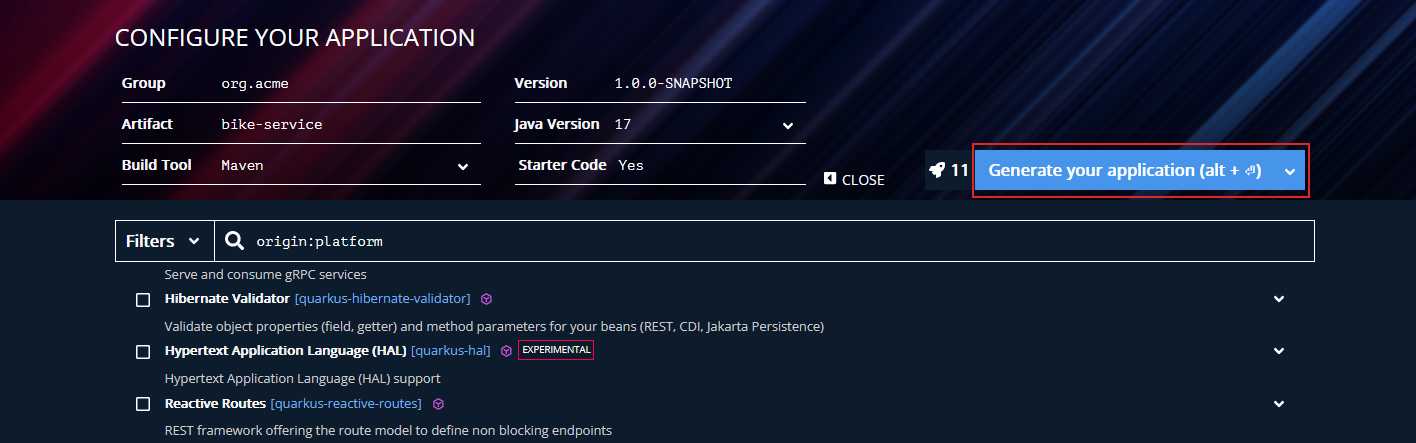
Open Quarkus to generate another Java project named bike-service. Ensure the project includes the same dependencies as the User service:
Unzip the bike-service application and put it alongside user-service in the same Microservices folder you created earlier. Test the source code boiler template like you did with the User service.
Next, open the application.properties file to specify the service’s data source and Swagger configurations below:
# DATABASE CONFIGURATION
quarkus.datasource.db-kind=postgresql
quarkus.hibernate-orm.database.generation=drop-and-create

# SWAGGER
quarkus.smallrye-openapi.path=/openapi

Using the following code, create a Bike.java file within the /src/main/java/org/acme/Bike/Service package to contain the Bike entity within the Bike service:

package org.acme.bike.service;

# TODO: Refer to imports in code from repository

@Entity
@Table(name = "bikes")
public class Bike extends PanacheEntity {

	@Column(name = "name")
	private String name;

	@Column(name = "model")
	private String model;

	@Column(name = "date_created")
	private Date dateCreated;

	@Column(name = "price")
	private Integer price;

	@Column(name = "image")
	private byte[] image;

	@Column(name = "warranty_status")
	private String warrantyStatus;

}
Now, create a BikeRepository.java file within the /src/main/java/org/acme/Bike/Service package to create a repository using the Bike entity. Add the following code to the file:
package org.acme.bike.service;

# TODO: Refer to imports in code from repository

@ApplicationScoped
public class BikeRepository implements PanacheRepository<Bike> {

	@Transactional
	public Bike postBikeAd(Bike bikeData) {
  	persist(bikeData);
	return bikeData;
	}
	}

	Then, create a BikeService.java file to store the following entity-related statements:

	package org.acme.Bike.Service;

	# TODO: Refer to imports in code from repository

	@ApplicationScoped
	public class BikeService {
	@Inject
	BikeRepository bikeRepository;

	@Transactional
	public List<Bike> retrieveBikes() {
     	return bikeRepository.listAll();
	}

	public Bike postBikeAd(Bike bike) {
     	return bikeRepository.postBikeAd(bike);
	}
}
Create a BikeResource.java file within the /src/main/java/org/acme/Bike/Service package to define the API routes within the Bike microservice.
package org.acme.bike.service;

# TODO: Refer to imports in code from repository

@Path("/api/bikes")
@Produces(MediaType.APPLICATION_JSON)
@Consumes(MediaType.APPLICATION_JSON)
public class BikeResource {

	@Inject
	BikeService bikeService;

	@GET
	public Response getAllBikes() {
     	List<Bike> bikes = bikeService.retrieveBikes();
     	return Response.ok(bikes).build();
	}

	@POST
	public Response postBike(Bike bike) {
     	Bike newBike = bikeService.postBikeAd(bike);
     	return Response.ok(newBike).build();
	}
}
NOTE: As with the User service, ensure you have this property in the application.properties:
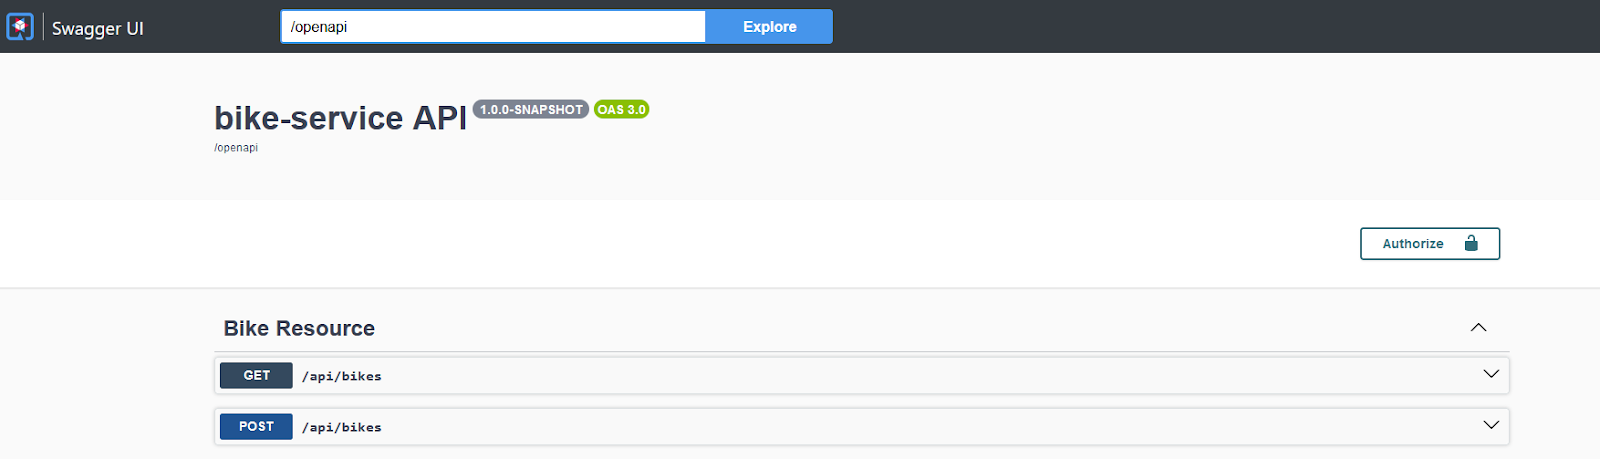
quarkus.hibernate-orm.sql-load-script=import.sqlFinally, navigate to http://localhost:8080/q/swagger-ui/ to try your Bike service endpoints:
Serving the UI
While the above microservices handle the important Bike and User-related functions of the application, you also need a service that delivers the web pages to the user so they can navigate the site. To do so, you’ll create a third Quarkus service designed to feed pages back to requests. You can re-use the pages from our original legacy application, and create a service to handle presenting them.
Create the Quarkus project through the same steps outlined above. Once you have the project set up, follow these instructions to serve static files and pages for the Pedal application:
- Place static files: Put your static files, such as HTML, CSS, and JavaScript, in the src/main/resources/META-INF/resources directory of your Quarkus application. For instance, if you have a file like src/main/resources/META-INF/resources/index.html, it will be accessible at http://localhost:8080/index.html.
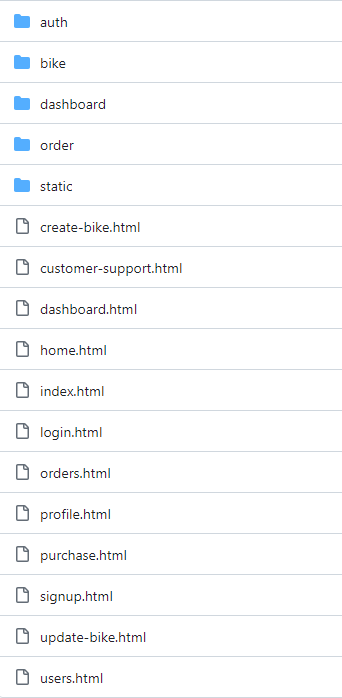
For Pedal, you’ll want to move the following HTML files, as well as the static, files from the folders, to this location.
- Set index page: In your application.properties file, specify the
quarkus.http.static-resources.index-pageproperty to be the path of the page you want to serve at the root URL. For the Pedal application, you’ll want something likequarkus.http.static-resources.index-page=pedal/index.html. - Enable static asset caching: To improve performance, you can enable static asset caching by adding
quarkus.http.static-resources.caching-enabled=trueto yourapplication.propertiesfile. You can also configure the cache’s lifespan and size withquarkus.http.static-resources.max-ageandquarkus.http.static-resources.max-cache-size, respectively. Set up SSL/TLS: For secure communication, set up SSL/TLS by adding the following properties to your
application.propertiesfile:quarkus.http.ssl.certificate.files=/path/to/certificate quarkus.http.ssl.certificate.key-files=/path/to/key
This allows your static resources to be accessed securely via https://localhost:8080.
- Serve static libraries with WebJars: To manage and serve static libraries like jQuery and Bootstrap, use WebJars. Add the following dependencies to your pom.xml file for jQuery:
<dependency>
        <groupId>org.webjars</groupId>
        <artifactId>jquery</artifactId>
        <version>3.1.1</version>
</dependency>
<dependency>
        <groupId>io.quarkus</groupId>
        <artifactId>quarkus-webjars-locator</artifactId>
</dependency>
After restarting quarkus dev, you should be able to access the jQuery library at http://localhost:8080/webjars/jquery/jquery.min.js.
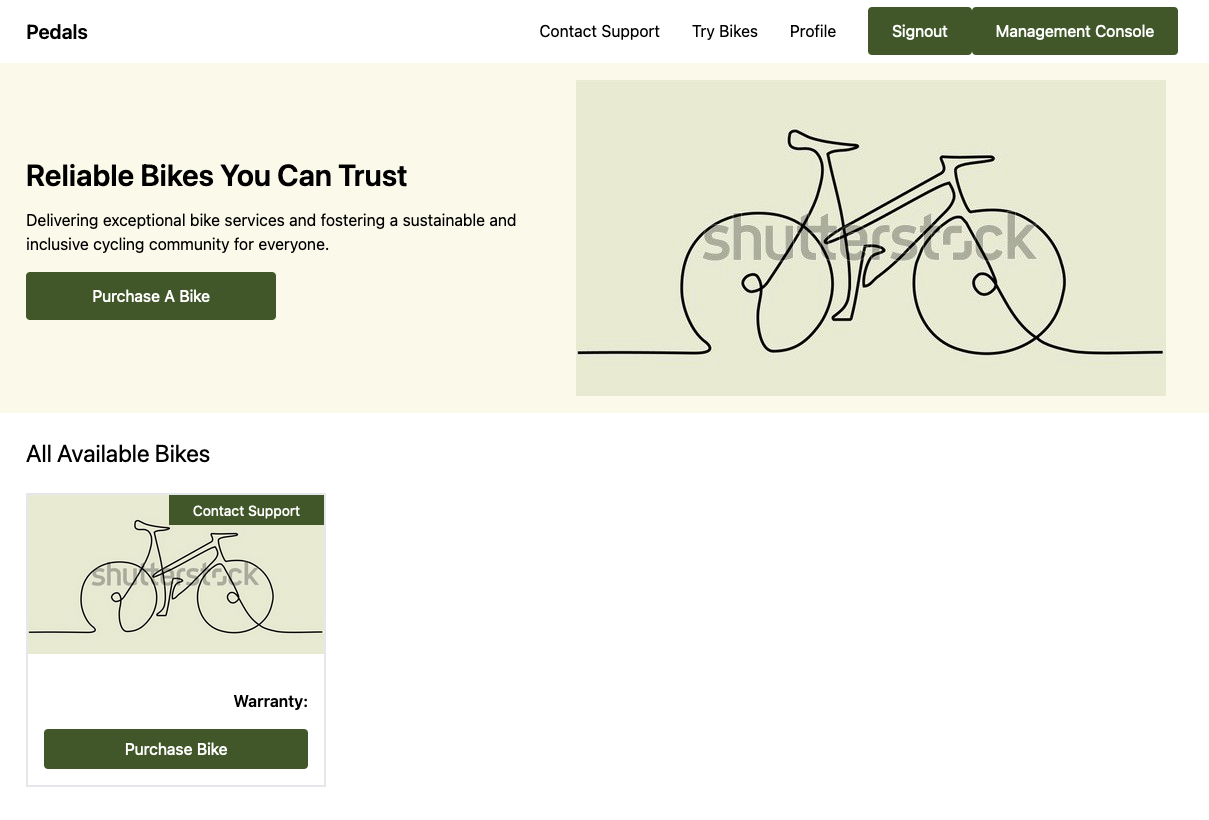
To access your webpage, navigate to http://localhost:8080/index.htm. You’ll be greeted with a welcome screen, as shown below:
By following these steps, you can set up a Quarkus service to serve the UI for the Pedal application, providing users with a seamless web experience.
Rehosting made easy with OpenShift Virtualization
The Red Hat OpenShift Virtualization helps organizations jumpstart the transition to modernizing operations. They get to use most of their investments in virtualization to use containers while on the same platform. This unified process increases operational efficiency by optimizing most idle physical hardware, which allows you to run multiple workloads within a single machine, resulting in cost savings.
In an upcoming article, you’ll learn how to use OpenShift Virtualization to create workloads within virtual machines for the Pedal application services developed here.
Next steps
Microservices allow software engineers to partition large software systems into small, isolated, independent services. Engineers can then independently scale and manage these services in hybrid cloud systems.
For example, consider Pedal’s owner, who may prioritize enhancing the security of the User service to protect customer information while keeping the Bike service openly accessible for anyone to browse bike listings. Pedal engineers may need to scale the User service to accommodate growth or the Bike service to hold all the new holiday inventory. Thanks to the microservice architecture, they can independently take specific actions with each service.
You’ve now learned how to convert a monolith Java application into microservices using Eureka. You can apply the same technique to benefit from virtualizing your own application’s microservices.
Your next step is to deploy the Pedal application’s microservices to an OpenShift cluster using Red Hat Virtualization. Visit the Red Hat Developer portal to learn more about building a hybrid cloud environment for your microservices.