Red Hat Enterprise Linux (RHEL) is a powerful and widely-used Linux distribution known for its stability, security features, and enterprise-grade support. When installing RHEL, you have the opportunity to configure it as a workstation to optimize performance and usability for your specific needs. In this article, we will guide you through the steps to configure RHEL as a workstation during the installation process.
What is RHEL workstation?
The organization needs high-end workstations that can support developers and power users, such as artists, physicians, scientists, and engineers, so they can concentrate on what they do best. Designed for advanced Linux users and day-to-day usage with powerful hardware, Red Hat Enterprise Linux for Workstations (RHEL Workstation) is optimized for high-performance graphics, animation, and scientific applications. It includes all the capabilities and applications that workstation users need, plus development tools for provisioning and administration.
How to install and configure a RHEL workstation
The following sections will demonstrate how to configure RHEL as a workstation during the installation process.
Prerequisites
- Red Hat Enterprise Linux installation media or ISO file.
- Bootable USB/DVD drive containing.ISO file of RHEL 9.2.
- Activated no-cost Red Hat Developer subscription.
- A system that meets the following requirements:
- A 64-bit x86 or ARM machine
- 4 GB of RAM
- At least 20 GB of available disk space(50 GB for best results)
Prepare Windows system for RHEL installation
We are making a single machine with two operating systems, RHEL workstation and Windows 11. We need to isolate the operating systems from each other to install RHEL on the same disk where Windows OS is already installed.
Follow these steps required to make a single disk into multiple partitions:
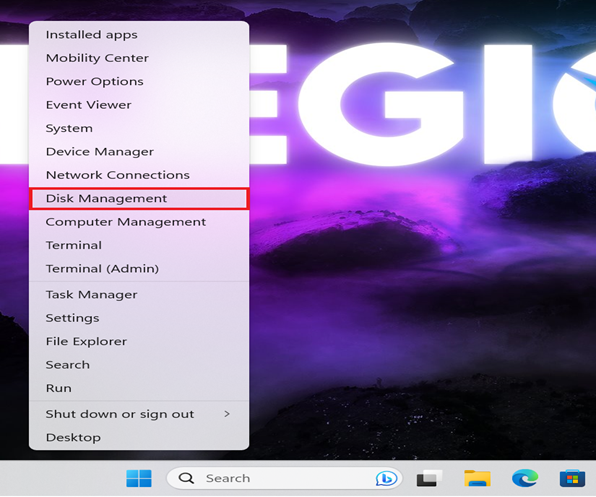
- Right-click on the Windows icon and select the disk management option, as shown in Figure 1.
- You will see the window with all drives shown graphically.
- Select the drive which has enough space to make a partition.
- Right-click on drive and select the Shrink Volume option.
- In the wizard, define the partition and size by entering Enter the amount of shrink in MB and click on the Shrink button. (Note: Define space at least 50GB for best experience.)
- The freed space should now be shown with Unallocated Status in the bottom pane. Right-click on it and select New Simple Volume.
- In the next wizard, select Do not assign a drive letter or drive path and click on Next.
- In the Format Partition window, keep everything as default and change the Volume label new volume to RHEL.
- Click Finish.
- After completing the setup, you will see the disk partition for RHEL in Figure 2.

Start installing RHEL
To begin installation on RHEL, make sure a bootable USB/DVD is attached to the device.
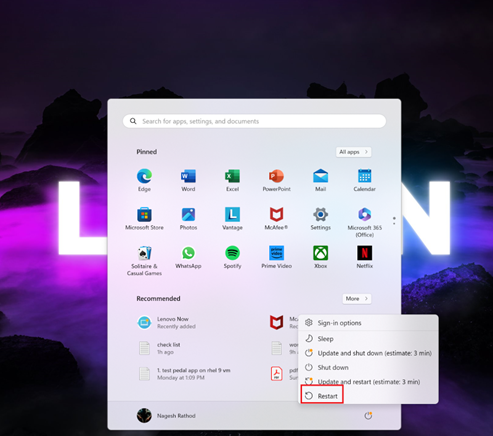
Press the shift key and restart the system, as shown in Figure 3.
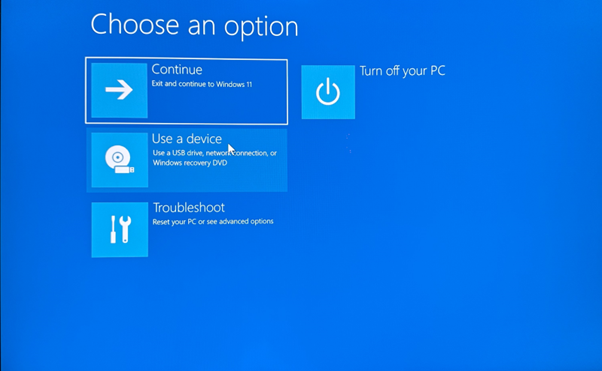
During system boot up, the screen in Figure 4 appears. Click on the Use a device option.
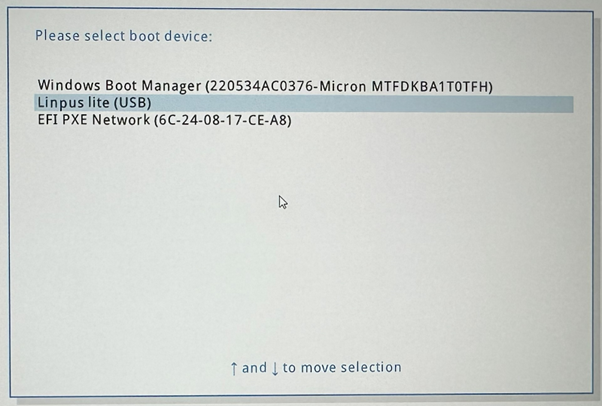
Select the Linpus lite (USB) option using navigation keys from the keyboard and press enter, as shown in Figure 5.
The screen in Figure 6 appears to choose the RHEL installation option, and boot the system using bootable installation media containing the RHEL 9.iso file. For this article, we will use Red Hat Enterprise Linux 9.2. Then press enter.
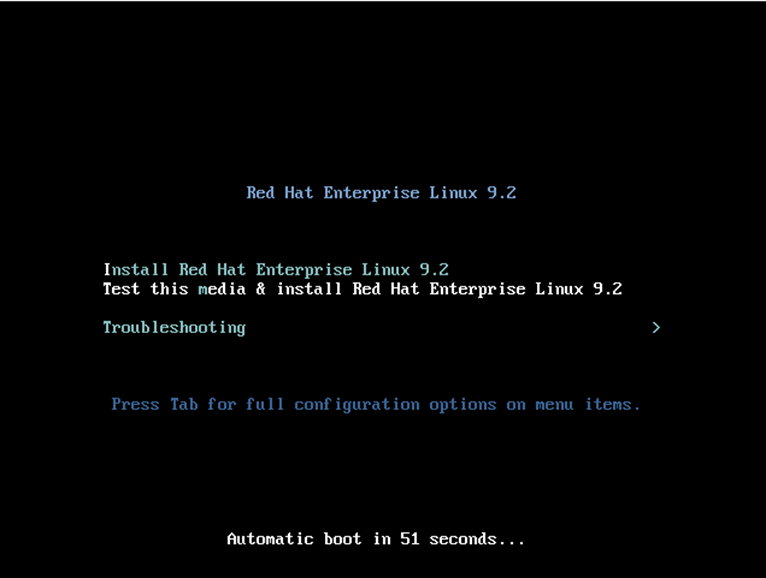
NOTE: During booting, you can skip the media checking step by hitting the Esc key.
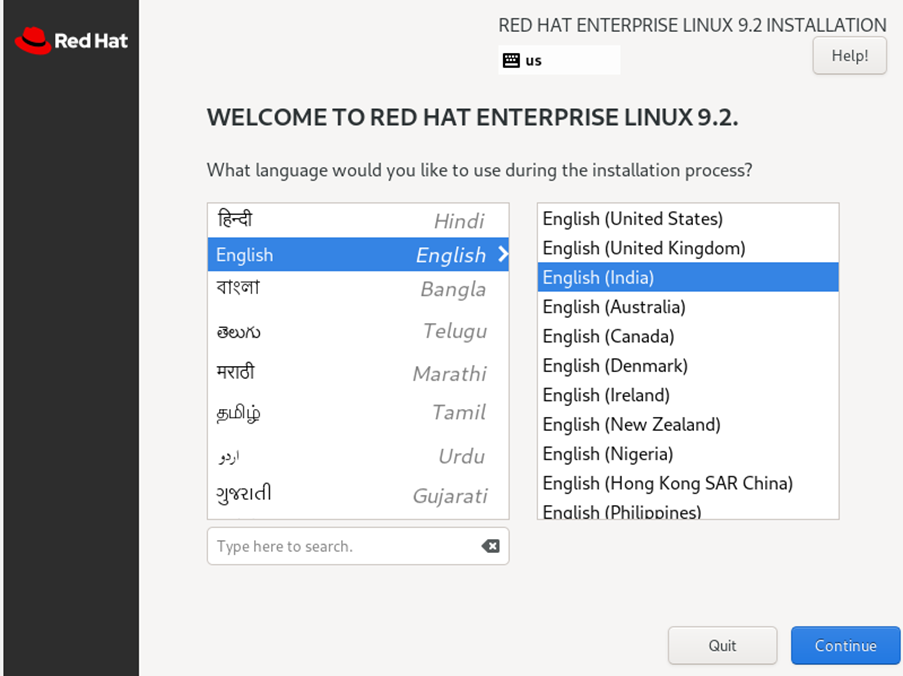
As shown in Figure 7, select the language of RHEL to install and click Continue.
Configure RHEL
During installation, we must manually configure RHEL.
- Click on Connect to Red Hat, as shown in Figure 8.
- Fill in your username and password for the activated no-cost Red Hat Developer subscription.
- Leave the organization blank (optional).
- Click on the Register button.

Choose the disk and partition
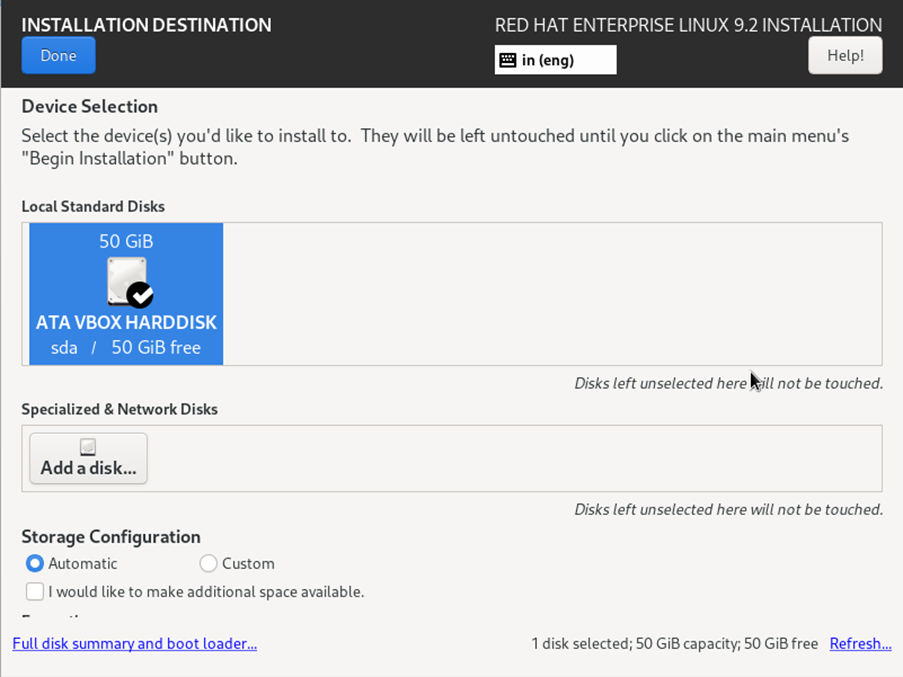
The Installation Destination has a caution sign. To install RHEL, we must select the drive. There are two ways to install RHEL on disk with a dedicated disk and partitioned disk space.
Dedicated disk
- Click on Installation Destination.
- It shows all available disks. Select the disk on which you want to install RHEL.
- Click Done.
Partitioned disk
- Get into the Installation Destination.
- Click on disk and select the claim drive.
- In the window in Figure 9, you will see all the partitions of the hard disk.
- Select RHEL labeled drive.
- Click on Delete to the left.
- Select the Reclaim space button.
Configure the network and host name
Next, configure the system network.
- Click on the Network & HostName under SYSTEM.
- Turn on the adaptor by clicking the toggle switch.
- If you have built-in WIFI in the system, it shows the Ethernets below as a secondary option to connect to the internet.
Note: If you do not enable the network here, you will not be able to install RHEL, because it downloads all dependencies over the internet during the installation process.
Set the root password
- Scroll down to the Root Password under the user setting and click on it.
- Next, add the password two times. Make sure it is a strong password. Based on the complexity of your password, it will show the strength of the password under it.
Select the software
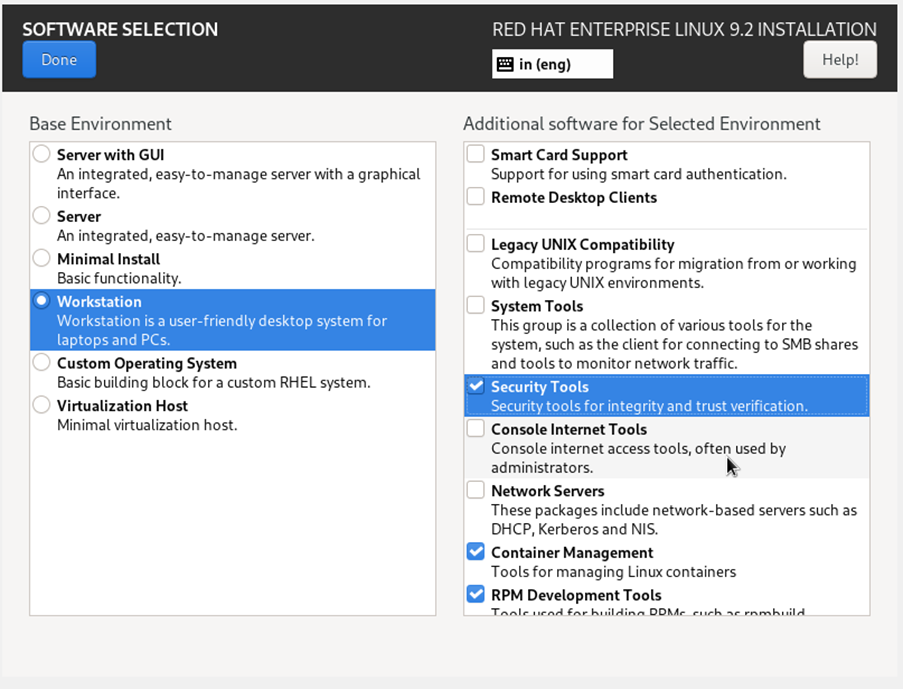
RHEL gives the flexibility to install additional packages and tools during the installation process so users can get most of the things in a single go. Refer to Figure 10 for the following steps:
- Click on the Software Selection button.
- Select the Workstation under the Base Environment.
- From Additional software for Selected Environment, select the tools of your preference, such as container management, security tools, etc.
- Click Done.
Install the RHEL Workstation
After completing all configurations, we are ready to begin the installation of RHEL Workstation.
- Click the Begin installation button shown in Figure 11 to start the installation.
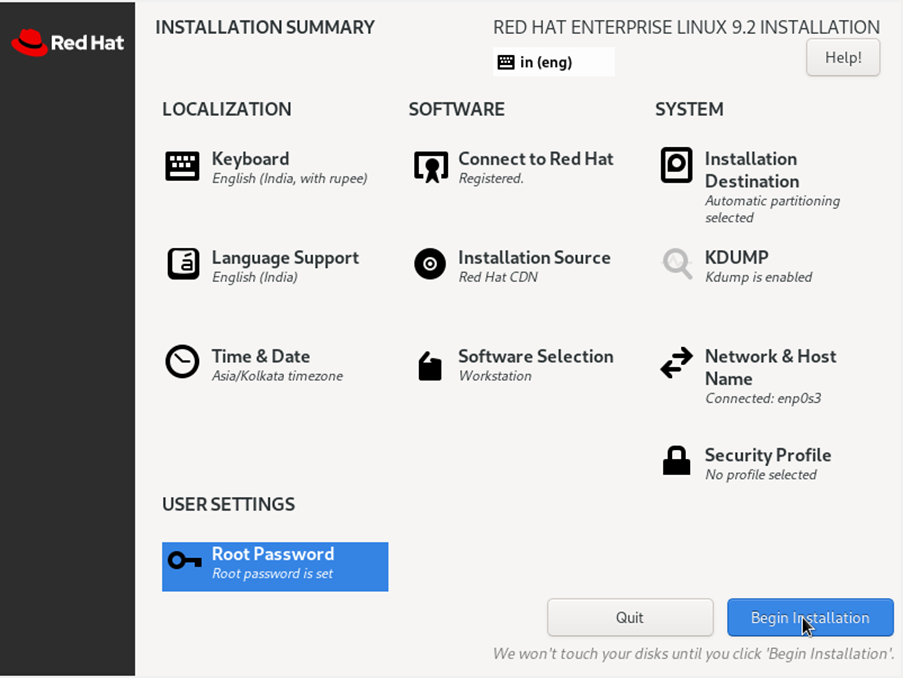
The installation may take some time based on your internet speed and compute power.
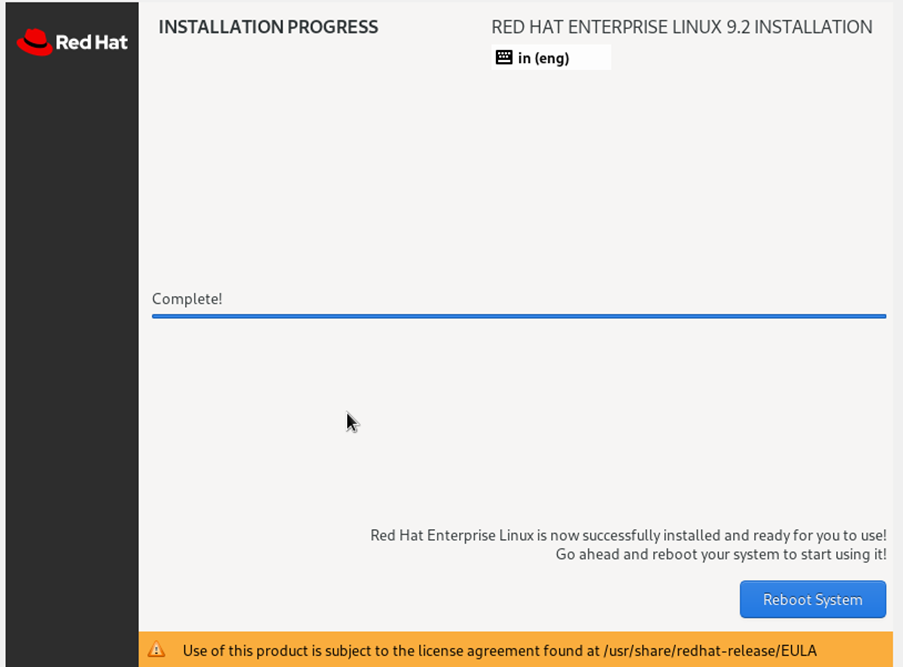
- After installation, we need to reboot the system, by clicking on the Reboot System button in Figure 12.
Set up RHEL
After the successful installation of RHEL, you will see the screen in Figure 13.
- Simply click Start Setup.
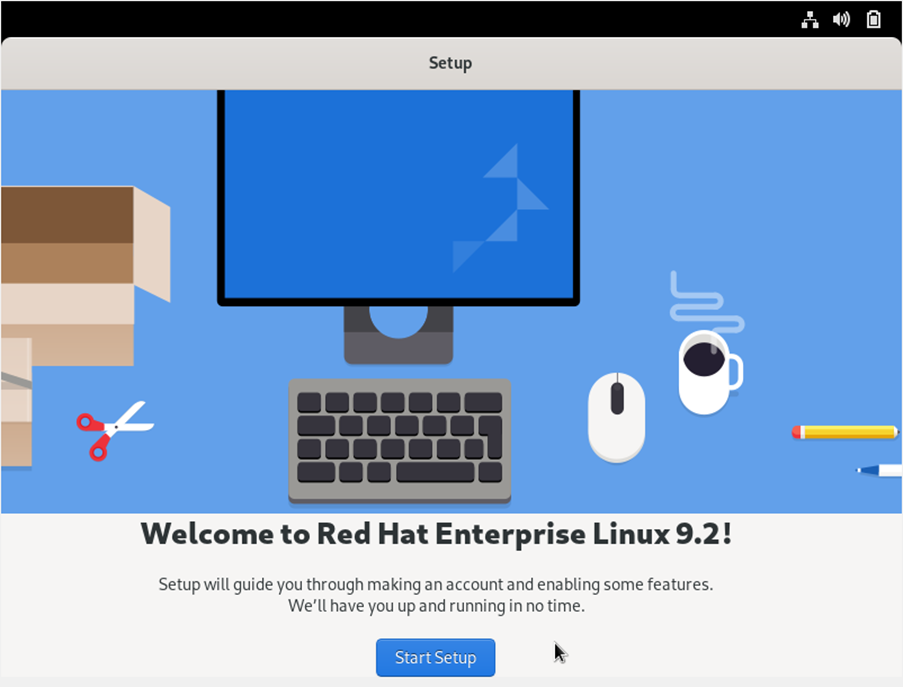
- RHEL requires more inputs before using it.
- Accept the policy of RHEL and click on next.
- Add the accounts of Google and Microsoft or skip it and click on Next.
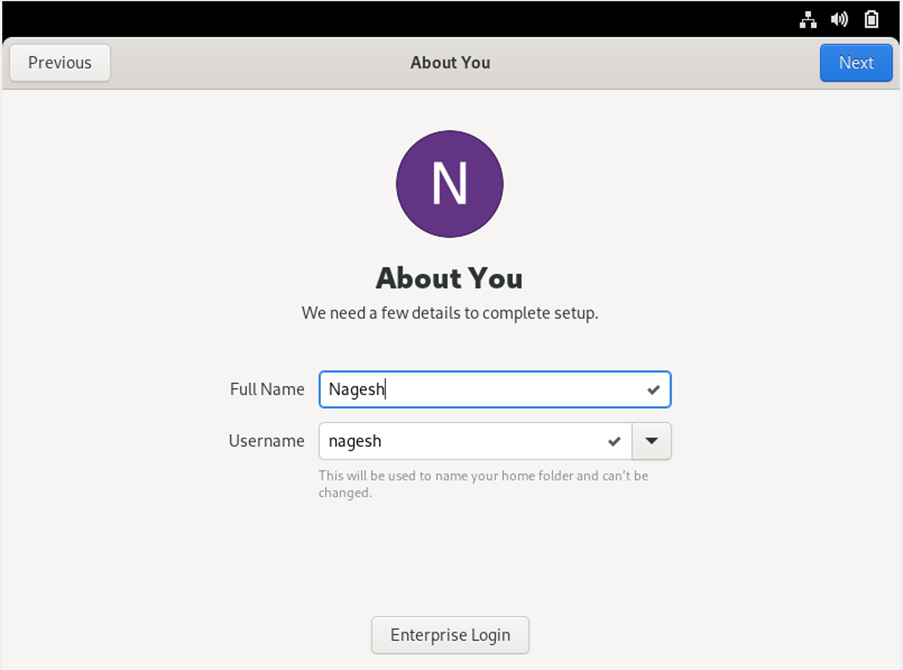
- Create a new user ID (Figure 14). Fill in the Full Name and Username boxes and click Next.
- On the next screen, set the password for the login system. Make sure the password is strong.
- Click on the Start Using Red Hat Enterprise Linux (Figure 15).
RHEL Workstation is now ready for personal and high-end use (Figure 16).
Find more resources
If you want to have a more hands-on experience of RHEL, you can follow the Red Hat curated lab. Learn more with Red Hat's hands-on labs for all skill levels. Try these labs to see your favorite products in action.
You can also get customized RHEL images for AWS, Google Cloud Platform, Microsoft Azure, and VMware and deploy them to the platform of your choice.