The purpose of this article is to demonstrate how to create an execution environment with custom dependencies and how to execute Ansible playbooks using the automation controller's GUI, a component of Red Hat Ansible Automation Platform. For this article, we will use Ansible Roles to install Microsoft SQL on Red Hat Enterprise Linux 8.
Make sure you have the Ansible Automation Platform installed on your machine before you begin. For more information about Ansible Automation Platform installation, please refer to our previous article, How to install Red Hat Ansible Automation Platform on RHEL 9. Follow these five steps to complete this demonstration.
Step 1. Setting up the automation execution environment
Automation execution environments provide a defined, consistent, and portable environment for executing automation jobs. Unlike legacy virtual environments, automation execution environments are Linux container images that make it possible to incorporate system-level dependencies and collection-based content. Each automation execution environment allows you to have a customized image to run jobs, and each of them contains only what you need when running the job.
There are dependencies for the automation execution environment, such as Python 3 and Podman. Make sure these tools are installed. We have provided instructions for installing and using Podman in this video.
Before you can complete any of the following tasks, you must create a registry service account. To log in, open up your terminal and type the following commands:
podman login registry.redhat.io
Username: {REGISTRY-SERVICE-ACCOUNT-USERNAME}
Password: {REGISTRY-SERVICE-ACCOUNT-PASSWORD}
Login Succeeded!
Once we are successfully logged in, we need to create a container image by using a Containerfile containing the following context:
FROM registry.redhat.io/ansible-automation-platform-22/ee-29-rhel8:latest
RUN ansible-galaxy collection install microsoft.sql
To build an image using Podman, enter the following:
podman build -t <image-name>.
The image should be pushed into the container image registry. Log in to the private container image registry using the command 'podman login' before pushing.
podman push <image-name>
Add the image name in the automation execution environment, as shown in Figure 1.

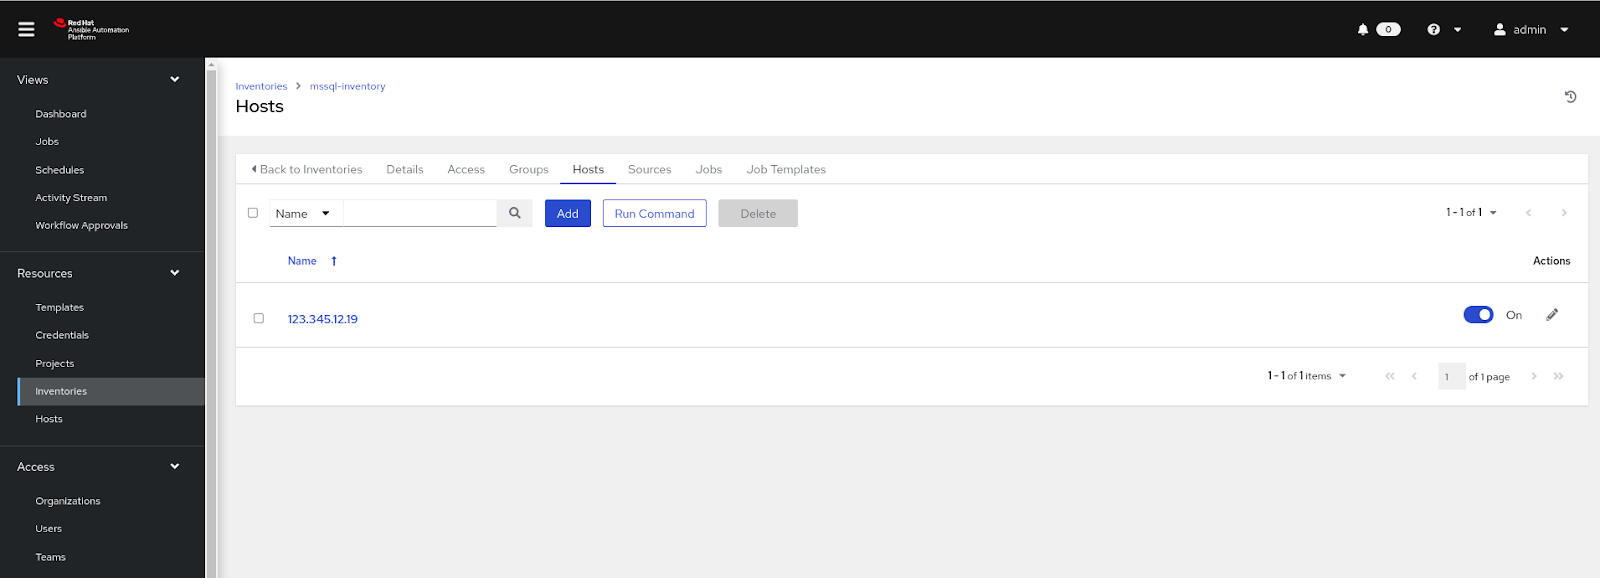
Step 2. Set up the inventory
An inventory is a collection of hosts against which jobs may be launched. To create inventory in Ansible Automation Platform, follow these steps and refer to Figure 2:
- Select the inventory from the left menu.
- Click on add.
- Select add inventory.
- Give a name to the inventory and save it.
- Select the hosts from inventories and click add hosts.
- Give the targeted server IP or name and save it.
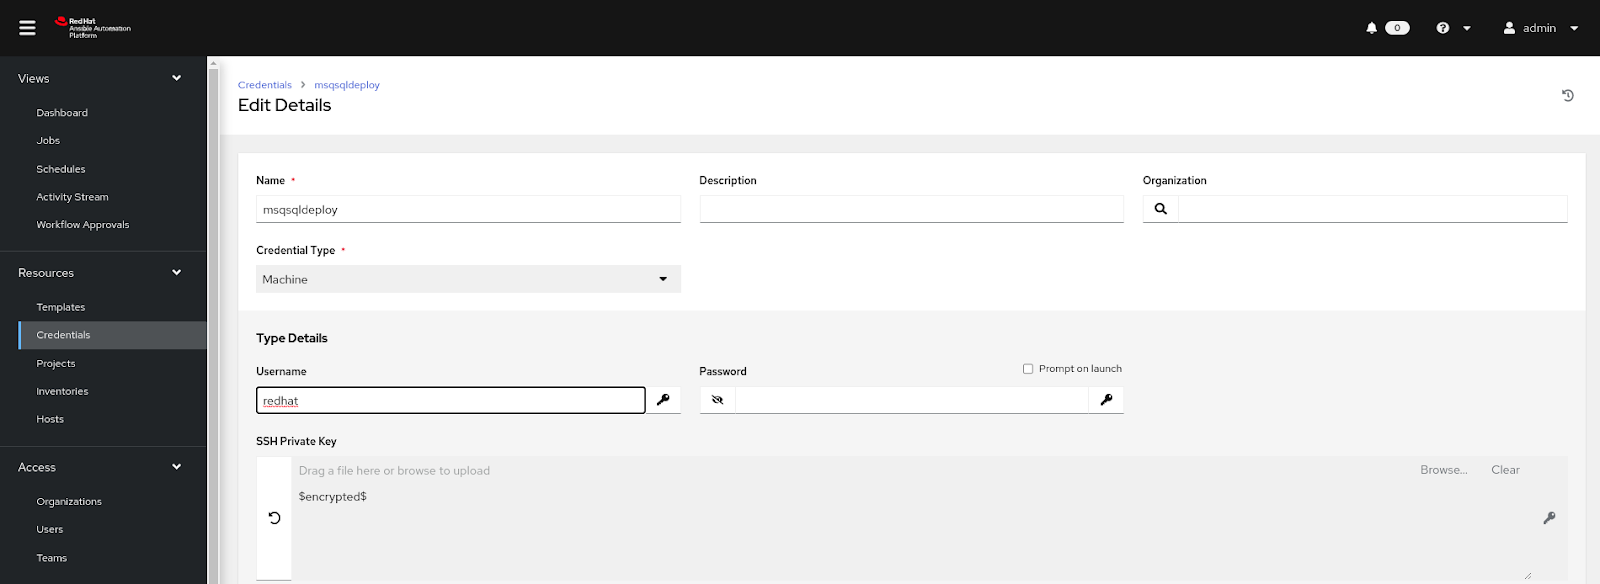
Step 3. Set up the credentials
To connect with the target server, we need credentials such as username, password, or ssh key. By using credentials, we can pass the required credentials during the playbook execution.
Follow these steps and refer to Figure 3:
- Select the credentials from the left menu.
- Click on new credentials and select Machine credentials type.
- Add your username, password, or ssh key in the corresponding fields.
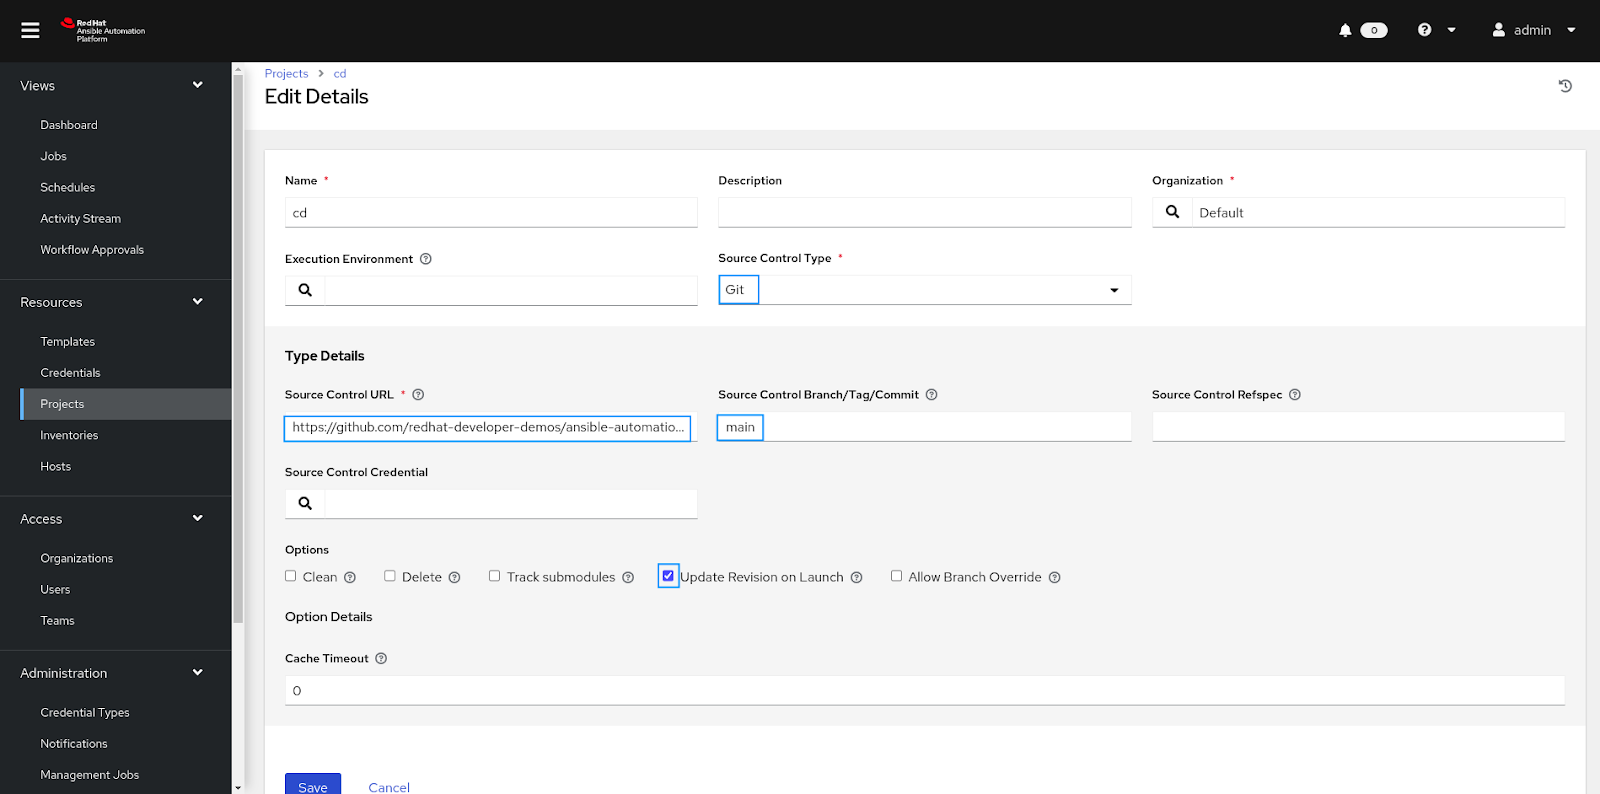
Step 4. Configuring a project
A project is a logical collection of Ansible Playbooks represented in the controller. You can manage playbooks and playbook directories on your controller server either manually or by using a source code management (SCM) system such as Git, Subversion, or Mercurial supported by the controller.
Follow these steps to create a project and refer to Figure 4:
- Create a new project for our git repository from the left menu.
- Click on the + icon in the right corner.
- Give the project a name.
- Select your organization (or choose Default).
- Select the SCM TYPE (GIT in our case).
- Add RESOURCE DETAILS
- SCM URL
- SCM BRANCH(main)
- SCM CREDENTIAL
- Save it.
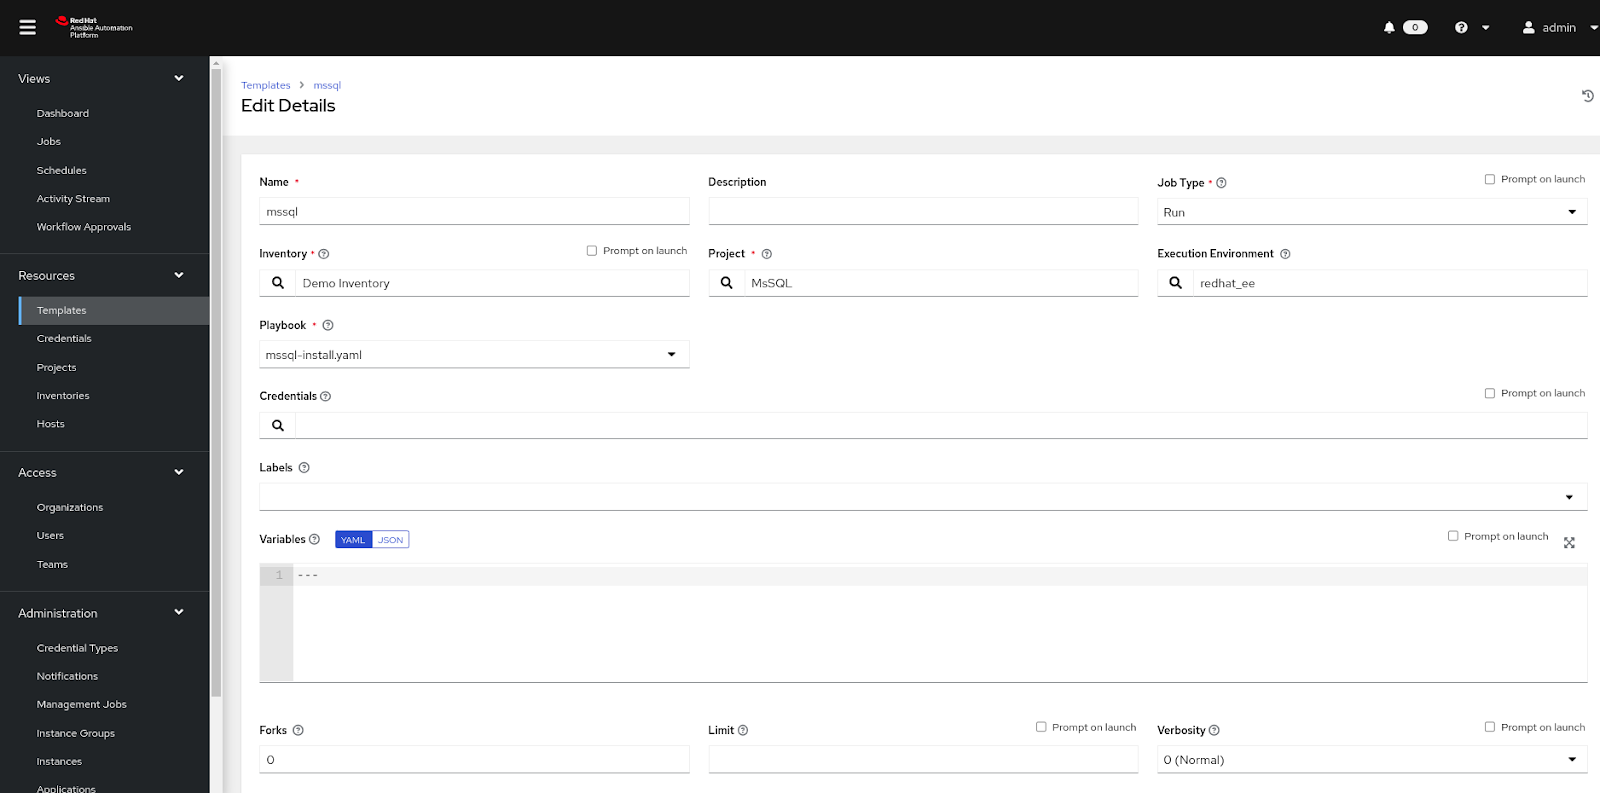
Step 5. Configuring templates
Templates define and set parameters for running jobs. A template is more like a blueprint where all of the dependencies are defined, such as inventory, projects, credentials, etc.
Follow these steps to create a template to execute the job for us (see Figure 5):
- From the left menu, select templates and create a new template.
- Click on + icon from the right corner and select the Job template.
- Give the template a name.
- Select the project and playbook you want to run in the template.
- Select microsoft_sql_playbook.yaml playbook.
- Select the execution environment which you created previously.
---
- hosts: dev
collections:
- microsoft.sql
vars:
mssql_accept_microsoft_odbc_driver_17_for_sql_server_eula: true
mssql_accept_microsoft_cli_utilities_for_sql_server_eula: true
mssql_accept_microsoft_sql_server_standard_eula: true
mssql_password: "YourP@ssw0rd"
mssql_edition: Evaluation
mssql_enable_sql_agent: true
mssql_install_fts: true
mssql_install_powershell: true
mssql_tune_for_fua_storage: true
roles:
- microsoft.sql.server
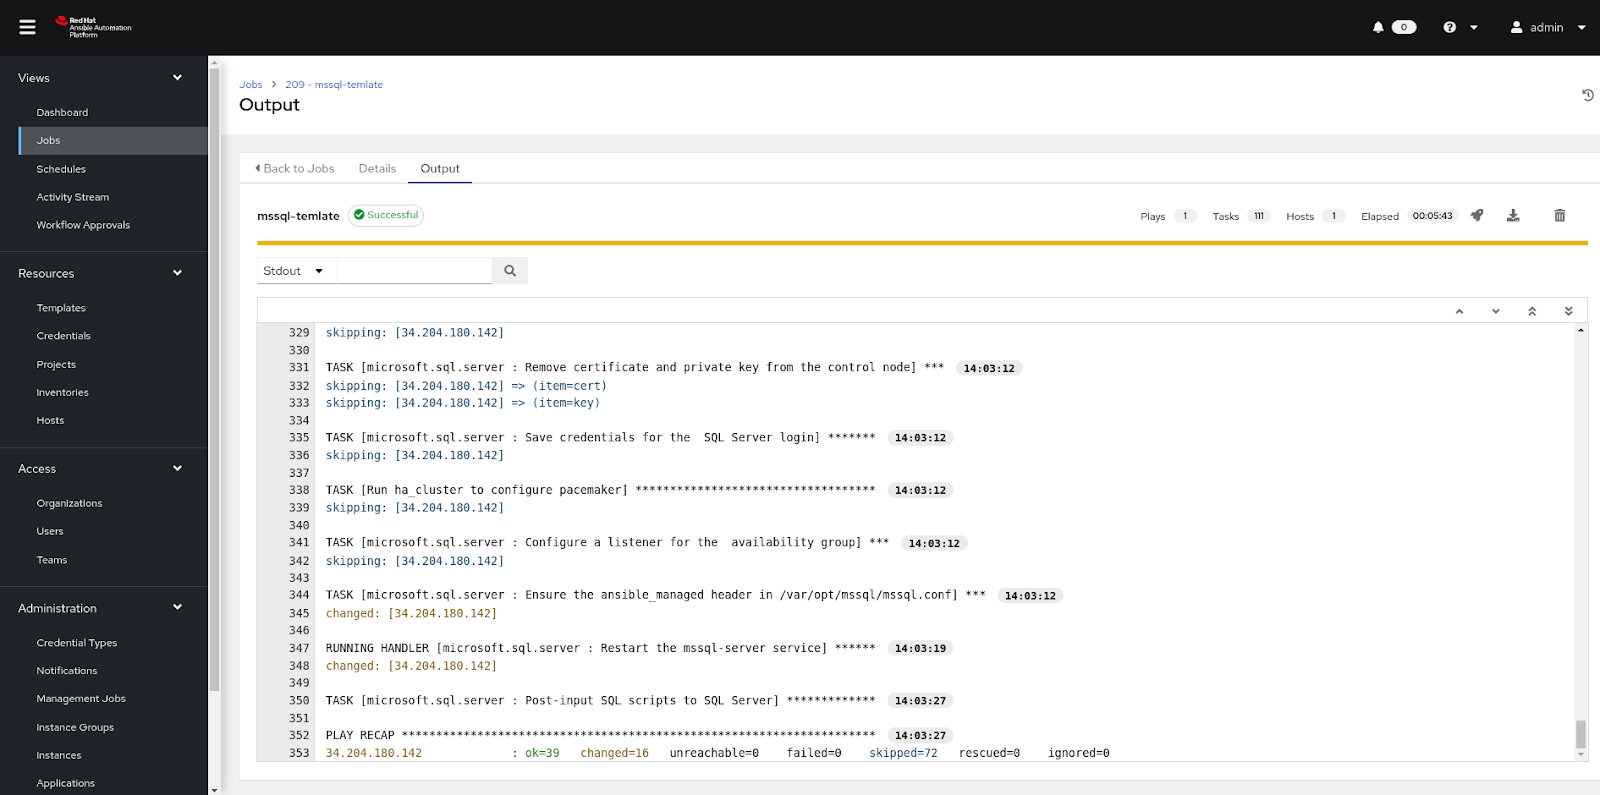
7. Launch it (Figure 6).
Continue your automation journey with Ansible
Get started with the Ansible Automation Platform by exploring interactive labs. Ansible Automation Platform is also available as a managed offering on Microsoft Azure and as a self-managed offering on AWS.
Last updated: August 14, 2023