Making a container out of an application, and moving it into Kubernetes, can be a complicated task involving many tools and edits. Red Hat OpenShift makes it much easier. This article offers an exercise with a Java application that you can run on the Developer Sandbox for Red Hat OpenShift. In this exercise you will:
- Generate a simple Java application from the Quarkus bootstrapping site.
- Provision a cost-free development cluster in OpenShift.
- Add the Eclipse JKube OpenShift Maven plugin to your project.
- Deploy the Java application to Red Hat OpenShift.
Prerequisites
Besides opening a cost-free account on the Developer Sandbox, you need the following tools to do this activity:
- The OpenShift command-line interface (CLI), which offers the
occommand. - A Java Development Kit (JDK).
- A text editor.
Generate a simple Java application
Once you have access to a cluster on Red Hat OpenShift, you need to prepare a Java Maven project. For this exercise, you will create a sample application on your local system before deploying the application to OpenShift. There are various alternatives for creating a container-ready Java application, including Spring Boot, Micronaut, or Quarkus. We'll pick Quarkus because it has been trending for the past few years.
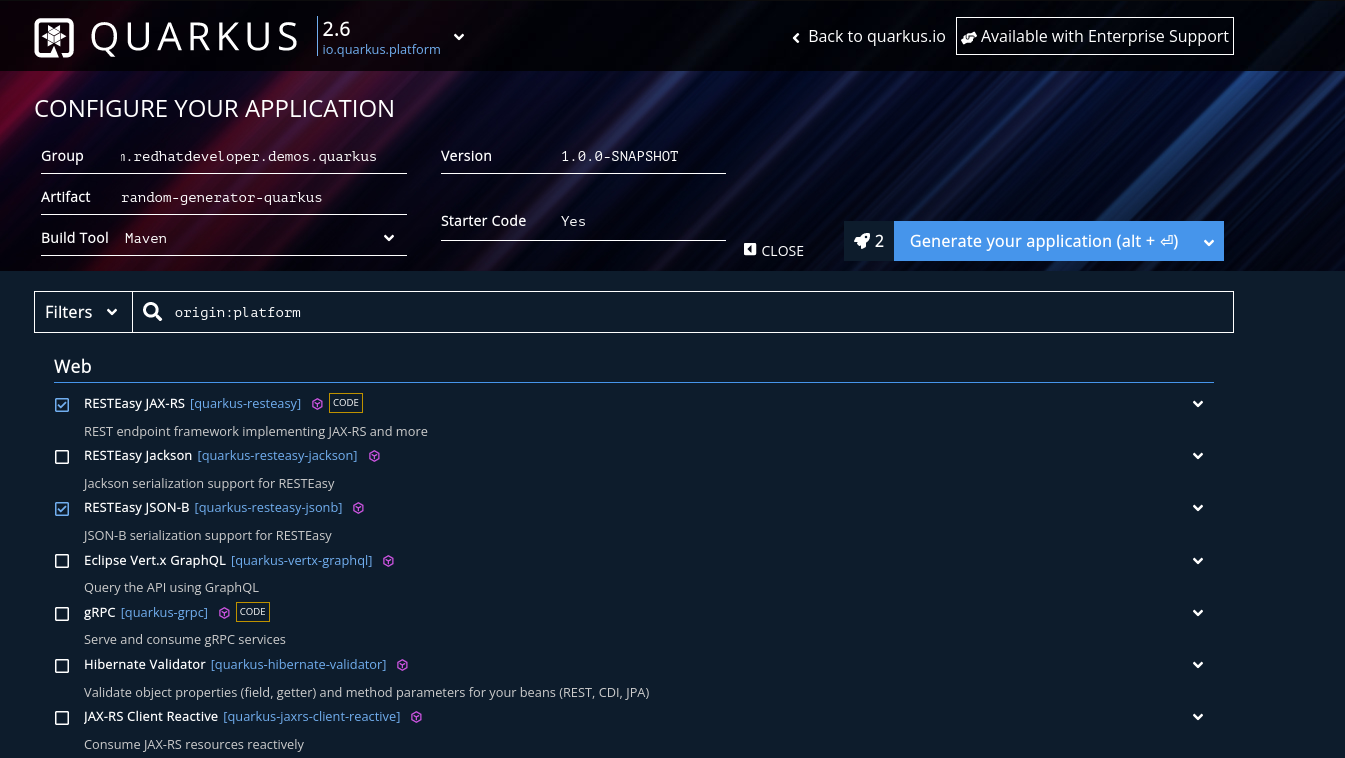
So go to the Quarkus bootstrapping site and generate a project from there. Choose Maven as a build tool and check the boxes for the RESTEasy JAX-RS and RESTEasy JSON-B dependencies, which add starter code for a sample REST endpoint (Figure 1). Click the blue Generate your application button to download the files.
Let's add a simple random generator endpoint that prints a random JSON message at an endpoint named /random. I've provided the source code for the application in my GitHub repository. Download this repository, move to a directory on your computer where you'd like to store the code, and install it as follows:
$ unzip quarkus-random-generator.zip
Go to the project directory:
$ cd quarkus-random-generator/
Open this project in a text editor or IDE of your choice. The source code of the random generator application consists of the following three files:
RandomResponse: A plain old Java object that serves as a model for the responseRandomGeneratorService: A utility class that generates the random responseRandomGeneratorResource:: The class where you declare your REST endpoint and callRandomGeneratorService
You can place the files in a single package or in different packages. In my case, the directory structure looks like this:
quarkus-random-generator : $ tree src/main/java/
src/main/java/
└── com
    └── redhat
        └── developers
            └── demos
                └── quarkus
                    ├── model
                    │   └── RandomResponse.java
                    ├── rest
                    │   └── RandomGeneratorResource.java
                    └── service
                        └── RandomGeneratorService.java

8 directories, 3 files
The contents of RandomResponse.java are:
package com.redhat.developers.demos.quarkus.model;

public class RandomResponse {
  private String id;

  public RandomResponse(String id) {
    this.id = id;
  }

  public String getId() { return id; }

  public void setId(String id) { this.id = id; }
}
The contents of RandomGeneratorService.java are:
package com.redhat.developers.demos.quarkus.service;

import com.redhat.developers.demos.quarkus.model.RandomResponse;
import java.util.UUID;

public class RandomGeneratorService {
  private static final UUID id = UUID.randomUUID();

  public RandomResponse createRandomMessage() {
    return new RandomResponse(id.toString());
  }
}
The contents of RandomGeneratorResource.java are:
package com.redhat.developers.demos.quarkus.rest;

import com.redhat.developers.demos.quarkus.service.RandomGeneratorService;

import javax.ws.rs.GET;
import javax.ws.rs.Path;
import javax.ws.rs.Produces;
import javax.ws.rs.core.MediaType;
import javax.ws.rs.core.Response;

@Path("/random")
public class RandomGeneratorResource {
    @GET
    @Produces(MediaType.APPLICATION_JSON)
    public Response hello() {
        RandomGeneratorService randomGeneratorService = new RandomGeneratorService();
        return Response.ok(randomGeneratorService.createRandomMessage()).build();
    }
}
Once you've added these files to your project, build it using the following command:
$ ./mvnw clean install
If the build is successful, run the project by executing a runnable JAR generated by Quarkus:
$ java -jar target/quarkus-app/quarkus-run.jar
Open the localhost:8080/random link in your browser, you should see something like Figure 2.
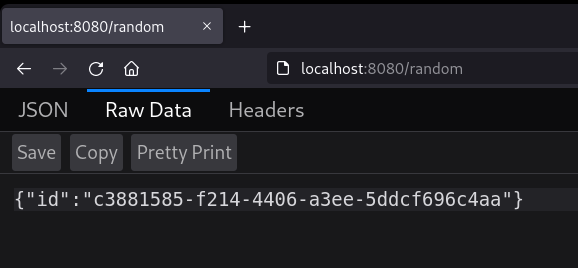
Cool, your application seems to be working locally. Next, we'll deploy the application to the Developer Sandbox for Red Hat OpenShift.
Provision your sandbox
The Developer Sandbox for Red Hat OpenShift is a free OpenShift cluster that gives you the experience of working with a Kubernetes cluster and learning more about Kubernetes. Unlike other cloud platforms, Developer Sandbox doesn't require a credit card. You just need to create a Red Hat account and use that to provision your OpenShift cluster.
Once you've created an account and logged into your OpenShift cluster, you should get a console screen like Figure 3.
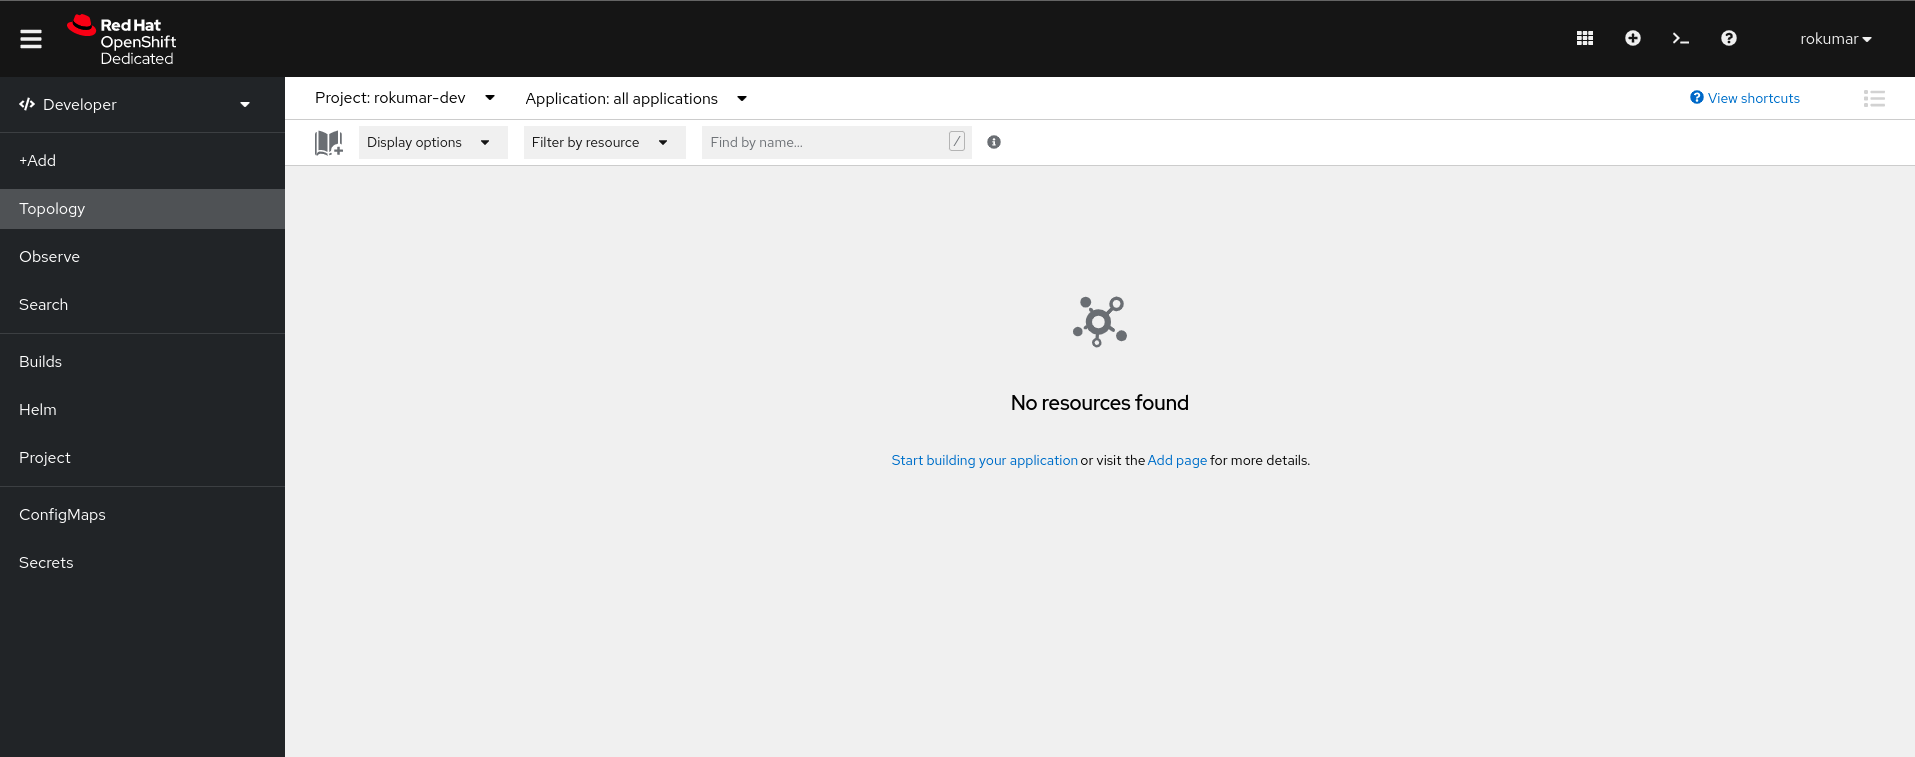
You can specify Developer Sandbox parameters by using the console. You can also deploy applications, check their status, and do many other tasks there. But for some tasks, you need the oc command-line tool. After you install it on your machine, you can use it to connect to your OpenShift cluster from your terminal.
Get the login command you need by pulling down the menu that bears your user name in the upper right corner of your console screen. Choose the Copy login command menu item (Figure 4). You should be taken to a screen that says Display token. Clock that link to see the token as well as a complete oc login command, which you should copy.

Paste the command into your terminal:
$ oc login --token=sha256~%TOKEN% --server=https://%SERVER%:6443
Logged into "https://%SERVER%:6443" as "%USERNAME%" using the token provided.

You have access to the following projects and can switch between them with 'oc project <projectname>':

  * %USERNAME%-dev
    %USERNAME%-stage

Using project "%USERNAME-dev".
Welcome! See 'oc help' to get started.
You can learn more about the oc command in the article Access your Developer Sandbox for Red Hat OpenShift from the command line.
Add the OpenShift Maven plugin to your project
You'll be using the Eclipse JKube plugin to package and deploy this application to Red Hat OpenShift. Since you're using Maven for this exercise, download the latest version of the OpenShift Maven plugin from Maven Central. If you're a Gradle user, you will also find the OpenShift Gradle plugin useful for your projects. You can find more information about Eclipse JKube in the following articles:
- Java development on top of Kubernetes using Eclipse JKube
- Introduction to Eclipse JKube: Java tooling for Kubernetes and Red Hat OpenShift
- Get started with Eclipse JKube Kubernetes/OpenShift Gradle Plugins
You can add the plugin to the build section of your pom.xml.It is advisable to keep the plugin in a separate OpenShift profile, in the profiles section:
    <profile>
      <id>openshift</id>
      <build>
        <plugins>
          <plugin>
            <groupId>org.eclipse.jkube</groupId>
            <artifactId>openshift-maven-plugin</artifactId>
            <version>${openshift-maven-plugin.version}</version>
          </plugin>
        </plugins>
      </build>
    </profile>
Deploy the application to OpenShift
Once you've added the Maven plugin to the project, use it to build a container image, generate YAML manifests, and apply them to the OpenShift cluster:
$ ./mvnw oc:build oc:resource oc:apply -Popenshift
The following OpenShift Maven plugin goals carry out the tasks we need for this exercise:
- oc:build: Creates a container image for your Java Maven application using the Source to Image (S2I) build strategy. The image is built in a pod and pushed to OpenShift's internal container registry.
- oc:resource: Generates opinionated YAML manifests (DeploymentConfig, Service, Route, etc.) for your Java Maven application. You can view the manifests in the
target/classes/META-INF/jkube/openshiftdirectory. - oc:apply: Applies these generated YAML manifests to the connected OpenShift Cluster. You can think of this as the equivalent of an
oc applyorkubectl applycommand.
Earlier in this article, you logged into your OpenShift cluster using the oc login command, automatically setting up several properties. But if you want to deploy an application without having logged into the cluster previously, you need to set the pr properties shown in Table 1.
| Property | Description |
|---|---|
kubernetes.master |
URL of the OpenShift cluster |
kubernetes.auth.token |
OpenShift API token received from the Copy login command console menu item |
kubernetes.namespace |
Namespace where you want to deploy the application |
kubernetes.auth.tryServiceAccount |
Whether to check for a mounted service account |
kubernetes.auth.tryKubeConfig |
Whether to check for the KubeConfig file |
Once the application is deployed, you can check whether its pods got created in the Developer Sandbox web console. In the Administrator view, go to Workloads→Pods. There you should see something like Figure 5.

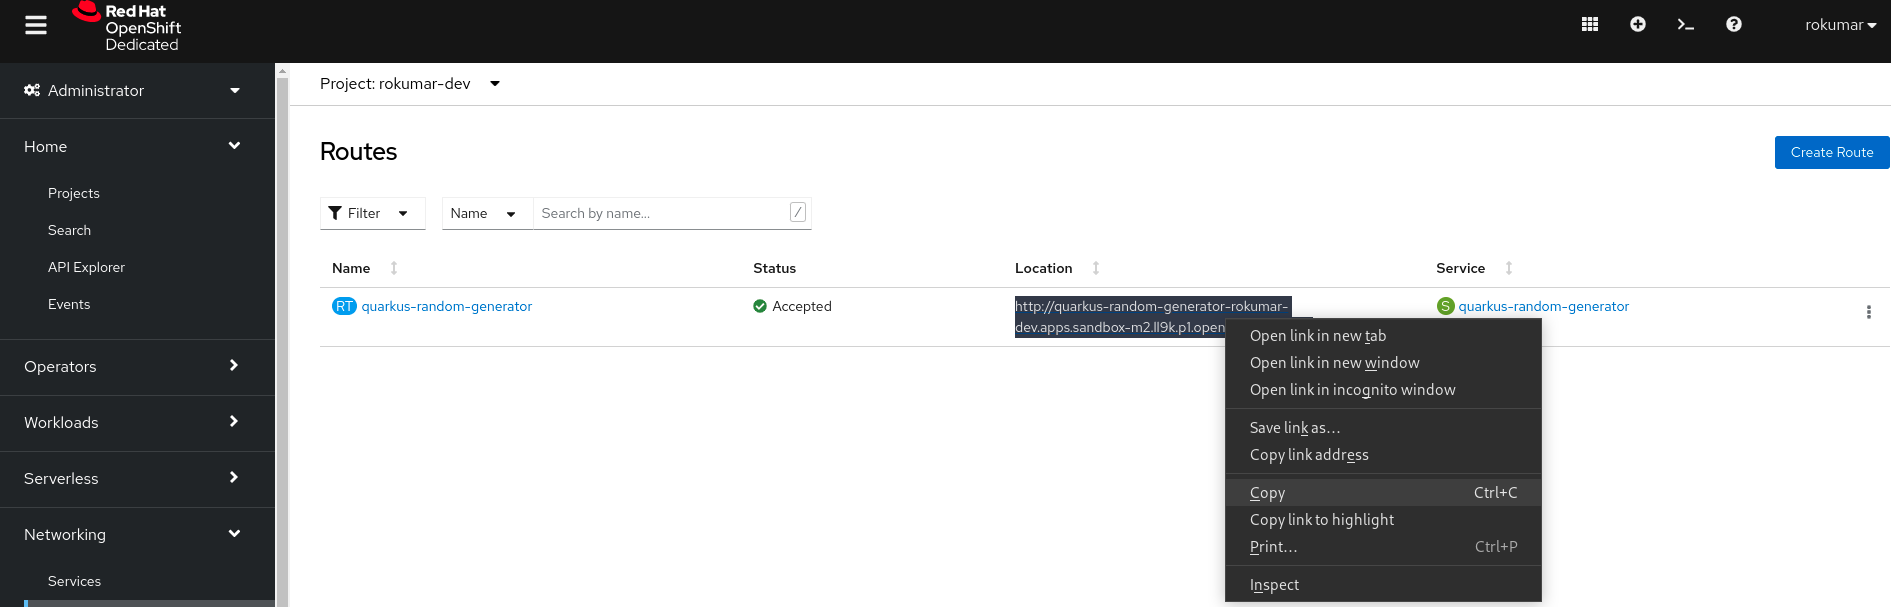
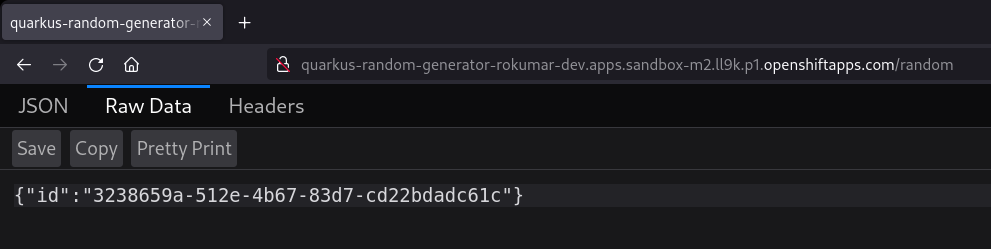
Once your application pods are in the Running state, you can access your application using the route URL from the OpenShift web console. In the Administrator view, go to Networking→Routes. You should see something like Figure 6.
You can copy the URL from the console and paste it into a browser's location bar to view the application. Figure 7 shows the running application, which looks the same as Figure 2 but is now running in your OpenShift cluster instead of your local system.
And that's it—you've successfully deployed a Java Maven application to a Red Hat OpenShift Cluster.
Once you've done testing your application, you can undeploy it using the undeploy goal in the OpenShift Maven plugin:
$ ./mvnw oc:undeploy -Popenshift
Conclusion
In this activity, you've learned how easy it is to deploy a Java application to Red Hat OpenShift using Eclipse JKube's OpenShift Maven plugin. You don't need to worry about building a Dockerfile, doing an OpenShift build, maintaining YAML manifests, etc.—you can just focus on your application logic. To learn more about Eclipse JKube, check these links:
Last updated: September 20, 2023