Recently, I had to help a customer get Apache Kafka MirrorMaker 2, which replicates data from one Apache Kafka cluster to another, working with Red Hat OpenShift Streams for Apache Kafka. I used Strimzi, a project focused on running Apache Kafka on Kubernetes. While the process was relatively straightforward, the configuration was a bit tricky.
In this article, I'll share the steps I took to get MirrorMaker 2 and OpenShift Streams for Apache Kafka working together. The specific configuration I used will serve as our example.
What is Apache Kafka MirrorMaker 2?
Apache Kafka MirrorMaker 2 is a cross-cluster data replication (mirroring) technology. It's built on top of Apache Kafka Connect, which provides increased scalability and reliability over Apache Kafka MirrorMaker 1. MirrorMaker 2 can be used for migration, backup, disaster recovery, and failover
Guides and prerequisites
We will use a number of guides for this configuration; You can open them now or use the links in each section:
- Getting started with Red Hat OpenShift Streams for Apache Kafka
- OpenShift Dedicated: Cluster management
- Configuring a GitHub identity provider
- OpenShift Dedicated: Managing administration roles and users
- Configuring and connecting Kafkacat with Red Hat OpenShift Streams for Apache Kafka
Note that you will need a no-cost Red Hat Developer account to access some of the resources provided in this article.
Set up your Apache Kafka clusters
Our example is based on a common use case for MirrorMaker: Migrating from a self-managed Kafka cluster to a cloud service. In this case, your source would be your self-managed Kafka instance while your target would be OpenShift Streams for Apache Kafka. However, to simplify the example, I created both the source and target using OpenShift Streams for Apache Kafka.
Begin by creating both source and target Kafka clusters using OpenShift Streams for Apache Kafka. You can use two different Red Hat accounts for this in order to take advantage of the trial instances offered.
For each Red Hat account, follow the guide to getting started with Red Hat OpenShift Streams for Apache Kafka, creating a Kafka instance and a service account. As described in the guide, copy the bootstrap server, client ID, and client secret for each, and save copies to a temporary location to use later.
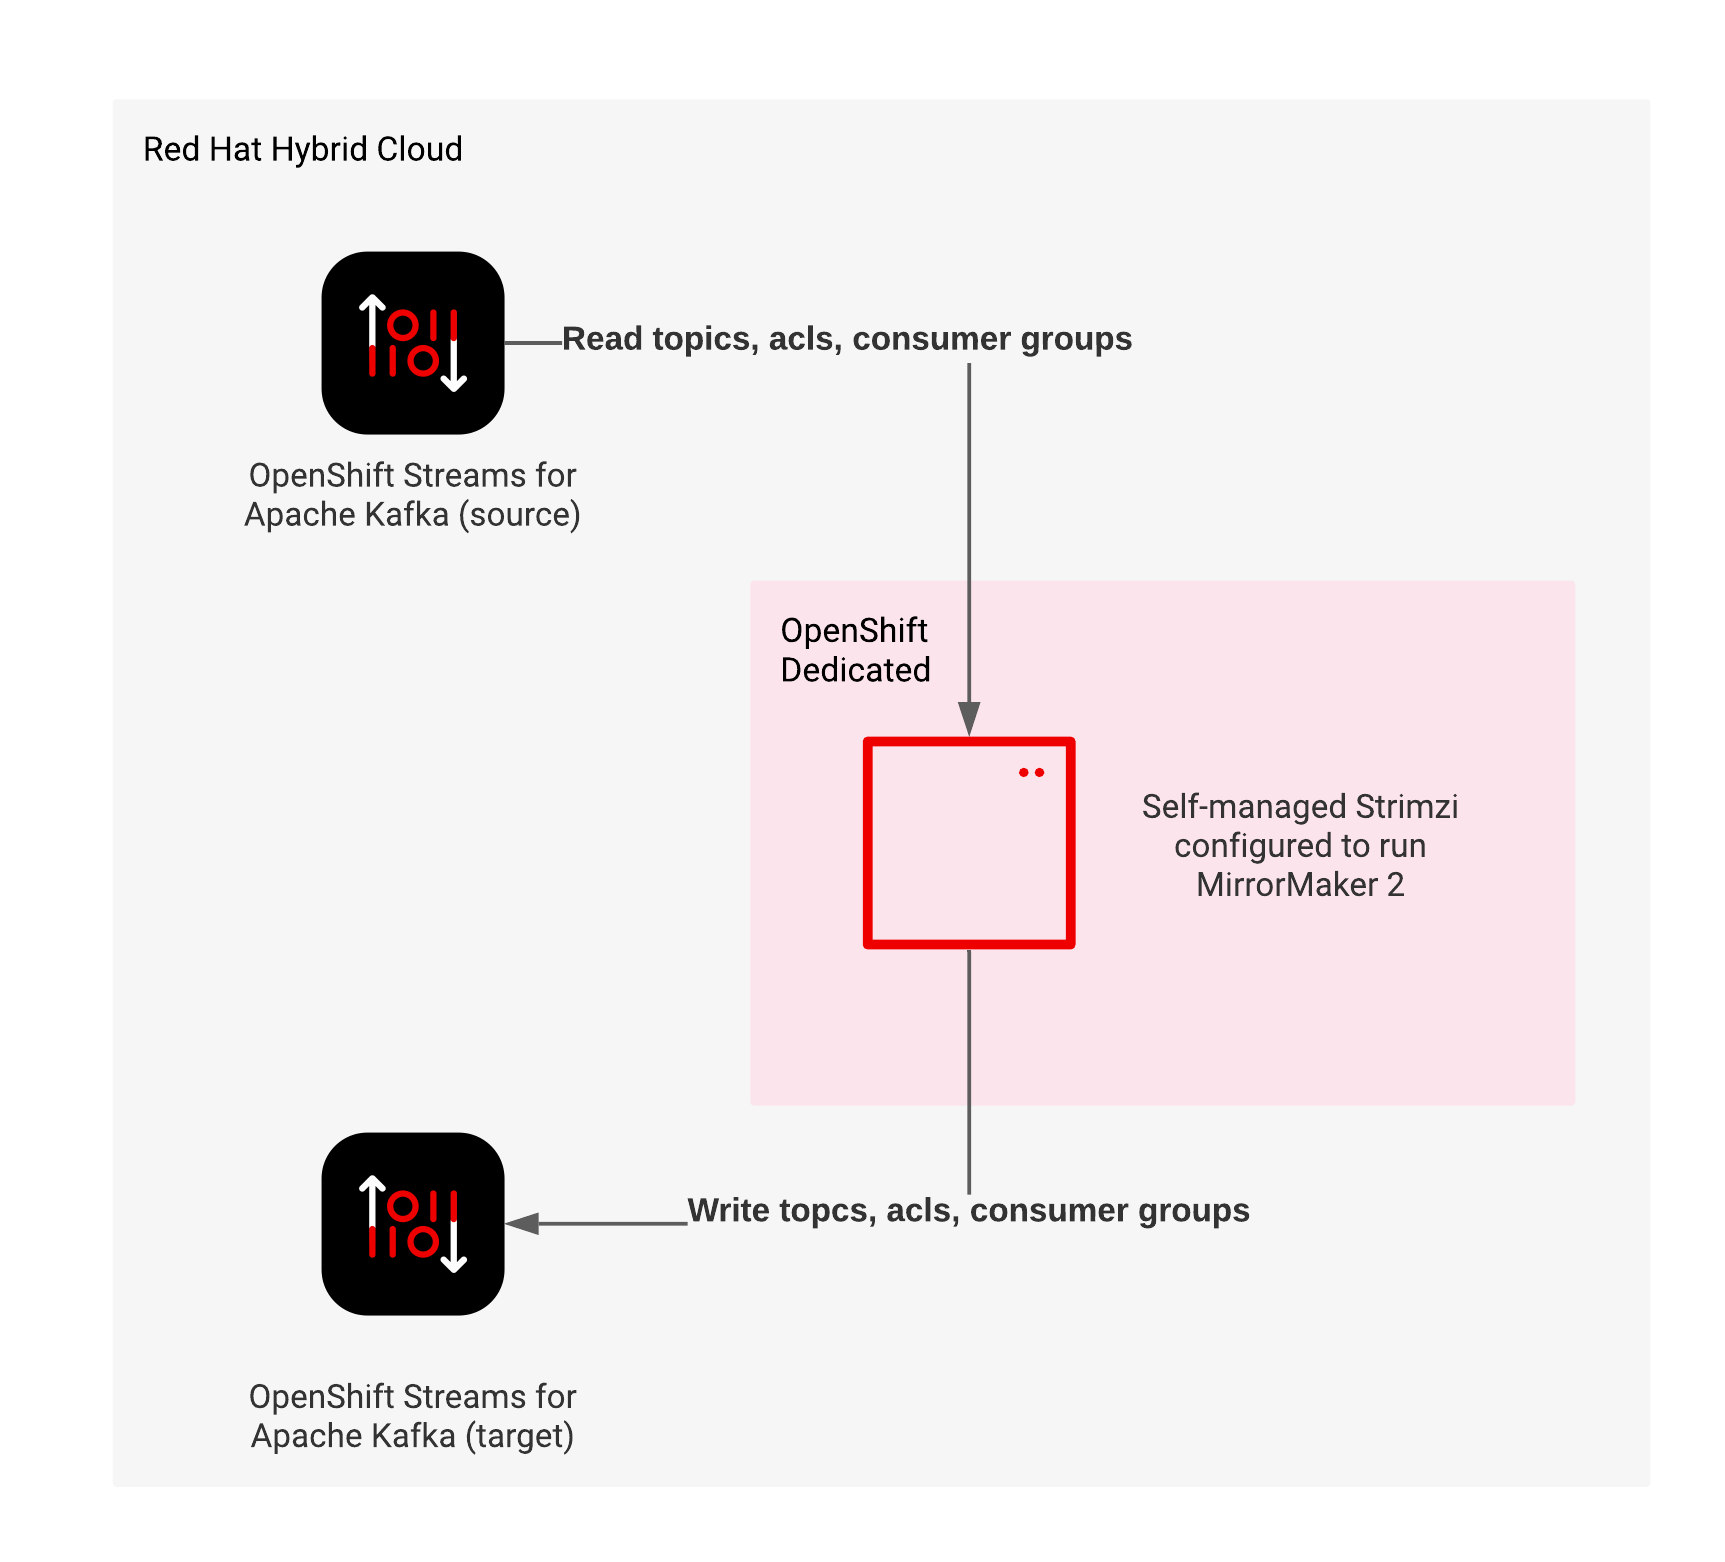
MirrorMaker needs broad access to Kafka, so we'll need fairly liberal permissions for this example, as shown in Figure 1. In production, you could probably get away with making the permissions more restrictive—for instance, you could set them so that all topics could be read, and then only add write permissions to the topics that MirrorMaker uses to manage the replication.

For the target cluster, give the service account you created similar permissions, as shown in Figure 2. These permissions include the ability to alter the Kafka instance so that the access control lists can be replicated.

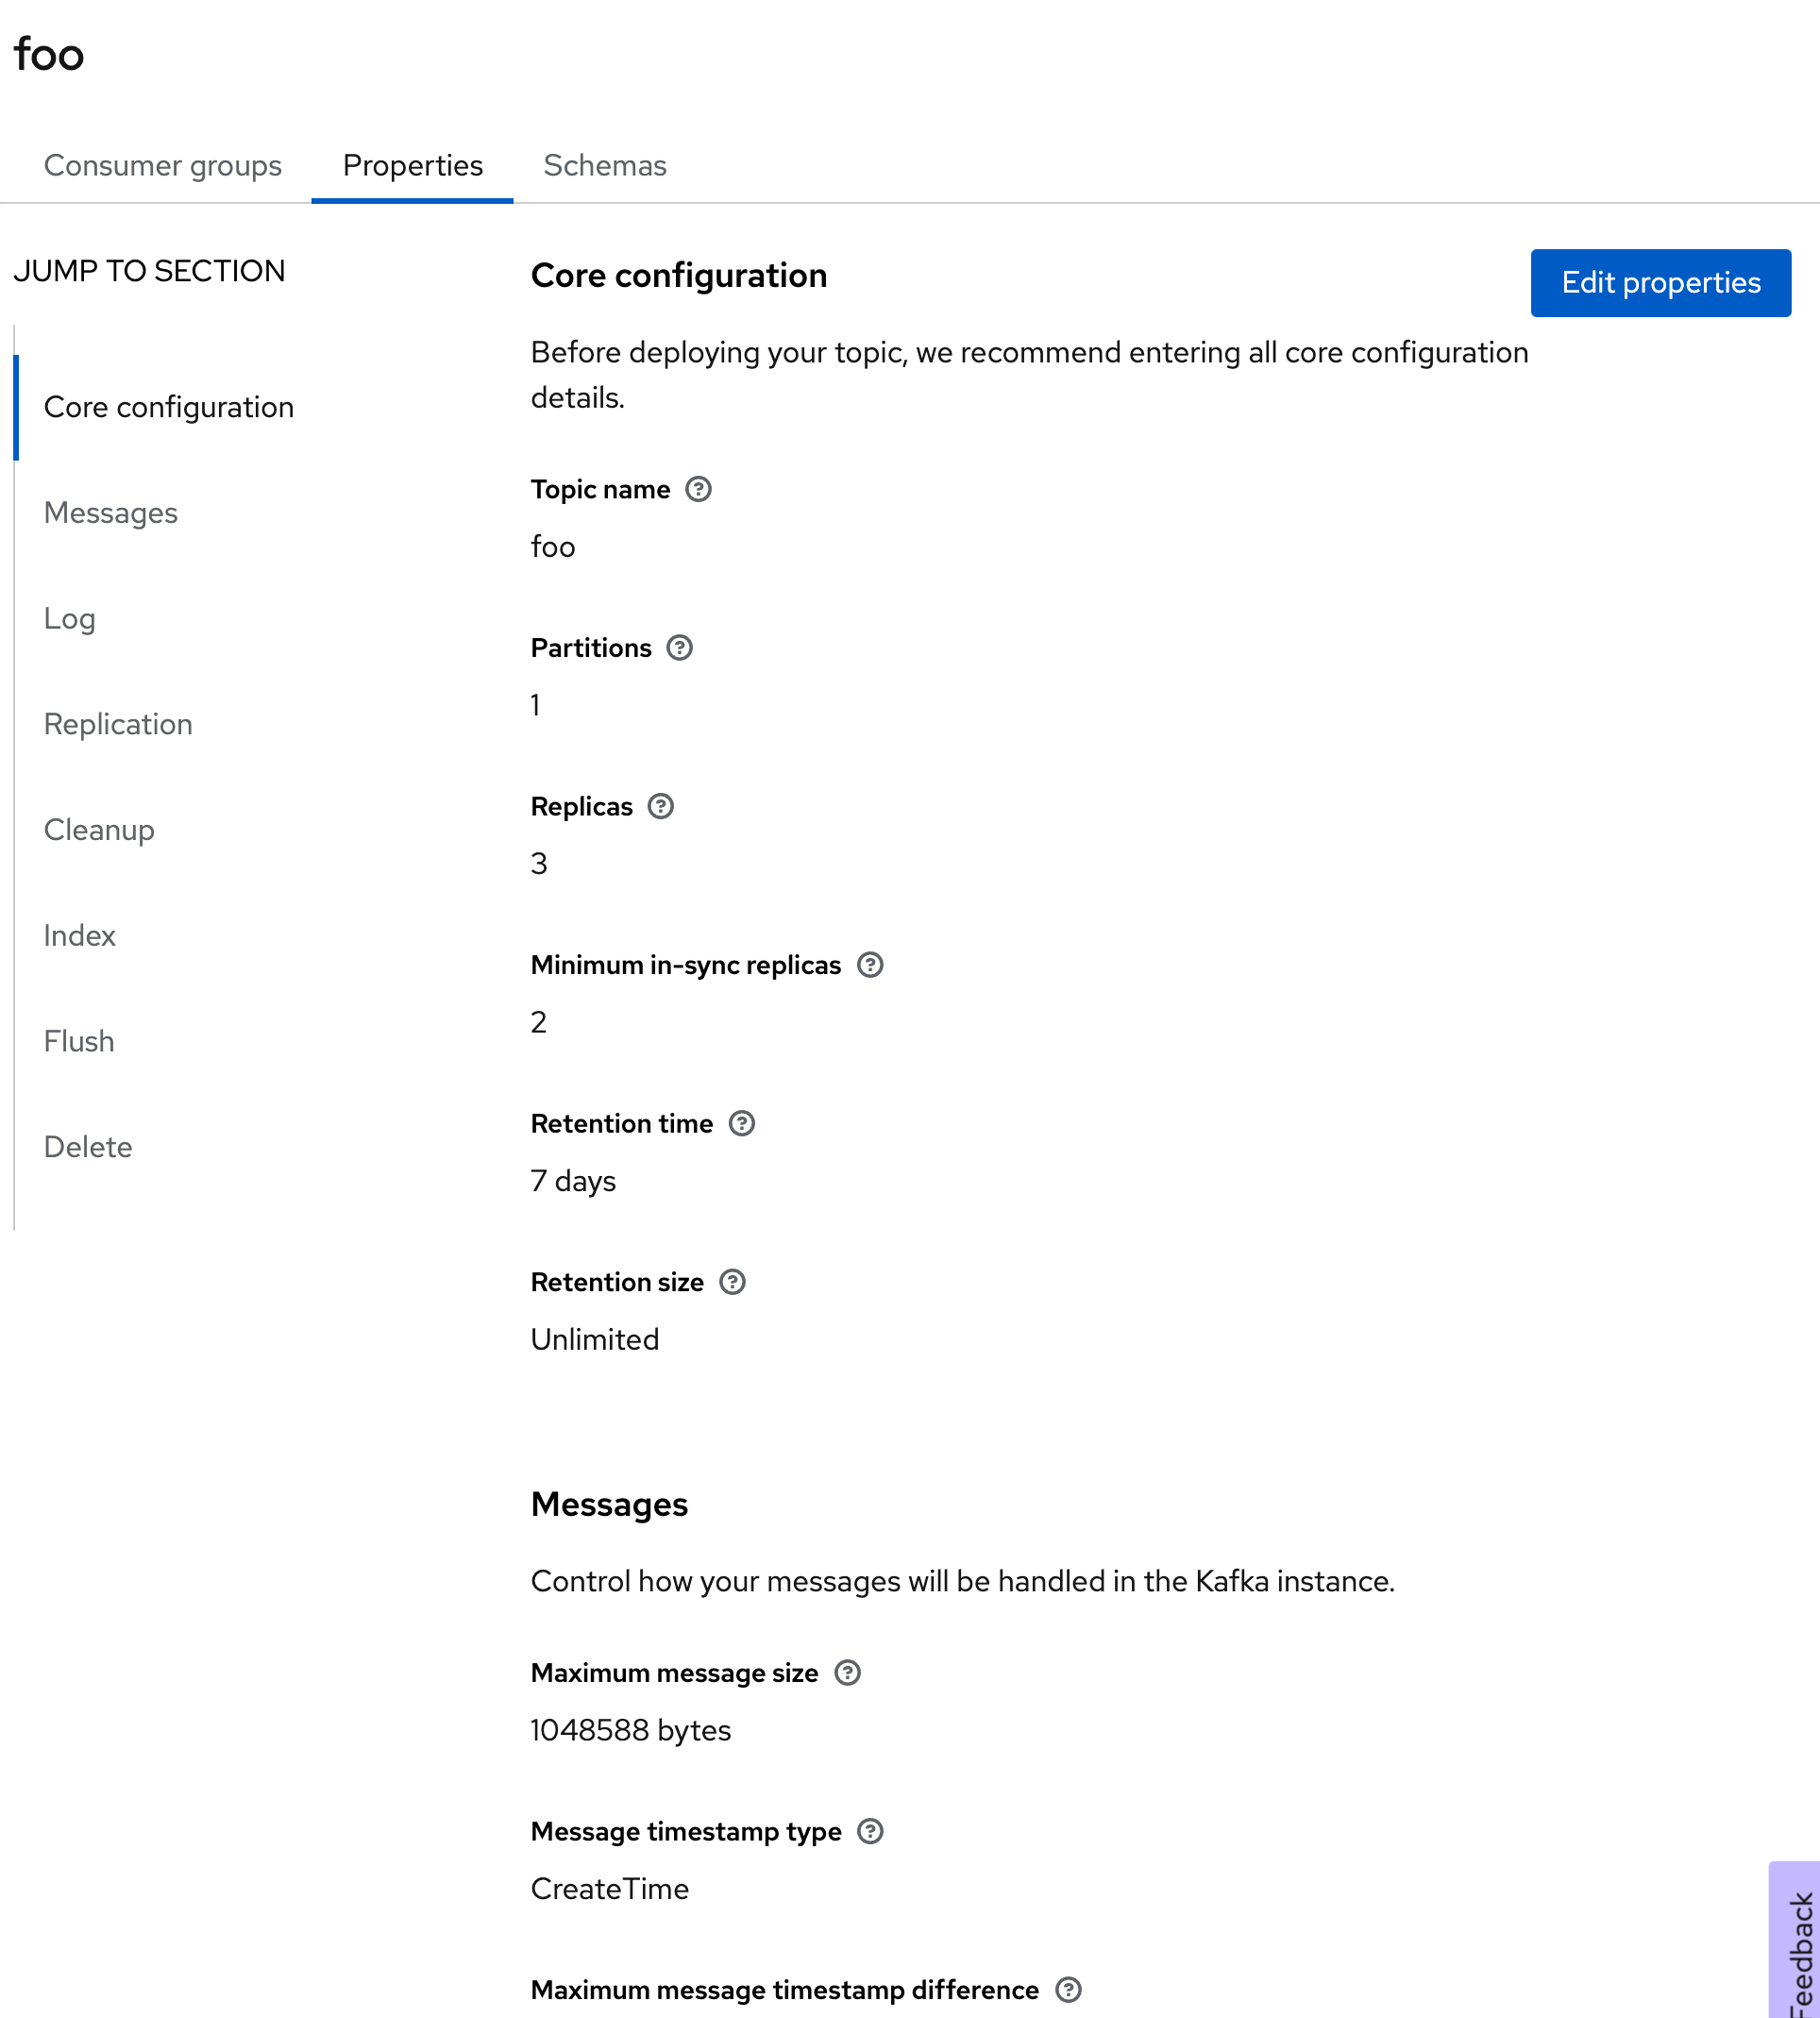
Finally, create a topic, foo, and accept the defaults, as shown in Figure 3.
Set up OpenShift Dedicated
You'll need a Kubernetes cluster in order to run Strimzi. This example uses Red Hat OpenShift Dedicated, but you could also use Red Hat OpenShift Container Platform, or you could install Strimzi yourself on any Kubernetes distribution.
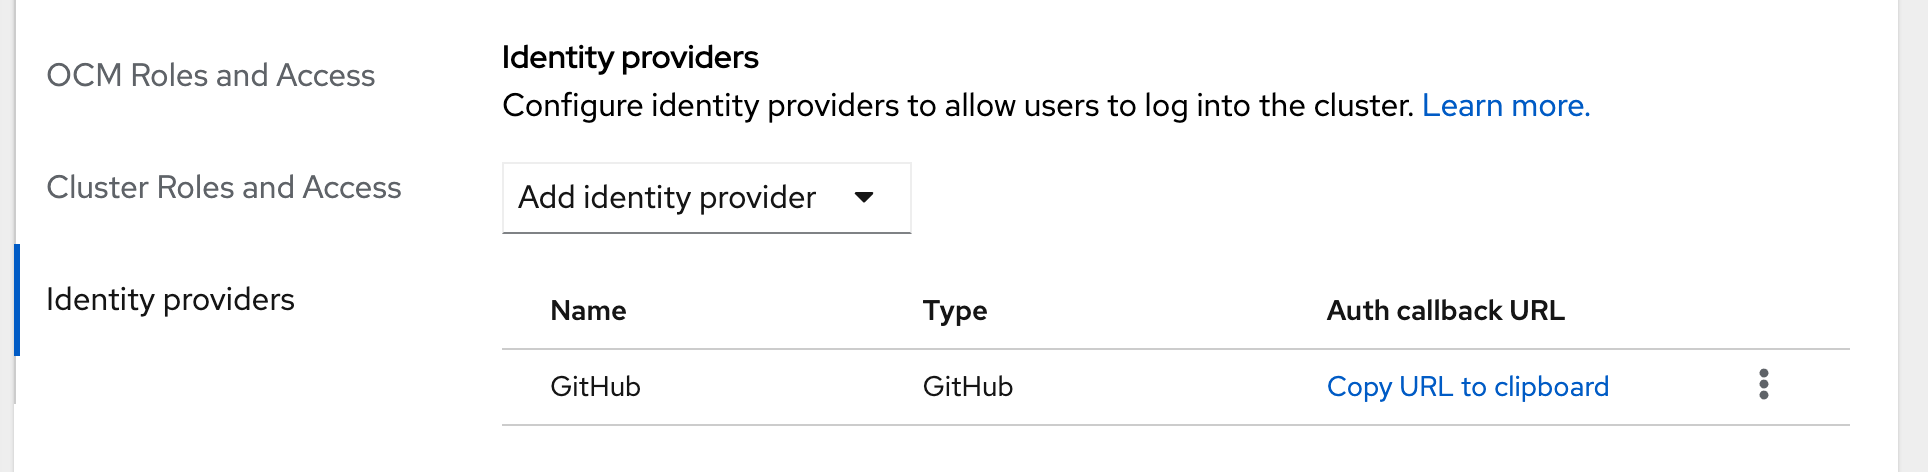
Following the Installation guide, create a Customer Cloud Subscription cluster on Amazon Web Services (AWS). Then follow the Configuring a GitHub identity provider guide so you can use your GitHub ID to log in to OpenShift. (Other options are available, but our example is based on this login method.) The results should look like Figure 4.
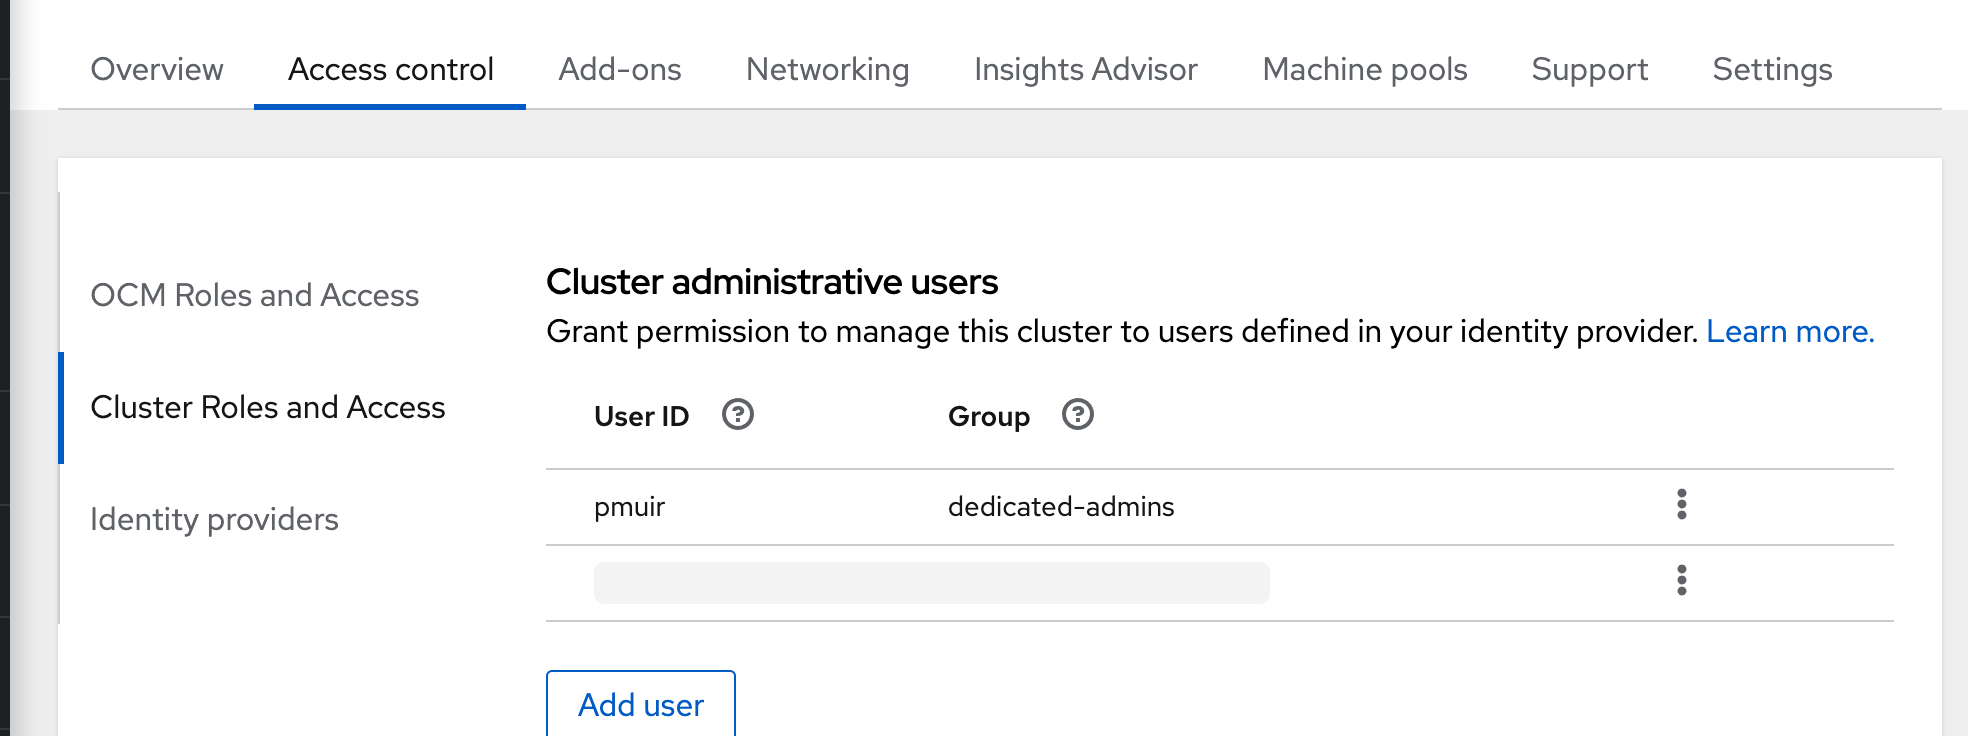
Finally, give this GitHub user the dedicated-admins role by following the Managing administration roles and users guide. The result should be what you see in Figure 5. Note that you need to use your GitHub username as the principal here.
Now you can log into the console using the Open Console button.
Set up Strimzi
To install Strimzi on OpenShift Dedicated, navigate to Operators -> OperatorHub. Filter for Strimzi, click Install, and accept the defaults. You can validate that Strimzi is installed by checking the Installed Operators list. If you prefer to use the kubectl command-line interface with a Kubernetes cluster, you can switch to a terminal and copy the login command from the OpenShift console user menu to set up your Kubernetes context.
Now we have setup Strimzi, and two OpenShift Streams for Apache Kafka instance our major elements as shown in Figure 6.
Configure MirrorMaker 2
Strimzi uses Kubernetes custom resources to configure MirrorMaker. Load the following code into your editor; note that in this listing and elsewhere, code that you'll need to modify with information specific to your setup is surrounded by angle brackets (< >). Save the file to disk as mm2.yml. The snippet includes inline comments to help you understand the configuration. In particular, note that you're reducing the sync interval to 60 seconds. This will make debugging for development easier because it provides a faster feedback loop. You would probably want to set this back to the default for production use.
apiVersion: kafka.strimzi.io/v1beta2
kind: KafkaMirrorMaker2
metadata:
  name: my-mirror-maker2
spec:
  clusters:
    -
      alias: my-cluster-source
      authentication:
        clientId: "<Source Client ID>" # The Client ID for the service account for the source Kafka cluster
        clientSecret: # A reference to a Kubernetes Secret that contains the Client Secret for the service account for the source Kafka cluster
          key: client-secret
          secretName: source-client-secret
        tokenEndpointUri: "https://sso.redhat.com/auth/realms/redhat-external/protocol/openid-connect/token"
        type: oauth # Red Hat OpenShift Streams for Apache Kafka prefers OAuth for connections
      bootstrapServers: "<Source Cluster Bootstrap server>" # The bootstrap server host for the source cluster
      tls: # Red Hat OpenShift Streams for Apache Kafka requires the use of TLS with the built in trusted certificates
        trustedCertificates: []
    -
      alias: my-cluster-target
      authentication:
        clientId: "<Target Client ID>" # The Client ID for the service account for the target Kafka cluster
        clientSecret: # A reference to a Kubernetes Secret that contains the Client Secret for the service account for the target Kafka cluster
          key: client-secret
          secretName: target-client-secret
        tokenEndpointUri: "https://sso.redhat.com/auth/realms/redhat-external/protocol/openid-connect/token"
        type: oauth # Red Hat OpenShift Streams for Apache Kafka prefers OAuth for connections
      bootstrapServers: "<Target Cluster Bootstrap server>" # The bootstrap server host for the source cluster
      config: # Red Hat OpenShift Streams for Apache Kafka requires a replication factor of 3 for all topics
        config.storage.replication.factor: 3
        offset.storage.replication.factor: 3
        status.storage.replication.factor: 3
      tls: # Red Hat OpenShift Streams for Apache Kafka requires the use of TLS with the built in trusted certificates
        trustedCertificates: []
  connectCluster: my-cluster-target
  mirrors:
    -
      checkpointConnector:
        config:
          checkpoints.topic.replication.factor: 3 # Red Hat OpenShift Streams for Apache Kafka requires a replication factor of 3 for all topics
          emit.checkpoints.interval.seconds: 60 # Setting sync interval to 60 seconds is useful for debugging
          refresh.groups.interval.seconds: 60 # Setting sync interval to 60 seconds is useful for debugging
          sync.group.offsets.enabled: true # Enable sync'ing offsets
          sync.group.offsets.interval.seconds: 60 # Setting sync interval to 60 seconds is useful for debugging
      sourceCluster: my-cluster-source
      sourceConnector:
        config:
          refresh.topics.interval.seconds: 60 # Red Hat OpenShift Streams for Apache Kafka requires a replication factor of 3 for all topics
          replication.factor: 3  # Red Hat OpenShift Streams for Apache Kafka requires a replication factor of 3 for all topics
          sync.topic.acls.enabled: true # Enable sync'ing offsets
      targetCluster: my-cluster-target
      topicsPattern: .* # Sync all topics
  replicas: 1 # Running a single replica of MirrorMaker makes debugging the logs easier
Create your secrets
As you can see in the configuration file, you will need a couple of secrets for storing the client authentication for each cluster. You'll create those next. First, create the secret for the source cluster as follows, using your client secret for the service account you created for the source cluster:
kubectl create secret generic source-client-secret --from-literal=client-secret=<Source Client Secret>
Next, create the secret for the target cluster, using your client secret for the service account you created for the target cluster:
kubectl create secret generic target-client-secret --from-literal=client-secret=<Target Client Secret>
Finally, apply the MirrorMaker configuration you created above:
kubectl apply -f mm2.yml
Check your work
To ensure that everything worked, run kubectl get kmm2 -o yaml and check that the condition has status: True. If you encounter problems, you may have copied some of the configurations incorrectly, or the authorization could be wrong. The MirrorMaker logs don't highlight errors very well (they tend to be in there as warnings) but if you dig through them, you should be able to find a pointer.
If you check the target cluster in the OpenShift Streams for Apache Kafka UI, you should now see a number of topics created by MirrorMaker, including one called my-cluster-source.foo.
Test MirrorMaker's synchronization
To confirm that messages are being synchronized, follow the Kafkacat guide to producing and consuming messages. In this case, you'll produce the message on the source cluster and consume it from the target cluster.
Open one terminal window for each cluster. In the terminal for the source cluster, set these three environment variables:
export BOOTSTRAP_SERVER=<Source cluster Bootstrap server>
export CLIENT_ID=<Source Client ID>
export CLIENT_SECRET=<Source Client Secret>
In the terminal for the target cluster, set these three environment variables:
export BOOTSTRAP_SERVER=<Target cluster Bootstrap server>
export CLIENT_ID=<Target Client ID>
export CLIENT_SECRET=<Target Client Secret>
Now go back to the first terminal and produce a message to the source cluster:
kcat -t foo -b $BOOTSTRAP_SERVER -X security.protocol=SASL_SSL -X sasl.mechanisms=PLAIN -X sasl.username="$CLIENT_ID" -X sasl.password="$CLIENT_SECRET" -P
In the second terminal, consume it from the target cluster:
kcat -t my-cluster-source.foo -b "$BOOTSTRAP_SERVER" -X security.protocol=SASL_SSL -X sasl.mechanisms=PLAIN -X sasl.username="$CLIENT_ID" -X sasl.password="$CLIENT_SECRET" -
There may be a bit of delay caused by MirrorMaker 2's synchronization period.
Conclusion
In this article, I've shown you how to use Apache Kafka MirrorMaker 2 to replicate data between two OpenShift Streams for Apache Kafka instances, using Strimzi to configure and run MirrorMaker 2 on an OpenShift Dedicated cluster.
Last updated: March 18, 2024