Page
Create a Red Hat Developer Hub template
What we are going to do now is create a Software Template. It is simplistic, but will demonstrate some of the things you can do with templates.
The template itself is at:
https://github.com/backstage/software-templates/blob/main/scaffolder-templates/create-react-app/template.yamlThis template:
- Defines a set of input parameters–in this case a name and a git repo to create.
- Fetches the content of another GitHub repo, which contains a component definition for Developer Hub.
- Publishes a copy of this repo to the new repo.
- Instantiates the component (a set of links).
It’s a pithy example but will show the mechanics of an installed and working Developer Hub.
In this lesson, you will:
- Configure the RHDH install to use the GitHub plugin for talking to Git repositories.
- Create a template using an example.
Configure the RHDH install to use the GitHub plugin for talking to Git repositories
Red Hat Developer Hub is incredibly extensible using concepts called ‘plugins’. These provide functional endpoints in external functionality that can be called from within templates (plugins also provide Ux extensions for the Portal that is provided to the end user).
We are going to use a template that interacts with GitHub, and as such we need to add the plugin to the RHDH install in order for it to understand the actions the template is going to use.
The plugin is actually part of the install, but is not installed by default. Do the following steps to enable it:
- On the OpenShift User Interface, click on Helm and then Releases.
- Select the kebab (three vertical dots) next to the active Red Hat Developer Helm release and choose the Upgrade option.
- Click YAML View.
Add the following code under the clusterRouterBase definition:
clusterRouterBase: apps.sandbox-m2.ll9k.p1.openshiftapps.com
  dynamic:
    includes:
      - dynamic-plugins.default.yaml
    plugins:
      - package:
'./dynamic-plugins/dist/backstage-plugin-scaffolder-backend-module-github-dynamic'
          disabled: false
Important: The location must follow the package: directly (Make sure there is no line feed).
Now click on Upgrade and wait for the Red Hat Developer Hub Pod to be healthy. Watch the roundel in the Topology until it turns a darker blue - the same as the PostGres roundel.
Create the template
To start the process, add a template that users can work with. You can do this from the Red Hat Developer Hub interface:
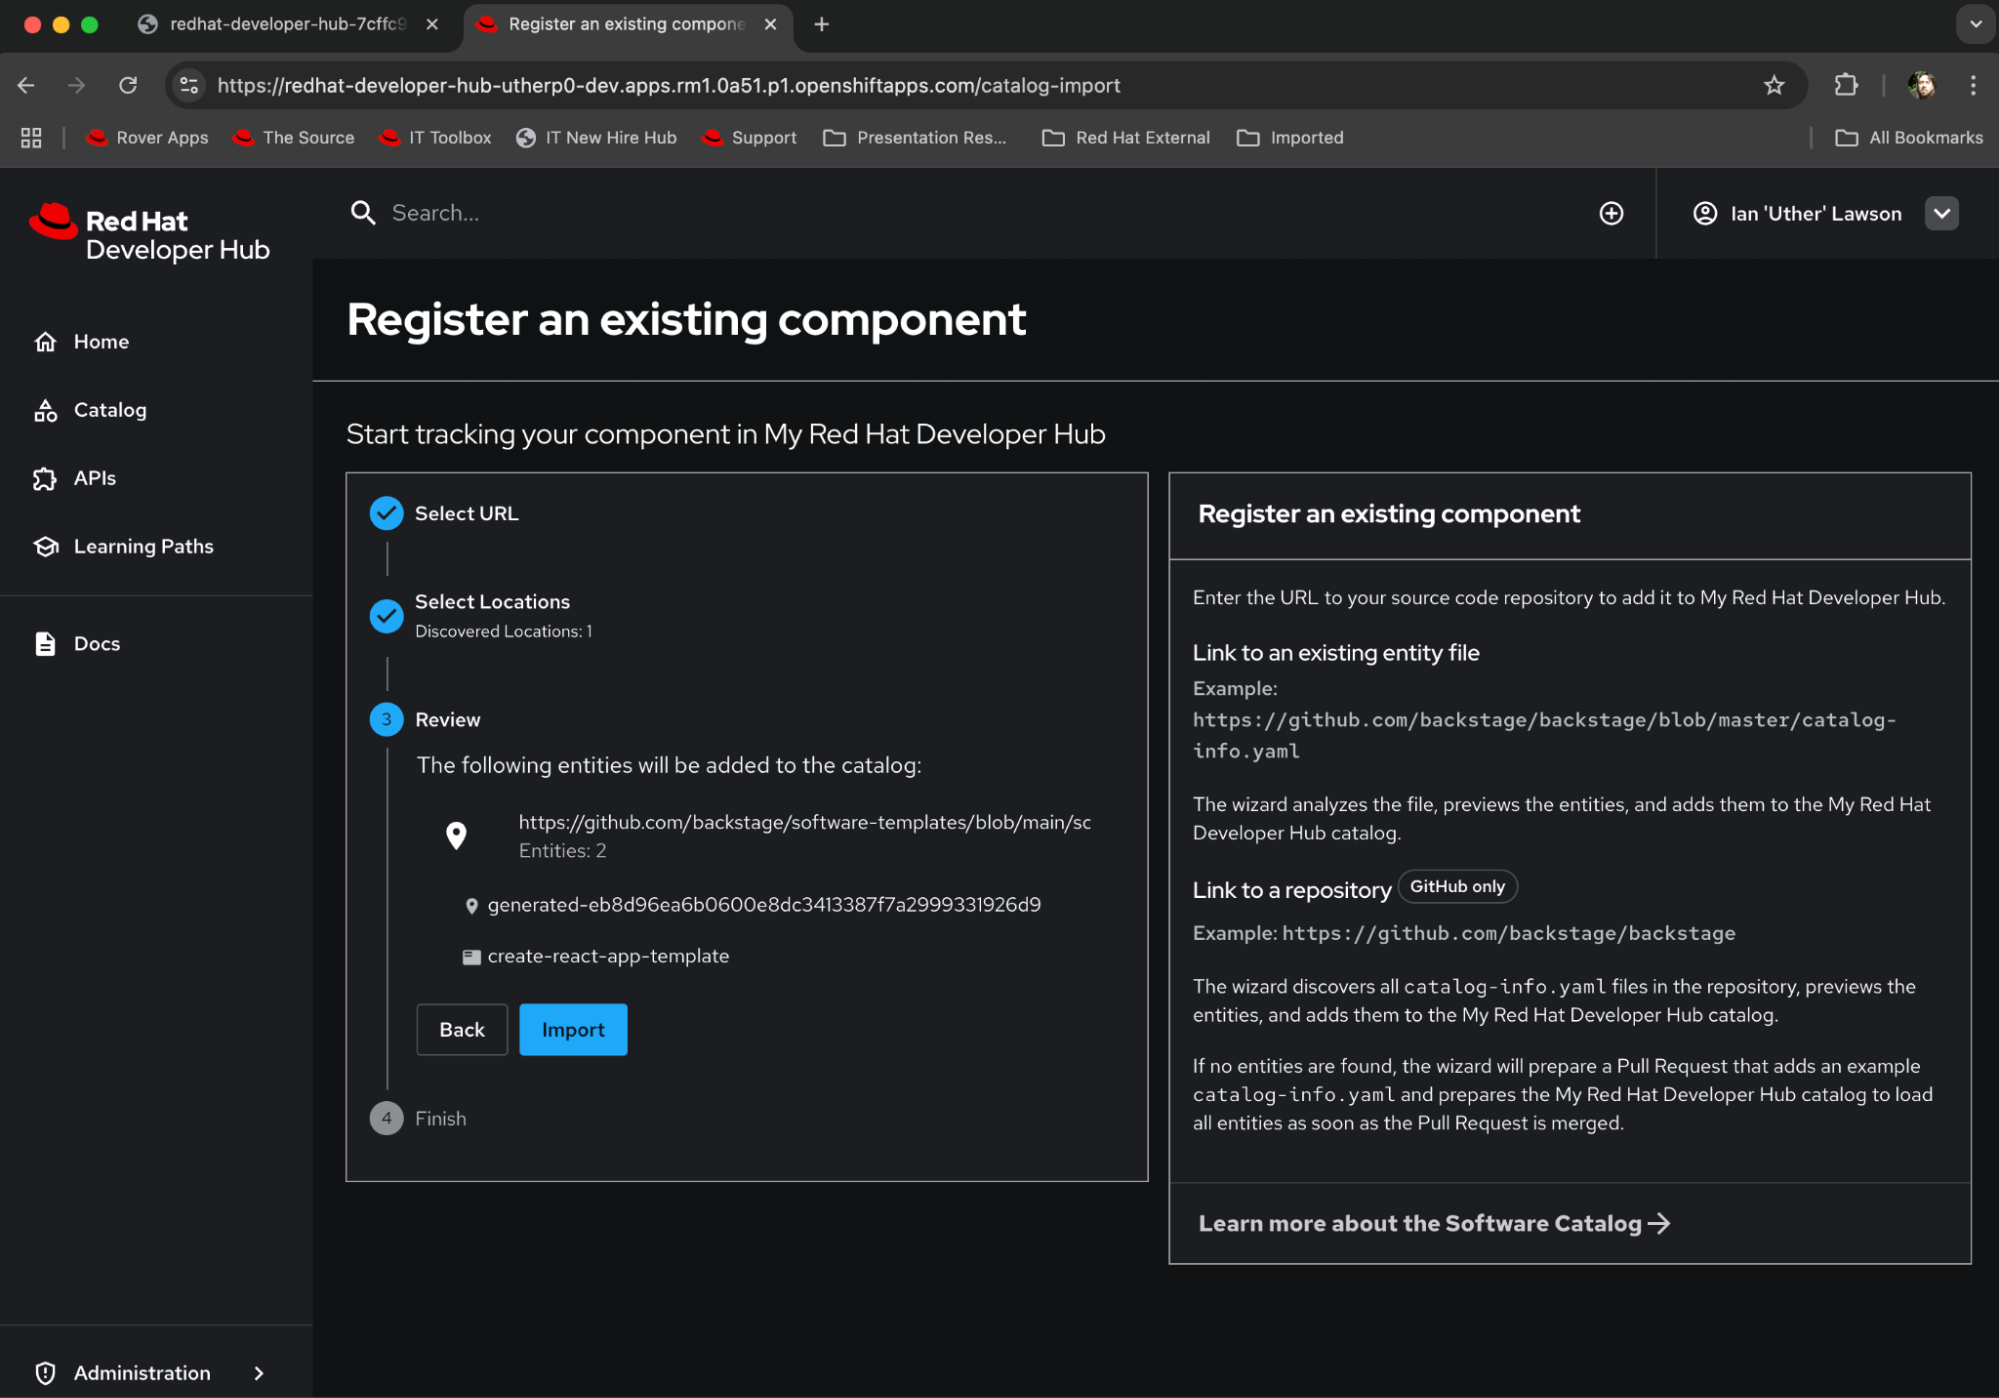
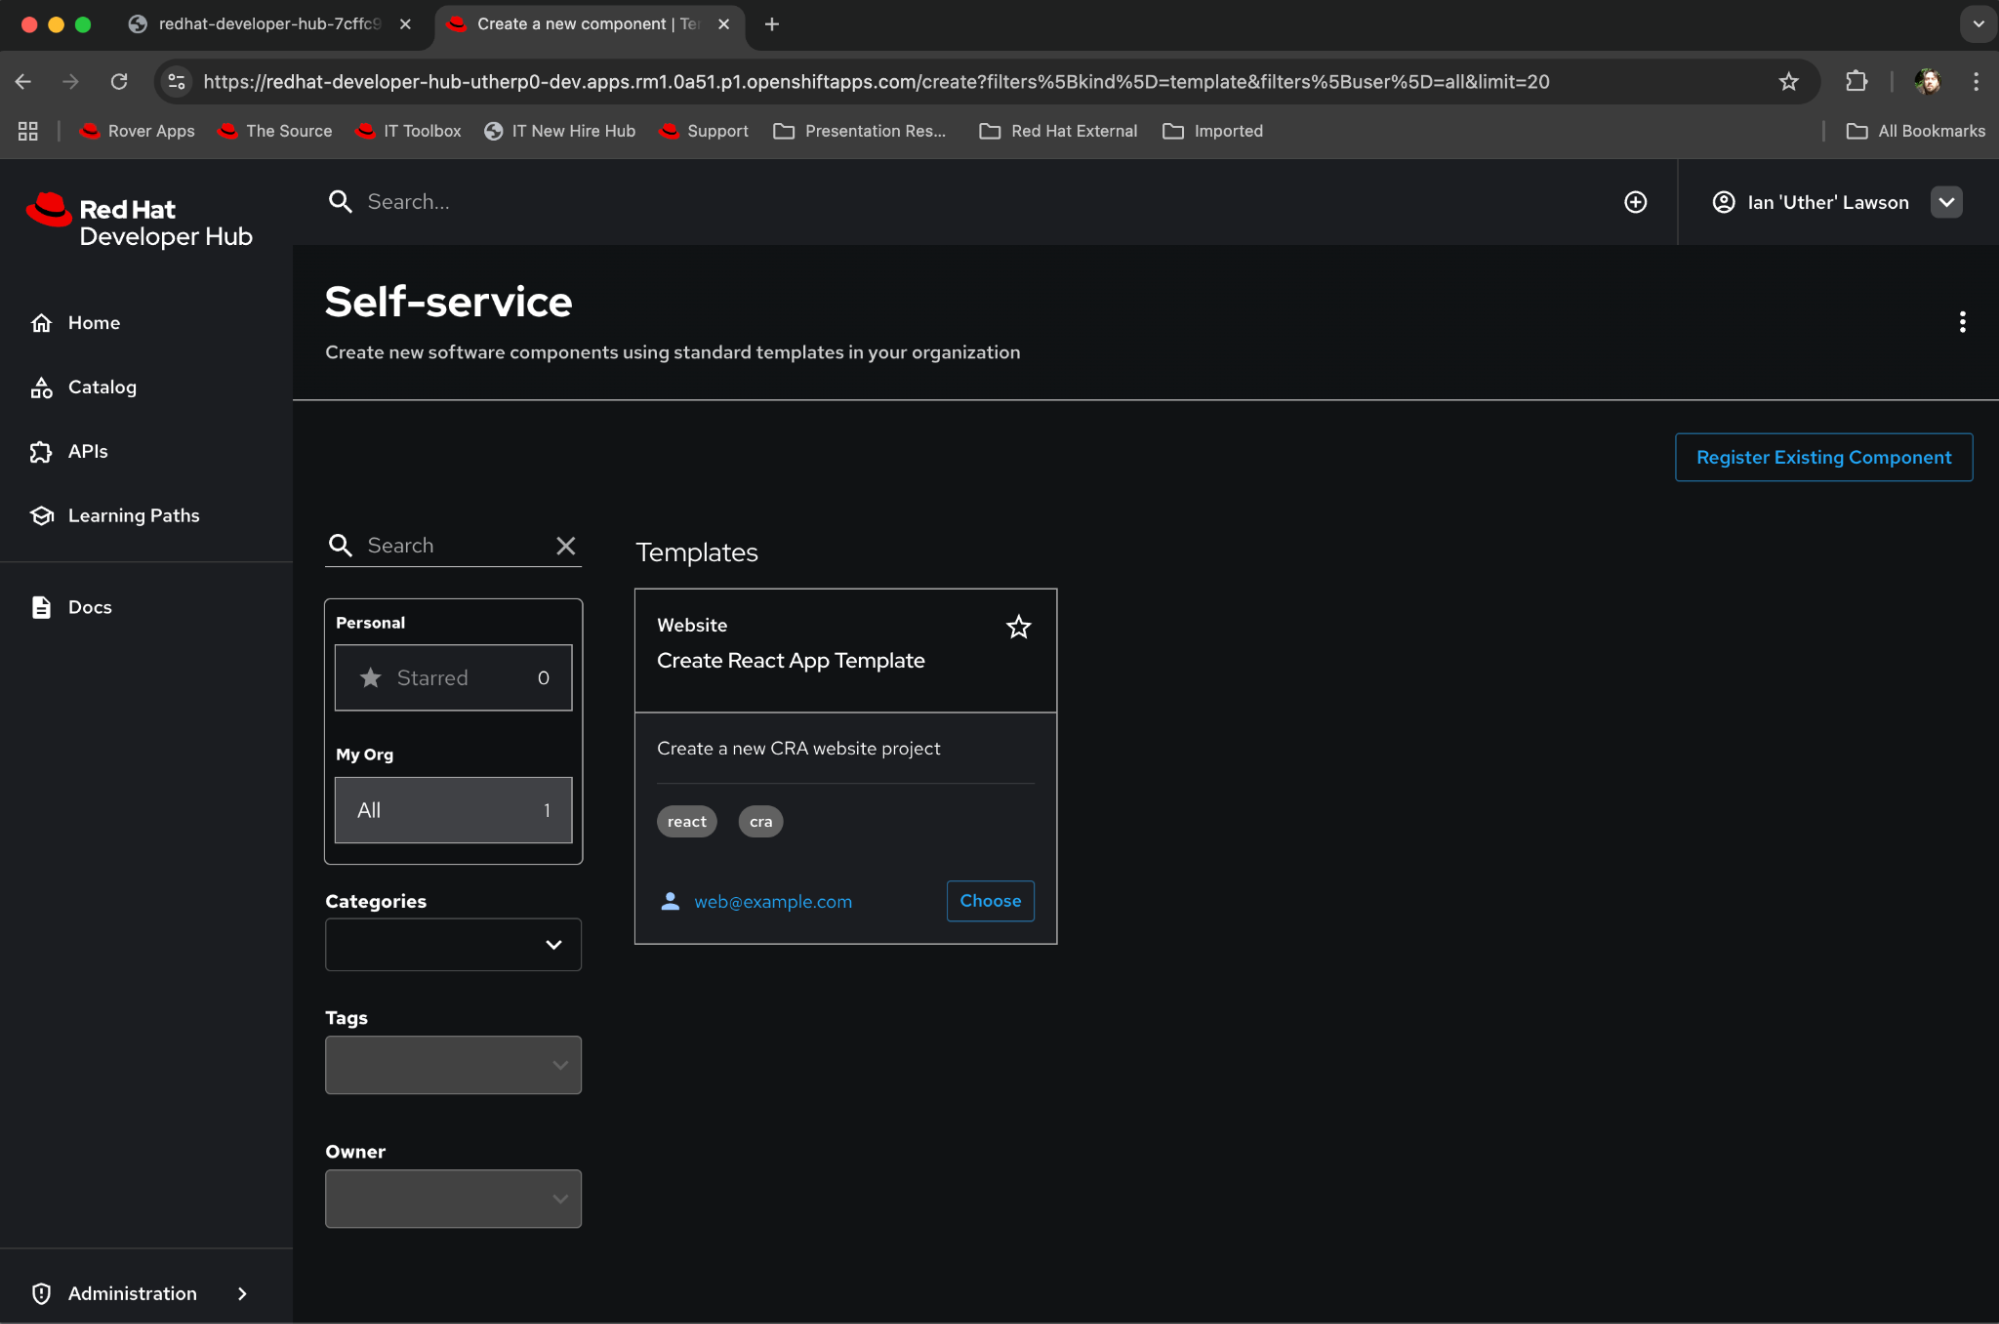
Click Catalog and then click Self-service. You will see a dialog that looks like Figure 18.
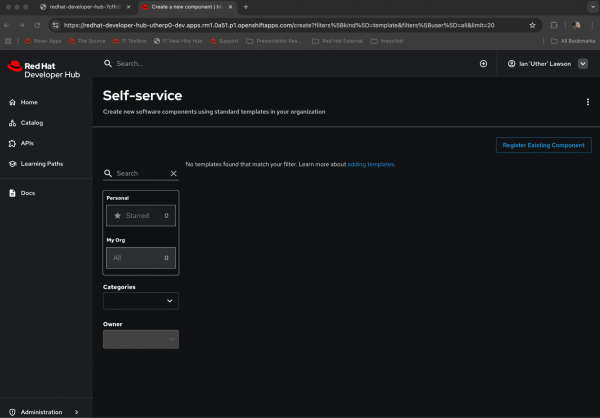
Figure 16: Create a new template by starting from the Golden Path Templates screen. Figure 18: Create a new template by starting from the Golden Path Templates screen. - Click Register Existing Component. You will provide it with the YAML definition for the template actions.
In the URL field, enter:
https://github.com/backstage/software-templates/blob/main/scaffolder-templates/create-react-app/template.yamlThis is the raw template YAML to be added.
Once you have entered the URL, click Analyze. The system will process the YAML and provide a review (Figure 19).
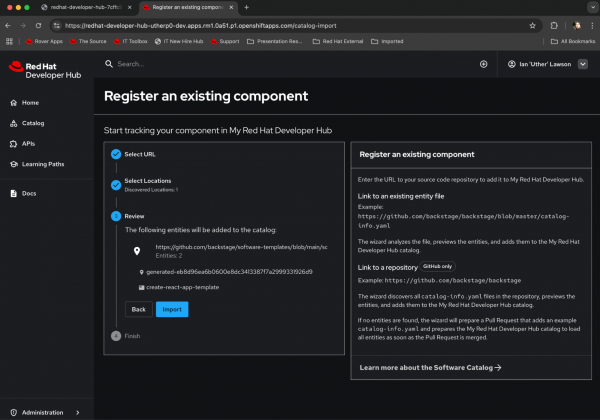
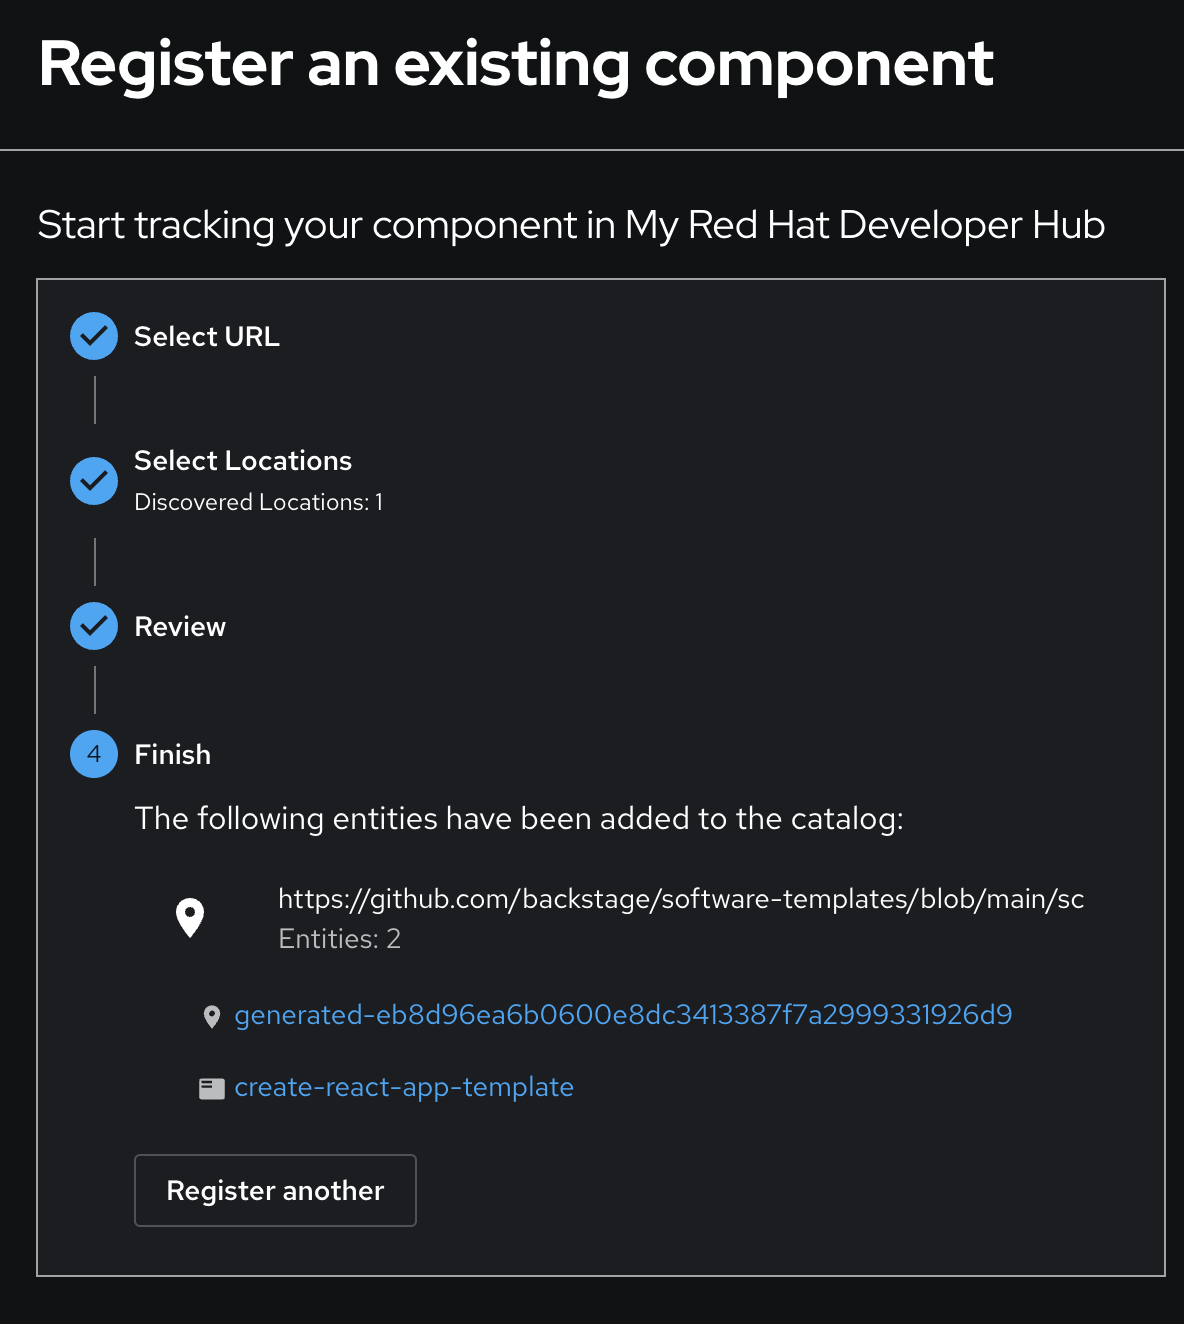
Figure 17: Register an existing component to create a new template. Figure 19: Register an existing component to create a new template. Select IMPORT. This will map the template into the system so it can be used. The output should look like Figure 20.
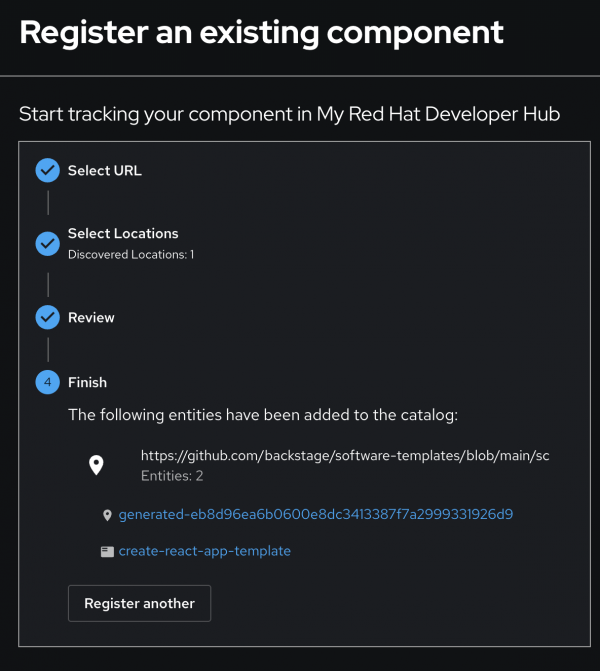
Figure 18: The results of registering your new template. Figure 20: The results of registering your new template. - We have added what is known as a location (the root source in the Developer Hub system) and a template called create-react-app-template.
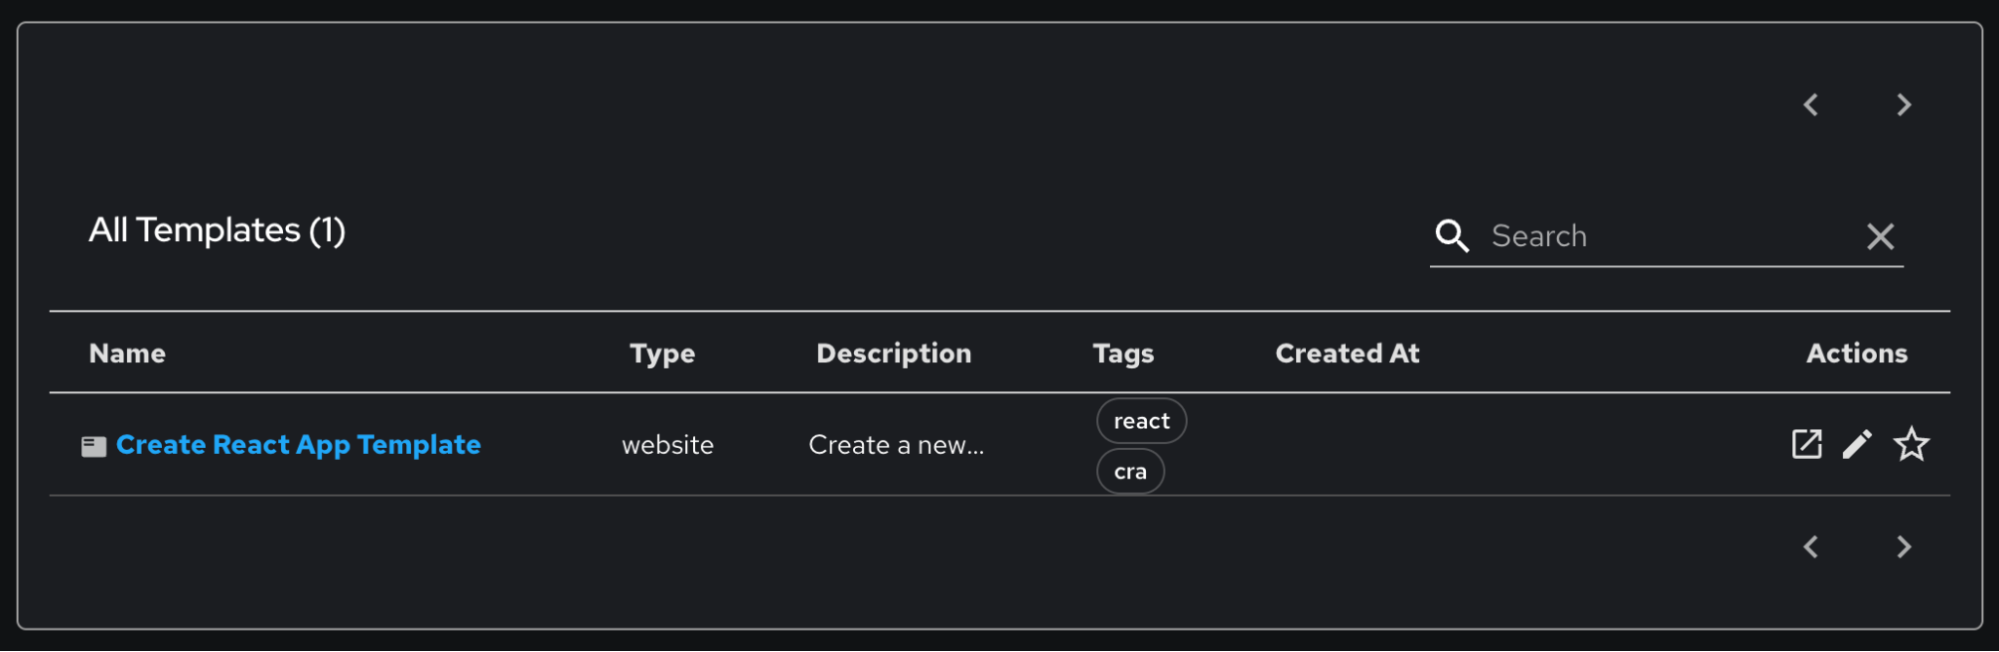
Click Catalog and set the Kind filter to Template. You will see the template is installed and ready to use (Figure 21).
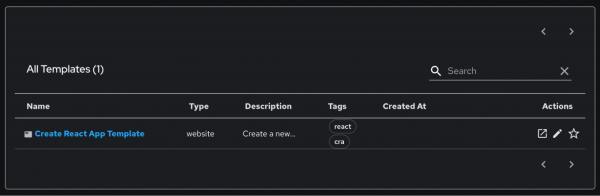
Figure 19: Filter the kind of entry in the catalog to see your new template. Figure 21: Filter the kind of entry in the catalog to see your new template. Click Self-service on the top right side of the content panel. You will get a choice panel with all of your templates installed. We have a grand total of one available template (Figure 22).

Figure 20: Your installed templates show up in the Golden Path Templates screen. Figure 22: Your installed templates show up in the Golden Path Templates screen.

Instantiate the template
Now we can create an instance of this template. It will scaffold a code repository, and instantiate a Catalog item that contains some essential links. Basically, a developer coming in and using this template would get a code repository to work on and some documentation to help.
To instantiate the template in the Red Hat Developer Hub Self-service screen, click CHOOSE at the bottom right of the ‘Create React App Template’
Developer Hub will process the template as defined, prompting you for additional parameters:
- In the Create React App Template screen, enter what to call the template instance in the Name box (for example, myreactapp). This name will appear in the Catalog once the template has completed.
- The Owner field allows you to map this to a user in the system. Set it to your GitHub username.
- Click Next Step. We already logged in via GitHub, so the host of the repositories will be shown as GitHub.
- Under Owner, enter your GitHub username.
- Under Repository, provide a repository name. The Template will create this repository in GitHub for your user. Since we authenticated with GitHub, Developer Hub has access to the repositories.
- Click Review We have now provided all of the parameters that the template defined that we needed. You will see a panel that shows the parameters you provided.
- Click Create.
Developer Hub will process the template actions, which will be displayed in order, along with their results. This order is defined by the actions in the template. The template's activity will then be displayed, including any failures. If the template completes successfully, you will see an output similar to Figure 23.
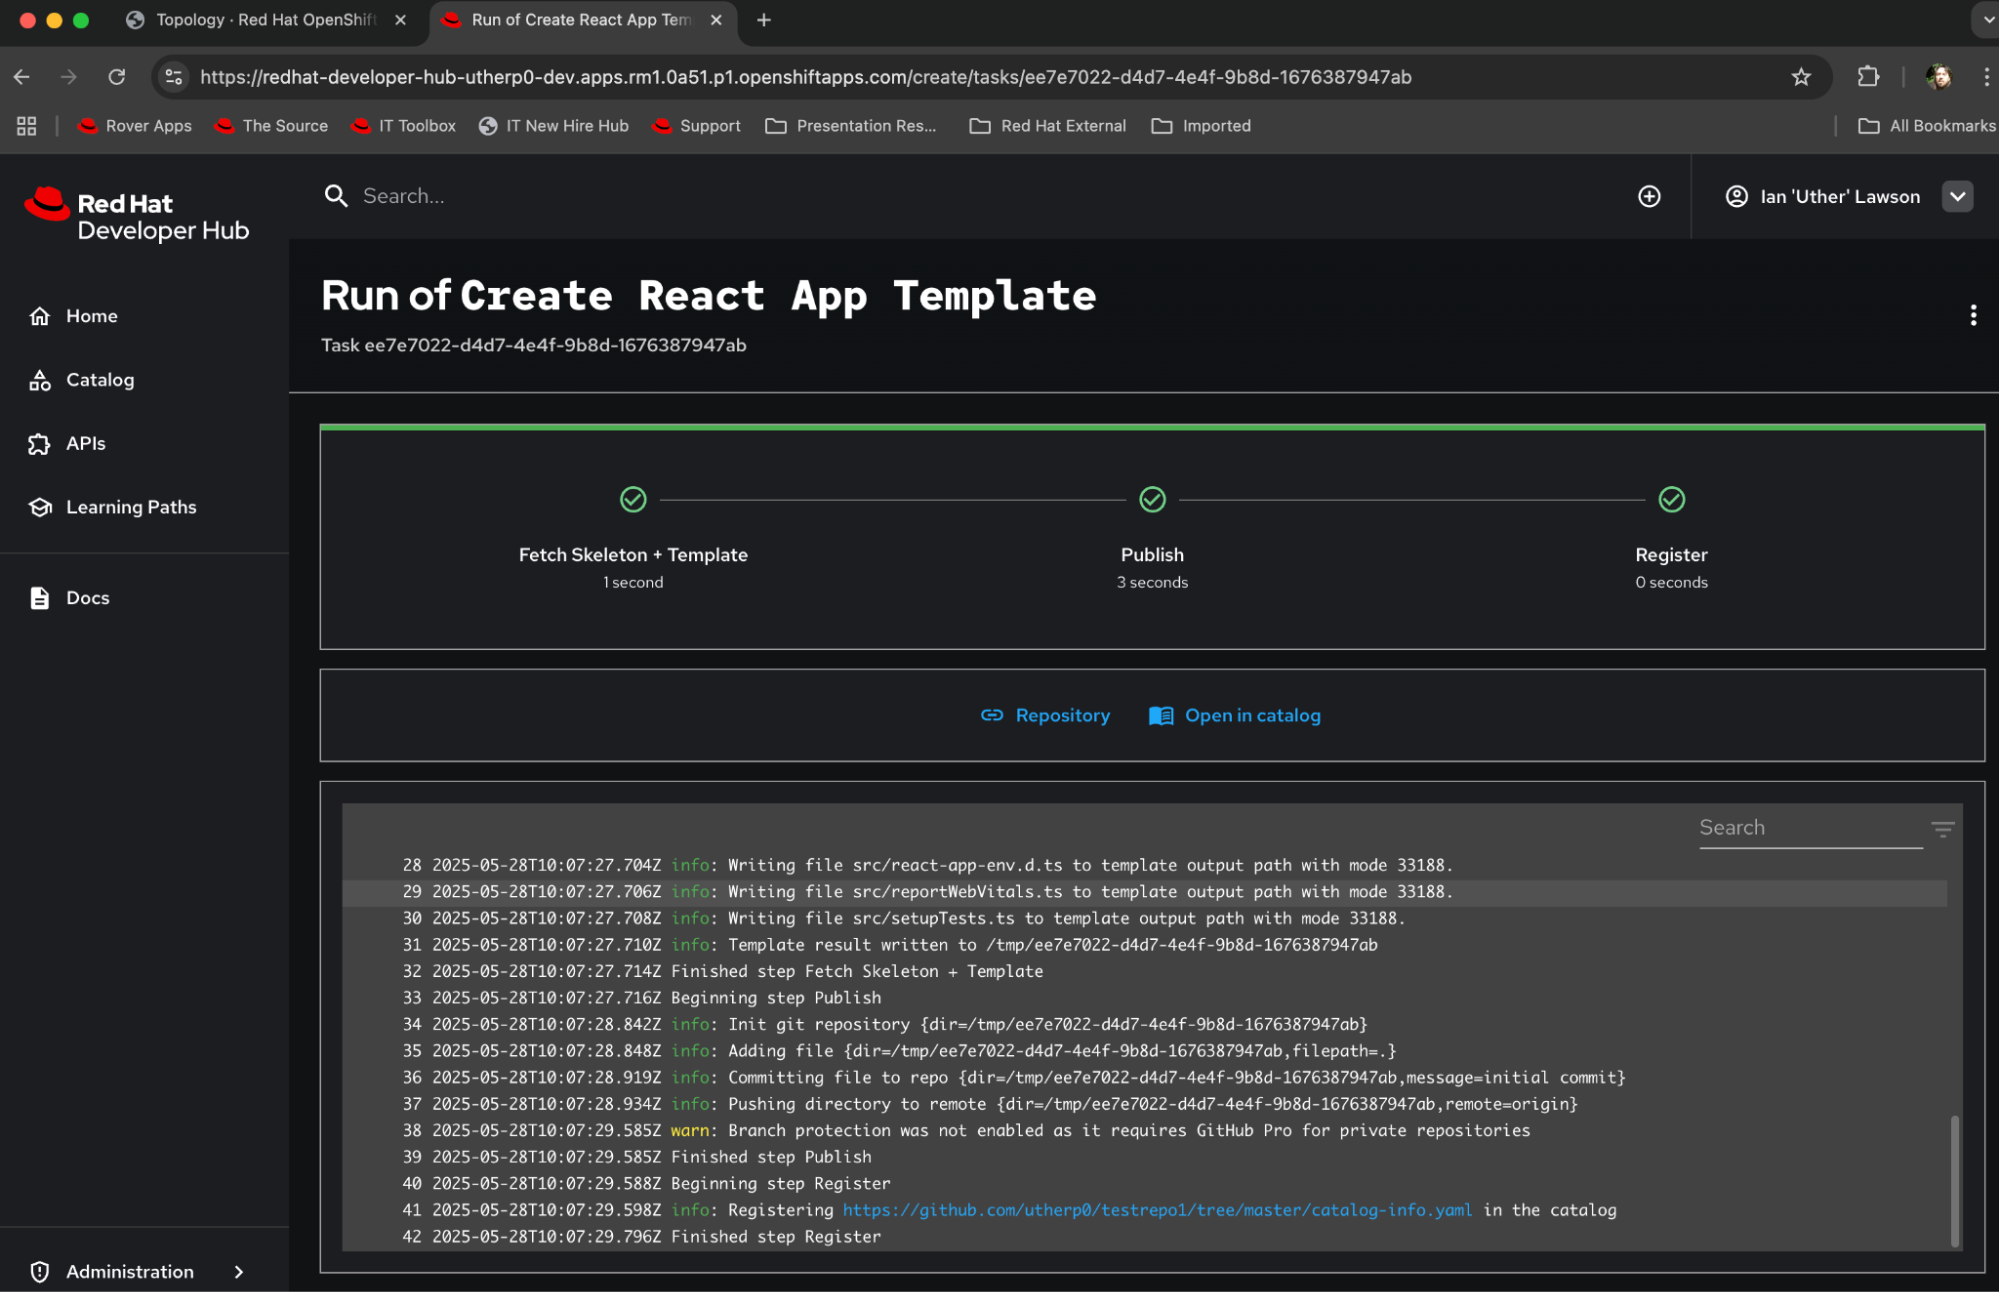
At the bottom of the list of ordered tasks, there will be two icons:
- One icon is for the repository it created. Click on this icon to see the fully populated code repository in your GitHub account.
- The other icon is for a direct link to the Catalog item that we created as part of the register phase.
If you click on the Catalog and make sure the Kind filter is set to Component, you will see a new component the template added called backstagedocs, which links to a set of useful Backstage URLs.
At this point, the template has walked the developer through entering required parameters, generated a code repository, and created a usable component within the developer’s Internal Developer Portal (IDP).
Summary
We have walked you through a simplistic example that shows the composite power of the Red Hat Developer Hub for administrators and platform engineers. In upcoming learning paths, we will dive into appropriately setting up the users/groups and controls and give a deeper look into the fantastic developer experience of an Developer Hub end user.
Ready to onboard onto your installed Red Hat Developer Hub instance and run your first application? Proceed to the next learning path: Application development with Red Hat Developer Hub.
