Page
Prerequisites and step-by-step guide

Prerequisites
To run through the learning exercise you need to install Node.js and to clone the ai-experimentation repository. To set up these prerequisites:
- If you don’t already have Node.js installed, install it using one of the methods outlined on the Nodejs.org download page.
Clone the ai-experimentation repository with:
git clone https://github.com/mhdawson/ai-experimentation- cd ai-experimentation/lesson-3-4
- Create a directory called models.
- Download the mistral-7b-instruct-v0.1.Q5_K_M.gguf model from HuggingFace and put it into the model’s directory. This might take a few minutes, as the model is over 5GB in size.
Install the applications dependencies with
npm installCopy over the markdown files for the Node.js Reference Architecture into the directory from which we’ll read additional documents to be used for context:
mkdir SOURCE_DOCUMENTS git clone https://github.com/nodeshift/nodejs-reference-architecture.git cp -R nodejs-reference-architecture/docs SOURCE_DOCUMENTSFor windows use the file manager and make sure to copy the docs and all subdirectories to SOURCE_DOCUMENTS.
- Install nodeshift as outlined in nodeshift CLI for OpenShift Node.js deployment.
From some parts of the learning exercise, you will also need either an OpenAI key or an accessible Openshift.ai instance running an vLLM runtime and its endpoint to run the examples shown. Having said that, you can easily follow along without either of those.
To deploy vLLM Model Serving instance in Openshift.ai in the OpenAI compatible API mode, deploy following one of these two sets of instructions:
In both cases, make sure you deploy the model mistral-7b-instruct-v0.1.Q5_K_M.gguf
If you have an OpenAI key, you will need to put that key in a file called key.json in the directory immediately outside of the lesson-3-4 directory. The key.json file should be in this format:
{
 "apiKey": "your key"
}Step-by-step guide
1. Exploring how to use different deployment options
To explore how you can use different deployment options we’ll look at the code in langchainjs-backends.mjs. In that example we’ve added a function to allow creation of the model with different back ends and you can see that we have the following options, where you can uncomment the one you choose to use:
////////////////////////////////
// GET THE MODEL
const model = await getModel('llama-cpp', 0.9);
//const model = await getModel('openAI', 0.9);
//const model = await getModel('Openshift.ai', 0.9);Uncommenting the desired line is the only change you need to do in order to switch the application to use a different backend. This illustrates how you can easily develop locally (or whatever makes sense in your organization) and then switch to the appropriate backend for production. It also means it should be easy for organizations to switch from one backend to another, avoiding lock-in that might come from coding to a specific services API or endpoint.
If you run the example without modification it will run with the local model using llama-cpp. The example uses Retrieval Augmented Generation (RAG) with a Node.js application in order to optimize the AI application. It leverages the Node.js Reference Architecture in order to improve how the AI application answers a question on how to start a Node.js application. It uses Langchain.js to simplify interacting with the model and by default uses node-llama-cpp to run the model in the same Node.js process as your application. As we progress through the learning example we will show you how to run the application with Openshift.ai and OpenAI.
Now let’s look at the getModel method to see what’s needed for each backend:
async function getModel(type, temperature) {
  console.log("Loading model - " + new Date());
  let model;
  if (type === 'llama-cpp') {
    ////////////////////////////////
    // LOAD MODEL
    const __dirname = path.dirname(fileURLToPath(import.meta.url));
    const modelPath = path.join(__dirname, "models", "mistral-7b-instruct-v0.1.Q5_K_M.gguf")
    const { LlamaCpp } = await import("@langchain/community/llms/llama_cpp");
    model = await new LlamaCpp({ modelPath: modelPath,
                                 batchSize: 1024,
                                 temperature: temperature,
                                 gpuLayers: 64 });
  } else if (type === 'openAI') {
    ////////////////////////////////
    // Connect to OpenAPI
    const { ChatOpenAI } = await import("@langchain/openai");
    const key = await import('../key.json', { with: { type: 'json' } });
    model = new ChatOpenAI({
      temperature: temperature,
      openAIApiKey: key.default.apiKey
    });
  } else if (type === 'Openshift.ai') {
    ////////////////////////////////
    // Connect to OpenShift.ai endpoint
    const { ChatOpenAI } = await import("@langchain/openai");
    model = new ChatOpenAI(
      { temperature: temperature,
        openAIApiKey: 'EMPTY',
        modelName: 'mistralai/Mistral-7B-Instruct-v0.2' },
      { baseURL: 'http://vllm.llm-hosting.svc.cluster.local:8000/v1' }
    );
  };
  return model;
};This method accepts a string to select which backend to use. Backends may have different runtime specific parameters but here often there will be a common set of parameters like temperature, etc. which are passed on to the model.
Looking at the section for OpenAI:
////////////////////////////////
    // Connect to OpenAPI
    const { ChatOpenAI } = await import("@langchain/openai");
    const key = await import('../key.json', { with: { type: 'json' } });
    model = new ChatOpenAI({
      temperature: temperature,
      openAIApiKey: key.default.apiKey
});We’ve swapped out the modelName for the openAIApiKey. There may be other options you want to specify, but that’s all it takes to switch from running with the local model to using the OpenAI service.
If you run the application you should get an answer which is similar to what we saw when accessing the model hosted by OpenAI:
answer: 'Based on the provided context, it is recommended to avoid using 'npm' to start a Node.js application for the reasons mentioned, such as reducing components, processes, and potential security vulnerabilities'.Now lets try the same thing by running with a model served in an OpenShift.ai environment using the vLLM runtime. We will assume you have set up the vLLM endpoint based on the instructions shared earlier. Looking at the section for Openshift.ai:
 } else if (type === 'Openshift.ai') {
    ////////////////////////////////
    // Connect to OpenShift.ai endpoint
    const { ChatOpenAI } = await import("@langchain/openai");
    model = new ChatOpenAI(
      { temperature: temperature,
        openAIApiKey: 'EMPTY',
        modelName: 'mistralai/Mistral-7B-Instruct-v0.2' },
      { baseURL: 'http://vllm.llm-hosting.svc.cluster.local:8000/v1' }
    );
};You can see that we used the same integration as for OpenAI as vLLM provides a compatible endpoint. We did have to provide the base URL ('http://vllm.llm-hosting.svc.cluster.local:8000/v1') option, though, in order to point to the model running in Openshift.ai instead of the public OpenAI service. In our setup no API key was needed, although that is unlikely in a real deployment. In that case for vLLM you simply pass 'EMPTY' for the api key.
Info alert: Note: You will need to modify the baseURL to match the endpoint that you set up using the instructions shared earlier and may need to set the openAIApiKey value based on how the endpoint was set up.
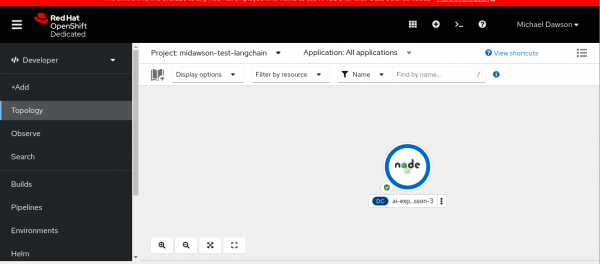
In our vLLM deployment in OpenShift.ai we could only access the endpoint from within the cluster. We therefore, deployed the example using "nodeshift deploy" to easily start it in the Openshift instance hosting Openshift.ai:

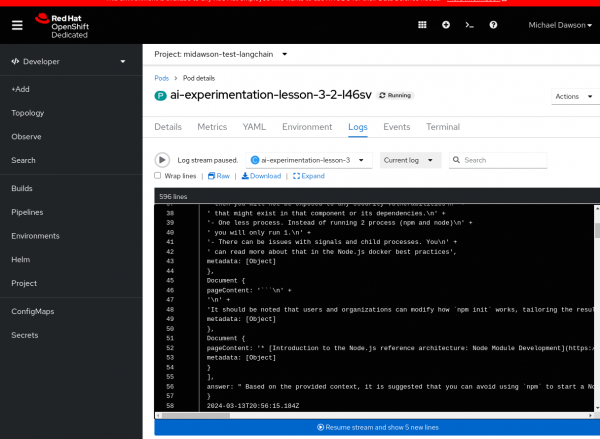
And from the logs for the pod we can see that the example ran and generated the expected output:

If you need to deploy in the cluster hosting OpenShift.ai like us, before you deploy the application we suggest you add some extra code to keep the pod running long enough to see the logs. Add the part shown below which starts with 'setInterval' to the Openshift.ai option in getModel();
 } else if (type === 'Openshift.ai') {
    ////////////////////////////////
    // Connect to OpenShift.ai endpoint
    const { ChatOpenAI } = await import("@langchain/openai");
    model = new ChatOpenAI(
      { temperature: temperature,
        openAIApiKey: 'EMPTY',
        modelName: 'mistralai/Mistral-7B-Instruct-v0.2' },
      { baseURL: 'http://vllm.llm-hosting.svc.cluster.local:8000/v1' }
    );
    // The next 3 lines are what you need to add
    setInterval(() => {
      console.log('keep-alive');
    }, 120000);
};Now go ahead and experiment, uncommenting one of the following lines to run in OpenAI, OpenShift.ai or locally (Running with the llama-cpp option will take a minute or two if you are not on a platform where GPU acceleration is available/supported):
////////////////////////////////
// GET THE MODEL
const model = await getModel('llama-cpp', 0.9);
//const model = await getModel('openAI', 0.9);
//const model = await getModel('Openshift.ai', 0.9);That’s all it takes to switch between the 3 different deployment options!
We hope that you can see from the example that with the abstractions the Langchain.js APIs provide we can easily switch between models which are running locally, in cloud services, or in an environment like Openshift.ai operated by your organization. This helps to maximize your flexibility and avoid lock-in to any particular service.
