Page
Quarkus, please log everything
In this lesson, you will learn how to change an OpenShift/Kubernetes resource in your application. You will also learn how to inspect the application logs and open a terminal to the pod that runs the application.
What you need to know
In order to get the full benefits of taking this lesson, you need to have a basic understanding of:
- Kubernetes/OpenShift resources.
What you’ll be doing
In this lesson, you will:
- Delete the existing DeploymentConfig.
- Edit the environment variables in the DeploymentConfig and recreate it on the cluster.
- Follow the application logs.
- Open a terminal to the pod that runs the application on the cluster.
How long will it take?
- 20 minutes
Add an environment variable
The Quarkus framework logs any event that’s at least INFO. To change this, configure the property quarkus.log.level in application.properties. You can also set it by an environment variable. This is especially useful when you deploy to an OpenShift or Kubernetes cluster.
In OpenShift, the DeploymentConfig allows you to set the environment for its pods. In your openshift.yml file, you will find an environment variable already. It sets the environment variable KUBERNETES_NAMESPACE to the name of your namespace.
To add your property and configure the Quarkus logging level, go to DeploymentConfig > template > spec > containers > env and add the following:
- name: QUARKUS_LOG_LEVEL
    value: ALL
The editor continuously monitors your modifications and reminds you to push them once a resource has been changed. While you could typically proceed with pushing the changes to the cluster, it's recommended that you delete the existing DeploymentConfig first, then push the updated version.
This is particularly important when modifying environment variables, because a "running" DeploymentConfig would not be affected by the changes, leading to pods without the updated environment variables.
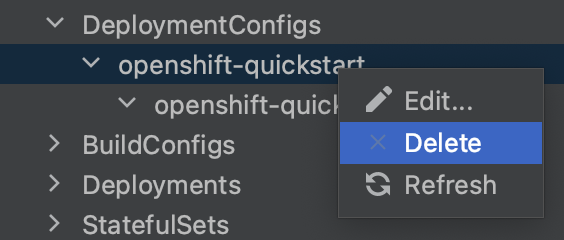
To delete the existing DeploymentConfig, select Delete from the context menu of your DeploymentConfig (Figure 13).
The plugin notifies you that the DeploymentConfig was successfully deleted, and the editor prompts you to push and recreate it (Figure 14).

Deleting the existing DeploymentConfig terminates the existing pods. They've disappeared from the resource tree. When you recreated the DeploymentConfig, you created new pods. These pods also reappeared as they were spawned. The tree is fully dynamic and reflects changes to the resources as the changes occur.
Follow Logs
Now that you’ve told Quarkus to log all, verify that your change is effective. Select Follow Log from the context menu of the new pod (Figure 15).

The log console in the lower part of your IDE will appear. It displays the log entries as they come in (Figure 16).
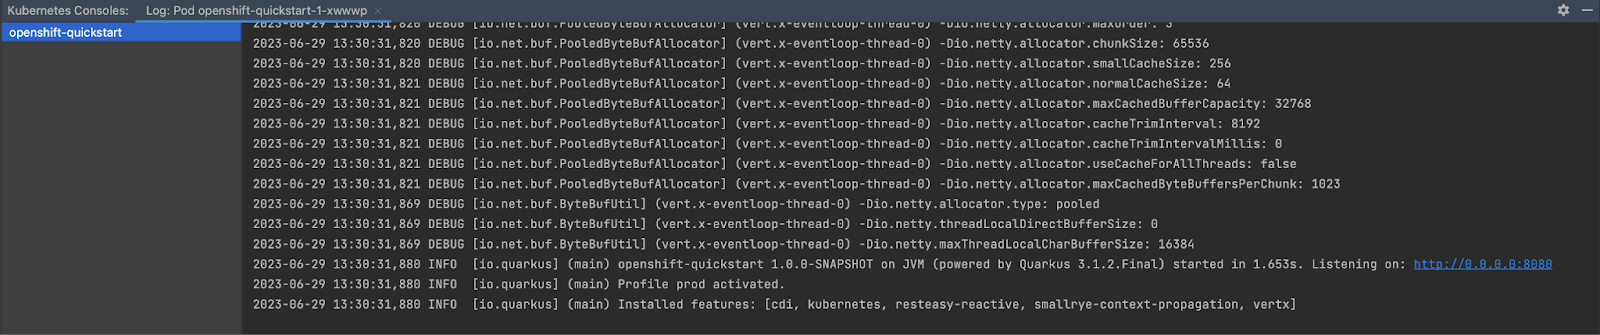
Notice the Quarkus application is logging all events from FATAL to TRACE. A Quarkus application by default only logs INFO and upwards. The environment variable that you added caused finer logging to happen.
The log console is split in half. The right side shows the log, and the left side shows the containers. Our pod only holds a single container. That means we only see a single entry. A pod that consists of several containers would have these containers listed in it. You could then have terminals to either one of these, and switch between them by clicking on the listed containers.
Open up a terminal
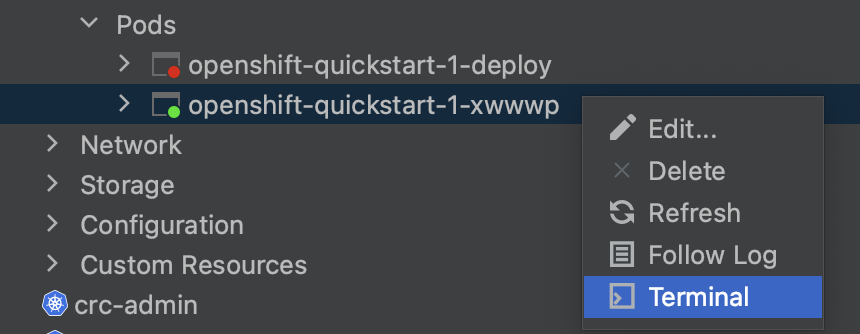
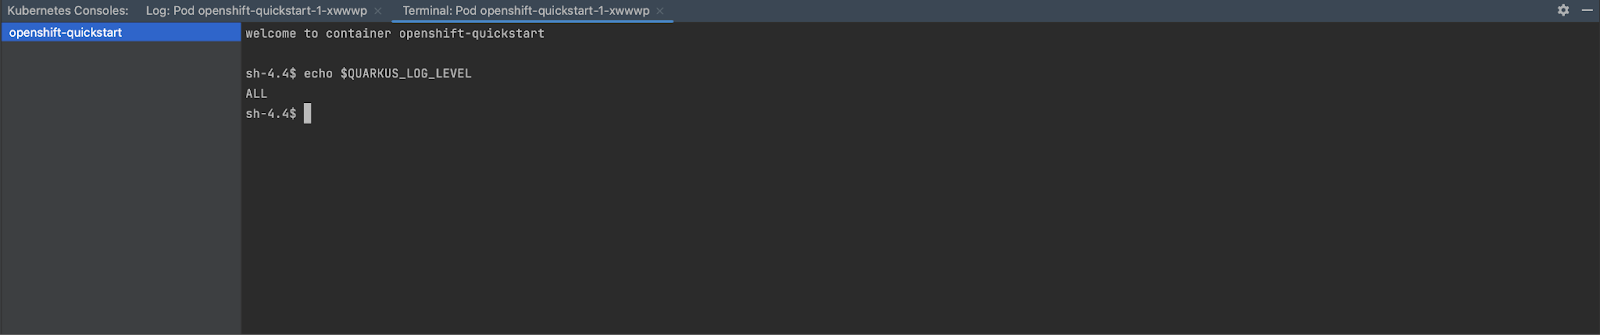
To verify in the terminal that the environment is set as defined in the DeploymentConfig, select Terminal from the context menu of your pod (Figure 17).
At the command prompt, echo your environment variable and verify the value that you configured in your resource file (Figure 18).
Conclusion
Congratulations! You’ve learned the deployment process for a Quarkus application to an OpenShift cluster, specifically within the free-tier Developer Sandbox as well as the usefulness of a Kubernetes Plugin for JetBrains IDEA in facilitating this task.
Using the editor, you created and updated the necessary resources for application deployment, and the dynamic resource tree provided real-time visibility of these resources as they were created. By utilizing the diff feature in the editor, you were able to observe how the cluster manipulated your resources during creation, which allowed you to identify important details such as the generated hostname.
Lastly, you learned additional features of the plugin, including the ability to monitor application logs and access a terminal shell within the running container.
