Page
Deploy the application
Now that you've installed the Kubernetes plugin and prepared your environment for deployment, this lesson will show you how to create the OpenShift resources you'll need and use the Diff feature to configure your route.
What you need to know
In order to get the full benefits of taking this lesson, you need to have a basic understanding of:
- Kubernetes and OpenShift resources.
What you’ll be doing
In this lesson, you will:
- Create the OpenShift resources on the cluster.
- Watch how they appear in the plugin resource tree.
- Get the application url and browse the running application.
How long will it take?
- 15 minutes
Create OpenShift resources
When you executed your Maven build, you generated a file in the target/kubernetes directory. This file encompasses the OpenShift resources necessary for deploying your application (Figure 7).
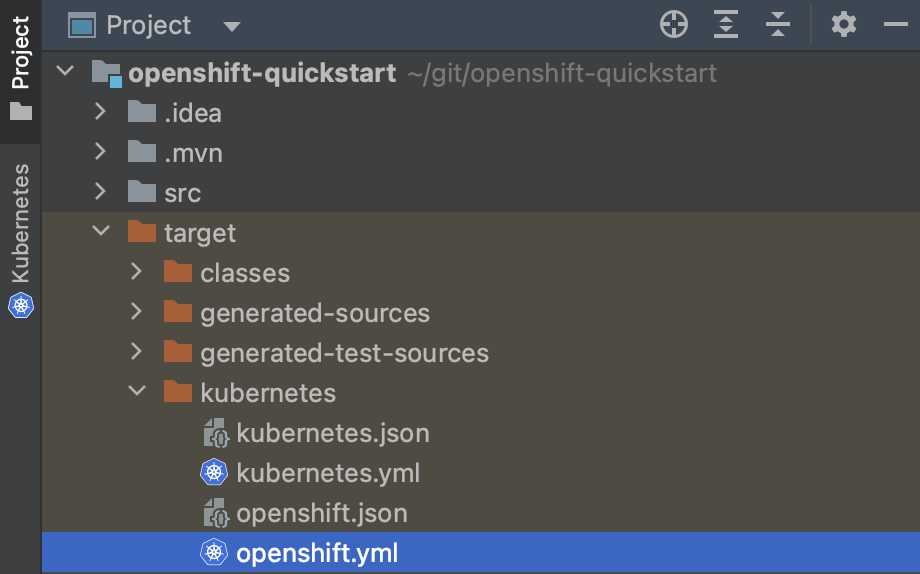
If you open this file, you can catch a glimpse of how your application is deployed. The file consists of the following OpenShift resources:
- DeploymentConfig
- ImageStream
- Service
- Route
The DeploymentConfig is responsible for creating a pod, which serves as the environment for running containers that host your application. These containers will utilize the Docker image you have built and published on Docker Hub.
kind: DeploymentConfig
...
          image: openshift-quickstart:1.0.0-SNAPSHOT
To make the Docker image available to the cluster, utilize an ImageStream. This ImageStream is configured to reference your image stored on Docker Hub. The referencing URL below uses my Docker Hub account, but you should replace it with yours.
kind: ImageStream
...
  dockerImageRepository: docker.io/adietish/openshift-quickstart
To expose your application within the cluster, employ a Service. This Service is responsible for mapping the container ports to ports that are accessible internally within the cluster.
kind: Service

...

    - name: https

      port: 443

      protocol: TCP

      targetPort: 8443
To expose the Service to the internet, utilize a Route, which makes your application accessible from external sources.
kind: Route

...

  port:

    targetPort: http

  to:

    kind: Service

    name: openshift-quickstart
To deploy your application, simply create these resources on the cluster. The editor will prompt you to push the file to the cluster and generate the necessary resources. You can also use the Push icon located in the toolbar as another option (Figure 8).

The resource tree in the Kubernetes toolkit window is highly dynamic, continuously reflecting the presence and absence of cluster resources. When you push the resource file, you create the corresponding resources on the cluster and instantly appear in the resource tree.
The specific resources with which we are currently interacting, can be found under the Workloads and Network categories in the resource tree (Figure 9).
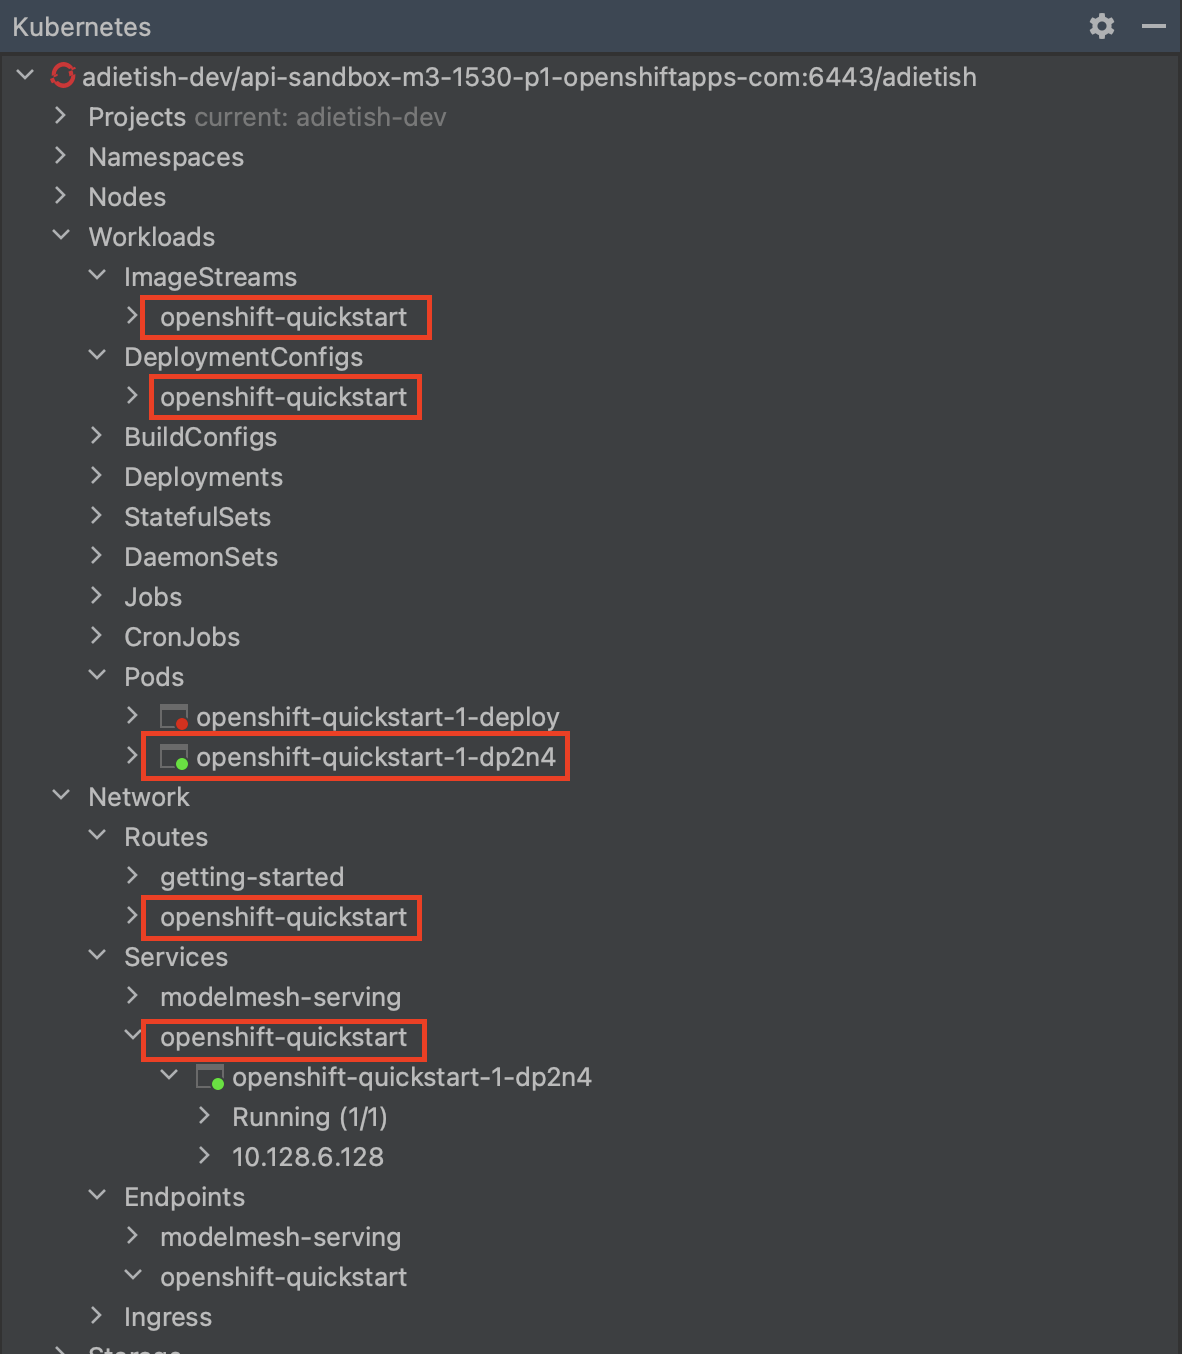
Pods in the resource tree are represented by icons that display either a red or green dot. A green dot signifies that the pod is currently running. A red dot indicates that the pod is either in the process of being initialized or terminated.
By expanding a pod in the tree, you reveal additional information, including its internal cluster IP and the status of its container(s). In Figure 9, the pod consists of a single container that is currently running.
Browse the application
In order to access the application through a browser, you will need its URL. In your configuration, let OpenShift generate the host name for you. You can accomplish this by configuring the Route to have an empty or nonexistent host value.
kind: Route

...

  host: ""
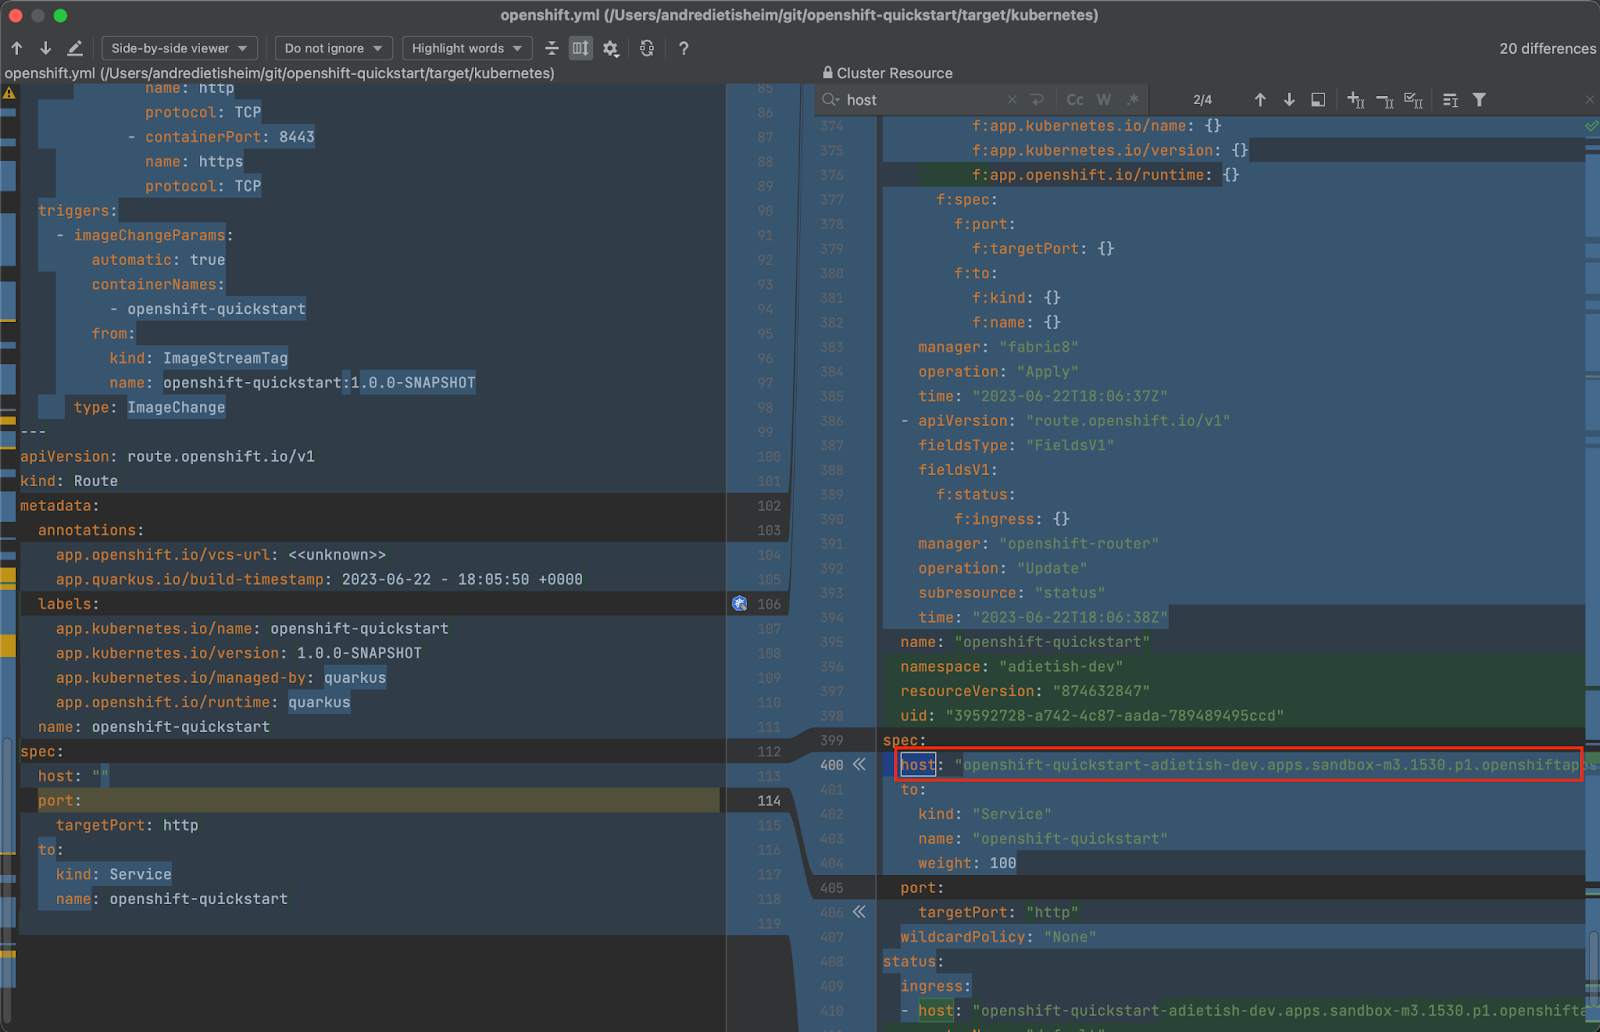
Hence, you will have to determine the hostname generated by the cluster. To do this, utilize the available Diff feature in the editor, which displays the disparities between the resources specified in your file and the resources that currently exist on the cluster (Figure 10).

Clicking on the Diff action in the toolbar will open a split dialog. The left section of the dialog displays the local file, while the right section displays the resources that currently exist on the cluster (Figure 11).
At this point, you can search for the host value and copy it once you locate it.
Now paste the host value into a browser to see the Quarkus framework page that your application displays when queried. The page shows you that the application consists of a REST service at /hello (Figure 12). Note: When you click the /hello-link, you can see the response of this service.

Next
The next lesson will demonstrate how to change the behavior of the application by editing its Kubernetes/OpenShift resources.
