Page
Configure and build the required bits and pieces

Before you can deploy your application, you will need to build the required environment and configure your application. In this lesson, you will learn how to install the Kubernetes plugin and get your source code ready for deployment. You will also learn how to publish an image to DockerHub and work in the Developer Sandbox for Red Hat OpenShift.
What you need to know
In order to get the full benefits of taking this lesson, you need to know the purpose and use of:
- Docker Images.
- Docker Hub (If you don't already have an account, create one.)
- OpenShift Clusters.
- The OpenShift CLI (If you haven't installed it yet, follow these installation instructions.)
- The Quarkus CLI (If you haven't installed it yet, follow these installation instructions.)
What you’ll be doing
In this lesson, you will:
- Install the Kubernetes plugin for Jetbrains IDEA.
- Create a Quarkus application or configure your existing one.
- Build and publish the Docker image to Docker Hub.
- Create your Red Hat Developer Sandbox and configure it in the Kubernetes plugin.
How long will this lesson take?
- 15 minutes
What is the IntelliJ Kubernetes plugin?
The Kubernetes plugin for JetBrains IDEA was written so a developer could deal with Kubernetes or OpenShift clusters in an integrated development environment (IDE).
The plugin has these distinct features:
- It updates the cluster resources automatically.
- There’s no need for a manual refresh.
- The resource tree is always up to date.
- It’s especially quick at its task since it doesn't use a Java library or rely on an external tool.
Install the Kubernetes plugin
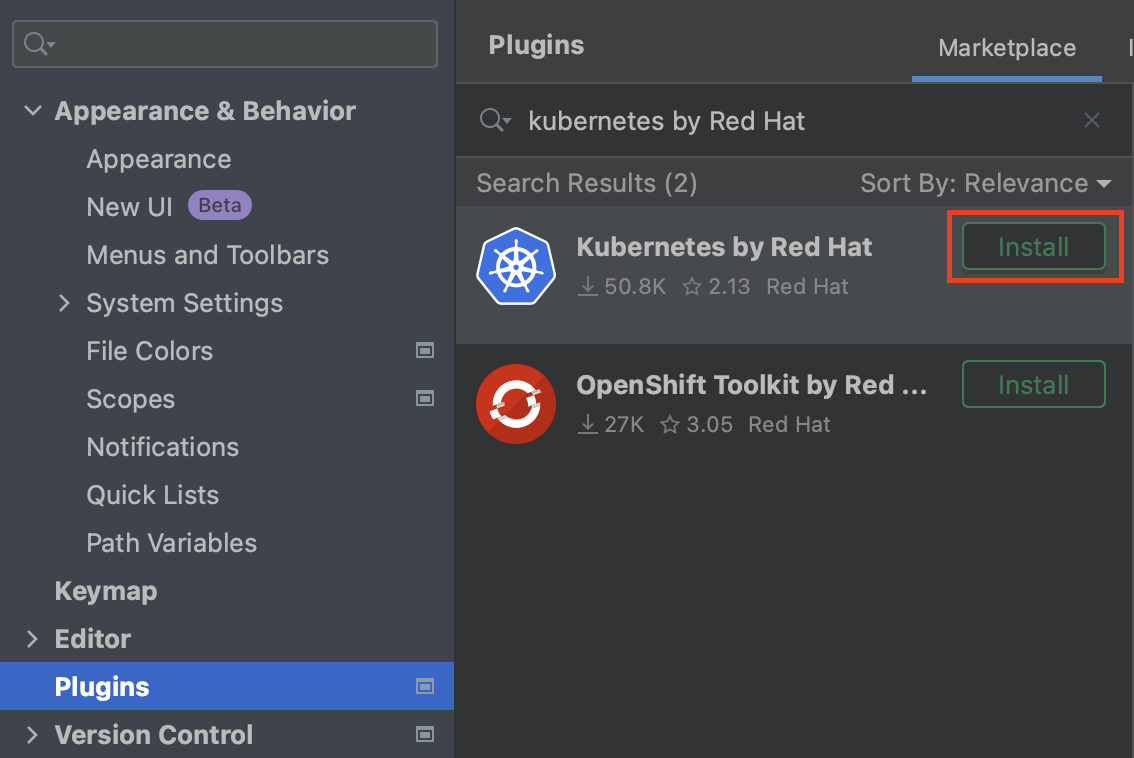
The plugin is available in JetBrains Marketplace. To install the plugin in your IDE, select Settings > Plugins then search for Kubernetes by Red Hat. Select Install (Figure 1).
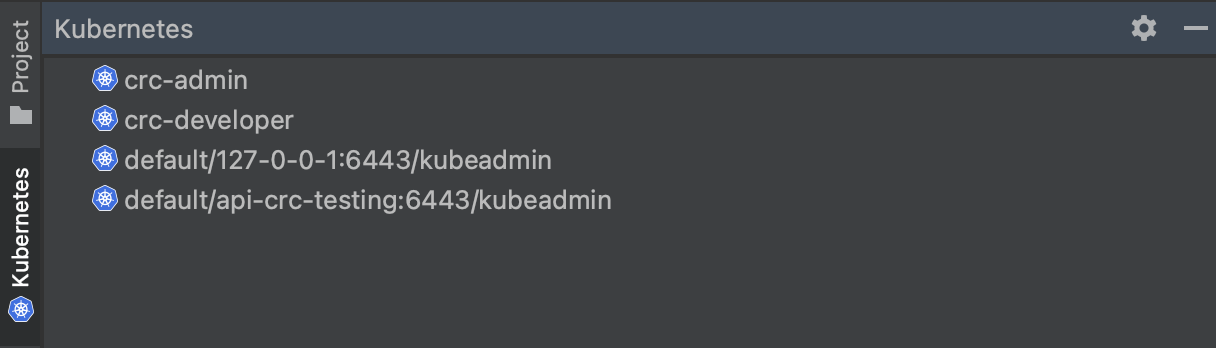
When you install the plugin, you will have an extra tool window positioned on the left side of your IDEA interface. This window displays the Kubernetes clusters specified in your Kubernetes configuration located at ~/.kube/config. If you haven't defined any clusters yet, the list will be empty (Figure 2).
Prepare your Quarkus application for OpenShift
Now that you’ve successfully installed the Kubernetes plugin for IDEA, let’s prepare our source code for deployment to OpenShift. You have the option to either retrieve the source from GitHub, utilize your existing source code, or create a new Quarkus application from scratch.
Assuming that you have your own source, you need to prepare it for deployment on OpenShift. Quarkus offers extensions that do most of the job for you. You’ll need the OpenShift extension and the Jib extension. Enable them using the Quarkus command line or add them manually to your pom file.
<dependency>
    <groupId>io.quarkus</groupId>
    <artifactId>quarkus-openshift</artifactId>
</dependency>
<dependency>
    <groupId>io.quarkus</groupId>
    <artifactId>quarkus-container-image-jib</artifactId>
</dependency>
Note: If you want to generate a Quarkus app from scratch, you can use the Quarkus command-line utility to configure those for you.
quarkus create app org.acme:openshift-quickstart \
--extension='resteasy-reactive,openshift,quarkus-container-image-jib'
Now that you have created your source, open it in JetBrains IDEA and get on with your deployment.
Publish the image to Docker Hub
The project generated by the Quarkus command-line tool includes a Dockerfile located at src/main/docker/Dockerfile.jvm. If you decide to use your own source code, you can easily copy the Dockerfile from the provided GitHub repository containing the sample source code.
The Dockerfile is utilized to generate a Docker image, which is used by OpenShift (or Kubernetes) to run your application. In order for OpenShift to access and utilize the image, it needs to be stored in a Docker registry. While most OpenShift or Kubernetes installations provide their own Docker registry, the Developer Sandbox for Red Hat OpenShift (Developer Sandbox) does not. You will employ Docker Hub for this purpose.
Configure
-
To build a registry, configure the build process to push the image to Docker Hub. Although these settings can be specified via the command line, for the sake of simplicity, utilize the src/main/resources/application.properties file.
quarkus.container-image.build=true quarkus.openshift.jvm-dockerfile=src/main/Dockerfile.jvm quarkus.container-image.builder=jib quarkus.container-image.push=true quarkus.container-image.group=adietish quarkus.container-image.name=openshift-quickstart quarkus.openshift.route.expose=true - Instruct the Maven build to build the Docker image.
quarkus.container-image.build=true - Point the build to our Docker file.
quarkus.openshift.jvm-dockerfile=src/main/Dockerfile.jvm - Tell Maven to use the jib extension to create the Docker image.
quarkus.container-image.builder=jib - Instruct the build to push the Docker image to a registry.
quarkus.container-image.push=true - Hand it your account on Docker hub.
quarkus.container-image.group=adietish - Configure the name of the resulting Docker image for easy identification.
quarkus.container-image.name=openshift-quickstart - Instruct the build to create a route so that our application is accessible from the internet.
quarkus.openshift.route.expose=true
Build
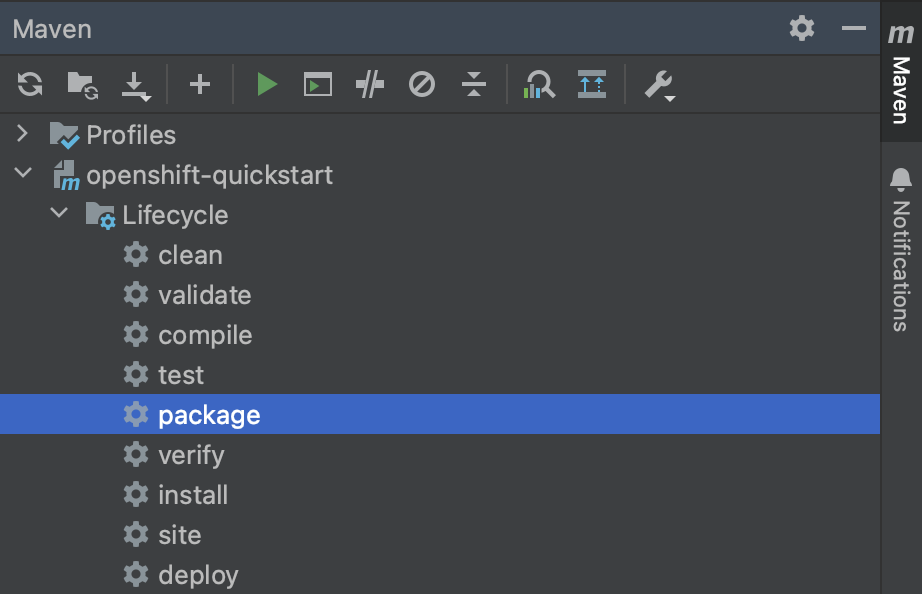
With the build configuration successfully set up, you’re now prepared to execute the build process. Simply running the Maven package command is all that's required to package the application into a JAR file, create a Docker image with the JAR, and push the image to Docker Hub.
To initiate the build, locate the Maven toolbox on the right edge of your IDEA and double-click on the package command (Figure 3).
You can also launch Maven on the command line:
./mvnw clean package
During the build process, you can observe the execution of all the aforementioned steps in the output.
[INFO] [io.quarkus.container.image.jib.deployment.JibProcessor] LogEvent [level=INFO, message=trying docker-credential-desktop for registry.hub.docker.com]

[INFO] [io.quarkus.container.image.jib.deployment.JibProcessor] Using base image with digest: sha256:f921cf1f9147e4b306908f3bcb61dd215b4a51970f8db560ede02ee6a492fa99

[INFO] [io.quarkus.container.image.jib.deployment.JibProcessor] LogEvent [level=LIFECYCLE, message=Using credentials from Docker config (/Users/andredietisheim/.docker/config.json) for adietish/openshift-quickstart:1.0.0-SNAPSHOT]

[INFO] [io.quarkus.container.image.jib.deployment.JibProcessor] Container entrypoint set to [java, -Djava.util.logging.manager=org.jboss.logmanager.LogManager, -jar, quarkus-run.jar]

[INFO] [io.quarkus.container.image.jib.deployment.JibProcessor] Pushed container image adietish/openshift-quickstart:1.0.0-SNAPSHOT (sha256:bfba9dd104b363e828a61bde800cd2299fae8b65fc9a5ffcd4c322061b3a8c0e)
Get your free Developer Sandbox
Next, let's focus on the cluster to which we intend to deploy. Red Hat provides a free OpenShift cluster for individuals interested in exploring its capabilities. To obtain your own cluster, simply visit https://developers.redhat.com/developer-sandbox and request an instance.
Once you complete a quick and straightforward registration process, you can start the cluster and access its web console. In the console, your username will be visible in the upper right corner of the header.
- Clicking on your username will display a menu. Select Copy login command (Figure 4). This command will configure the Developer Sandbox as your current cluster and store a locally accessible token for authentication purposes.
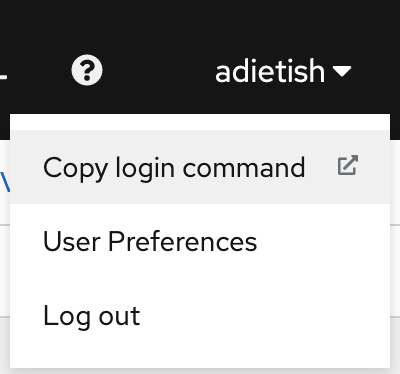
Figure 4: Select the Copy login command. - A token field similar to Figure 5 will appear.

Figure 5: The login command as shown in the web console. - Now copy, paste, and run your command in your terminal shell:
Note: If you already have a Developer Sandbox account, chances are your token is expired. You’ll see this notice if listing the projects isn’t possible.oc login --token=sha256~XXXXXXXXXXXXXXXX --server=https://api.sandbox-m3.1530.p1.openshiftapps.com:6443 - To get a new token, proceed as shown above. Copy the login command and run it in your shell.


IntelliJ Kubernetes is your friend
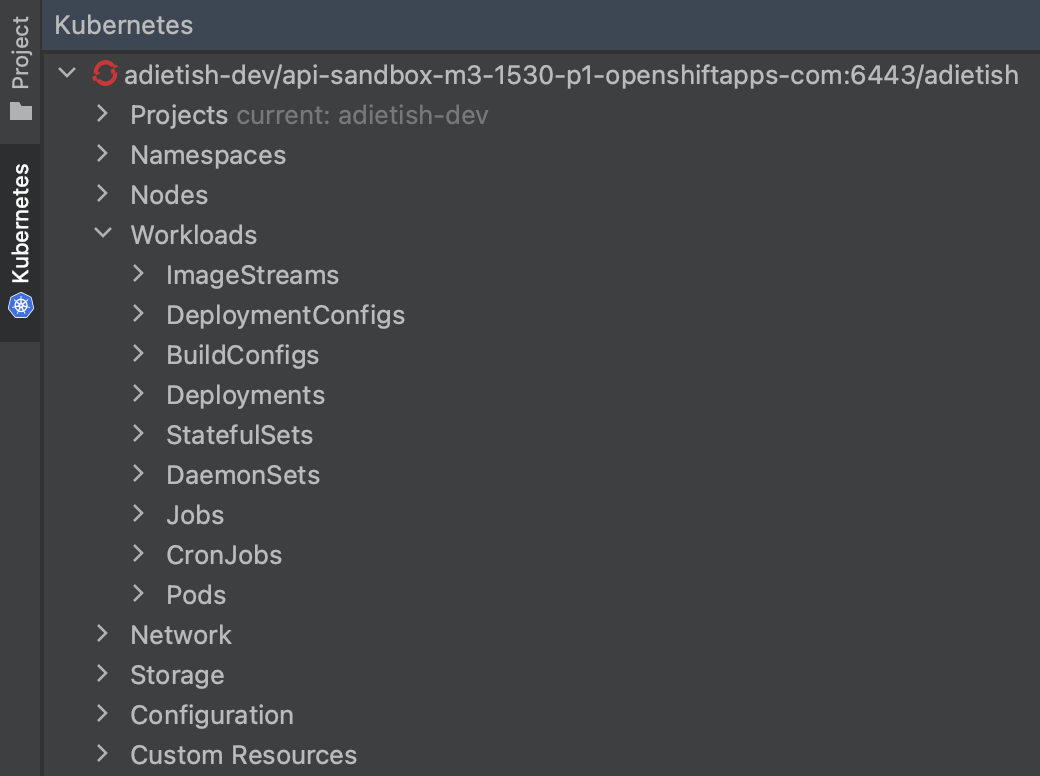
In IntelliJ, you can now navigate to the Kubernetes tool window, where you will find the Developer Sandbox set as the active cluster. By expanding the cluster, you can explore various resource categories that reveal the existing resources within your cluster.
For example, you can view your current project or namespace (Figure 6). Note: Any action performed through the plugin will be executed within the context of this project.
Next
The next lesson will demonstrate how to deploy your application to the Developer Sandbox.
