In Part 2 of this learning path, you will combine the two containers running in Podman Desktop into a single pod and deploy that pod to your Developer Sandbox instance.
Step 10: Create a pod in Podman Desktop with running containers
At this point, there are two containers running. The next step is to put those two containers into a single pod that can later be deployed to OpenShift—in this case, your Developer Sandbox instance.
In Podman Desktop, as highlighted in Figure 5:
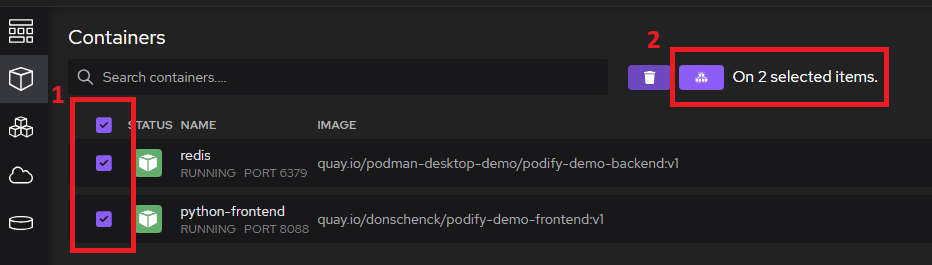
- Select both containers (Figure 5, callout 1).
- Click the Create Pod image near the top of Podman Desktop (Figure 5, callout 2).
On the Copy containers to a pod panel, first unselect the Port 6379 as seen in Figure 6, callout 1—there is no reason to expose the Redis port outside of the pod—then select Create Pod (Figure 6, callout 2).

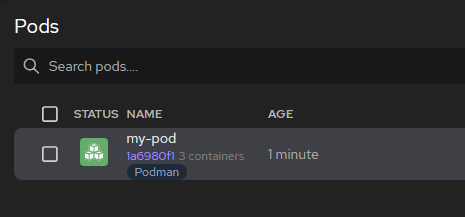
After a few moments, formerly running containers will be stopped, and you'll be able to see the newly created pod will be displayed in the Pods section as well as the combined logs and a summary of the containers (Figure 7).
Checkpoint Checkpoint
Here, we've now pushed our local image to a remote registry to share with others, and successfully created a pod. Here, we can locally test our application in a local Kubernetes cluster such as Kind, or go ahead and deploy them to our remote Developer Sandbox instance.
Step 11: Set up your Developer Sandbox in Podman Desktop
Podman Desktop includes the option to connect to your Developer Sandbox instance and easily deploy your applications, but first, you need to install this support (Figure 8). You can find complete instructions on the Podman Desktop documentation website.

Step 12: Log in to your sandbox
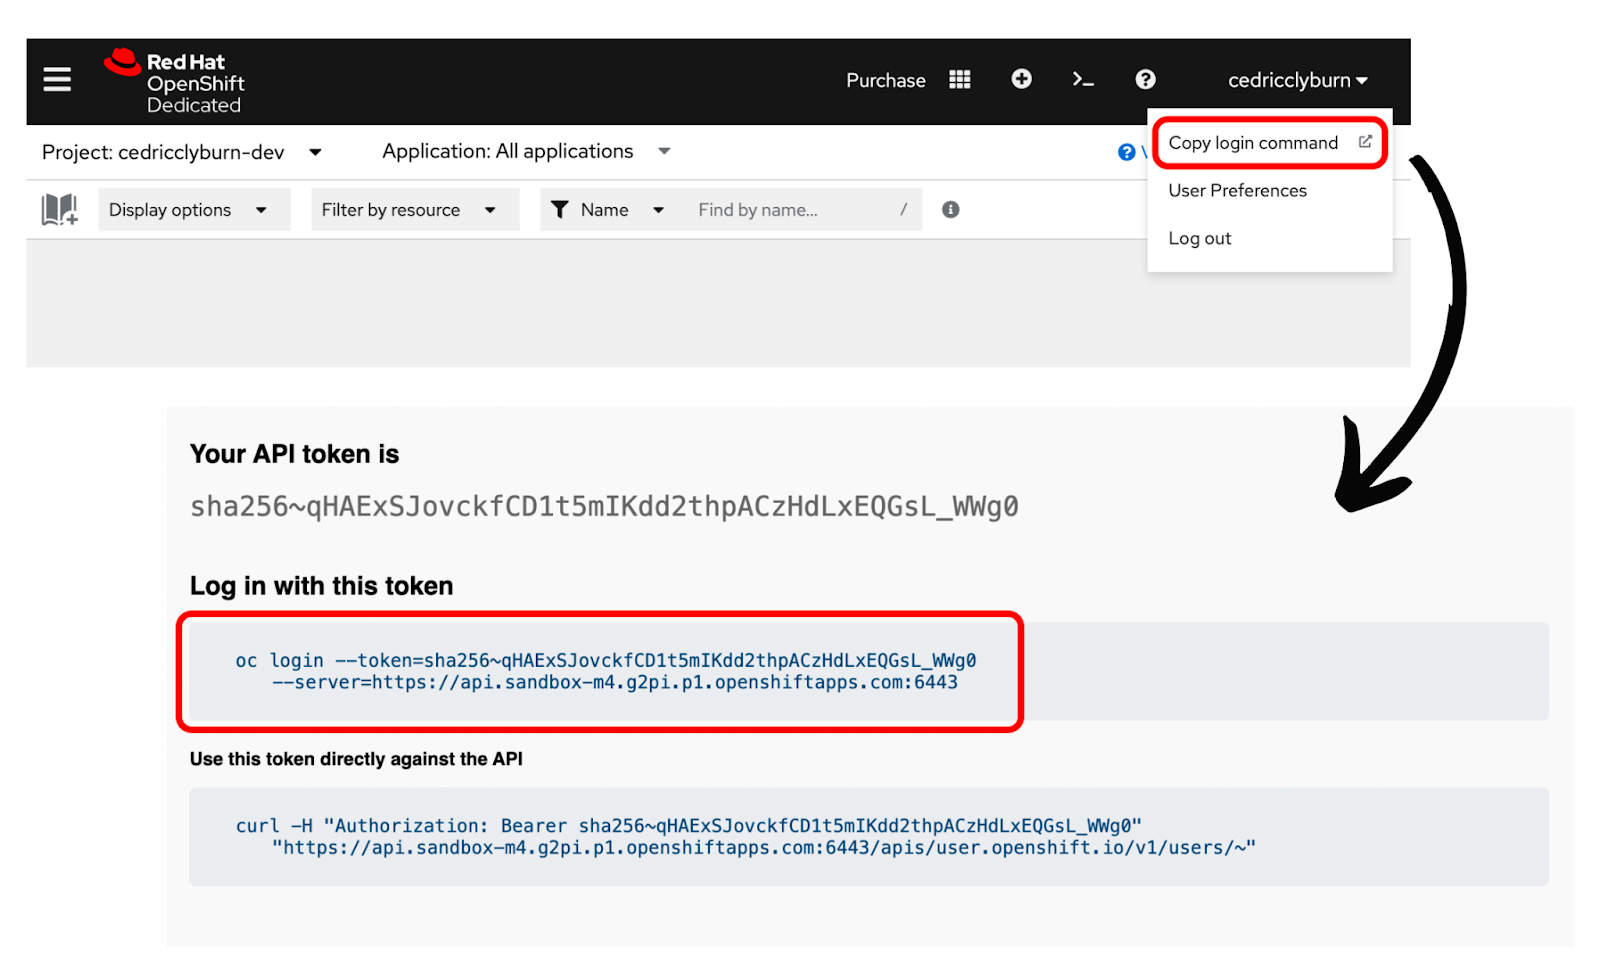
Per the instructions from Podman Desktop, you’ll need to navigate to the Developer Sandbox page and create or log in to your sandbox instance. Once authenticated, you’ll next need to copy the login token from the OpenShift web console over to Podman Desktop (Figure 9).
Step 13: Connect to your OpenShift cluster
Finally, to finish connecting Podman Desktop to your Developer Sandbox instance and add the OpenShift cluster, simply paste the login command and hit Create (Figure 10). This adds an entry to your system’s kubeconfig file, which is used to connect and authenticate with a Kubernetes cluster.

Step 14: Deploy a pod to Kubernetes from Podman Desktop
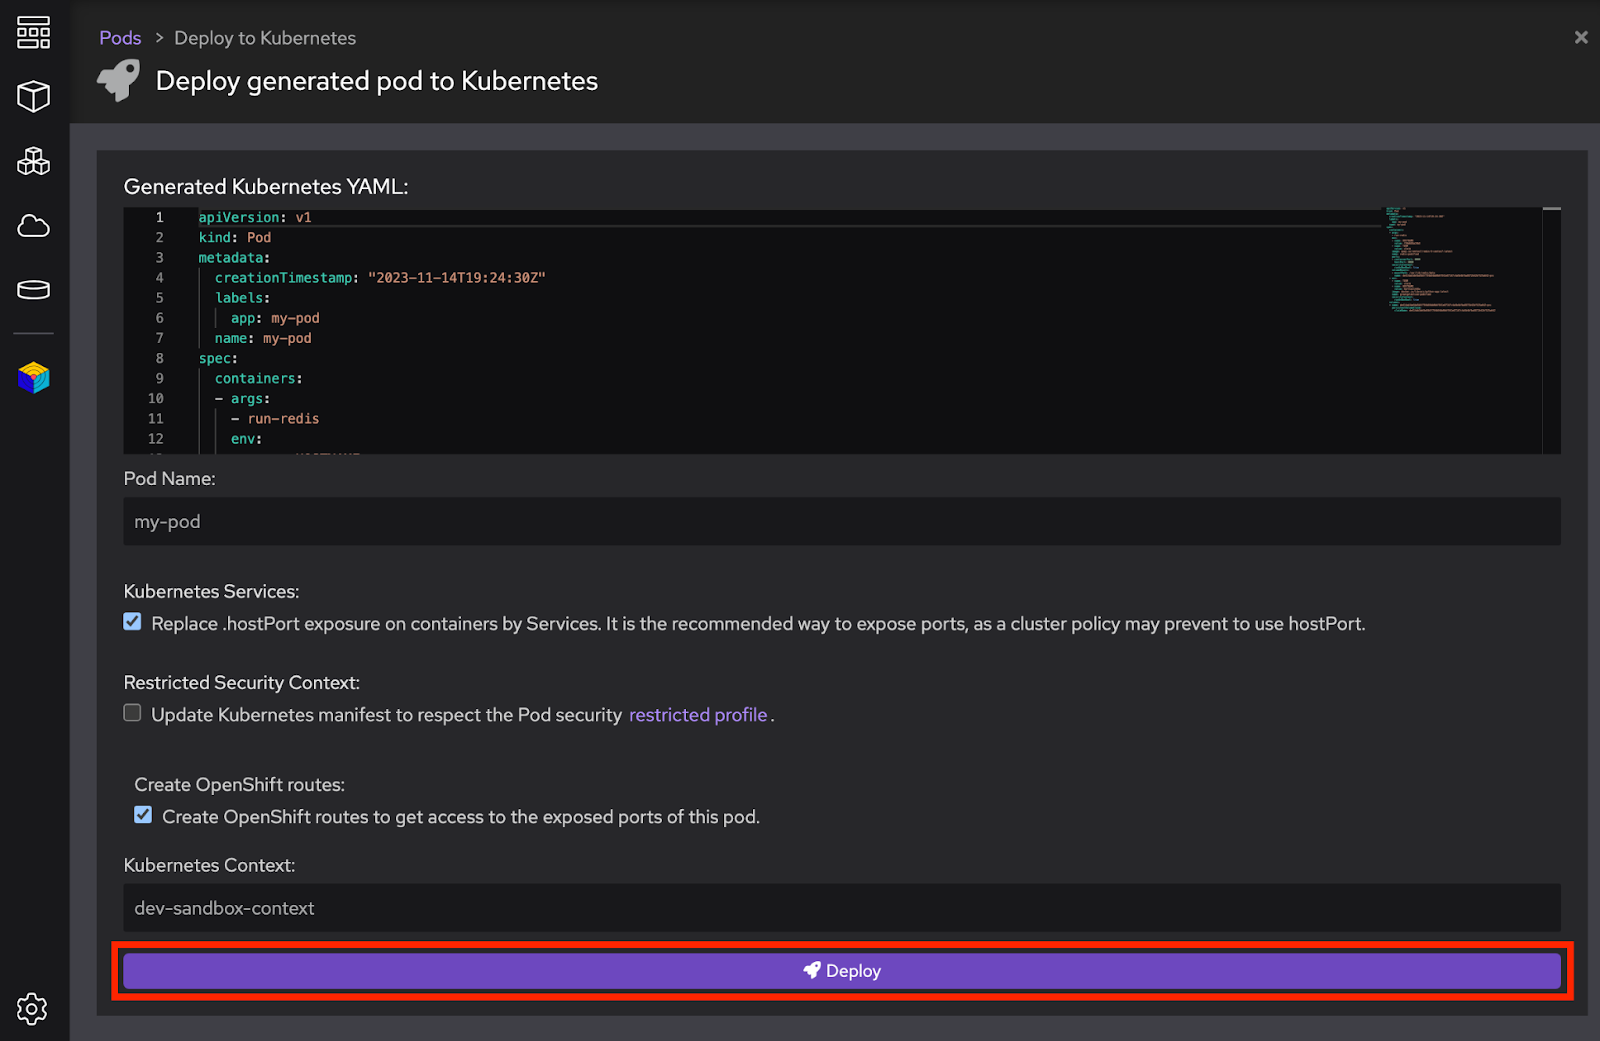
In the Pods view of Podman Desktop, click the kebab menu for the pod you created and choose the Deploy to Kubernetes option. When prompted, select Deploy (Figure 11).
Step 15: View your results in OpenShift console
Switch to your Developer Sandbox Developer Topology view and you will see the pod. By clicking on the Open URL icon, you can view the website in your browser (Figure 12).

Refresh the browser multiple times to see the counter increment.
If you return to the Pods section of Podman Desktop, you will notice that this new pod—running in your sandbox—is now reflected in the list (Figure 13).

Checkpoint
At this point, you have your pod running in your Developer Sandbox instance. The next step is to create a new version on your local machine, running in Podman Desktop.
