An introduction to Hyperparmeter optimization
In the dynamic world of machine learning, optimizing model performance is not just a goal—it's a necessity. This comprehensive guide aims to simplify the intricate process of hyperparameter optimization, leveraging the power of OpenShift AI, Ray Tune, and Model Registry to enhance model accuracy and efficiency. This guide is meticulously detailed based on the example code provided in this repository, offering a practical and hands-on approach to the optimization process.
Setup
Before embarking on this journey, it's essential to have the right tools and resources at your disposal. You'll need:
- An OpenShift cluster (4.0+) with OpenShift AI (RHOAI) 2.10+ installed:
- The codeflare, dashboard, ray and workbenches components enabled;
- Sufficient worker nodes for your configuration(s)
- An AWS S3 bucket to store experimentation results;
Setting the Stage: Setting up a Data Science Project and Ray Clusters on OpenShift AI
The initial step in our optimization journey is setting up our Data Science project within the OpenShift AI cluster. To get started, ensure you have the RedHat OpenShift AI operator installed from the Operator Hub. Once installed, this operator becomes available as a service, facilitating the creation and management of Data Science projects.
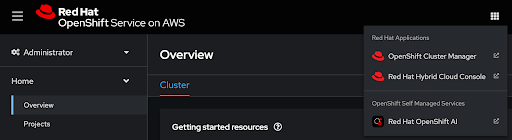
Assuming installation is completed, access the OpenShift AI dashboard from the top navigation bar menu:
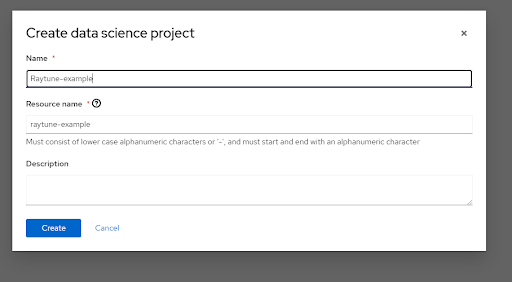
After this initiate the creation of a new Data Science project. This is where you will be able to view and manage all of the workbenches you create.
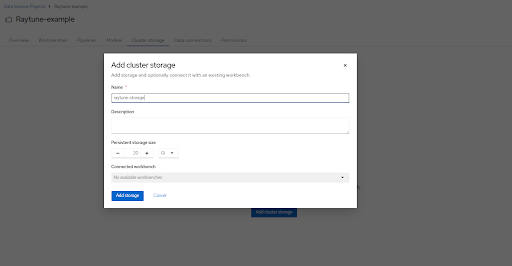
Following this if one does not already exist create a cluster storage, where we will store local information.
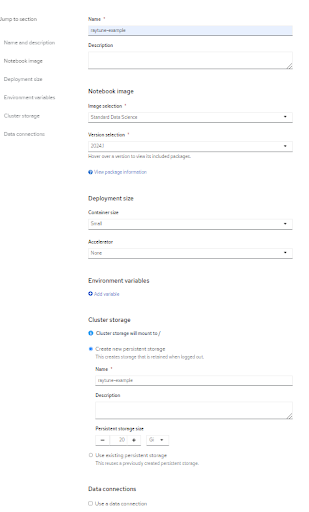
Once this is complete, create a new workbench with a standard data science image. Below is an example of the workbench settings. The notebook image selections which should be set to the latest versions to avoid issues. If you wish to use preexisting persistent storage, change the configuration as necessary. When the workbench is operational, you can directly access the Jupyter notebook environment.
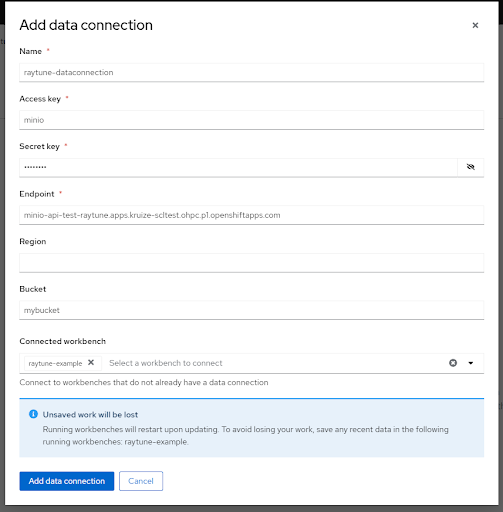
Post the creation of the workbench, we can add a data connection with relevant details. If you are simply running this as an example and wish to create a local Minio storage (not meant for production) feel free to follow the steps found here.
Assuming all the previous steps have been followed we should now be able to open the workbench allowing us to access the Jupyter notebook. Here we will clone the relevant repository and begin our journey using raytune to perform hyper parameter optimisation.
After cloning you will be able to see 3 different examples in the examples folder. In these examples you will utilize the CodeFlare SDK to configure and launch our cluster, ensuring it is fully equipped to manage the intricate demands of our machine learning tasks. OpenShift AI excels in optimizing for distributed workloads by employing a strategy that involves the integration of Ray Clusters. In this setup, a collection of worker nodes are seamlessly connected to a central Ray head node, facilitating the efficient execution of distributed workloads.
To tailor the Ray cluster to our needs, we specify the CPU and memory resources allocated to each node. Once configured, we bring up the cluster, ready to be utilized for our Hyperparameter Optimization (HPO) tasks. This setup ensures that our project is not only well-organized but also prepared to handle the computational demands of our optimization process.
# Create and configure our cluster object (and appwrapper)
cluster = Cluster(ClusterConfiguration(
	name='terrestial-raytest',
	num_workers=2,
	min_cpus=1,
	max_cpus=1,
	min_memory=4,
	max_memory=4,
	num_gpus=0,
	image="quay.io/rhoai/ray:2.23.0-py39-cu121"
))
An example of the configuration using codeflare sdk in /demos/raytune-oai-demo.ipynb
In the next few sections we will discuss the code contained in the examples folder of this repository. Feel free to follow along with the code contained in the notebooks.
The Heart of the Matter: Hyperparameter Optimization with Ray Tune
In this demo we're focusing on finding the optimal hyperparameters for a Simple Neural Network model using Ray Tune. This involves tuning two key parameters: hidden_size and learning_rate. Given that we're leveraging a PyTorch example, it's crucial to ensure that all necessary packages, including torch and Ray Tune, are installed in our cluster environment. This necessitates re-instantiating these packages to ensure they're correctly set up.
# Additional libs
runtime_env = {"pip": ["ipython","torch","onnx","ray[train]","protobuf==3.20.1"]}

ray.init(address=ray_cluster_uri, runtime_env=runtime_env, _system_config={"PROTOCOL_BUFFERS_PYTHON_IMPLEMENTATION": "python"})

print("Ray cluster is up and running: ", ray.is_initialized())
Ensuring the environment is correctly setup
Once the Ray Clusters are operational, we proceed to tune the model with Ray Tune, specifying the number of samples (trials) we wish to run. After each trial concludes, we return the model's accuracy and the trial model itself.
Upon completion of the Ray Tune process, we're presented with the best trial and the corresponding optimal hyperparameters. Ray Tune enables us to explore a broad spectrum of hyperparameters, testing various combinations to identify the one that achieves the highest accuracy. There are multiple strategies we can employ within Ray Tune to enhance our tuning process.
The Importance of Metadata
Metadata in HPO experiments is the goldmine of insights. It includes details about each trial's configuration, performance metrics, and even the state of the model at the end of the trial. This information is invaluable for understanding the optimization process, identifying trends, and refining future experiments.
What is the Model Registry
If we view the example raytune-oai-MR-gRPC-demo.ipynb we can see we utilize the Model Registry. The Model Registry is a central repository for model developers to store and manage versions and artifacts metadata. This Go-based application leverages the ml_metadata project, as well as providing a python api for ease of use. It is a key component in the process of managing models. In our use case it is particularly useful for managing the large number of different model versions that are generated and used.
Integrating Model Registry for Metadata Management
To seamlessly integrate Model Registry into our HPO process, it's crucial to confirm its setup and readiness.
To utilize the default Model Registry service, install the model registry operator and start the service as per the instructions provided here.
Upon integration, each trial's metadata is captured and stored via the Model Registry. This encompasses the hyperparameters utilized, the performance metrics achieved, and any other pertinent details. ModelRegistry ensures that this data is well-organized, easily accessible, and prepared for analysis.
In our example code, we generate various types of metadata, including:
kf.HPOConfig (Artifact) for saving HPO configurations.
kf.HPOExperiment (Context) for saving HPO experiment details, serving as a parent to HPOTrial.
kf.HPOTrial (Context) for saving trial information for each experiment, acting as a child to HPOExperiment.
This metadata is saved as part of the HPO run, facilitating a comprehensive analysis. The example code utilizes the python gRPC API to access the Model Registry metadata, with future support for REST APIs. Allowing for the comparison of different trials and the identification of top optimized deployments in real-time, even as the HPO experiment continues for other trials.
Enhancing Model Deployment
Having a comprehensive record of our HPO experiments is not just about understanding past performance. It also informs our future model deployments. By analyzing the metadata, we can identify the most effective configurations and apply them to new models. This ensures that our deployments are not just successful but also optimized for the best possible performance.
The Final Frontier: Saving and Sharing the Best Model
Upon identifying the optimal model, it's time to make it known to the world. We choose to save our model in ONNX format, a universal standard that guarantees compatibility across a wide range of platforms and frameworks. This step is pivotal for deploying our model in various environments, ensuring its accessibility to a broader audience.
OpenShift AI supports deployment in multiple frameworks, with ONNX being one of them. By saving our model in ONNX format, we align with this support, facilitating a smooth deployment process across different platforms.
The Grand Finale: Deploying the Model for Inference
The culmination of our optimization journey is the deployment of our refined model for inference. We upload our model to an AWS S3 bucket, ensuring its accessibility for practical applications. To facilitate deployment, we navigate to our Data Science project, deploy the model directly from the dashboard, and obtain the inference URLs. This allows us to access the model for real-world applications.
If our interest lies in exploring the top 5 optimized models from a 50-trial experiment, we have the flexibility to save multiple models. This approach enables us to conduct further experiments with these models, enhancing our understanding and refining our optimization efforts.
Utilizing a REST API, we can now send data to our model and receive predictions, demonstrating the effectiveness of our optimized model in a practical setting.
Conclusion: The Journey Continues
This guide has provided a glimpse into the world of hyperparameter optimization, showcasing how OpenShift AI, Ray Tune, and the Model Registry can be used to optimize machine learning models. As we continue our journey, we'll explore more advanced techniques and tools, always striving to push the boundaries of what's possible in machine learning.