In this article, you'll learn how to deploy Microsoft SQL Server 2019 on Red Hat OpenShift. We’ll then use SQL Server from an ASP.NET Core application that is also deployed on OpenShift. Next, I'll show you how to connect to SQL Server while working on the application from your local development machine. And finally, we’ll connect to the server using Azure Data Studio.
Note that I am using Red Hat CodeReady Containers to run OpenShift 4.3 locally on my development machine.
Deploying Microsoft SQL Server
To start, log in to your OpenShift cluster using the oc login command. Create a new project by entering:
$ oc new-project mssqldemo
Use the following template to facilitate deploying the Red Hat Enterprise Linux (RHEL)-based SQL Server image:
$ oc create -f https://raw.githubusercontent.com/redhat-developer/s2i-dotnetcore-persistent-ex/dotnetcore-3.1-mssql/openshift/mssql2019.json
template.template.openshift.io/mssql2019 created
$ oc process --parameters mssql2019
NAME                DESCRIPTION                                                                  GENERATOR           VALUE
NAME                The name assigned to all of the frontend objects defined in this template.                       mssql
SA_PASSWORD                                                                                      expression          aA1[a-zA-Z0-9]{8}
ACCEPT_EULA         'Y' to accept the EULA (https://go.microsoft.com/fwlink/?linkid=857698).
MSSQL_PID           Set to 'Developer'/'Express'/'Standard'/'Enterprise'/'EnterpriseCore'.                           Developer
VOLUME_CAPACITY     Volume space available for data, e.g. 512Mi, 8Gi                                                 512Mi
For this deployment, you can retain the default parameters. Accept the end-user license agreement (EULA) as follows:
$ oc new-app --template=mssql2019 -p ACCEPT_EULA=Y
--> Deploying template "mssqldemo/mssql2019" to project mssqldemo

 	Microsoft SQL Server 2019
 	---------
 	Relational database management system developed by Microsoft.

 	* With parameters:
    	* Name=mssql
    	* Administrator Password=aA1qxWYb8ME # generated
    	* Accept the End-User Licensing Agreement=Y
    	* Product ID or Edition=Developer
    	* Persistent Volume Capacity=512Mi

--> Creating resources ...
	secret "mssql-secret" created
	service "mssql" created
	deploymentconfig.apps.openshift.io "mssql" created
	persistentvolumeclaim "mssql-pvc" created
--> Success
	Application is not exposed. You can expose services to the outside world by executing one or more of the commands below:
 	'oc expose svc/mssql'
	Run 'oc status' to view your app.
In addition to deploying SQL Server in a container, the template creates a secret (mssql-secret), which stores the administrator password. It also creates a persistent volume claim (mssql-pvc) for storage. Note that the secret includes the SQL Server service name, which facilitates binding to SQL Server later.
You can use the oc status command or the OpenShift web console to monitor the deployment's progress.
Using SQL Server from .NET Core on OpenShift
For this demo, we’ll use the s2i-dotnetcore-persistent-ex example application. This is a create, read, update, and delete (CRUD) application. The dotnetcore-3.1-mssql branch has support for an in-memory, PostgreSQL, or SQL Server back end.
You can configure the application with environment variables to support the back end that you choose. We're using the MSSQL_SA_PASSWORD and MSSQL_SERVICE_NAME environment variables for SQL Server. Here are the relevant code snippets:
// Detect that we should use a SQL Server backend:
string saPassword = Configuration.GetValue("MSSQL_SA_PASSWORD");
if (saPassword != null)
{
    dbProvider = DbProvider.Mssql;
}
...
// Determine the connection string:
case DbProvider.Mssql:
{
    string server = Configuration["MSSQL_SERVICE_NAME"] ?? "localhost";
    string password = Configuration["MSSQL_SA_PASSWORD"];
    string user = "sa";
    string dbName = "myContacts";
    connectionString = $@"Server={server};Database={dbName};User Id={user};Password={password};";
}
...
// Configure EF Core to use SQL Server:
case DbProvider.Mssql:
    Logger.LogInformation("Using Mssql database");
    services.AddDbContext(options =>
                options.UseSqlServer(connectionString));
The application that we want to deploy requires .NET Core 3.1. Let’s find out whether this version is available on the OpenShift cluster:
$ oc get is -n openshift dotnet
NAME      IMAGE REPOSITORY                                                           TAGS                 UPDATED
dotnet    default-route-openshift-image-registry.apps-crc.testing/openshift/dotnet   3.0,latest,2.2,2.1   2 months ago
.NET Core 3.1 is not listed, but we can add it by importing the required Universal Base Image (UBI) 8-based images:
# note: only needed when .NET Core 3.1 is not available
$ oc create -f https://raw.githubusercontent.com/redhat-developer/s2i-dotnetcore/master/dotnet_imagestreams_rhel8.json
imagestream.image.openshift.io/dotnet created
imagestream.image.openshift.io/dotnet-runtime created
Now, we're ready to deploy the application:
$ oc new-app dotnet:3.1~https://github.com/redhat-developer/s2i-dotnetcore-persistent-ex#dotnetcore-3.1-mssql --context-dir app
--> Found image 45eae59 (28 hours old) in image stream "mssqldemo/dotnet" under tag "3.1" for "dotnet:3.1"

	.NET Core 3.1
	-------------
	Platform for building and running .NET Core 3.1 applications

	Tags: builder, .net, dotnet, dotnetcore, dotnet-31

	* A source build using source code from https://github.com/redhat-developer/s2i-dotnetcore-persistent-ex#dotnetcore-3.1-mssql will be created
  	* The resulting image will be pushed to image stream tag "s2i-dotnetcore-persistent-ex:latest"
  	* Use 'start-build' to trigger a new build
	* This image will be deployed in deployment config "s2i-dotnetcore-persistent-ex"
	* Port 8080/tcp will be load balanced by service "s2i-dotnetcore-persistent-ex"
  	* Other containers can access this service through the hostname "s2i-dotnetcore-persistent-ex"

--> Creating resources ...
	imagestream.image.openshift.io "s2i-dotnetcore-persistent-ex" created
	buildconfig.build.openshift.io "s2i-dotnetcore-persistent-ex" created
	deploymentconfig.apps.openshift.io "s2i-dotnetcore-persistent-ex" created
	service "s2i-dotnetcore-persistent-ex" created
--> Success
	Build scheduled, use 'oc logs -f bc/s2i-dotnetcore-persistent-ex' to track its progress.
	Application is not exposed. You can expose services to the outside world by executing one or more of the commands below:
 	'oc expose svc/s2i-dotnetcore-persistent-ex'
	Run 'oc status' to view your app.
Use the oc status command or the OpenShift web console to monitor the deployment's progress. Once the application is deployed, expose it externally and capture the URL:
$ oc expose service s2i-dotnetcore-persistent-ex
route.route.openshift.io/s2i-dotnetcore-persistent-ex exposed
$ oc get route s2i-dotnetcore-persistent-ex
NAME                       	HOST/PORT                                             	PATH  	SERVICES                   	PORT   	TERMINATION   WILDCARD
s2i-dotnetcore-persistent-ex   s2i-dotnetcore-persistent-ex-mssqldemo.apps-crc.testing         	s2i-dotnetcore-persistent-ex   8080-tcp             	None
When browsing to the URL, note that the application is running from an in-memory database.
Adding contacts
Next, we'll add a few contacts, as shown in Figure 1.
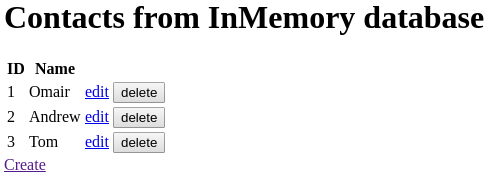
Figure 1: Adding contacts from the application's in-memory database.">
We'll use the oc set env command to configure the application to connect to SQL Server. Then, we'll add the data from mssql-secret to the application's deployment configuration:
$ oc set env --from=secret/mssql-secret dc/s2i-dotnetcore-persistent-ex --prefix=MSSQL_
The oc set env command restarts the application and connects to the Microsoft SQL Server running on OpenShift. Now you can create, remove, and update contacts in the database. Figure 2 shows a list of contacts.
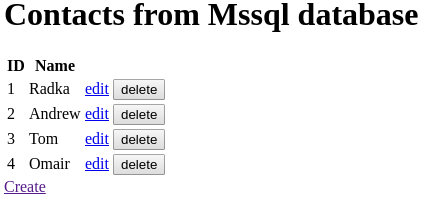
Figure 2: Contacts in the Microsoft SQL Server database.">
Connecting from a local .NET application
It is sometimes useful to connect to SQL Server on OpenShift from a .NET application that is running on your development machine. I'll show you how to do that next.
First, let’s get the application source code:
$ git clone https://github.com/redhat-developer/s2i-dotnetcore-persistent-ex
$ cd s2i-dotnetcore-persistent-ex
$ git checkout dotnetcore-3.1-mssql
$ cd app
Use the oc get pod command to identify the SQL Server pod. Then, enter the oc port-forward command to expose SQL Server on the local machine:
$ oc get pod | grep mssql | grep Running
mssql-1-288cm                           1/1       Running     0          34m
$ oc port-forward mssql-1-288cm 1433:1433
Forwarding from 127.0.0.1:1433 -> 1433
Forwarding from [::1]:1433 -> 1433
To connect the application to the database, we set the MSSQL_SA_PASSWORD environment variable. The password was printed when we deployed the SQL database. If you missed it, try doing a Base64-decode from the oc get secret mssql-secret -o yaml output.
Let’s run the application with the environment variable set:
$ MSSQL_SA_PASSWORD=aA1qxWYb8ME dotnet run
info: RazorPagesContacts.Startup[0]
      Using Mssql database
info: Microsoft.EntityFrameworkCore.Infrastructure[10403]
      Entity Framework Core 3.1.0 initialized 'MssqlDbContext' using provider 'Microsoft.EntityFrameworkCore.SqlServer' with options: None
...
info: Microsoft.EntityFrameworkCore.Migrations[20405]
      No migrations were applied. The database is already up to date.
info: Microsoft.AspNetCore.DataProtection.KeyManagement.XmlKeyManager[0]
      User profile is available. Using '/home/redhat-developer/.aspnet/DataProtection-Keys' as key repository; keys will not be encrypted at rest.
Hosting environment: Production
Content root path: /tmp/s2i-dotnetcore-persistent-ex/app
Now listening on: http://localhost:5000
Now listening on: https://localhost:5001
Application started. Press Ctrl+C to shut down.
Browse to the localhost web server to display the contacts that you added earlier.
Note that the demo starts the operation from the command line. You can also set the environment variable as part of the IDE debug configuration and launch the application from your IDE.
Managing SQL Server
On a Windows desktop, you can manage SQL Server as you always have, with SQL Server Management Studio. On a Linux or Mac desktop, you can use Azure Data Studio. You can find the installation instructions for Azure Data Studio here.
To connect to SQL Server, you need to set up port forwarding, as we did in the previous section. Next, you can open Azure Data Studio and add a connection for the localhost user sa and the password from the mssql-secret, as shown in Figure 3.

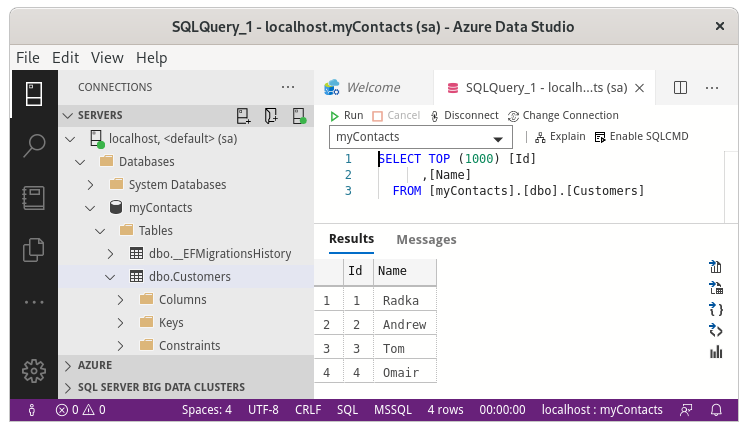
After connecting, you can perform operations from Azure Data Studio. For example, you could execute an SQL query against the Customer database, as shown in Figure 4.
Conclusion
In this article, you learned how to deploy Microsoft SQL Server on Red Hat OpenShift. I showed you how to use SQL Server from an ASP.NET Core application running on OpenShift and a .NET application running on your development machine. You also saw how to use Azure Data Studio to connect to the SQL Server database on OpenShift. You can try this on your development machine with CodeReady Containers.
Last updated: March 30, 2023