Data scientists often use notebooks to explore data and create and experiment with models. At the end of this exploratory phase is the product-delivery phase, which is basically getting the final model to production. Serving a model in production is not a one-step final process, however. It is a continuous phase of training, development, and data monitoring that is best captured or automated using pipelines. This brings us to a dilemma: How do you move code from notebooks to containers orchestrated in a pipeline, and schedule the pipeline to run after specific triggers like time of day, new batch data, and monitoring metrics?
Today there are multiple current tools and proposed methods for moving code from notebooks to pipelines. For example, the tool nachlass uses the source-to-image (S2I) method to convert notebooks ultimately into containers. In this article and in my original DevNation presentation, we explore a new Kubeflow-proposed tool for converting notebooks to Kubeflow pipelines: Kale. Kale is a Kubeflow extension that is integrated with JupyterLab's user interface (UI). It offers data scientists a UI-driven way to convert notebooks to Kubeflow pipelines and run the pipelines in an experiment.
We run these tools as part of the Open Data Hub installation on Red Hat OpenShift. Open Data Hub is composed of multiple open source tools that are packaged in the ODH Operator. When you install ODH you can specify which tools you want to install, such as Airflow, Argo, Seldon, Jupyterhub, and Spark.
Prerequisites
To run this demo, you will need access to an OpenShift 4.x cluster with cluster-admin rights to install a cluster-wide Open Data Hub Operator.
Install Kubeflow on OpenShift
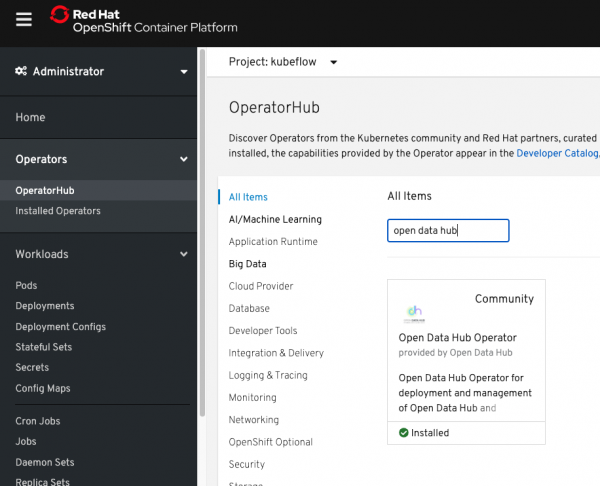
We can use the Open Data Hub Operator to install Kubeflow on OpenShift. From the OpenShift portal, go to the OperatorHub and search for Open Data Hub, as shown in Figure 1.
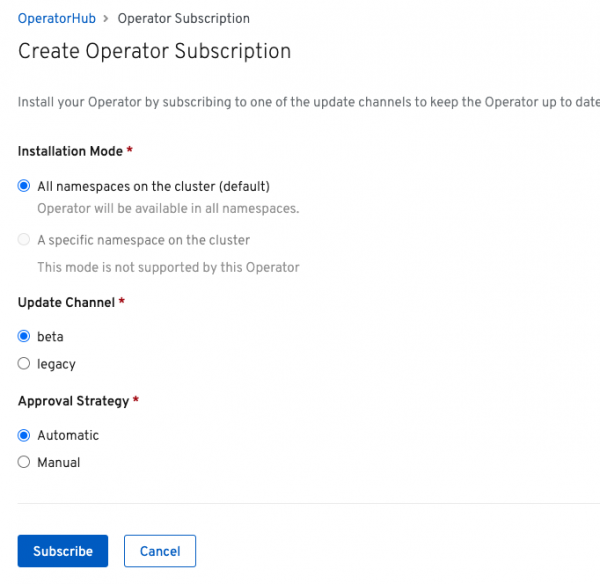
Click Install and move to the next screen. Currently, Open Data Hub offers two channels for installation: beta and legacy. The beta channel is for the new Open Data Hub releases that include Kubeflow. Keep the default settings on that channel, and click Subscribe, as shown in Figure 2.
After you subscribe, the Open Data Hub Operator will be installed in the openshift-operators namespace, where it is available cluster-wide.
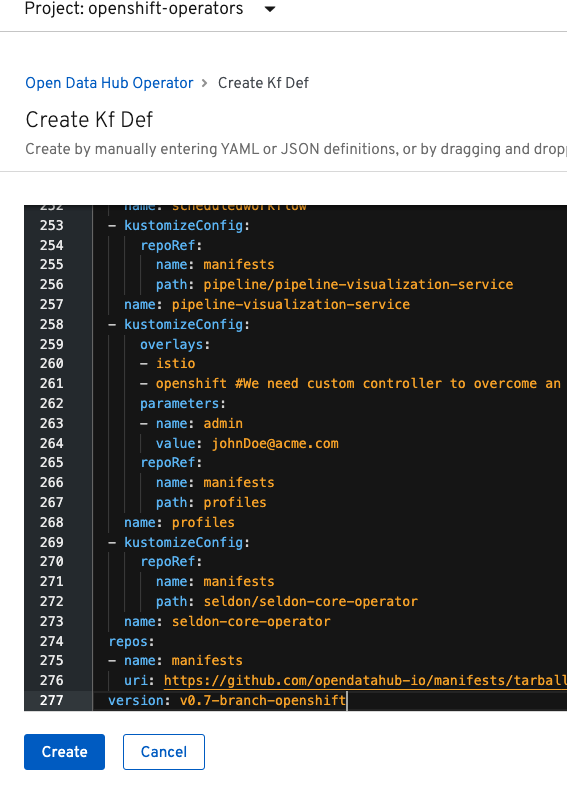
Next, create a new namespace called kubeflow. From there, go to Installed Operators, click on the Open Data Hub Operator, and create a new instance of the kfdef resource. The default is an example kfdef instance (a YAML file) that installs Open Data Hub components such as Prometheus, Grafana, JupyterHub, Argo, and Seldon. To install Kubeflow, you will need to replace the example kfdef instance with the one from Kubeflow. Replace the example file with this one, then click Create. You will see the file shown in Figure 3.
That is all it takes to install Kubeflow on OpenShift. Watch the pods install in the namespace and wait until all of the pods are running before starting on the next steps
Notebooks to pipeline
After the installation has successfully completed, the next step is to create a notebook server in your development namespace, then create a notebook that includes tasks for creating and validating models. To get to the Kubeflow portal, head over to the istio-system namespace and click on the istio-ingressgateway route. This route brings you to the main Kubeflow portal, where you must create a new profile and a working namespace. From the left side of the menu bar in the main menu, head over to Notebook Server and click on New Server. A new form will open, where you can create a notebook server to host your notebooks. Be sure that the namespace that you just created is selected in the drop-down menu.
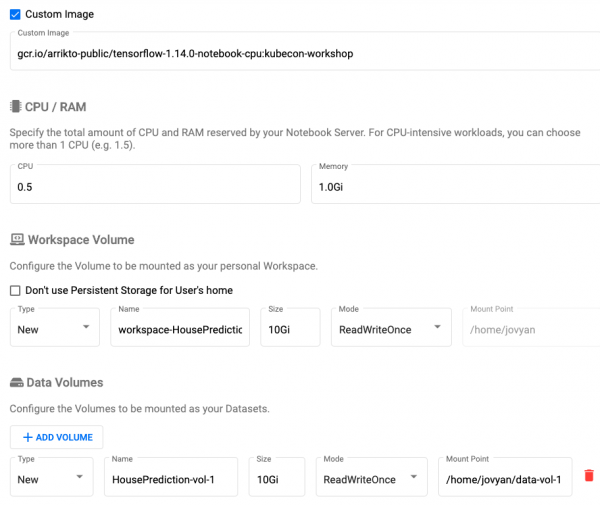
In this form, you must specify a custom image that includes the Kale component. Specify the custom image: gcr.io/arrikto-public/tensorflow-1.14.0-notebook-cpu:kubecon-workshop.
Add a new data volume, as shown in Figure 4, then hit Launch.
Once it is ready, you can connect to the notebook server that you just created. The new notebook server gets you to the main JupyterLab portal, which includes Kubeflow's Kale extension.
An example notebook
We will use a very simple notebook based on this example. The notebook predicts whether a house value is below or above average house values. For this demonstration, we simplified the notebook and prepared it for a pipeline. You can download the converted notebook from GitHub.
Tasks in this notebook include downloading the house-prediction data, preparing the data, and creating a neural network with three layers that can predict the value of a given house. At this point, the example notebook looks like a normal notebook, and you can run the cells to ensure that they are working.
To enable Kale in the notebook, click on the Kubeflow icon on the left-side menu bar and click Enable. You should see something similar to the screenshot in Figure 5.
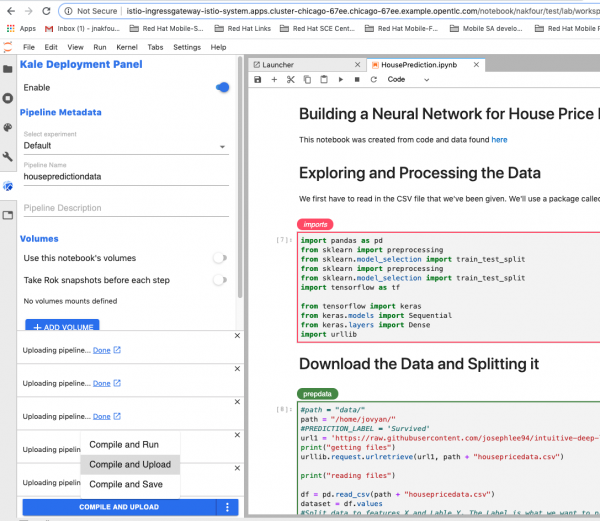
You can specify the role for each cell by clicking the Edit button on the top-right corner of each cell. As shown in Figure 5, we have an imports section and a prepdata pipeline step, as well as a trainmodel pipeline step (not shown) that depends on prepdata step. Name the experiment and the pipeline, then click Compile and Upload.
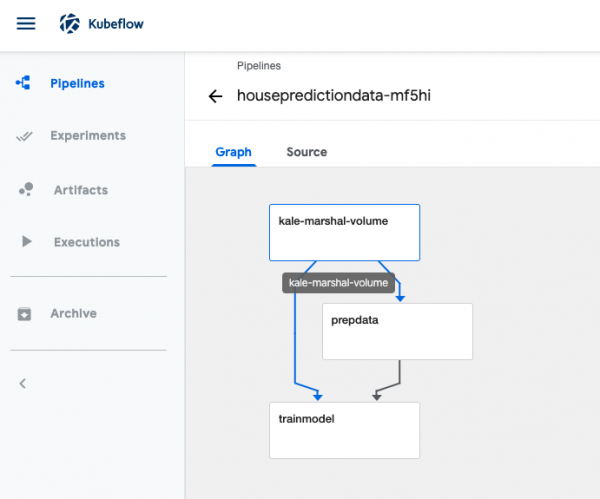
For now, we will just create the pipeline and defer running it until later. When you get an Okay message, head over to the main Kubeflow portal and select Pipelines. The first pipeline listed is the Kale-generated pipeline. If you click on it, you should see the pipeline details shown in Figure 6.
Adjusting the pipeline
You can explore the code and see the different steps in the pipeline. This is a generated pipeline that assumes the underlying Argo is using a docker container. As a result, this pipeline will not run on OpenShift, which uses a CRI-O container engine and the k8sapi executor for Argo.
Also, note that the container image that is used for each step requires root permissions, so we had to give root privileges to the service account running the workflow (oc adm policy add-role-to-user admin system:serviceaccount:namespace:default-editor). Obviously, this method of running containers on OpenShift is not advised. In the future, we hope to change the container so that it does not require root privileges.
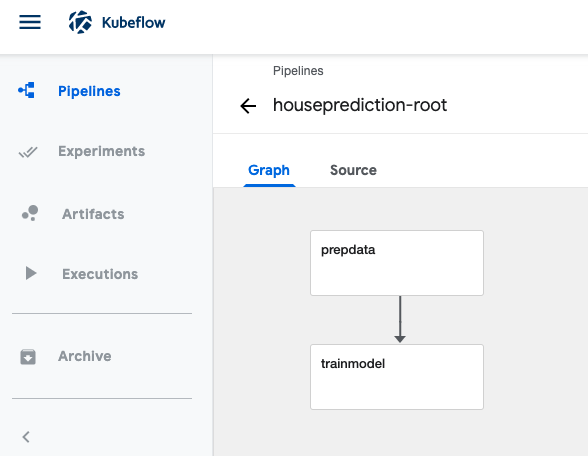
You can download the adjusted pipeline and a volume YAML resource from GitHub. Create the volume before uploading and running the adjusted pipeline, which is shown in Figure 7.
Note: This adjustment does not change the containers themselves. Instead, the pipeline structure, permissions, and added volumes were changed.
Conclusion
In this article, you learned how to install Kubeflow on OpenShift using the Open Data Hub Operator, and we explored using Kubeflow's Kale extension to convert notebooks to pipelines. Moving code from notebooks to pipelines is a critical step in the artificial intelligence and machine learning (AI/ML) end-to-end workflow, and there are multiple technologies addressing this issue. While these conversion tools might be immature and in development, we see great potential and room for improvement. Please join our Open Data Hub community and contribute to developing AI/ML end-to-end technologies on OpenShift.
Last updated: February 5, 2024