You can start developing with the latest versions of languages, databases, and web servers available with Red Hat Enterprise Linux 8 even if you are still running RHEL 7. It is pretty simple to do with containers, even if you’ve only been through a “Hello, World” or two.
By the end of this article, you’ll have the current RHEL 8 application stream versions of PHP, MariaDB, and Apache HTTPD running in containers, managed by systemd on your RHEL 7 system. Podman makes it easy to accomplish this since there is no container daemon to complicate things. We’ll use WordPress as a placeholder for your own application code.
From my perspective, using RHEL 8 application streams in a container is preferable to using software collections. All of the software installs in the locations you’d expect. There is no need to use scl commands to manage selected versions of software, instead each container gets an isolated filesystem. You don’t have to worry about conflicting versions. You just need to get comfortable using containers.
In case you haven’t been following the Red Hat Developer blog closely, there are a few new things you should know. For example, If you are looking for rhel8 container images you might be surprised to find them under ubi8 instead of rhel8. This article pulls those details together to get you started using RHEL 8 application streams and Universal Base Images (UBI) in containers so you’ll have up-to-date versions for development.
TL;DR — How to run RHEL 8 in a container on RHEL 7
$ sudo subscription-manager repos --enable rhel-7-server-extras-rpms
$ sudo yum install podman buildah
$ sudo podman login registry.redhat.io
$ sudo podman run -it registry.redhat.io/ubi8/ubi
Now inside the RHEL 8 container, see what application streams are available, then install PHP 7.2:
# yum module list
# yum -y module install php/7.2
# php -v
Now you have the application stream for PHP 7.2 in the running container and can explore the other RHEL 8 application streams and rpms. Later in the article, we'll cover how to get MariaDB and HTTPD running in containers.
Install Podman and Buildah on RHEL 7
First, we need to install Podman, which is in the extras repo on RHEL 7. The extras repo isn’t enabled by default. It is recommended that developers also enable the rhscl (Red Hat Software Collections), devtools, and optional repos.
$ sudo subscription-manager repos --enable rhel-7-server-extras-rpms \
    --enable rhel-7-server-optional-rpms \
    --enable rhel-server-rhscl-7-rpms \
    --enable rhel-7-server-devtools-rpms
Now install Podman and Buildah. If sudo isn’t set up on your system, see "How to enable sudo on Red Hat Enterprise Linux."
$ sudo yum install podman buildah
Later, we’ll be running containers with systemd. If SELinux is enabled on your system, which is the default, you must turn on the container_manage_cgroup boolean to run containers with systemd. For more information, see the "containers running systemd" solution.
Note: The Red Hat ID that was created when you joined Red Hat Developers gives you access to content on the Red Hat Customer Portal.
$ sudo setsebool -P container_manage_cgroup on
Run RHEL 8 in a container
Next, we’ll pull the RHEL 8 universal base image; but first, we’re going to log into the new Red Hat Container registry which supports authentication, registry.redhat.io. If you don’t log in, you’ll get a somewhat cryptic error message when you try to pull down an image that requires authentication.
Use your Red Hat Developer username and password to log in to the registry:
$ sudo podman login registry.redhat.io
Note: podman has been designed so that it can be run without root. However, the support for it isn’t there with RHEL 7.6. For more information, see Scott McCarty’s preview of running containers without root in RHEL 7.6.
Ok, now pull the RHEL 8 image:
$ sudo podman pull registry.redhat.io/ubi8/ubi
You can now inspect the image to see things like the command that will be run when the container is started, for example:
$ sudo podman inspect registry.redhat.io/ubi8/ubi | grep -A 1 Cmd
If you need help with Podman commands, see the Podman Basics Cheat Sheet.
Now run the RHEL 8 container:
$ sudo podman run -it registry.redhat.io
Because the default command is /bin/bash, you’ll be dropped into a Bash shell with a RHEL 8 userland. Check the version and then see what application streams are available:
# cat /etc/redhat-release
# yum module list
You can install and explore application streams and/or other rpms at this point. Keep in mind that containers are designed to be ephemeral, so changes you make won’t stick around.
For RHEL 8 commands, see the RHEL 8 Developer Cheat Sheet.
When you are done and have exited the container, you can clean it up with podman rm. To make things easy during development there is an option, -a that will get rid of all of the containers on your system:
$ sudo podman rm -a
Red Hat Universal Base Images
In the yum module list output from RHEL 8 in a container, you might notice application streams labeled Red Hat Universal Base Image 8 and others labeled Red Hat Enterprise Linux 8. So, what is UBI all about?
From Mike Guerette’s article, "Red Hat Universal Base Image: How it works in 3 minutes or less":
“Red Hat Universal Base Images (UBI) are OCI-compliant container base operating system images with complementary runtime languages and packages that are freely redistributable. Like previous RHEL base images, they are built from portions of Red Hat Enterprise Linux. UBI images can be obtained from the Red Hat Container Catalog and be built and deployed anywhere.
And, you don’t need to be a Red Hat customer to use or redistribute them. Really.”
With the release of RHEL 8 in May, Red Hat announced that all RHEL 8 base images would be available under the new Universal Base Image End User License Agreement (EULA). This means you can build and redistribute container images that use Red Hat’s UBI images as your base instead of having to switch to images based on other distributions, like Alpine. In other words, you won’t have to switch from using yum to using apt-get when building containers.
There are three base images for RHEL 8. The standard one is called ubi, or more precisely, ubi8/ubi. This is the image used above and is the one you will probably use most often. The other two are very minimal containers; they have very little supporting software in them for when image size is a high priority and a multi-service image that allows you to run multiple processes inside the container managed by systemd.
Note: There are also UBI images for RHEL 7 under ubi7 if you want to build and distribute containers running on a RHEL 7 image. For this article, we’ll only be using the ubi8 images.
If you are just starting out with containers, you might not need to delve into UBI details right now. Just use the ubi8 images to build containers based off RHEL 8. However, you will want to understand UBI details when you start distributing container images or have questions about support. For more information, see the references at the end of this article.
Run MariaDB in a container
In this next step, we’ll get the RHEL 8 MariaDB application stream running in a container managed by systemd on the host system. We’ll follow the example from Alessandro Arrichiello’s article, "Managing containerized system services with Podman," but update it to use the RHEL 8 application stream.
First, pull down the MariaDB image. Note: When this article was written there wasn’t a MariaDB image based on UBI in the Red Hat Container Catalog.
$ sudo podman pull registry.redhat.io/rhel8/mariadb-103
Because containers are designed to be ephemeral, we need to set up permanent storage for the database. We’ll set up a directory on the host’s system and map it into the container. First, inspect the image to find the user ID we’ll need for the directories. Alternatively, we could also get information about this image from the Red Hat Container Catalog page.
$ sudo podman inspect mariadb-103 | grep -A 1 User
Once you have the user ID, create a directory on the host and give that User ID ownership.
$ sudo mkdir -p /opt/var/lib/mysql/data
$ sudo chown 27:27 /opt/var/lib/mysql/data
Next, create a systemd unit file to manage mysqld. As root, use an editor or cat > to create /etc/systemd/system/mariadb-wordpress.service with the following contents:
[Unit]
Description=Custom MariaDB Podman Container
After=network.target

[Service]
Type=simple
TimeoutStartSec=5m
ExecStartPre=-/usr/bin/podman rm "mariadb-wordpress"

ExecStart=/usr/bin/podman run --name mariadb-wordpress -v /opt/var/lib/mysql/data:/var/lib/mysql/data:Z -e MYSQL_USER=wordpress -e MYSQL_PASSWORD=mysecret -e MYSQL_DATABASE=wordpress --net host registry.redhat.io/rhel8/mariadb-103

ExecReload=-/usr/bin/podman stop "mariadb-wordpress"
ExecReload=-/usr/bin/podman rm "mariadb-wordpress"
ExecStop=-/usr/bin/podman stop "mariadb-wordpress"
Restart=always
RestartSec=30

[Install]
WantedBy=multi-user.target
Next, tell systemd to reload, start the MariaDB service, and then check the output:
$ sudo systemctl daemon-reload
$ sudo systemctl start mariadb-wordpress
$ sudo systemctl status mariadb-wordpress
The MariaDB port, 3306, is exposed to the host system. So if you have the client installed, you should be able to connect to the database.
Set up the HTTPD and PHP container
Next, we’ll need a web server and a recent PHP running in a container. Browsing the Red Hat Container Catalog, you’ll find a PHP 7.2 image that includes Apache HTTPD 2.4 and is based on ubi8. Start by pulling down the image:
$ sudo podman pull registry.redhat.io/ubi8/php-72
Inspect the image to check the user ID, ports, and WorkingDir:
$ sudo podman inspect registry.redhat.io/ubi8/php-72 | egrep -A 1 User\|ExposedPorts\|WorkingDir
Next, create a systemd unit file to manage HTTPD. As root, use an editor or cat > to create /etc/systemd/system/httpd-wordpress.service with the following contents:
[Unit]
Description=Custom httpd + php Podman Container for example app

After=mariadb-wordpress.service

[Service]
Type=simple
TimeoutStartSec=30s
ExecStartPre=-/usr/bin/podman rm "httpd-wordpress"

ExecStart=/usr/bin/podman run --name httpd-wordpress -p 8080:8080 -v /opt/src/wordpress:/opt/app-root/src:Z --net host registry.redhat.io/ubi8/php-72 /bin/sh -c /usr/libexec/s2i/run

ExecReload=-/usr/bin/podman stop "httpd-wordpress"
ExecReload=-/usr/bin/podman rm "httpd-wordpress"
ExecStop=-/usr/bin/podman stop "httpd-wordpress"
Restart=always
RestartSec=30

[Install]
WantedBy=multi-user.target
Tell systemd to reload, but don’t start it yet; we need to create our example application first.
$ sudo systemctl daemon-reload
Use WordPress as an example PHP application
Next, we’ll use WordPress as a placeholder for your PHP application under development. The code will be stored on your local machine and mapped into the HTTPD/PHP container when it runs. You’ll be able to edit the code on your local machine as you would any other application. Because it is mapped via a volume mount, the changes you make to the code will be immediately visible inside the container, which is very convenient for dynamic languages that don’t need to be compiled. This isn’t the way to do things for production use, but it is a way to get going quickly and should provide essentially the same development inner loop that you’d have developing locally without containers.
Pull down and unpack the latest WordPress source code:
$ cd /tmp
$ curl -L -o wordpress-latest.tar.gz https://wordpress.org/latest.tar.gz
Now we need to create a directory with the code that the httpd container can map and have access to. Although WordPress is good as a somewhat canonical demo app, it’s a little problematic in that it needs write access for the configuration file. Ideally, configuration would be stored separately from the code. For the sake of brevity in this article, we’ll do a quick hack and change the ownership of the WordPress directory to the user ID that the HTTPD container runs under (which we obtained previously).
$ sudo mkdir -p /opt/src/wordpress
$ sudo tar -C /opt/src -xvf /tmp/wordpress-latest.tar.gz
$ sudo chown -R 1001 /opt/src/wordpress
Start the HTTPD and PHP container, test the app
Start the container with systemd, then check the status:
$ sudo systemctl start httpd-wordpress
$ sudo systemctl status httpd-wordpress
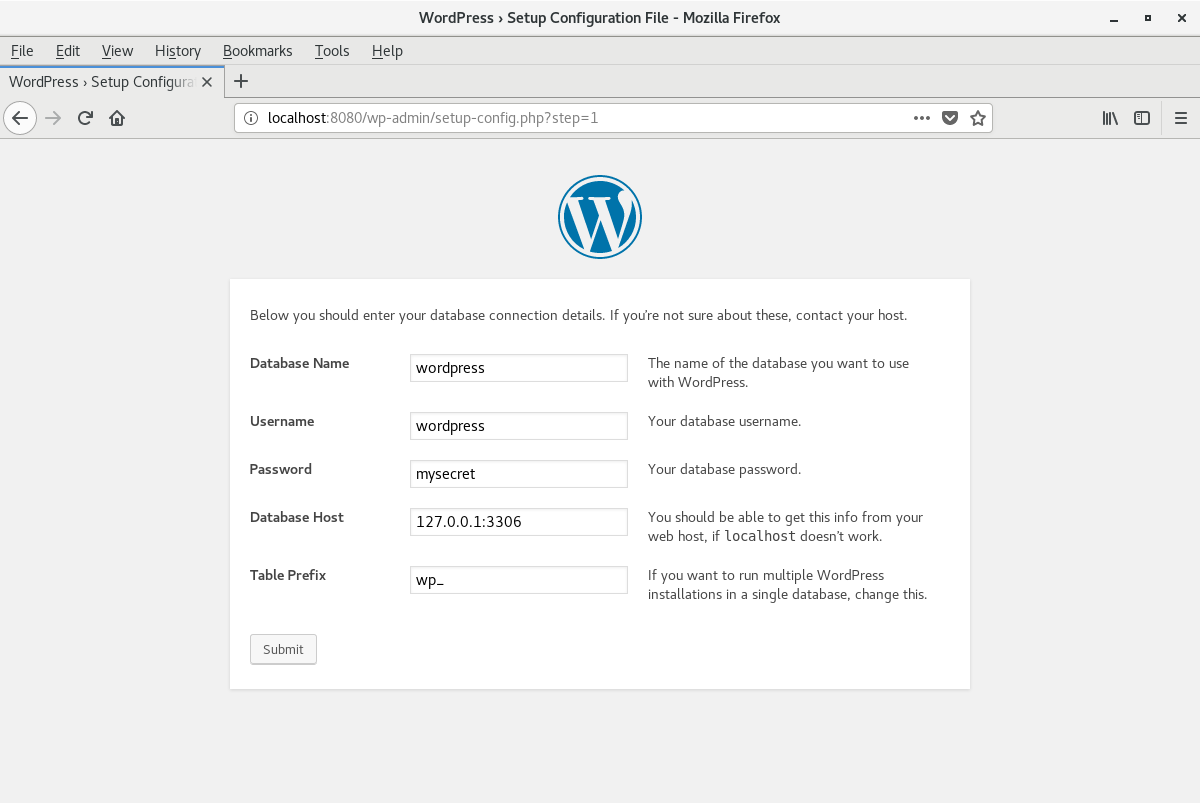
Once the container is running, use a browser on your host system to navigate to http://127.0.0.1:8080/. You should see the WordPress "set language" screen. Follow the prompts to begin the installation. Then, set up the parameters to connect to the database:
- Database name: wordpress
- Username: wordpress
- Password: mysecret
- Database Host: 127.0.0.1:3306
- Table Prefix: wp_
If you want to access the HTTPD server from a different machine, you'll need to open up the firewall for port 8080:
$ sudo firewall-cmd --permanent --add-port=8080/tcp
$ sudo firewall-cmd --add-port=8080/tcp
You can now develop your application on your local machine using the container versions of MariaDB, PHP, and Apache HTTPD.
Use Buildah to create an image with your PHP app
After you’ve developed your app, you can use Buildah to create a container image with your app, which is based on the UBI 8 PHP 7.2 image. When that container image is run, it will pull in PHP and HTTPD running on top of the UBI 8 base image.
With Buildah, you can use Dockerfiles or command lines, which are better for build automation and complex builds. First, the Dockerfile approach:
Create this Dockerfile in /opt/src:
FROM registry.redhat.io/ubi8/php-72
ADD wordpress /opt/app-root/src
CMD [ "/bin/sh", "-c", "/usr/libexec/s2i/run"]
To build the image (don’t forget the trailing ‘.’):
$ cd /opt/src
$ sudo buildah bud -t myorg/myphpapp .
You can inspect the image with either Buildah or Podman:
$ sudo buildah inspect myorg/myphpapp
To run the new image, first stop the systemd container, then start the new container
$ sudo systemctl stop httpd-wordpress
$ sudo podman run --name myphpapp --net host -d -p 8080:8080 myorg/myphpapp
If you go to http://127.0.01:8080/ in a browser, you should see the blog running in the new container.
You could now push the myorg/myapp image to a container registry to share it with others.
Instead of using a Dockerfile, we could have built the image with Buildah command lines. Here are the commands that would build the same image:
$ su -
# buildah --name myorg/myphpapp from ubi8/php-72
# buildah copy myorg/myphpapp wordpress /opt/app-root/src
# buildah config --cmd '/bin/sh -c /usr/libexec/s2i/run' myorg/myphpapp
# buildah commit myorg/myphpapp
Buildah has other nice features, including the mount command, which will let you mount the image on the host system for inspection:
# mountpoint=$(buildah mount ${container})
# cd $mountpoint
Now you can look around the image as a regular filesystem. You can also modify the image during builds. This opens up many possibilities for streamlining the way images are built. See "Getting Started with Buildah" for an overview.
Next Steps
By now you should see that it is pretty easy to get the software components you need running in containers so you can focus on development. It shouldn’t feel very different from developing without containers.
Once your app is ready, you can build it into a container image that uses the same components you used during development. You can push it to a registry such as Red Hat’s Quay.io.
You can check out the other UBI 8 images available for use in the Red Hat Container Catalog. If the language, runtime, or server aren’t available as a UBI image, you can build your own starting with the ubi8 base image. Then, you can add the application streams and other rpms you need using yum commands in a Dockerfile, or using buildah run.
The setup in this article has several drawbacks. It was intended to be a quick-and-easy demo, and there are many ways to improve the setup. For example, the containers were configured to share the host’s network with --net host, which made it simple for the web server to connect to the database server. Although this is quick and easy for development, you don’t have the network isolation you get from the default container networking configuration. You could run into port conflicts if you have a number of apps that want to use the same port.
One way to improve the configuration would be to use Podman’s pod capabilities to put the web and database containers in the same pod where they share namespaces.
The limits of compatibility and supportability with containers
If you are considering running RHEL 8 containers on top of RHEL 7 in production, you should consult the Red Hat Enterprise Linux Container Compatibility Matrix to see what is appropriate for your specific situation.
It's a common misconception that you can run any container on any container host and everything will just work. One of the advantages (and one of the disadvantages) of containers is that any container you run shares the Linux kernel of the host machine. There has been great effort to maintain an application binary interface (ABI) for compatibility between applications and kernel versions, but there have also been changes over time that may break things in subtle ways.
To put this in perspective, RHEL 8 uses Linux kernel version 4.18, whereas RHEL 7 uses kernel version 3.10. So, when you run RHEL 8 containers on top of RHEL 7, you are running things that were built and tested for a 4.18 kernel on top of a 3.10 kernel. Because of ABI compatibility, many things just work as long as they don’t dig too far down into the more esoteric system interfaces that have changed over time. As you can see from the sheer amount of containerized software that is available, most applications work on a range of host systems, but there are no guarantees that everything has been tested or is fully supported.
For more details, see Scott McCarty’s article, "The limits of compatibility and supportability with containers." He explains the problems that can (and have) occurred. However, he says, “At Red Hat, we feel confident that we can offer support, and patching of RHEL 6, RHEL 7, and RHEL 8 container images on RHEL 7 and RHEL 8 container hosts.” Hopefully, I didn’t take that too far out of context.
More information
Cheat sheets:
Podman and Buildah:
- Podman and Buildah for Docker Users
- Managing containerized system services with podman
- Podman: Managing pods and containers in a local container runtime
- Getting Started with Buildah
- Building, Running, and Managing Containers - RHEL 8 Documentation
- Getting Started with Containers - RHEL 7 Documentation
UBI:
Last updated: January 5, 2022