

You've crushed the whole containers thing—it was much easier than you anticipated, and you've updated your resume. Now it's time to move into the spotlight, walk the red carpet, and own the whole Kubernetes game. In this blog post, we'll get our Kubernetes environment up and running on Windows 10, spin up an image in a container, and drop the mic on our way out the door—headed to Coderland.
Windows? Oh, yeah!
Just because containers run on Linux doesn't mean Windows developers should be left out of the picture. Quite the contrary: Given that .NET runs in containers now, Windows devs are full first-class citizens of the containers and Kubernetes community. In this article, we'll apply a bit of PowerShell magic and we'll have your Windows PC already to for you to start learning about and using Kubernetes.
The parts
Unlike a certain brand of kitchen cabinets that I recently purchased that had instructions only as diagrams with a stick figure person and some numbers and arrows, we'll lay out the items and steps with diagrams and words. We need:
- A way to run containers.
- Kubernetes.
- The Kubernetes command-line tool,
kubectl. We can argue over how to pronounce it later. - Red Hat OpenShift command-line tool,
oc. - An image to run as a test.
A way to run containers
We need some sort of environment to run containers. Options include Minikube, CodeReady Containers, and a Red Hat OpenShift cluster (running on, say, AWS). We’ll keep things simple and forward-looking by choosing CodeReady Containers (abbreviated as "CRC"). This will run on our local machine yet give us the power of Kubernetes (and OpenShift 4, by the way) without spending any money.
That's always nice.
So let's install CodeReady Containers on Windows 10. It's four steps.
Installing CodeReady Containers
- Visit the CodeReady Containers downloads page and download the latest Windows-compatible release. Keep the page open; you'll need it for step five.
- Uncompress the file. The easiest way to do this is to double-click on it in the File Explorer, the extract the files.
- Put the executable (crc.exe) somewhere in your system path, or put it into a new directory and modify your system path. Hint: I use chocolatey on my machine and put binaries into my "C:\ProgramData\chocolatey\bin" directory.
- While you at the CodeReady Containers downloads page, go ahead and download the pull secret; the button is just a bit further down the page. This will be used for authentication the first time you start your Kubernetes (OpenShift, actually) cluster.
It looks like this:

Also; if you're not using chocolatey, stop everything and install it. It's that great.
Prove it
The command crc version should yield:
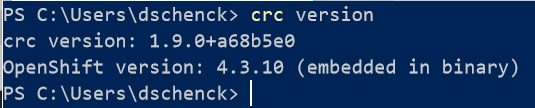
Note that, depending on when you do this, you may have a new version than shown here.
Installing Kubernetes
Bonus: It's included in CRC. Wow, that was easy.
Installing kubectl
The Kubernetes command-line tool, kubectl, is a breeze to install on Windows:
choco install -y kubernetes-cli
(If that fails, there is a more in-depth explanation on the kubectl installation page.)
Installing oc
To install oc, the OpenShift command-line tool, visit the CLI installation page and follow the directions. Basically, you download it and make sure it's in your system's path.
Set it up
Before you can start using CRC, you need to initialize it. There are several option you can set, such as how much memory and number of CPUs, but to keep it simple let’s go with the defaults. Use the following command:
crc setup
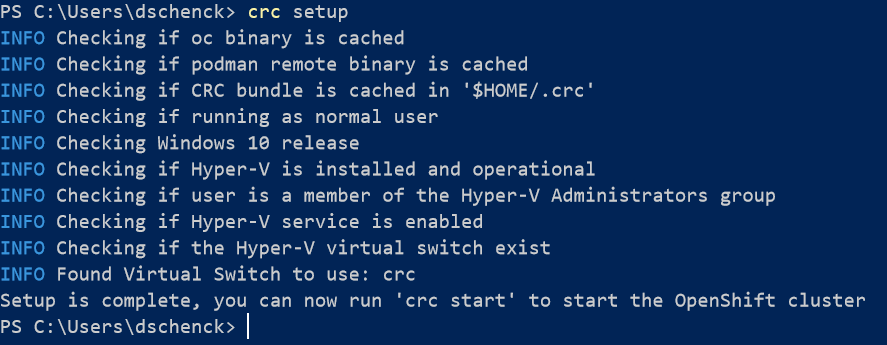
You will not see that final INFO line related to the virtual switch "crc". I added that to my machine because I'm using Windows 10 Enterprise, which is not supported by CodeReady Containers.
(However, I have a forthcoming blog post addressing that and how to make it work.)
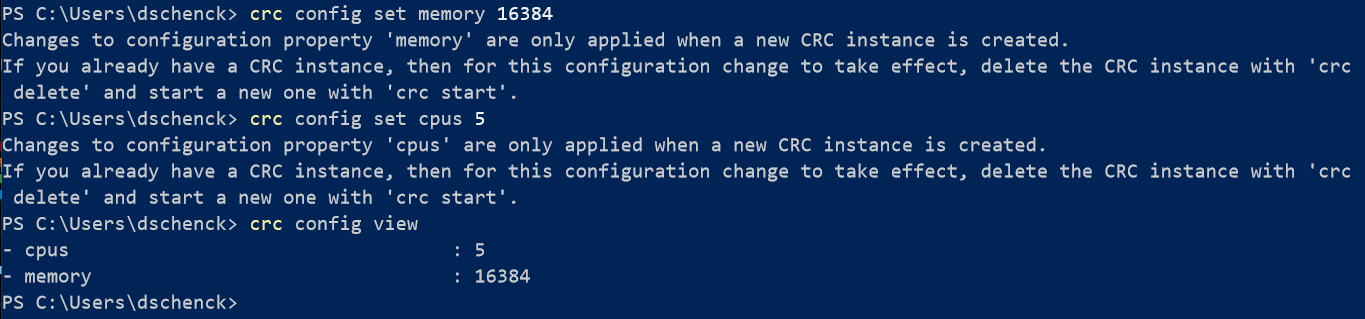
For the sake if improved performance, you can run two optional commands to set your memory and CPU usage. If you wish to do this, use the following commands to set and view your environment:
crc config set memory 16384
crc config set cpus 5
crc config view
Fire it up
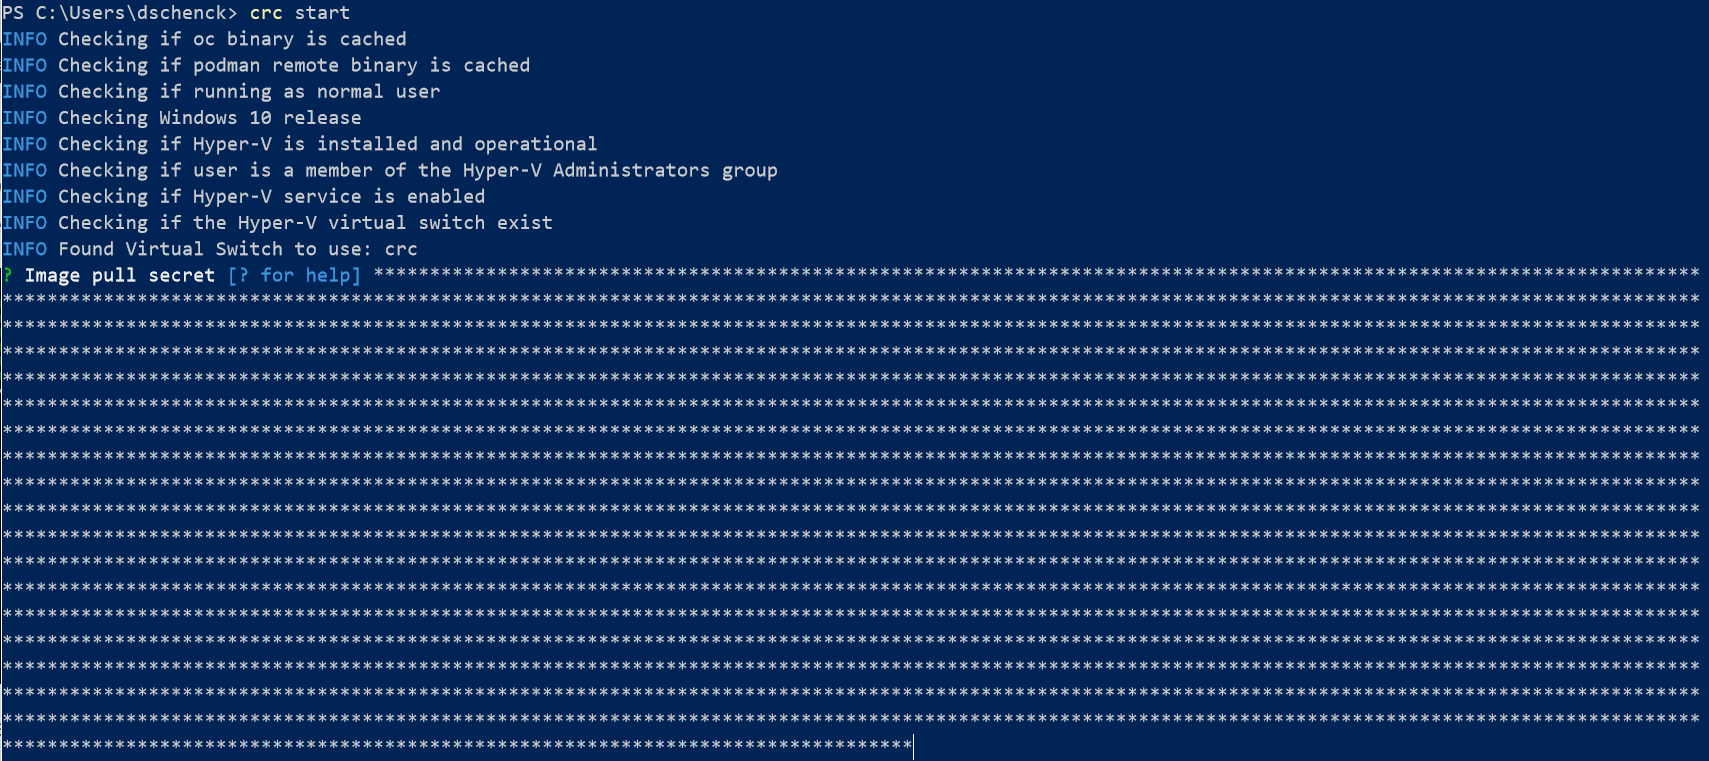
Time to get your cluster up and running. It’s one command, but, you’ll need your “pull secret” first. Copy it to your PC's clipboard so you can paste it into the terminal window.
It’s quite simple; at the command line, use the following command:
crc start
You will be prompted for your pull secret. Paste it into the command line and mash the Enter key and CRC will start.
Note: If, at any time, you want to start fresh with CRC, use the commands crc stop and crc delete --force --clear-cache.
Be patient, it takes a few minutes.
When that finishes, we need a few commands to get “attached,” if you will, to our cluster. We’re going to cheat here and use some OpenShift commands; those commands are shortcuts. If we didn’t use them, we’d have to alter our Kubernetes configuration and create a user and grant access. We can save a ton of steps. If you want to use only kubectl and be a purist, you can follow this blog post “Logging Into a Kubernetes Cluster With Kubectl."
Fortunately for us, the login instructions are displayed right there on the screen. You might want to save it for the sake of convenience. If you don’t, and you need to log in, you can use the command crc console --credentials.

An image to run
Finally, it’s a good idea to run a very basic image as a Kubernetes pod to test your setup. To do this, let’s run an image in a pod and then run curl to make sure it’s all working as expected.
What's in a name?
Kubernetes uses namespaces to group objects, and we need to create a namespace for our test. Since we are using CRC and have an OpenShift cluster running on top of our Kubernetes instance, let's cheat and make life easy by using the following command:
oc new-project test
This will create the "test" namespace and use it in subsequent commands.
Creating that first pod
We'll use a Linux image that I created. Use this command to spin up a pod:
kubectl run qotd --image=quay.io/donschenck/qotd:v2 --port=10000
This will pull an image down from my public repository to your system and run it using Kubernetes.
A little more detail: This creates a pod named qotd, retrieves the image, starts the image in a container, and uses port 10000 to route to it. Note that the pod name and the name of the image do not need to match. This is an area where you want to put some management thought into place. In other words, this is a great opportunity to make things really confusing if you’re not thoughtful. Don’t ask how I know this.
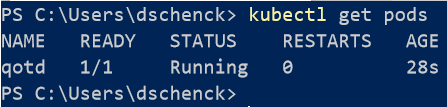
Note that waiting for this pod to get up and running might take a few minutes, depending on your machine’s performance. When done on a server or high-performance PC, it takes about a minute or so. You can check on it by running kubectl get pods.
When the pod is up and running, you cannot access it from your command line. Why is that? Because it’s running “inside” your Kubernetes cluster. However, Kubernetes is smart and provides a proxy to your pods in Kubernetes because there may be several containers running the same application; a pod of containers. All with the same URI. When you run kubectl get pods you can see your qotd pod.
Reaching the application
There are two aspects, if you will, to the proxy that Kubernetes has created. One aspect is the proxy itself. The other aspect is the public face of the proxy, that which allows you to access your pods. In other words, the proxy runs on port 8001, while the proxy routes are what allow you to reach your application.
To test the proxy and its access to your pod is a two-step process. Not to worry; this gets much better and much easier later. But for now, we must start the proxy and then access the pod through the proxy. You’ll need to open a second terminal window to do this.
In the first terminal window, run the following command:
kubectl proxy

The proxy is running. This will tie up the command line (i.e., it runs interactively), so you need a second terminal window to run the following PowerShell command, which will return a list of the proxy routes:
(curl http://127.0.0.1:8001).content

Wow. Those results. Those are all the routes built into the Kubernetes proxy. And that’s the thing: We’re not reaching our application yet … just the proxy.
The endpoint that leads to our application is /api/v1. The format we want is api/v1/namespaces/{our namespace}/pods/{pod name}/proxy/.
The {our namespace}, in our particular instance, is test.
The pod name can be found, again, by running kubectl get pods. In our example it’s qotd.
Put those pieces together and you can reach our application from your second terminal (remember: kubectl proxy is still running in our first terminal window):

Let’s have some fun
The application has several endpoints. Give them a try:
curl http://127.0.0.1:8001/api/v1/namespaces/test/pods/qotd/proxy/quotes/random).content
/version
/quotes
/quotes/random
/quotes/1
For example: (curl http:127.0.0.1:8001/api/v1/namespaces/test/pods/qotd/proxy/quotes/random).content
By the way…
By the way, qotd is written in Go. The magic of containers: (almost) all development languages are welcomed.
Wait, there's more
Although you now have a Kubernetes cluster running on your local machine, there's still a lot more to know and do. For instance, there must be an easier way to get to your application than running kubectl proxy in a second terminal. There must be a way to run more than one container, or more than one application. There must be a way to update your code while it's running—a "rolling update" as it's known.
And there is. We'll cover all this as the series continues.
