It has been just one month since the announcement of the release of Red Hat CodeReady Workspaces 1.0.0 Beta. Because the cloud/browser-based IDE may be full of promises, developers are usually suspicious, considering them as toys for occasional coders but not suitable for software craftsmen. But you'll quickly see that Red Hat's offering can be a good companion for building tailor-made environments.
The goal of this two-part series is to give a walk-through of using Red Hat CodeReady Workspaces to develop a Java EE (now Jakarta EE) application using Red Hat JBoss Enterprise Application Platform (JBoss EAP). I’ll give you details on how to bring your own tools, configure your workspace with helpful commands for JBoss EAP, and share everything so you can easily onboard new developers.
Red Hat CodeReady Workspaces
Red Hat CodeReady Workspaces is built on the Eclipse Che open source project and offers:
- Centralized configuration management of development workspaces
- Secured access to the development environment with source code that may remain on the central server, not the developer’s laptop
- Extensible configuration allowing you to bring your own tools and reuse the runtimes you’ll use in production
- A rich, browser-based development experience including auto-completion, navigation, debuggers, and easy sharing through the factory concept
The entire product runs on a Red Hat OpenShift cluster (on-premises or in the cloud), so there’s nothing to install on your machine. The installation instructions give details on how to set up everything on your OpenShift cluster; installation is done through an Ansible PlayBook Bundle running on the cluster Ansible Service Broker. Although it makes extensive use of containers technology for installation, defining your stacks, and configuring your workspaces, it is not exclusively dedicated to the development of applications running as containers. That’s what I’m trying to demonstrate throughout this post.
So, have you’ve got your Red Hat CodeReady Workspaces set up? Let’s dive into this JBoss EAP tour!
Defining your custom stack
A Red Hat CodeReady Workspaces stack is the basic building block for workspaces: it includes everything you may need for compiling, testing, debugging, or packaging your app. Even though the Red Hat CodeReady Workspaces installation comes with default stacks for many technologies (Java, JBoss EAP, Spring Boot, NodeJS, Python, and so on), extending them and creating your own stack is a common practice. Stacks are based on one or many container images and as such, providing stacks is basically a matter of writing Dockerfiles and building images.
Some common use cases, imagine your organization uses self-signed certificates to access infrastructure or you have started working with containerized apps on OpenShift and find it convenient to also use the oc or the odo command-line tools. You may have to extend the default stacks-java:1.0.0.Beta1 provided by Red Hat—which already includes OpenJDK, JBoss EAP, and Maven—in order to add your custom CA certificate and the tools you need:
FROM registry.access.redhat.com/codeready-workspaces-beta/stacks-java:1.0.0.Beta1
ADD ca.crt /etc/pki/ca-trust/source/anchors/ca.crt
RUN sudo update-ca-trust
USER root
RUN echo yes | keytool -keystore /etc/pki/java/cacerts -importcert \
               -alias HOSTDOMAIN -file /etc/pki/ca-trust/source/anchors/ca.crt \
               -storepass changeit
RUN curl -LO https://github.com/openshift/origin/releases/download/v3.11.0/openshift-origin-client-tools-v3.11.0-0cbc58b-linux-64bit.tar.gz && \
         tar xvf openshift-origin-client-tools-v3.11.0-0cbc58b-linux-64bit.tar.gz
RUN mv openshift-origin-client-tools-v3.11.0-0cbc58b-linux-64bit/oc /usr/local/bin/oc && \
         chmod +x /usr/local/bin/oc
Once you have produced this Dockerfile and put your ca.crt file in same directory, you just have to build your image and push it into a container images registry that is made available to your OpenShift cluster.
$ docker build --tag lbroudoux/stacks-java:1.0.0.Beta2 .
$ docker push lbroudoux/stacks-java:1.0.0.Beta2
Above, I’ve put my image on docker.io and you may easily reuse mine for a quick test. Then, we may start building a custom Red Hat CodeReady Workspace stack from the administration console.
Click on the Stacks left menu and review the default stack. Then you just have to click the Add Stack button to make a modal dialog appear, asking you for a Recipe. For this article, we are going to create a single container stack, so just select the DOCKERIMAGE thumbnail and enter the name of the Docker image we previously created: docker.io/lbroudoux/stacks-jaba:1.0.0.Beta2.
After having verified that the image exists, we navigate to the form allowing you to configure your stack. So start by assigning it a Name and a Description.

Scroll down to the Machines section. Here we have a single Machine and we decide to name it dev-machine. We can check that our machine will be based on the container image we provide and we may also adjust the number of resources that will be dedicated to this machine. There's more info on the machine here.

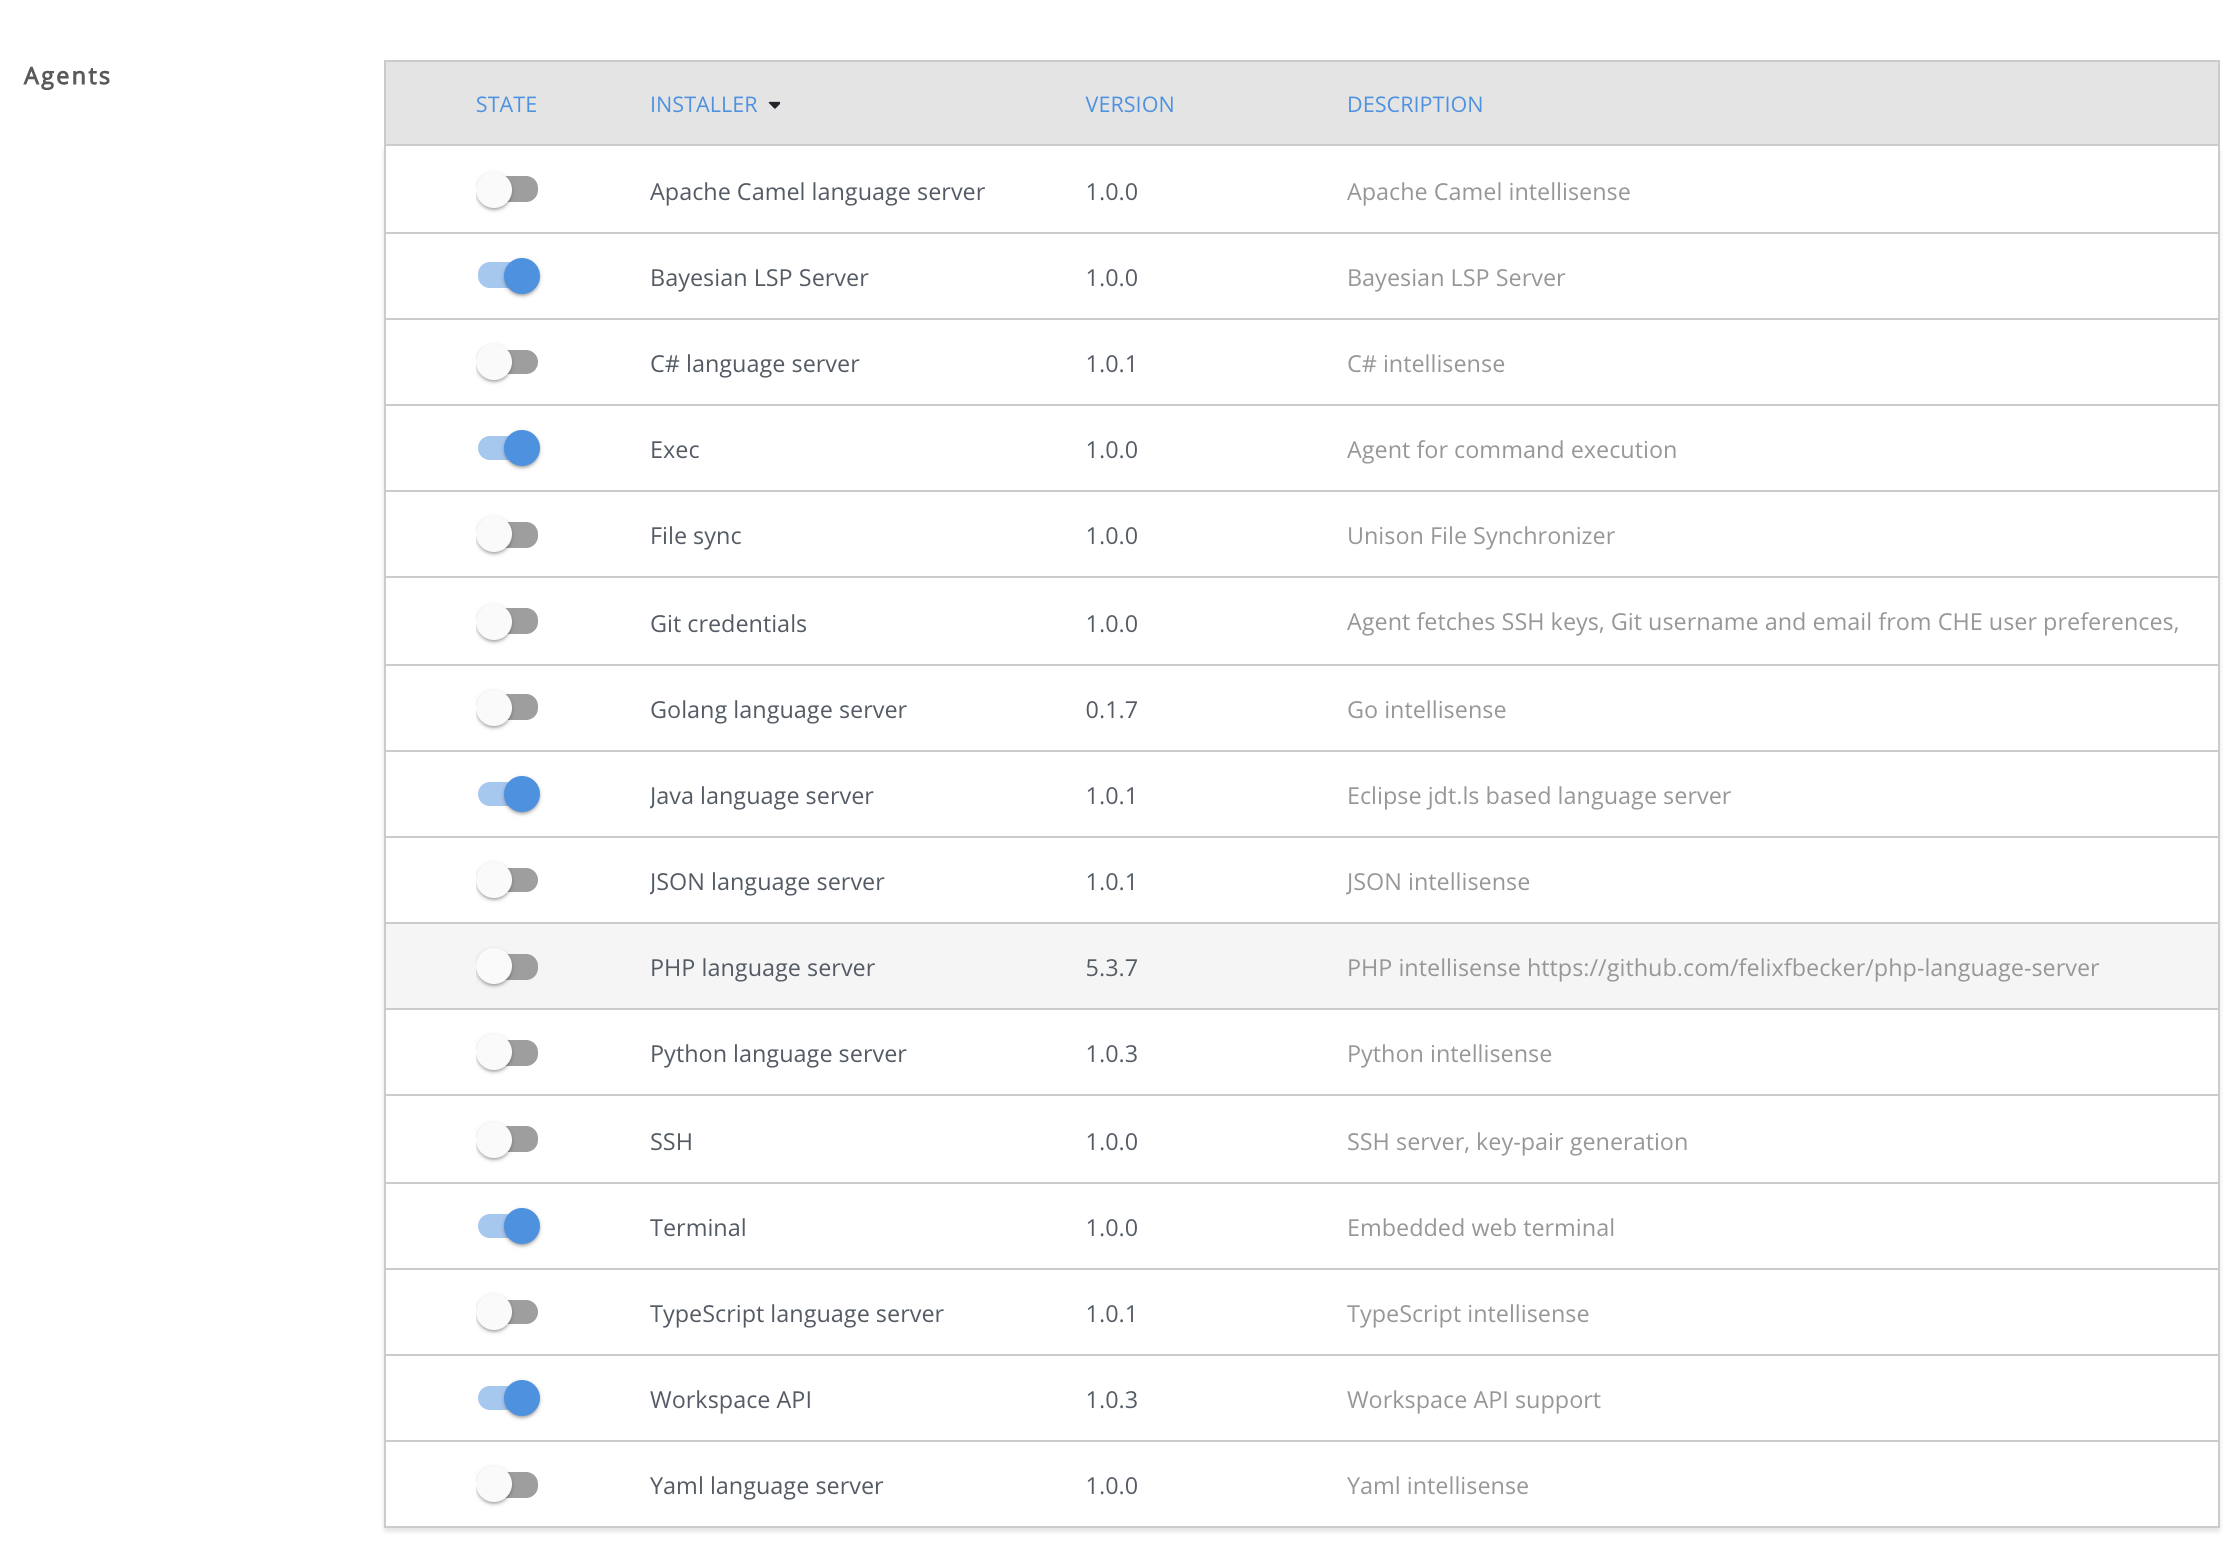
Scrolling down, we can check the Agents (or Installers) section. Agents allow you to activate specific features of the Eclipse Che IDE. Here, we’ll need the basic one for dealing with Java: being able to execute commands, opening a terminal, and interacting with the Workspace API. More info on installers is available here.
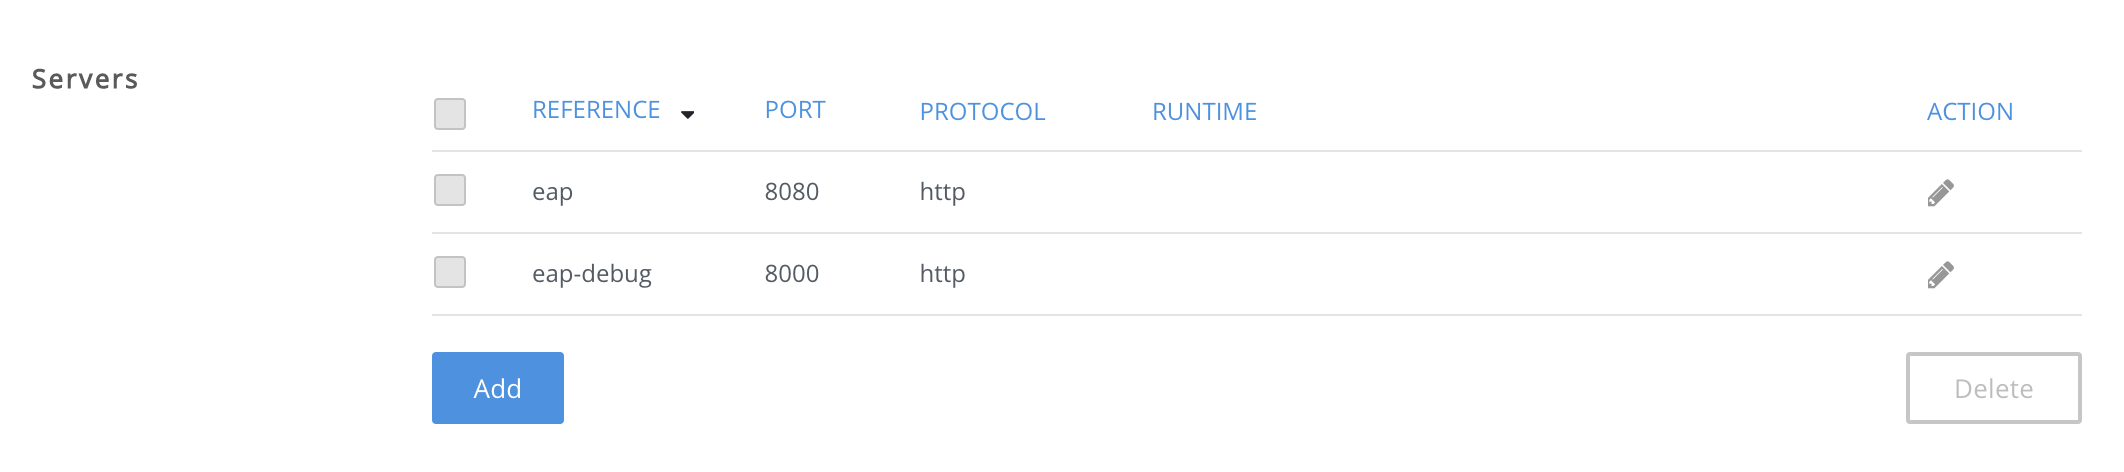
Below that is a very important part of the stack configuration where you may define the different Servers that will expose your machine. A servers definition allows you to declare the network ports that will be exposed by your workspace and that your developers will use for interacting and connecting to the app. In the case of our JBoss EAP development environment, we’ll declare two ports:
- Port 8080 will allow regular interaction with the JBoss EAP application server.
- Port 8000 will be used for remote debugging the deployed application.
More info on servers is available here.
The next section is related to Commands. Here we’re going to add a single command for building the whole project using Maven. We’ll add some other commands during our first tests of a new workspace. Commands are used to build, debug your app and interact with your server. More info on commands is here.

Finally, you may end by adding a description for components embedded in your stack. These descriptions are pure informational components and help with tags to organize your stack within the repository.
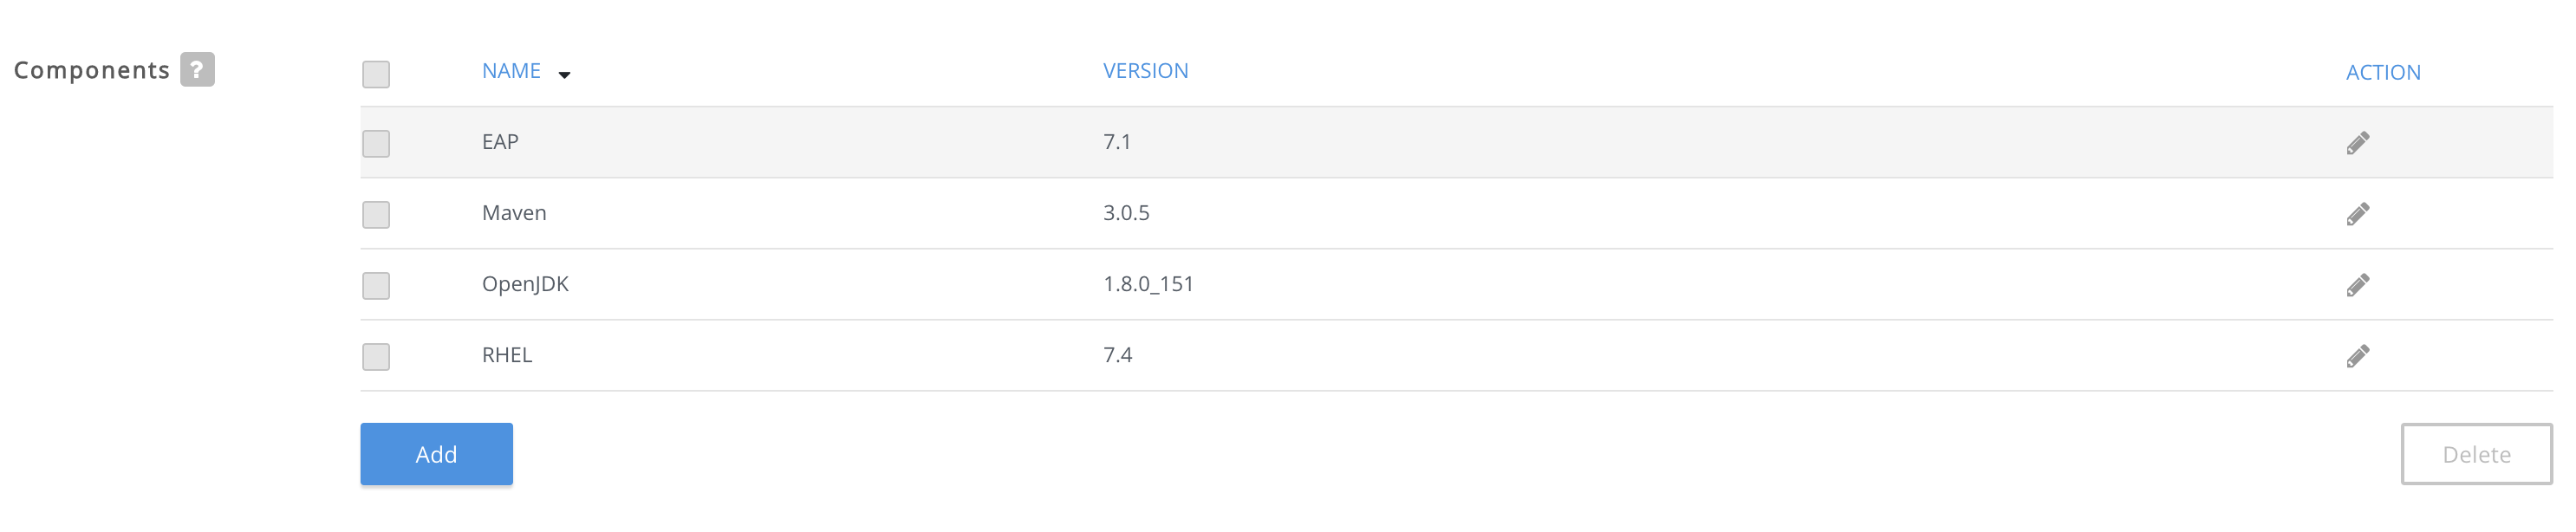
Once you have finished editing these last sections, you may now save your stack for later use through JBoss EAP workspaces. You can also check that everything you've done is exportable as JSON and can be versioned and saved into a Git repository. Just click the Show button within the Raw Configuration section. Everything we’ve seen and done so far can be found in my github.com/lbroudoux/codeready-workspaces repository.
Starting a JBoss EAP workspace
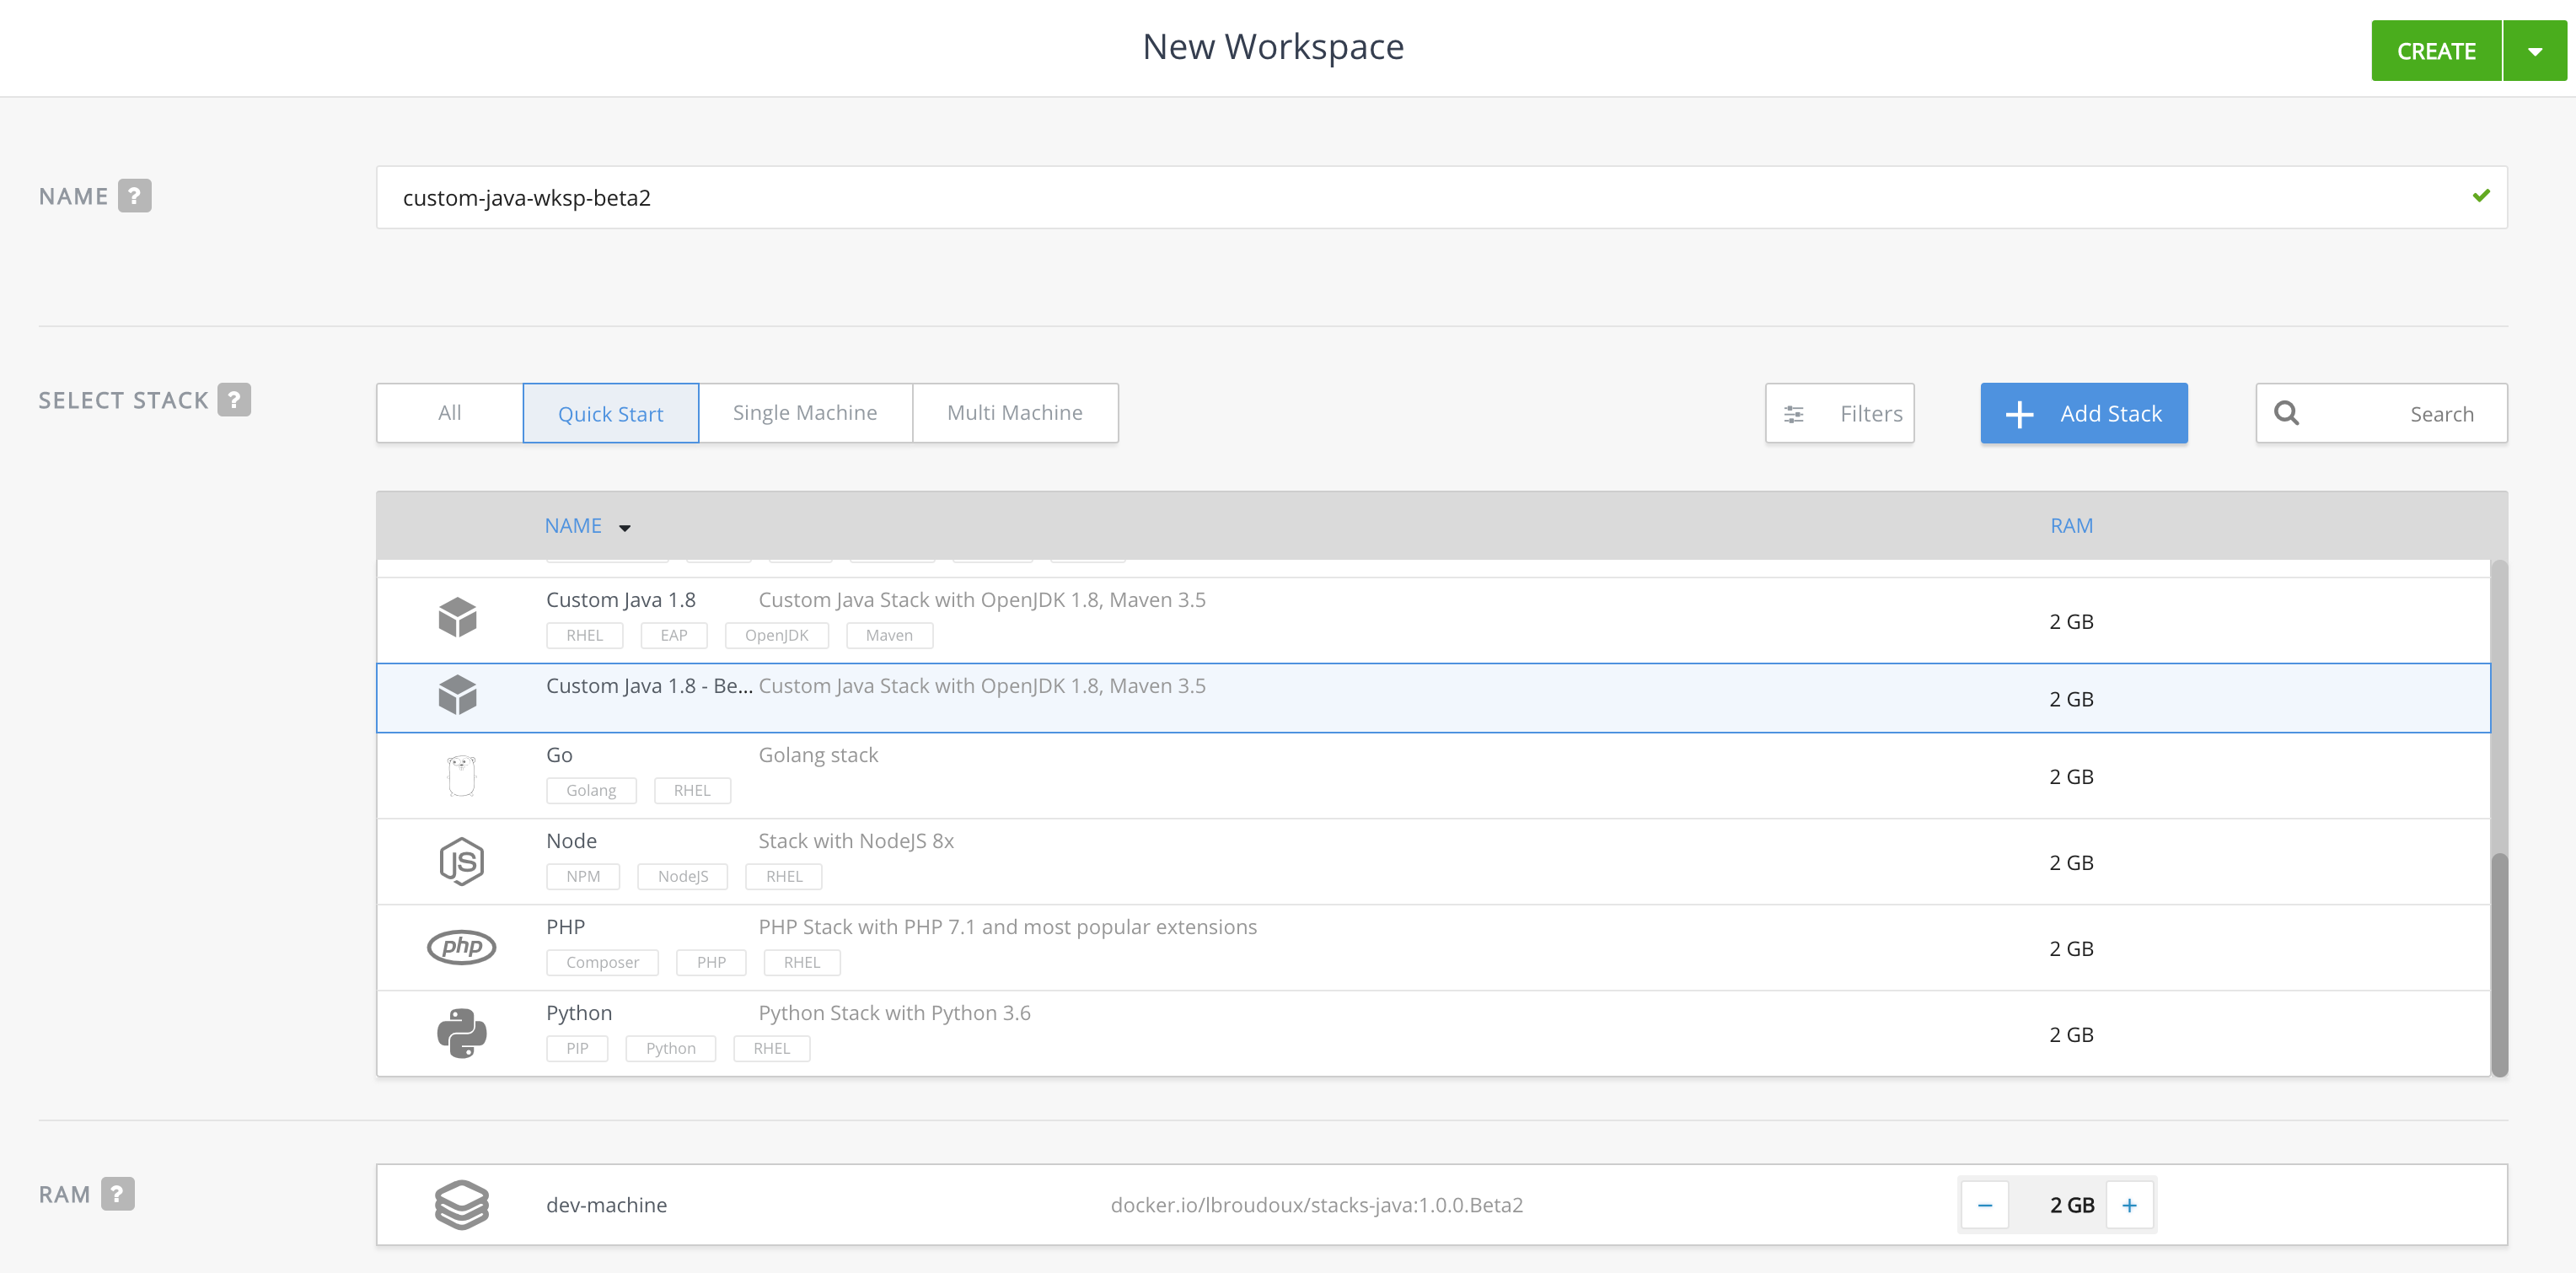
Now that we have a stack to build on, we may create a new workspace. So from the dashboard or the Workspaces page of Red Hat CodeReady Workspaces, just click the Add Workspace button. Creating a workspace starts by giving it a Name and picking the stack we previously created, as shown below.
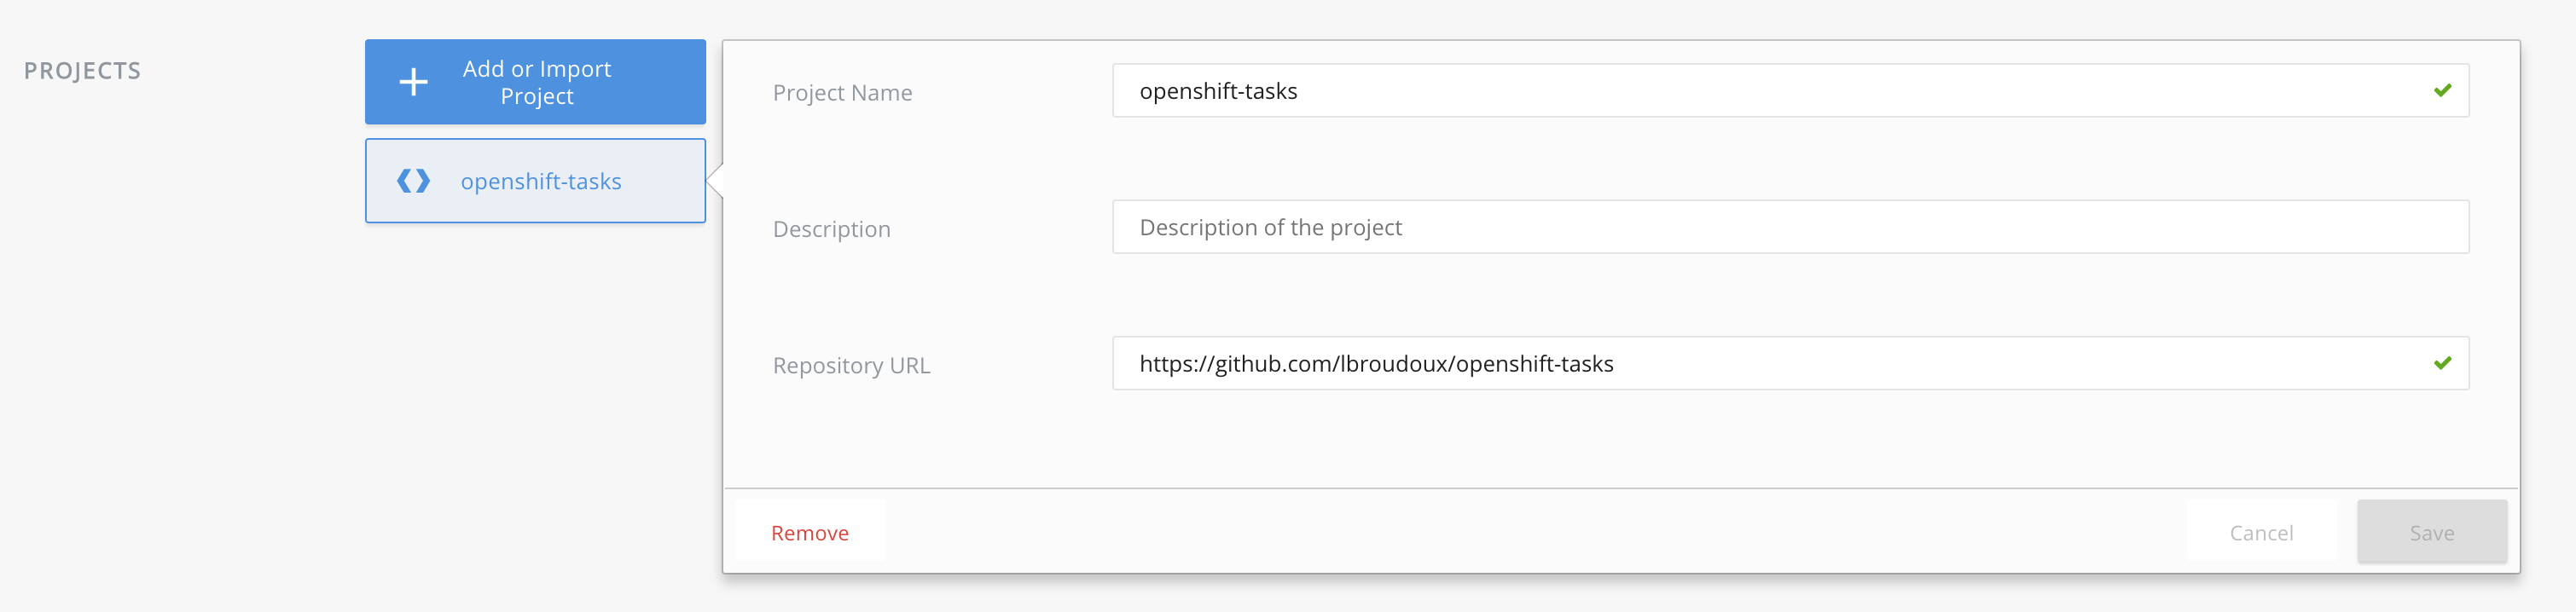
Workspaces are there for working on projects, so within the Projects section, be sure to add a new project. You can, for example, refer to one located on GitHub. I used github.com/lbroudoux/openshift-tasks, which is a JEE/JBoss EAP app I’ve used for demonstrating deployment on OpenShift, even though in our case, we’ll deploy the application to a regular, not containerized, JBoss EAP instance.
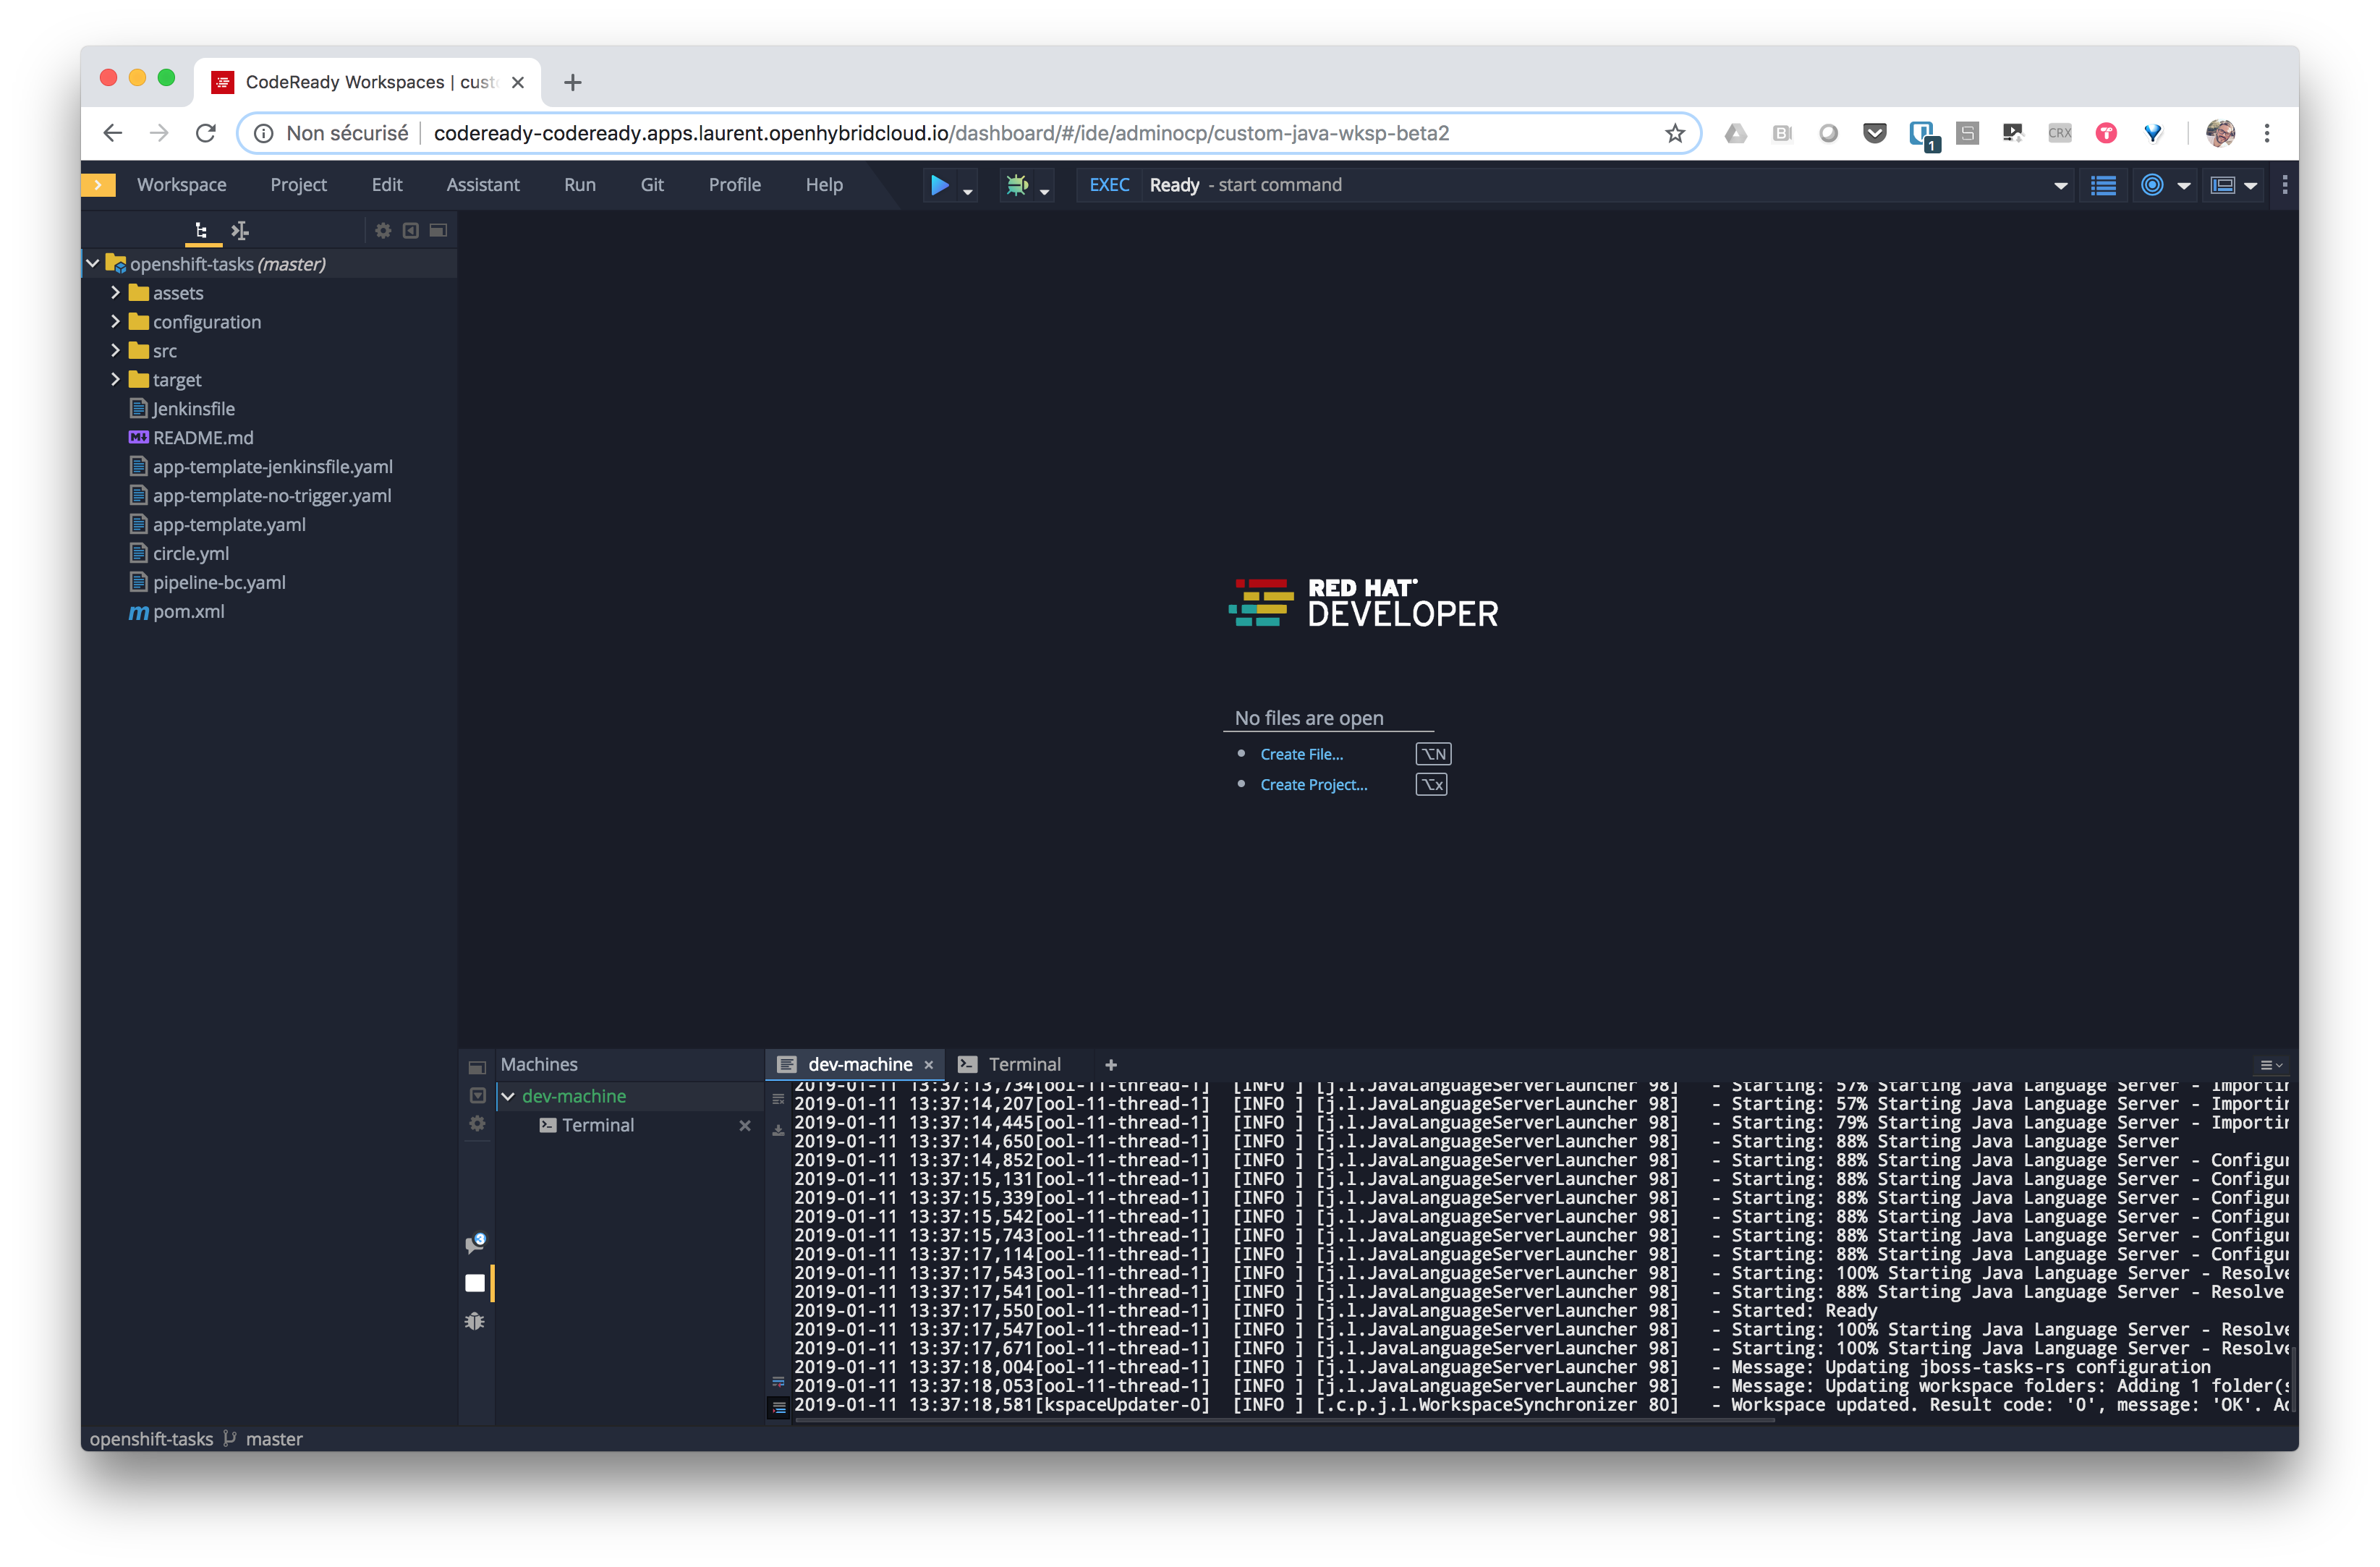
Leave untouched the other options and then create and run your workspace. In a few minutes, you should have a working IDE where a project has been cloned from GitHub and all the dev tools such as Java Language Server have started up into the dev-machine console.
Next steps
In this first part of the series, we have seen how to extend the Red Hat CodeReady Workspaces base image to include extra tooling and certificates. We have registered everything as a custom stack within the administration portal. Finally, we started a new workspace containing everything we need to code, compile, deploy, debug, and package our JEE/JBoss EAP application.
Read Streamline your JBoss EAP dev environment with Red Hat CodeReady Workspaces: Part 2 to see how to configure your workspace for the development tasks above. We'll see how to make everything easily reproducible and distributable through Red Hat CodeReady Workspaces Factory.
Last updated: November 8, 2023