Cloudera Impala is a tool to rapidly query Hadoop data in HBase or HDFS using SQL syntax. You can use Red Hat JBoss Data Virtualization to query that same data via Impala to take advantage of its optimization. You can also combine that data with other data sources in real time. The goal of this guide is to import data from a Cloudera Impala instance, manipulate it, and then expose that data as a data service. This guide includes access to a repository with example scripts, creating a custom base and view model, exposing it as a data service, and finally consuming that data via REST. This is a peer article to Unlock Your Cloudera Data with Red Hat JBoss Data Virtualization.
Integrating with Impala on Cloudera
Setup
- Download Cloudera all in one vm for the Virtualization platform you have installed. This example was done on KVM.
- You will need to populate your Impala instance. This example works off data from the Getting Started with Hadoop Tutorial.
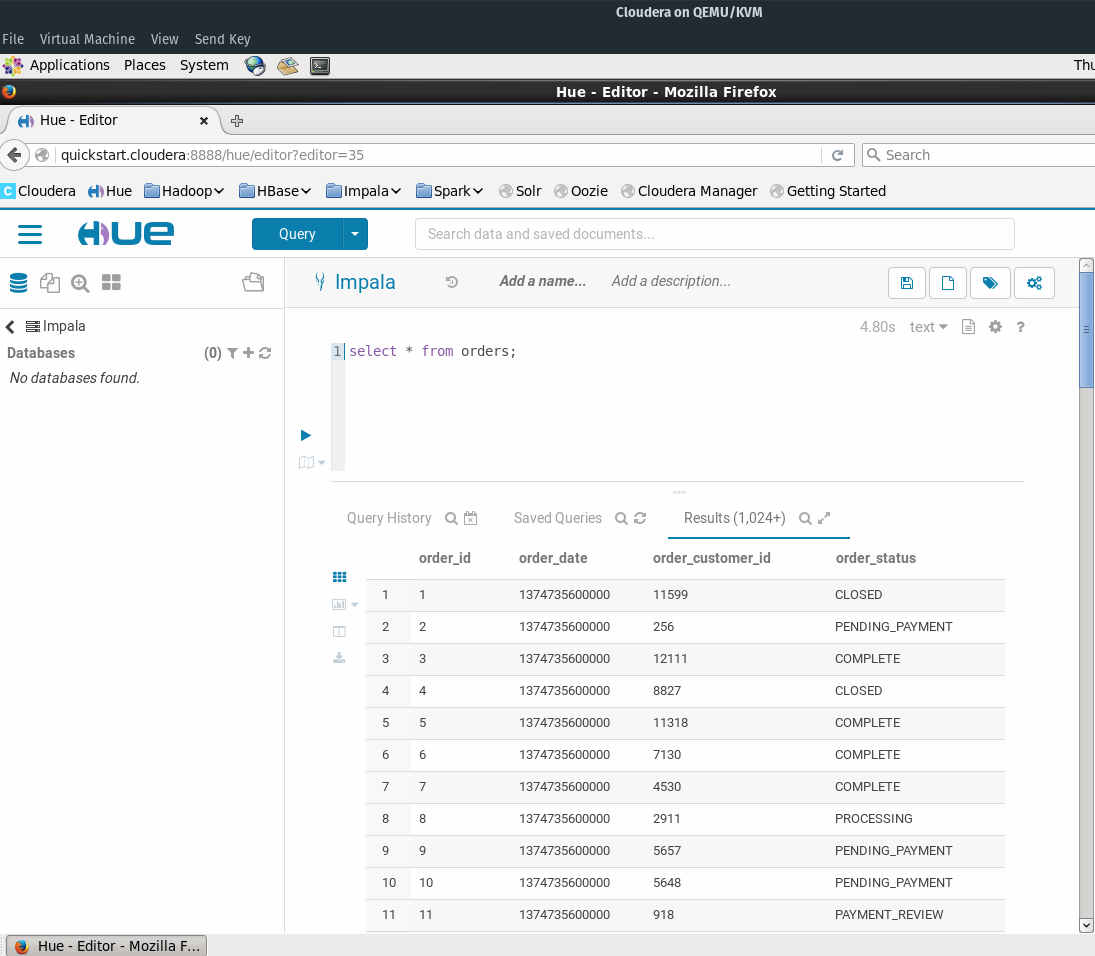
- We are going to be importing data from the Orders table. Go to the Impala interface in Cloudera HUE and verify that the example data was loaded successfully:
- Install JBoss Data Virtualization (JDV). Make sure the odata role is checked while going through the installation wizard.
- Install JBoss Developer Studio (JBDS). After installation, under the Software/Update tab, install JBoss Data Virtualization Development. If you do not see that option, check the Enable Early Access checkbox in the lower right.
- Details around installing JDV and JBDS are available on Red Hat's JDV Development Workshop page.
- You need to create a Cloudera data source outside of the teiid designer in order to connect to hive. This project brings the libraries from the Impala JDBC Connector 2.5.42 for Cloudera Enterprise.
- Clone the jdv-cloudera repo to get some helper scripts with creating data sources on the JDV server:
git clone https://github.com/mechevarria/jdv-cloudera
- Run the
setup-ds.shscript with theadd alloption to create and/or remove the module, driver, and data source. You need to set the path to your Jboss home directory in the cli.sh script. You will also need to tweak the cli/add-ds.cli for your specific impala connection information. If successful, you will see the following output:
{"outcome" => "Success"}
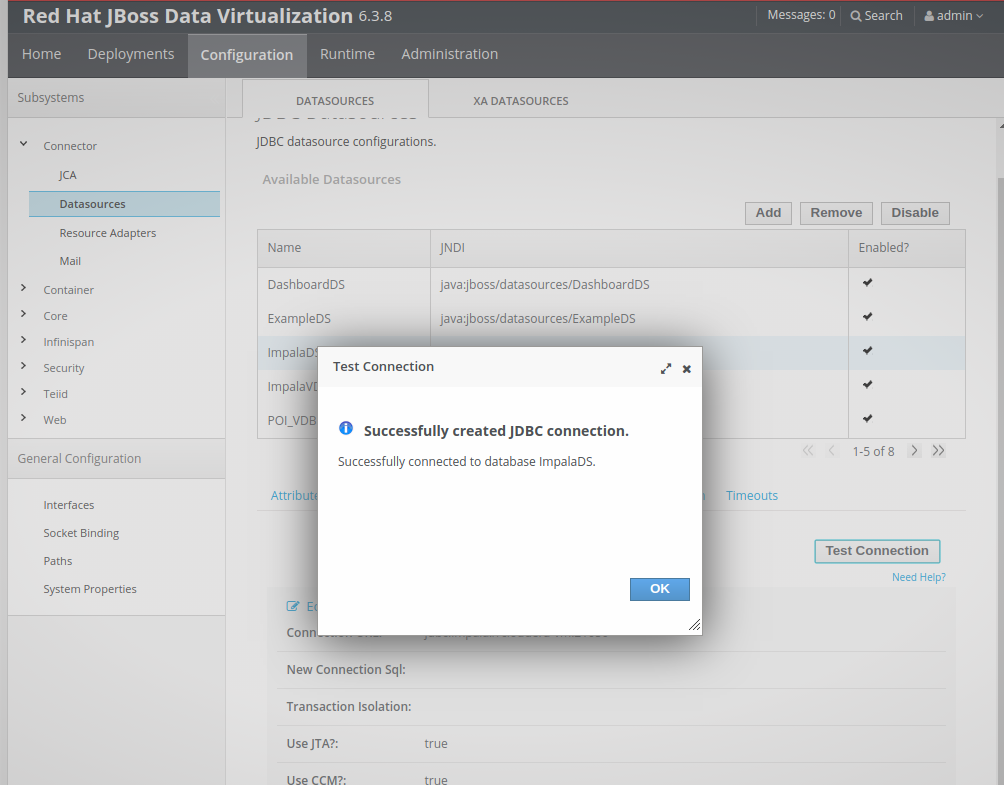
- To verify the data source is correct, test the data source connection in the Jboss admin console:
Connect Impala to JDV
- We are going to create a new project in JBoss Developer Studio. After opening the JBDS, you can follow these steps and screenshots to get started creating the project.
- file -> new -> teiid model project
- (See Screenshot)
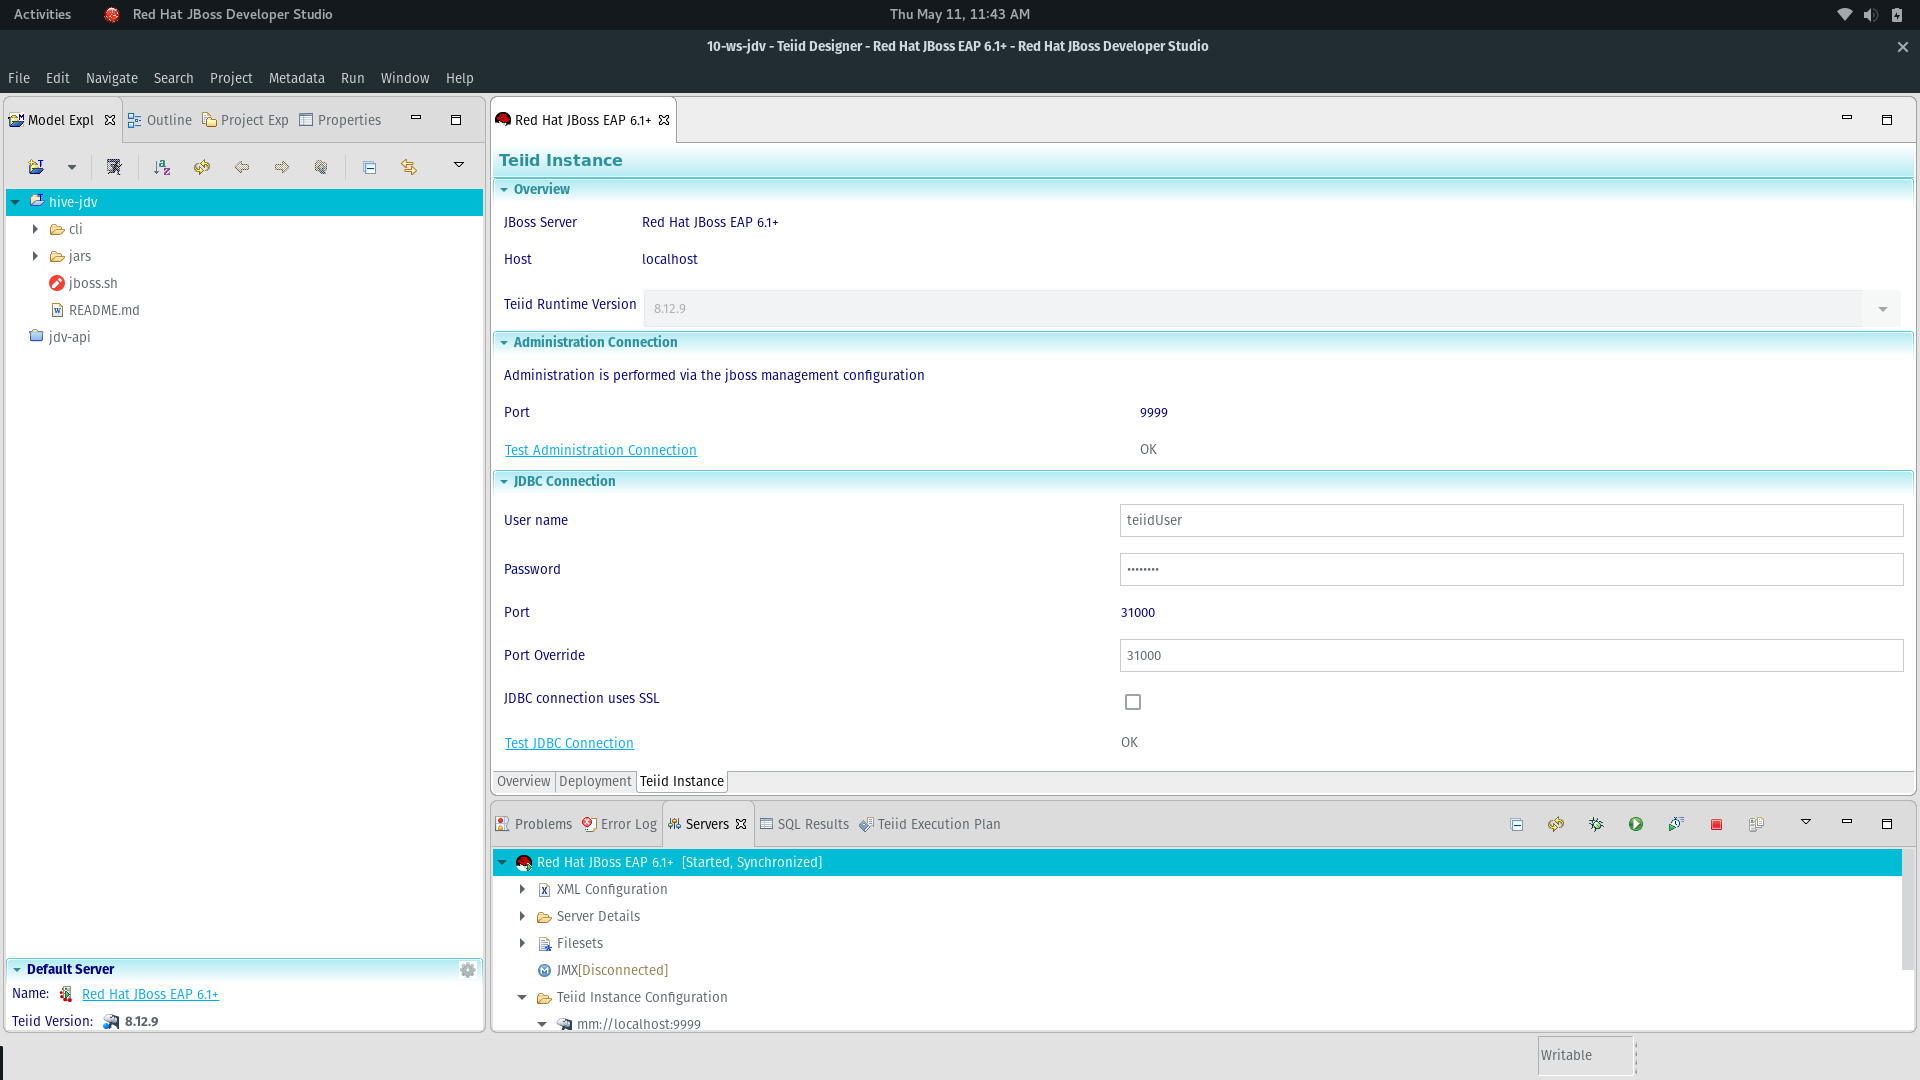
server panel -> start the jdv server. Make sure the admin and jdbc connection (teiidUser) are set with the proper user/pass from the install:
- In the designer we are going to use the proprietary Cloudera Impala driver instead of the built in translator. We are going to follow the same steps for importing a data source but create a custom connection just for Impala:
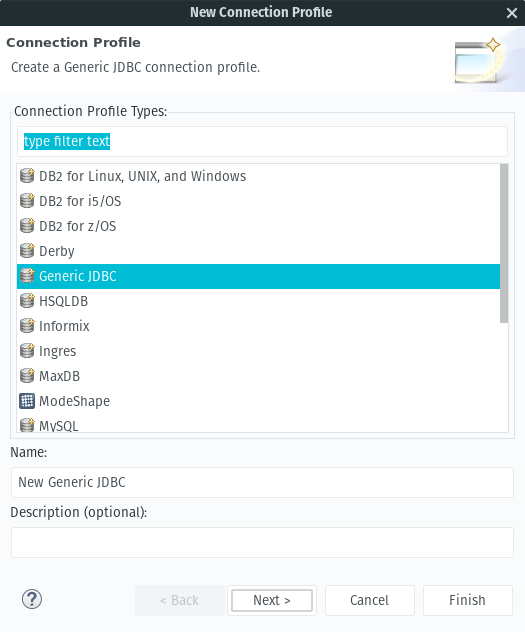
file -> import -> JDBC Database >> source model- Select New Connection Profile.
- Select Generic JDBC and then next:
- Select the New Driver Definition button.
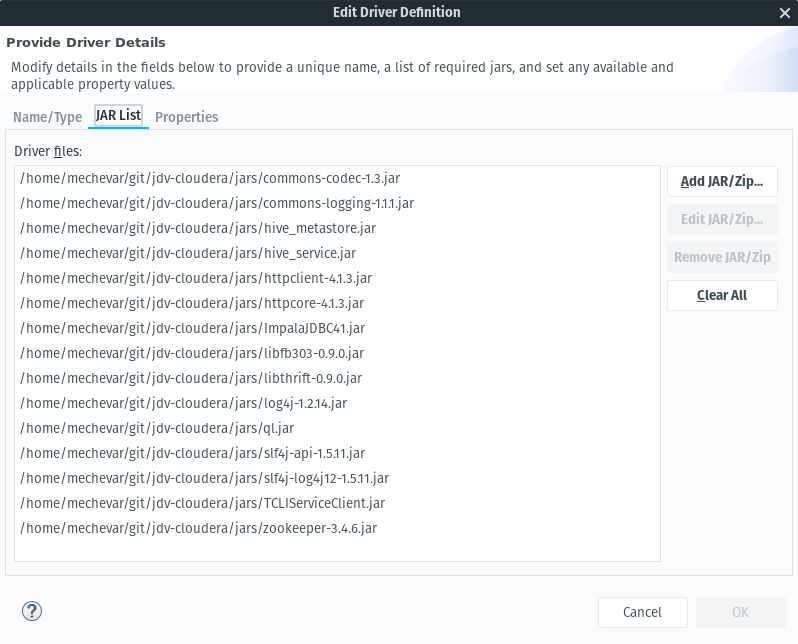
- Under the JAR List tab, add all of the jars from the directory:
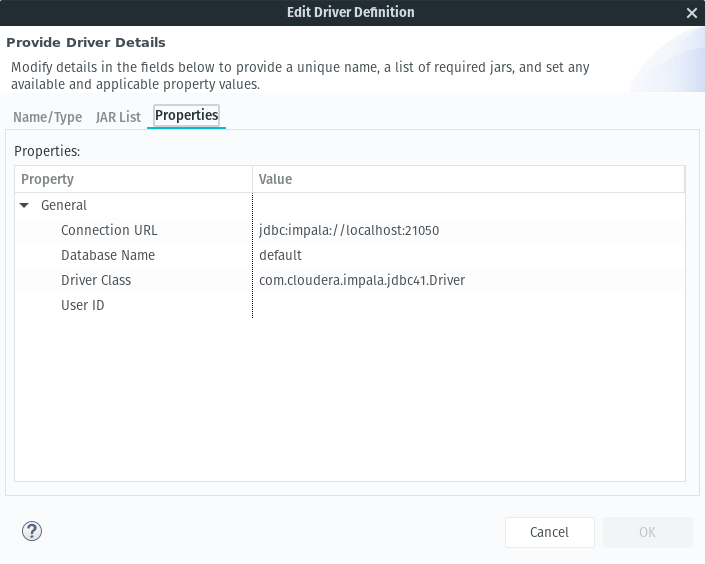
- Under the properties tab update the Driver Class to be
com.cloudera.impala.jdbc41.Driverand the connection url to bejdbc:impala://localhost:21050
- After selecting ok and returning to the connection profile, change localhost to the hostname or IP address of the impala server. In my case it was cloudera-vm.
- Set the username and password. For the quickstart vm both values are cloudera.
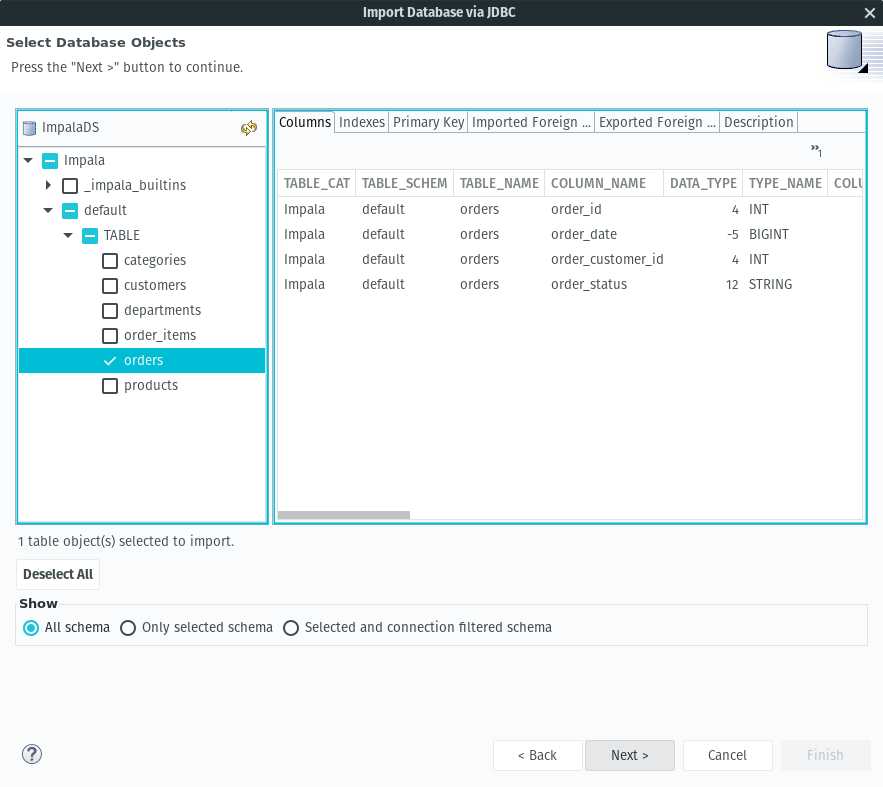
- Select Next and then select the orders table for import:
- Set Model Name to
OrderDS.xmiand set the JNDI Name tojava:/OrderDS - Selecting Finish will create the source model.
Check the Source Model
-
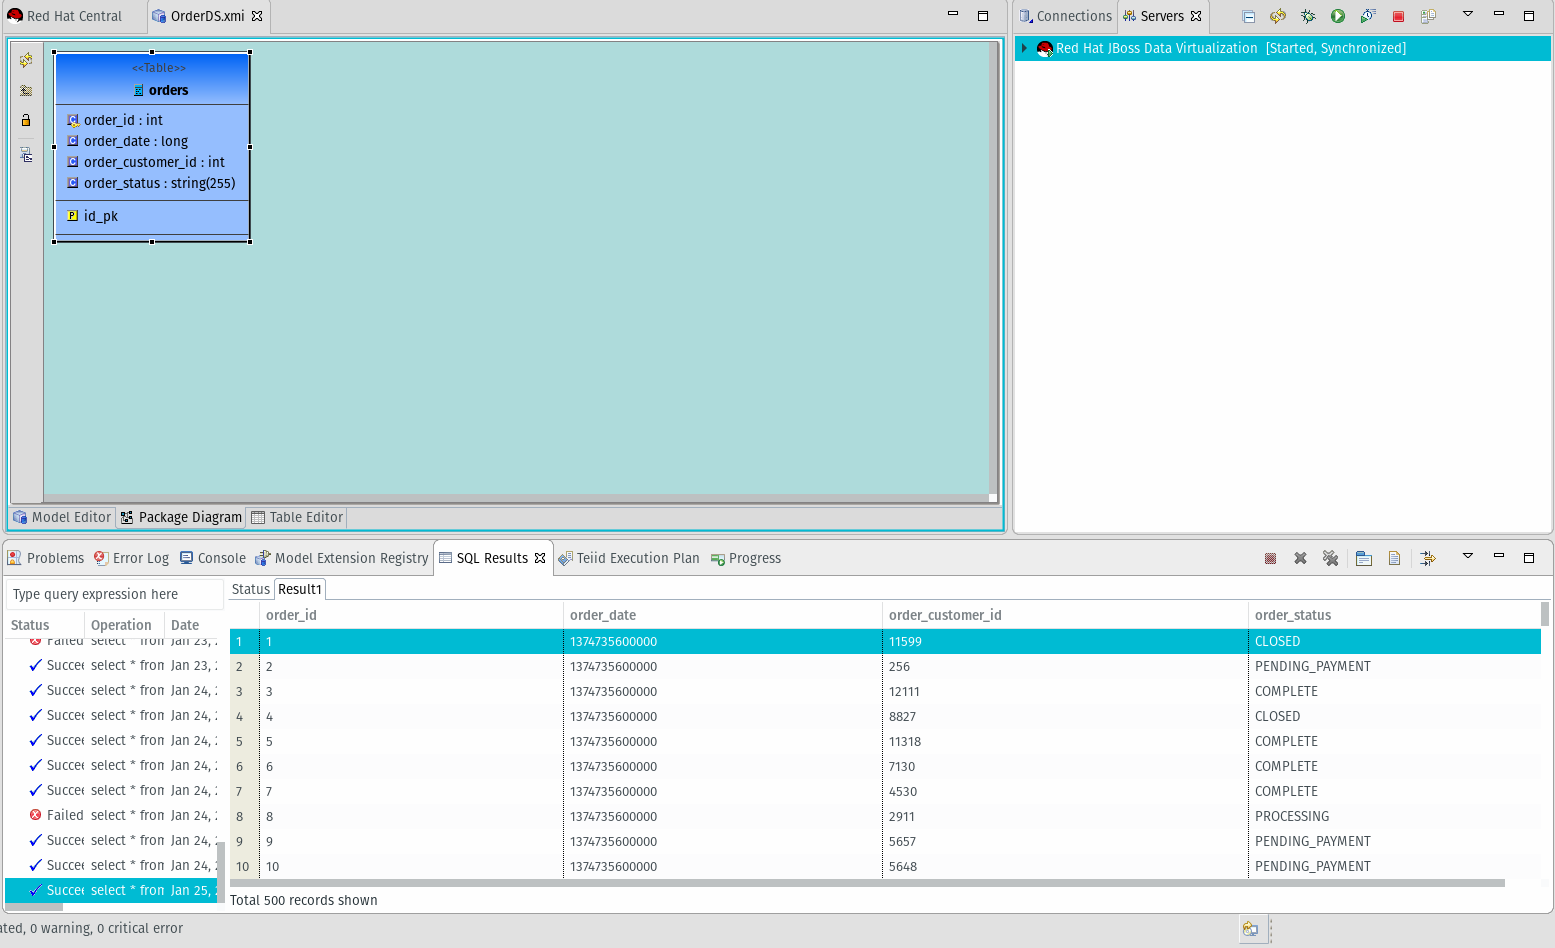
- Right-click and select modeling -> preview data. The SQL Results pane will show the data:
Create the View Model
- Now that we have a base model imported, we are going to create a view model on top of that base model. View models are where data composition occurs, and we are going to compose a custom field in this view model.
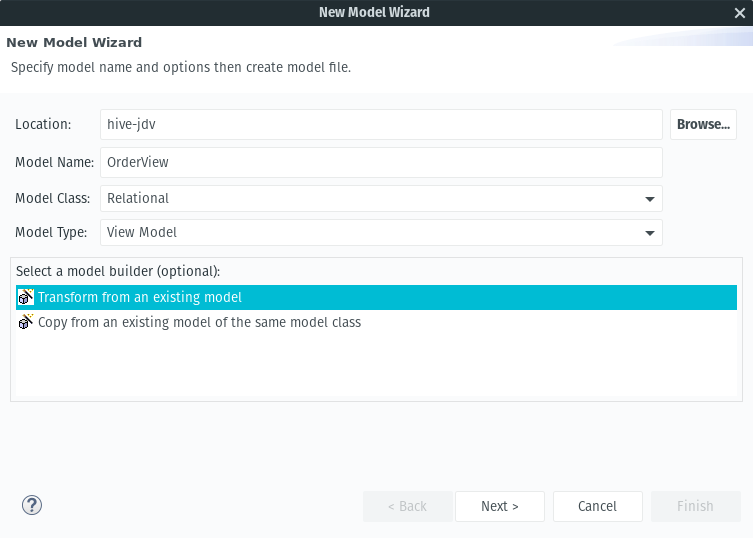
- Select file -> new -> teiid metadata model
- Name:
OrderView, model type:View Model. Select transform from existing model and next. - Select the OrderDS model and select finish:
Add a custom property to the view
- We are going to transform the order date column from a long value in milliseconds into a timestamp that can be filtered by a client application.
- Double click the T in the OrderView modeling diagram and then select the Reconcile SQL Transformation button:
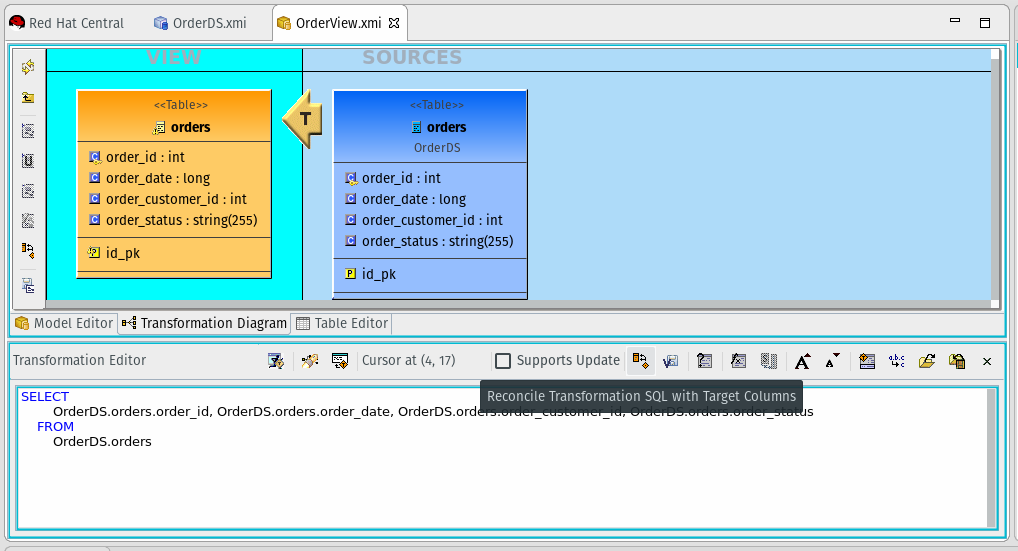
- Select the plus button Then select order_date.
- Select the <new button and then rename the field to
order_data_formatted - Select ok.
- In the Transformation Editor replace the value
OrderDS.orders.order_datewith:TIMESTAMPADD(SQL_TSI_SECOND, cast((OrderDS.orders.order_date / 1000) AS integer), {ts'1970-01-01 23:59:59.0'}) - For reference, these are the available Date/Time Functions.
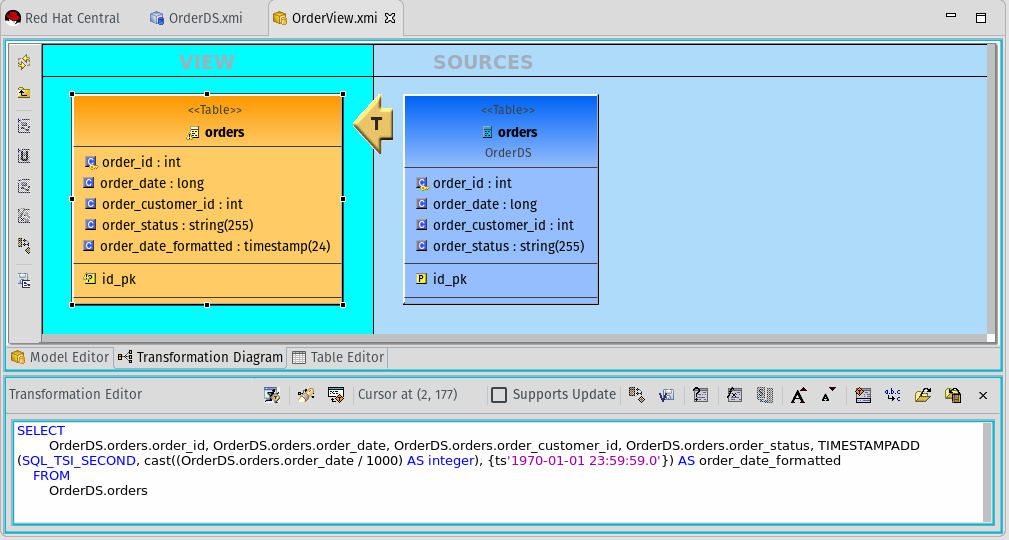
- Select the Save and Validate button.
- Save the updated View model.
- The complete transformation query should be:
SELECT
OrderDS.orders.order_id,
OrderDS.orders.order_date,
OrderDS.orders.order_customer_id,
OrderDS.orders.order_status,
TIMESTAMPADD(SQL_TSI_SECOND, cast((OrderDS.orders.order_date / 1000) AS integer), {ts'1970-01-01 23:59:59.0'}) AS order_date_formatted
FROM
OrderDS.orders
Deploy the VDB
- Now that we have created our models we need to move them from our studio workspace and deploy them on the JBoss Data Virtualization server. A virtual database or vdb is what is ultimately deployed to a running JBoss Data Virtualization server. We need to add our models to a vdb just tables to an actual database.
- file -> new -> teiid vdb
- Name the vdb ImpalaVDB.
- Select the OrderView to add and finish. This will automatically bring the OrderDS as well:
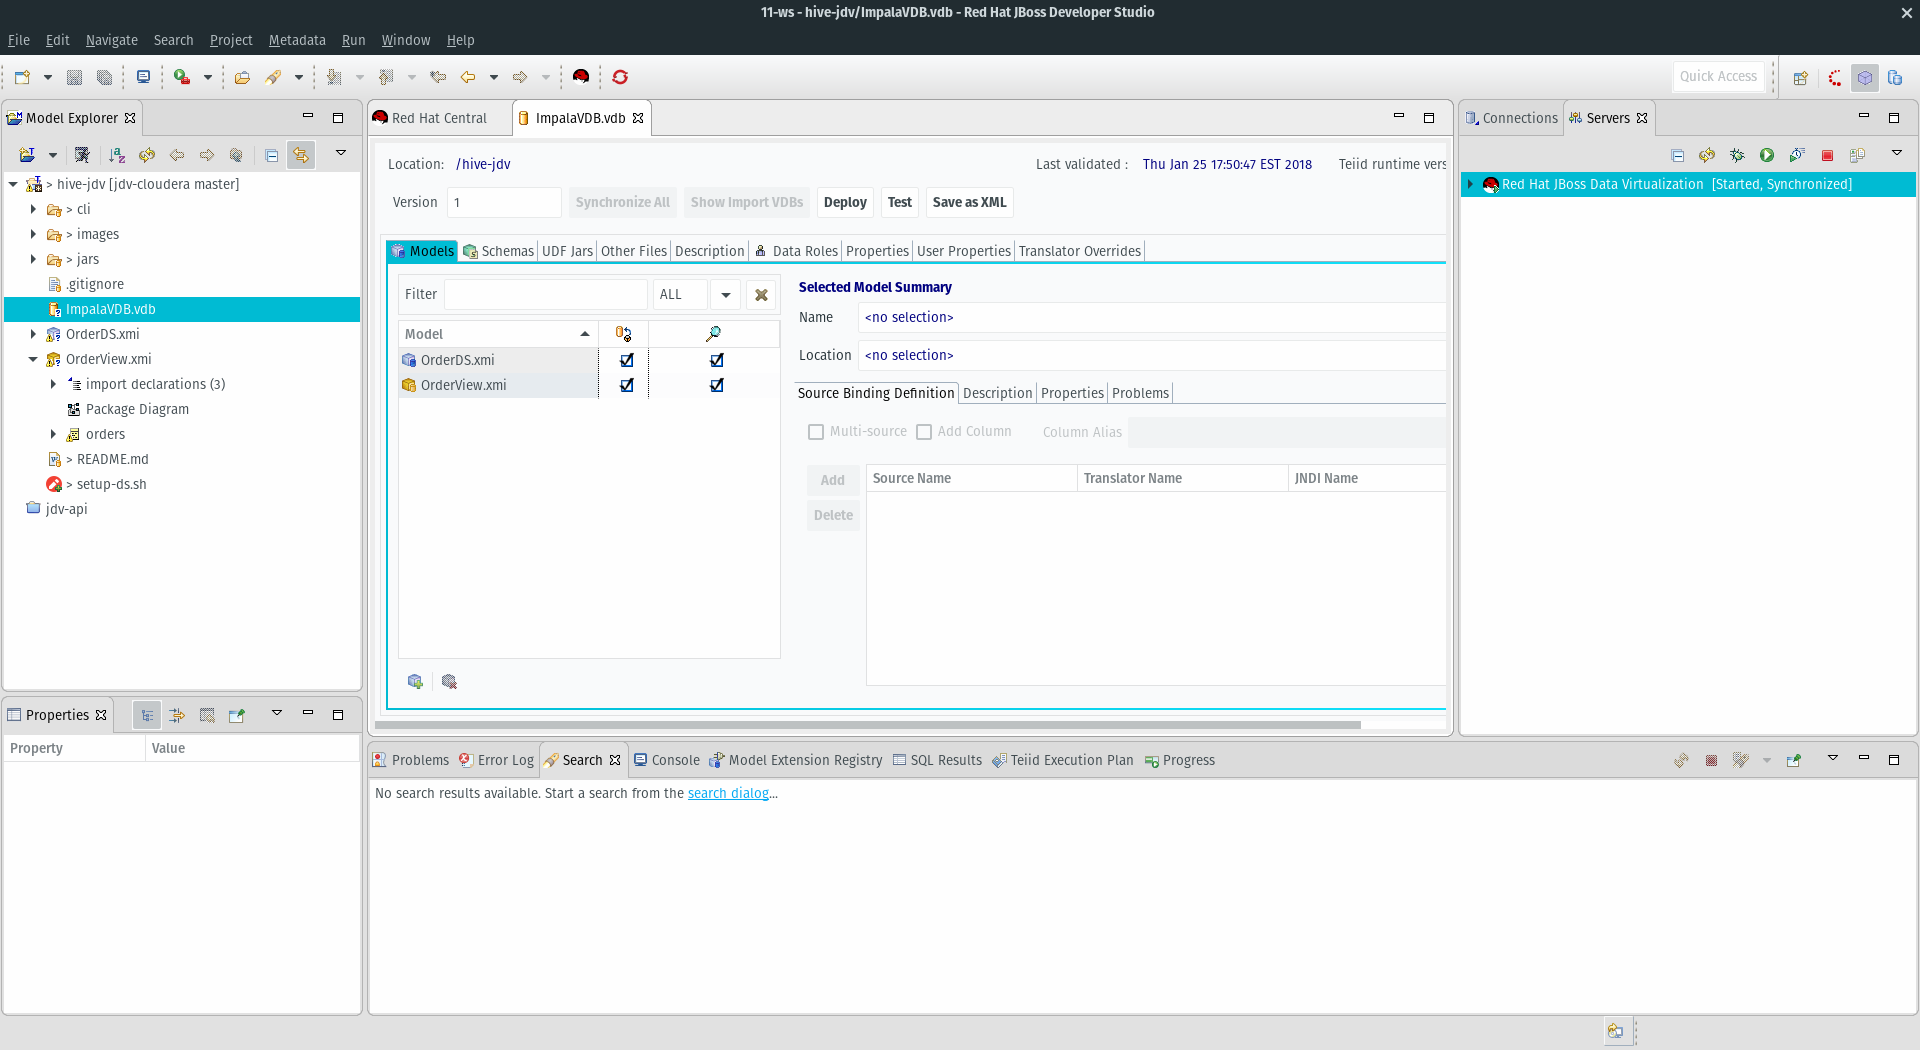
- To deploy, select the Deploy button.
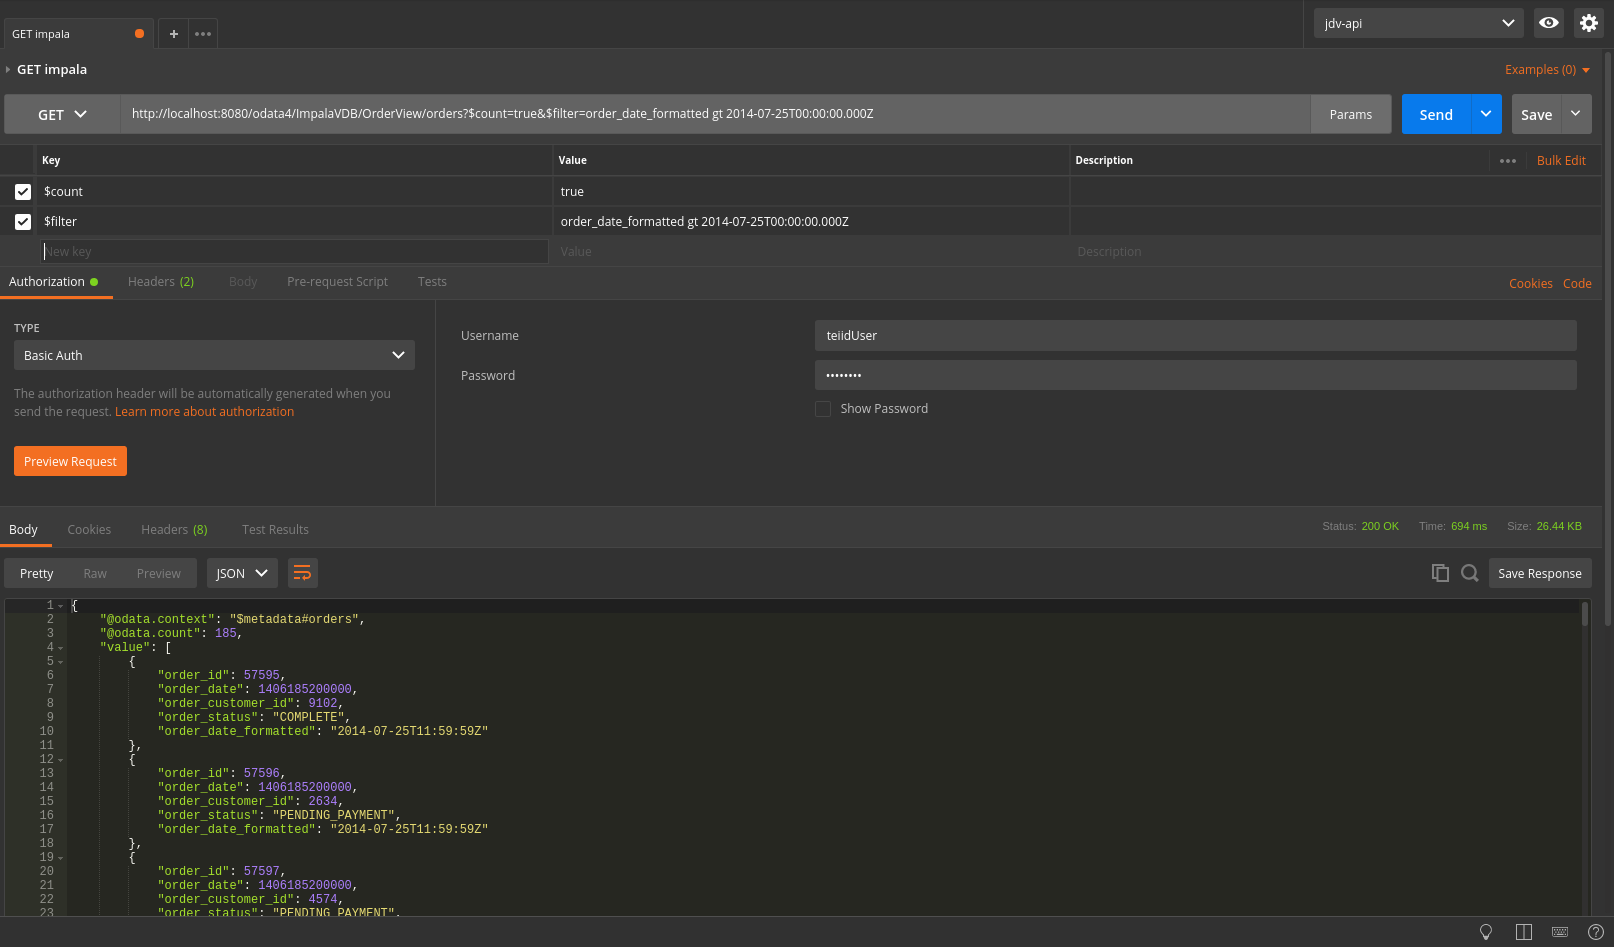
Consume the data service via REST
- Now that our data service is active we want to access that data.
- For this example, Postman was used to test. You can use your browser as well but you need to add a parameter to the url of
$format=json - An example url for a local server is:
http://localhost:8080/odata4/ImpalaVDB/OrderView/orders?$count=true - You will need to set basic auth params (user/pass) for the teiidUser.
- Under the Authorization tab select Basic Auth and then enter the credentials on the right.
- To filter the records, select Params next to the Send button and a param named $filter and its value to
order_date_formatted gt 2014-07-25T00:00:00.000Z - This will filter results with a timestamp greater than 2014-07-25. More details on OData parameters and usage can be found on OData.org.
- The power of Red Hat JBoss Data Virtualization in enterprise integration is not just exposing data as a service, but in combining multiple sources and doing transformations (like the timestamp). Hopefully this article was helpful and thanks for reading!
