Redhat Developers  Logo
  • Products

    Platforms

    • Red Hat Enterprise Linux
      Red Hat Enterprise Linux Icon
    • Red Hat AI
      Red Hat AI
    • Red Hat OpenShift
      Openshift icon
    • Red Hat Ansible Automation Platform
      Ansible icon
    • View All Red Hat Products

    Featured

    • Red Hat build of OpenJDK
    • Red Hat Developer Hub
    • Red Hat JBoss Enterprise Application Platform
    • Red Hat OpenShift Dev Spaces
    • Red Hat OpenShift Local
    • Red Hat Developer Sandbox

      Try Red Hat products and technologies without setup or configuration fees for 30 days with this shared Openshift and Kubernetes cluster.
    • Try at no cost
  • Technologies

    Featured

    • AI/ML
      AI/ML Icon
    • Linux
      Linux Icon
    • Kubernetes
      Cloud icon
    • Automation
      Automation Icon showing arrows moving in a circle around a gear
    • View All Technologies
    • Programming Languages & Frameworks

      • Java
      • Python
      • JavaScript
    • System Design & Architecture

      • Red Hat architecture and design patterns
      • Microservices
      • Event-Driven Architecture
      • Databases
    • Developer Productivity

      • Developer productivity
      • Developer Tools
      • GitOps
    • Automated Data Processing

      • AI/ML
      • Data Science
      • Apache Kafka on Kubernetes
    • Platform Engineering

      • DevOps
      • DevSecOps
      • Ansible automation for applications and services
    • Secure Development & Architectures

      • Security
      • Secure coding
  • Learn

    Featured

    • Kubernetes & Cloud Native
      Openshift icon
    • Linux
      Rhel icon
    • Automation
      Ansible cloud icon
    • AI/ML
      AI/ML Icon
    • View All Learning Resources

    E-Books

    • GitOps Cookbook
    • Podman in Action
    • Kubernetes Operators
    • The Path to GitOps
    • View All E-books

    Cheat Sheets

    • Linux Commands
    • Bash Commands
    • Git
    • systemd Commands
    • View All Cheat Sheets

    Documentation

    • Product Documentation
    • API Catalog
    • Legacy Documentation
  • Developer Sandbox

    Developer Sandbox

    • Access Red Hat’s products and technologies without setup or configuration, and start developing quicker than ever before with our new, no-cost sandbox environments.
    • Explore Developer Sandbox

    Featured Developer Sandbox activities

    • Get started with your Developer Sandbox
    • OpenShift virtualization and application modernization using the Developer Sandbox
    • Explore all Developer Sandbox activities

    Ready to start developing apps?

    • Try at no cost
  • Blog
  • Events
  • Videos

Remote debug your ASP.NET Core container on OpenShift with Visual Studio Code

October 23, 2017
Takayoshi Tanaka
Related topics:
Kubernetes.NET
Related products:
Red Hat OpenShift Container PlatformRed Hat OpenShift

Share:

    Visual Studio provides a graphical remote debugging ASP.NET Core app with Docker Tools for Windows. Since Visual Studio supports SSH protocol, you can remote debug ASP.NET Core process running on the Linux host. It used to be if you install and setup SSH server on docker container, you can remote debug with Visual Studio. However, it's strongly not recommended due to security reasons. Now I'll explain to you how to remote debug your ASP.NET Core on OpenShift with Visual Studio Code by using oc exec command instead of installing SSH server on docker container. You can use Microsoft proprietary debugger engine vsdbg with Visual Studio Code (or other Visual Studio products). Visual Studio Code can integrate other commands than SSH for debugger transport protocol.

    Install and set up vsdbg on docker container

    To follow the steps below, you may have to deploy ASP.NET Core app on OpenShift. If you haven't done so, you can use the example project. I will use this project as an example. Once the application pod runs, you'll install vsdbg on this pod. The dotnet image version 2.0-7 or later has an unzip command, you can install vsdbg with the steps below.

    $ export POD_NAME=<pod_name>
    $ oc rsh $POD_NAME
    sh-4.2$  curl -sSL https://aka.ms/getvsdbgsh | bash /dev/stdin -v latest -l /opt/app-root/vsdbg -r linux-x64
    Info: Creating install directory
    Using arguments
        Version                    : 'latest'
        Location                   : '/opt/app-root/vsdbg'
        SkipDownloads              : 'false'
        LaunchVsDbgAfter           : 'false'
        RemoveExistingOnUpgrade    : 'false'
    Info: Using vsdbg version '15.1.10630.1'
    Info: Previous installation at /opt/app-root/vsdbg not found
    Info: Using Runtime ID 'linux-x64'
    Downloading https://vsdebugger.azureedge.net/vsdbg-15-1-10630-1/vsdbg-linux-x64.zip
    Info: Successfully installed vsdbg at '/opt/app-root/vsdbg'

    If you use an older version of a dotnet image, an alternative way is installing vsdbg on your local machine and transferring them.

    $ export POD_NAME=<pod_name>
    $ curl -sSL https://aka.ms/getvsdbgsh | bash /dev/stdin -v latest -l ./vsdbg -r linux-x64
    $ oc rsync ./vsdbg $POD_NAME:/opt/app-root/app/

    The PID of a dotnet process is also required. It's usually 1, but confirm with the command below, just in case.

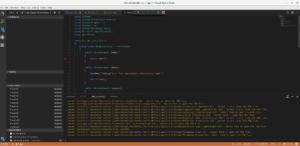
    $ oc exec $POD_NAME -- ps aux
    USER        PID %CPU %MEM    VSZ   RSS TTY      STAT START   TIME COMMAND
    default       1  0.0  0.5 21251236 75376 ?      SLsl Sep29   0:24 dotnet app.dll
    default      48  0.0  0.0  17748  2016 ?        Ss+  Sep29   0:00 /bin/sh
    default   25663  0.0  0.0  53424  1936 ?        Rs   05:47   0:00 ps aux

    Now the pod is ready to debug.

    Set up your local machine

    You should have the same code as the one deployed. If you use the dotnet example app, clone the code and checkout dotnetcore-2.0 branch.

    $ git clone https://github.com/redhat-developer/s2i-dotnetcore-ex.git
    $ cd s2i-dotnetcore-ex
    $ git checkout dotnetcore-2.0

    Now open the project with Visual Studio code.

    $ code app

    Then open a .vscode/launch.json file or create it if it hasn't been created. Then add the below json as an element of the configuration array.

    {
                "name": ".NET Core OpenShift Pod Remote Attach",
                "type": "coreclr",
                "request": "attach", 
                "processId": "",
                "pipeTransport": {
                    "pipeProgram": "oc", 
                    "pipeArgs": [ "exec", "-it", "<pod_name>", "--"], 
                    "quoteArgs":false, 
                    "debuggerPath": "/opt/app-root/vsdbg/vsdbg", 
                    "pipeCwd": "${workspaceRoot}"
                },
                "justMyCode":false,
                "sourceFileMap": { "/opt/app-root/src": "${workspaceRoot}"}
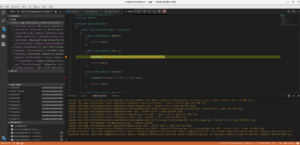
            }

    Visual Studio Code will launch the process specified by pipeProgram and pipeArgs as transferring remote debug commands. debuggerPath is a full path of vsdbg. If you install at another location, it should be changed. If your application builds with the Release configuration, which is a default for s2i-dotnetcore, justMyCode should be false. Since the s2i-dotnetcore builds your source located at /opt/app-root/src, you should specify this path at sourceFileMap. Please note this is a path where your project is located when it's built. If you build and deploy by .NET Core Runtime image, the application code has no source code. However, remote debug will work if you specify the sourceFileMap as above.

    Now ready for remote debugging.

    Start remote debugging

    You can start remote debug by selecting .NET Core OpenShift Pod Remote Attach in the debug menu and click the debug start menu or F5 key. You'll find log messages and remote debug icons once it's connected.

    remote debug

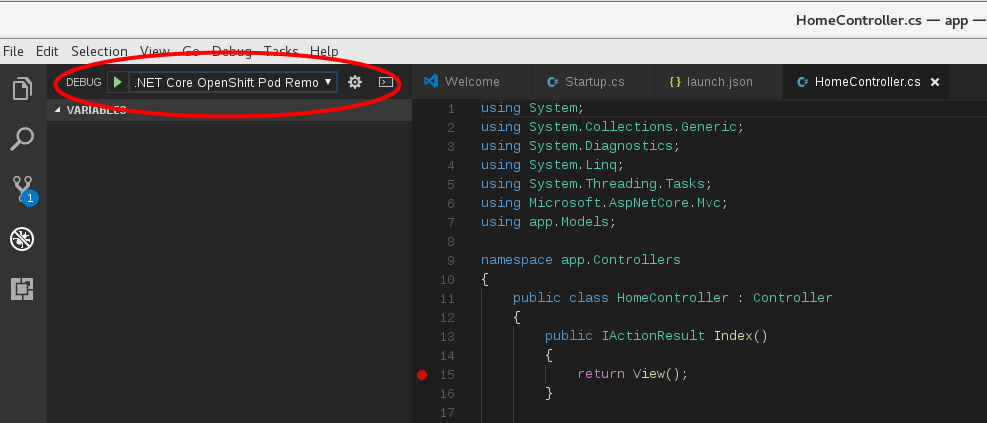
    Let's put in a breakpoint. Contoller/HomeContoller.cs is easy to test.

    breakpoint

    When you're accessing the about page,

    the debugger stops at the beak point.

    You can see the local variables and stack trace, set endpoint and so on. Let's enjoy remote debugging!

    Last updated: September 3, 2019

    Recent Posts

    • How to enable Ansible Lightspeed intelligent assistant

    • Why some agentic AI developers are moving code from Python to Rust

    • Confidential VMs: The core of confidential containers

    • Benchmarking with GuideLLM in air-gapped OpenShift clusters

    • Run Qwen3-Next on vLLM with Red Hat AI: A step-by-step guide

    Red Hat Developers logo LinkedIn YouTube Twitter Facebook

    Products

    • Red Hat Enterprise Linux
    • Red Hat OpenShift
    • Red Hat Ansible Automation Platform

    Build

    • Developer Sandbox
    • Developer Tools
    • Interactive Tutorials
    • API Catalog

    Quicklinks

    • Learning Resources
    • E-books
    • Cheat Sheets
    • Blog
    • Events
    • Newsletter

    Communicate

    • About us
    • Contact sales
    • Find a partner
    • Report a website issue
    • Site Status Dashboard
    • Report a security problem

    RED HAT DEVELOPER

    Build here. Go anywhere.

    We serve the builders. The problem solvers who create careers with code.

    Join us if you’re a developer, software engineer, web designer, front-end designer, UX designer, computer scientist, architect, tester, product manager, project manager or team lead.

    Sign me up

    Red Hat legal and privacy links

    • About Red Hat
    • Jobs
    • Events
    • Locations
    • Contact Red Hat
    • Red Hat Blog
    • Inclusion at Red Hat
    • Cool Stuff Store
    • Red Hat Summit
    © 2025 Red Hat

    Red Hat legal and privacy links

    • Privacy statement
    • Terms of use
    • All policies and guidelines
    • Digital accessibility

    Report a website issue