Welcome to the ninth installment of That App You Love, a blog series in which I show you how to you can make almost any app into a first-class cloud citizen. If you want to start from the beginning, jump back and check out Part 1: Making a Connection. You’ll need the docker service and the oc utility to follow along in this post; for instructions check out Part 5: Upping Our (Cloud) Game.
In Part 8 we learned how to deploy our app in a way that is repeatable, and also adds some basic security to our application. Now it’s time to create some state for the containerized ZNC app we’ve been playing with - but hey, forget about ZNC! We’re really talking about That App You Love, and we are very close to achieving a cloud-friendly version that is secure, robust, and stateful.
A Small Bit of System Administration
As developer, you won’t normally have to do this, but if you’ve been running the mini-cloud that we stood up in Part 5, then congratulations, because you are also a mini-cloud administrator! In order to set up persistent storage for our sample app, we’re going to need to wear the administrator hat for a few moments.
- If you don’t have a mini-cloud, jump back to Part 5 and get yourself up and running with OpenShift Container Platform. If you already have this, purge the current system environment by stopping and restarting the cluster:
sudo <path_to>/oc cluster down; sudo <path_to>/oc cluster up
- On the system where you are running your OpenShift Container Platform cluster, create a directory as the root user where your app’s config and state will live. Also, open up the permissions on this new directory so that the cluster can write to it:
sudo mkdir /tmp/znc_storage && sudo chmod 777 /tmp/znc_storage
- If you are on Fedora using SELinux (you can find out by running “getenforce”), you’ll need to change the security context of this directory as well:
sudo chcon -R -t svirt_sandbox_file_t /tmp/znc_storage
- Grab this Persistent Volume (PV) definition. I’ll explain PVs a little further along:
wget https://raw.githubusercontent.com/nhr/znc-cluster-app/master/znc-pv.yaml
- Change oc users so that you can be the equivalent of “root” on the cluster:
sudo <path_to>/oc login -u system:admin
- Load the PV definition:
sudo <path_to>/oc create -f znc-pv.yaml
- Change back to the “developer” user:
oc login -u developer -p developer --server=<server_IP>:8443
What did we just do? On your host system, we created a directory that will serve as the actual storage location for our app config. In the cluster, we exposed that directory as available storage through the use of a Persistent Volume object. Nice work, cluster administrator!
Meanwhile, back in developer land…
Staking a Claim
For the past few posts, we’ve been using templates to customize and fast-forward our app deployment. Let’s do it again with a new template that includes an additional object - a Persistent Volume Claim, or PVC:
- Use curl or wget to grab the new template:
wget https://raw.githubusercontent.com/nhr/znc-cluster-app/master/znc-template-with-pvc.yaml
- Process and create the objects for our app:
oc process -f znc-template-with-pvc.yaml | oc create -f -
- Kick off a deployment:
oc deploy dc/znc-cluster-app --latest
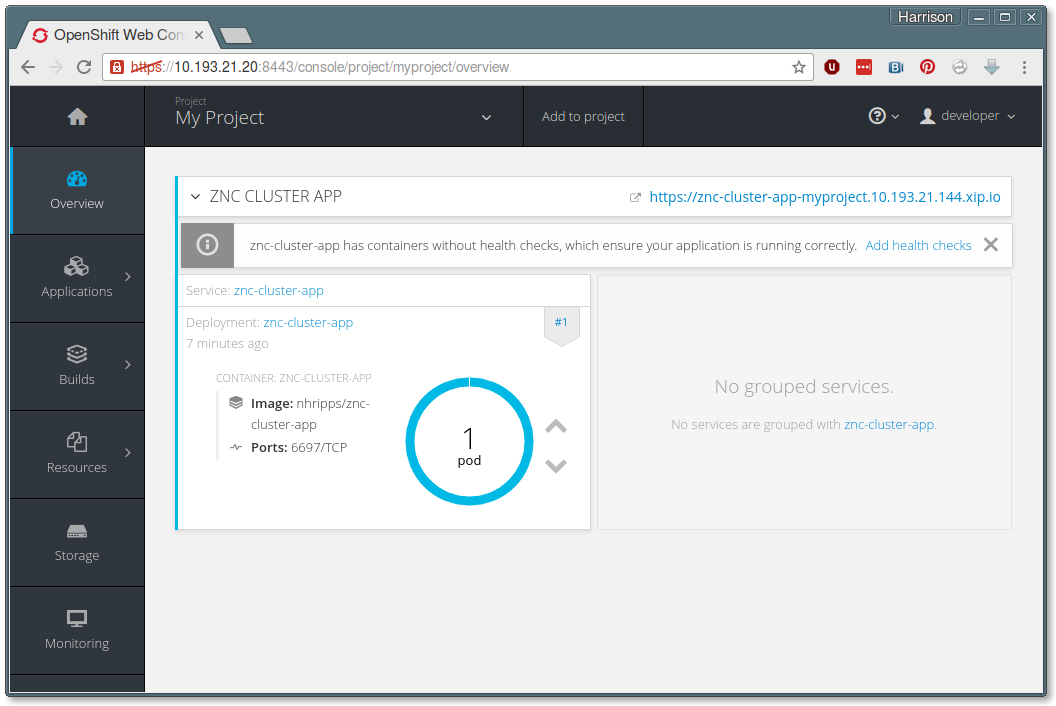
- Now let’s jump over to the web console. If you don’t remember the URL, look for it in the output of the “oc cluster up” command. It will be a URL that includes port 8443. Open that in your browser, log in with “developer” / “developer”, and drill into the “My Project” project:

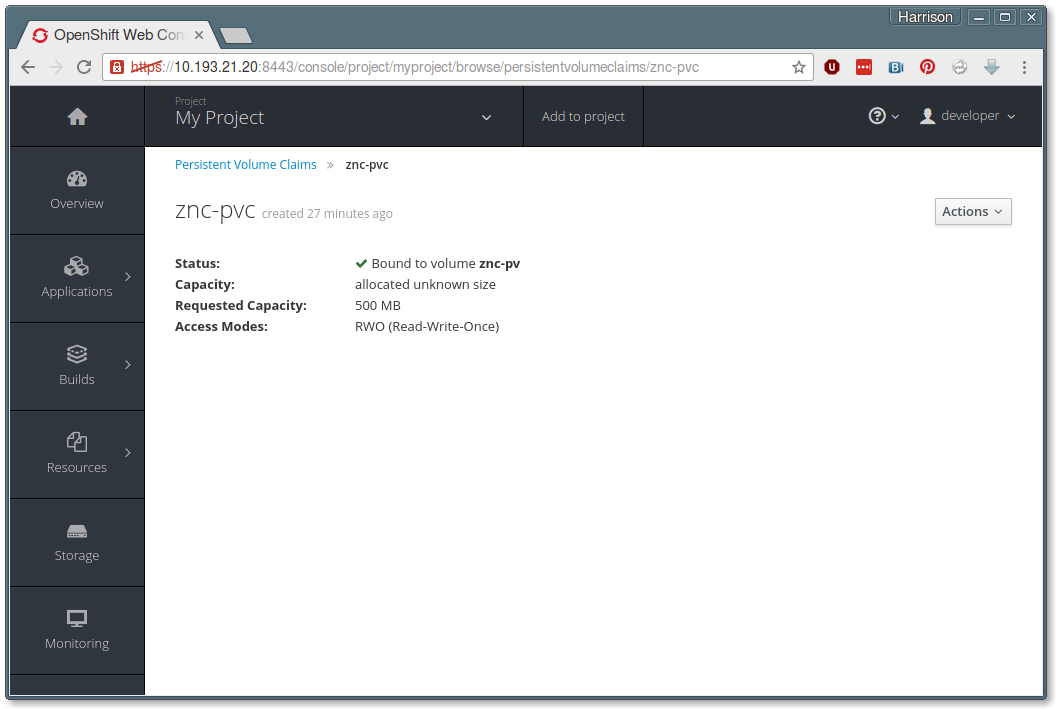
- Now click on Storage, and drill into the “znc-pvc” entry:

That “Status” line tells us everything that we need to know. Our project-specific Persistent Volume Claim has automatically linked up to the cluster-wide Persistent Volume that we introduced as a cluster administrator. That storage is now available to us in this project.
It’s Time to Get Stateful
The last step in our journey is to link that PVC into our app pod so that our ZNC configuration remains even after the pod goes away. Just like with our environment variable definitions back in Part 8, that means that we want to make this connection in our Deployment, so that future pods will pick up the same persistent storage mapping.
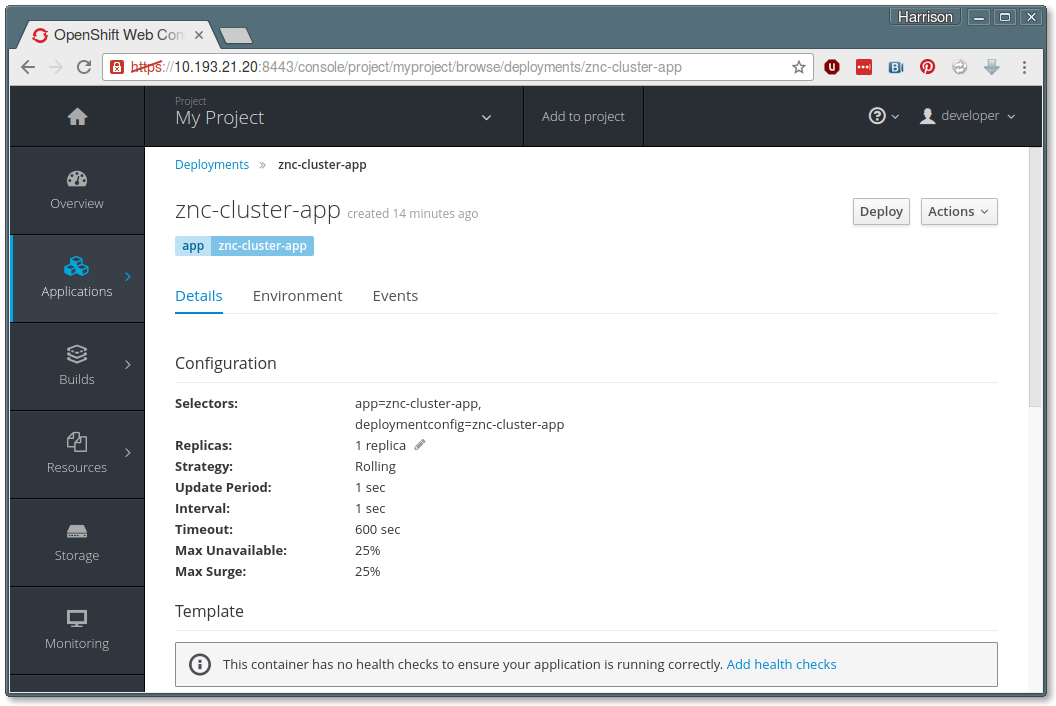
- In the web console, navigate to the deployment details page by going to Applications => Deployment => znc-cluster-app:

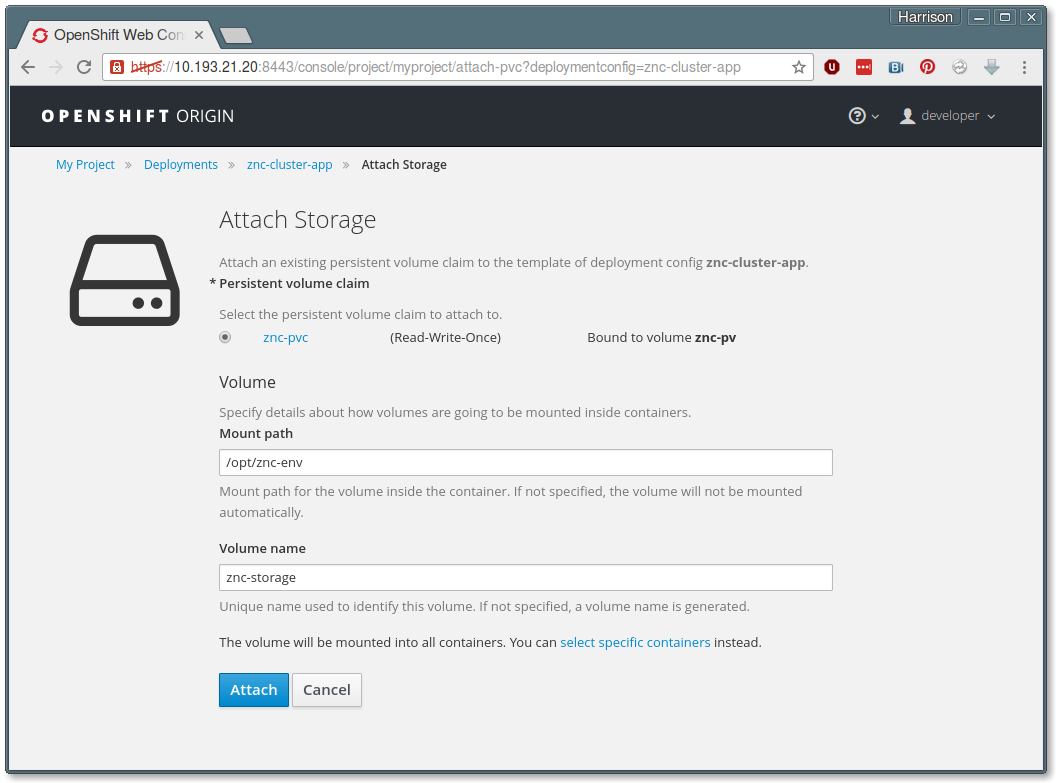
- From the Actions pulldown menu on the upper right, select Attach Storage. This will take you to the Attach Storage form:

Notice that “znc-pvc” is already selected as the Persistent Volume Claim to be used. - Provide the following values in the form, and then press Attach:
- Mount Path (this is where the PVC will be mounted inside the container): /opt/znc-env/
- Volume name: znc-storage
- Back on the Deployment detail page, press the “Deploy” button to trigger a redeployment.
- And finally, the moment of truth: go back to a terminal and have a look at the storage directory that we created:
ls /tmp/znc_storage
You should see some things there - something like:
configs moddata users znc.pem
And the coolest part? Remember back in Part 4 that we built our app container image using a “config-and-run” strategy? Now that you’ve got persistent storage, any subsequent pod that launches in your cluster is going to skip the Config part and go straight to Run with the settings that are already there!
Houston, we have persistence!
Wow - what’s left to do at this point? In the conclusion of our series, we’ll shine up That App You Love with a few nice-to-haves that will make it easier to monitor the availability and health of your deployment, along with some parting notes on improving your app’s security. See you in Part 10: Long Live That App You Love!
This series will run every Tuesday and Thursday until we've accomplished our goals, so stay tuned in, subscribe, and thanks for reading!
About the Author
Hi there! My name is N. Harrison Ripps, and I am an engineer and people manager on the Containers team at Red Hat. Together with the greater open source community, our team has taken the combination of the docker container format and Google’s Kubernetes orchestration system, and then extended this framework with a number of administrator- and developer-friendly features that we call the OpenShift Container Platform.
Last updated: March 17, 2023