Editor's Note: If you have a Linux system that runs KVM and would like to try Red Hat Enterprise Linux on KVM, follow our KVM Get started guide, https://developers.redhat.com/products/rhel/getting-started
The kernel-based Virtual Machine (KVM) is a virtualization infrastructure many have become familiar with throughout the industry. This article will guide you through getting a basic KVM hypervisor up and running and ready for use. In order to fully utilize the KVM, you will need a CPU that has virtualization extensions, and these will need to be enabled in the BIOS of the machine you’re working on. In general, you’ll need to look to enable VT-X or AMD-V depending on your system architecture.
Our Objectives
- Set up a RedHat Enterprise Linux (RHEL 7.2) server
- Identify whether Virtualisation extensions are present
- Install KVM and associated software components
- Networking Considerations
- Configure VNC
- Demonstrate how to fire up a new Virtual Machine running on the KVM hypervisor
- Listing existing Virtual Machines
Installing RHEL
For the purposes of this article, I’m going to be showing you how to manually install KVM from the command line, rather than opt to have it installed as part of the RHEL installation process. This will allow us to fine tune the installation by only installing what we need, and it also gives us a better understanding of how everything fits together. With this in mind, we will be working on the basis that you have opted for a ‘minimal install’ of RHEL. After first boot, you will want to register to the Red Hat network to receive updates and download software. This can be done by running the following command:
subscription-manager register –auto-attach
You will be prompted to enter your username and password.
Virtualisation Extensions
Now that we’re in a position to begin installing KVM and its components, I thought this would be a good time to show you how to check whether virtualisation extensions are being seen on our CPU from within RHEL. To do this, simply run:
grep –E ‘svm|vmx’ /proc/cpuinfo
You should see something similar to the following:
![]()
If you receive no output then it’s likely that virtualization extensions are not enabled in your BIOS and you will need to take steps to rectify this before moving forward with the KVM installation.
Install KVM and associated software components
For the purposes of this article, the assumption is that this RHEL machine running KVM will be used as a standalone hypervisor, so we will not be installing any graphical tools to manage the Virtual Machines.
To install KVM along with the components required to provision Virtual Machines from the command line, run the following command:
yum install qemu-kvm qemu-img libvirt virt-install libvirt-client libvirt-python
This command will also process a number of dependencies required during installation. Whilst we’re at it, let’s install ‘wget’ as we’ll be needing this later on:
yum install wget
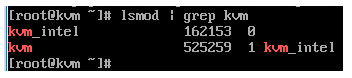
Once the above has completed, we should check to ensure that the relevant KVM modules have been loaded to allow us to make full use of KVM. You can do this by running:
lsmod | grep kvm
Your output should be as follows:
Excellent! We’re almost ready to begin creating Virtual Machines!
Networking Considerations
By default, KVM will set up a network interface on your hypervisor named ‘virbr0’. It creates a network for your Virtual Machines which uses NAT (Network Address Translation) to access resources outside of the network it resides on, which in our case is 192.168.122.0/24.
Depending on your environment, you may wish to create a bridge interface on your KVM hypervisor to allow the Virtual Machines to use the same network as the hypervisor by default and remove the layer of NAT.
Configure VNC
When you fire up a new Virtual Machine with the ‘—vnc’ option, you’ll find that it creates a listener on the localhost (127.0.0.1) address. If you want to be able to access this remotely without using things like SSH tunnels, then you’ll need to amend the ‘/etc/libvirt/qemu.conf’ file by removing the # in front of ‘vnc_listen = “0.0.0.0”’. This will allow any new VNC connections to listen on all interfaces and allow you to connect remotely.
It’s worth mentioning at this point that you’ll most likely want to add a firewall rule to allow the VNC traffic to your hypervisor—otherwise you won’t be able to connect. Generally, the VNC port range will start from TCP 5900. It’s unlikely that we will be running more than 200 Virtual Machines on our hypervisor, so if we open up TCP 5900 -> 6100, this should be enough to allow connections to succeed. We should first check which zone is active by running:
‘firewall-cmd –get-active-zones’
In my case, this is ‘public’. Now, we need to add a permanent firewall rule to allow traffic in on the ports defined above:
firewall-cmd --zone=public --permanent --add-port=5900-6100/tcp
We can verify our rule entry by running:
firewall-cmd --zone=public --permanent --list-ports
This command should return the following:
[root@kvm ~]# firewall-cmd --zone=public --permanent --list-ports
5900-6100/tcp
[root@kvm ~]#
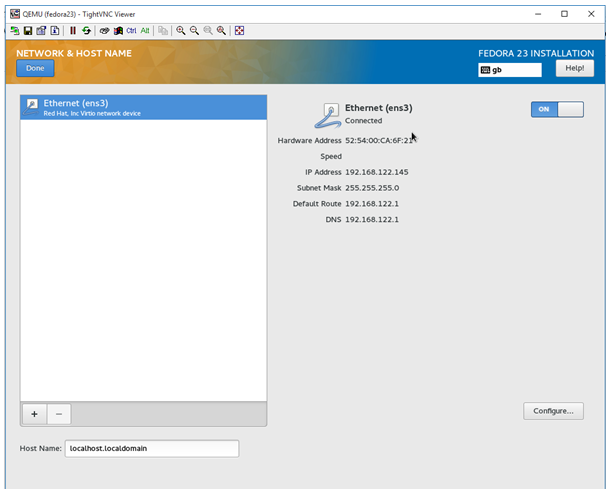
Creating a Virtual Machine
Now that we’re ready to provision a new Virtual Machine, let’s go ahead and download a Fedora ISO for example purposes. Run the following commands to create a directory to store your ISO images, then download the ISO. mkdir /home/iso && wget -O /home/iso/Fedora-Server-DVD-x86_64-23.iso https://download.fedoraproject.org/pub/fedora/linux/releases/23/Server/x86_64/iso/Fedora-Server-DVD-x86_64-23.iso
Once we have our ISO, we’re ready to do the fun bit and get a Virtual Machine up and running on our hypervisor! Whilst there are many options available when provisioning a new Virtual Machine, I’m going to include a simple one-liner below which will get you up and running.
virt-install --name fedora23 --ram 512 --file=/var/lib/libvirt/images/fedora.img --file-size=3 --vnc --cdrom=/home/iso/Fedora-Server-DVD-x86_64-23.iso
You should now see the following:

The above means that it’s waiting for you to proceed with the setup. We need to find out what VNC port the Virtual Machine Console is bound to. In order to do this run virsh vncdisplay fedora23. If this is the first Virtual Machine you’ve provisioned, then it’s likely it will return with “:0”. This means it’s listening on port 5900. If it was “:1” then the port would be 5901.
Now that we have the port of the VNC Console, use your favourite VNC client to connect to the address of the hypervisor and port. In my case, this would be 192.168.10.109:5900.
As you can see from the above screenshot, the VNC viewer shows the console of our Virtual Machine, and we can also see that an IP from the network range we discussed earlier has been assigned successfully!
Listing existing Virtual Machines
Another tool at our disposal is ‘virsh’. This can be used to perform all sorts of operations on your Virtual Machines. For instance, if you wish to see a list of all of your Virtual Machines (started or stopped), all you need to do is run:
virsh list –all
Final Thoughts
KVM is an incredibly powerful hypervisor and is used as the backbone of many virtualisation solutions out there (Openstack, for instance). We’ve only touched the surface of what KVM is capable of, but you now have the building blocks for getting your own virtualisation solution in place.
Resources
- A GUI can be used to manage your Virtual Machines. See here: https://access.redhat.com/documentation/en-US/Red_Hat_Enterprise_Linux/7/html/Virtualization_Deployment_and_Administration_Guide/sect-Creating_guests_with_virt_manager.html
- More information on ‘virsh’ can be found here: http://linux.die.net/man/1/virsh
- More information on KVM networking can be found here: http://www.linux-kvm.org/page/Networking
About Keith Rogers
 Keith Rogers is an IT professional with over 10 years’ experience who currently works for a large broadcasting company out of the UK. His long-standing passion in computing has led to him taking up multiple extra-curricular activities to further his knowledge and fuel his interest.
Keith has spent years working with Linux by utilizing Apache, MySQL and PHP to build full web stacks along with creating more complex load balanced and redundant solutions suitable for high availability. In the last 2 to 3 years he has found himself using new cloud- based infrastructures such as those provided by AWS and Azure to assist in achieving these goals.
Currently, he’s working in the DevOps space with a focus on utilizing new automation tools such as Terraform / Ansible / Cloud-Init to efficiently and consistently deploy infrastructure. Along with this, he has been focusing on improving the bridge between Operations and Development by deploying new tools like Graylog to make it easier to parse log data and visualize any patterns within these logs.
In his spare time, he likes to spend time furthering his tech knowledge by utilizing new technologies at home.
