Millions of us use open source software every day. But have you ever wondered what it would be like to actually give back to an open source community you cared about? This article shows you how. We'll fork a git repo, we'll make a change, and we'll create a pull request asking the maintainers of the project to make our updates part of the code base.
By the way, this is a companion piece to Season 2, Episode 3 of the Command Line Heroes podcast, available at https://www.redhat.com/en/command-line-heroes/season-2/ready-to-commit:
Forking the project's code
The example project we'll use here is the Command Line Heroes game. It's a node and HTML5 project led by Jared Sprague and Michael Clayton. To this point, dozens of people from around the world have expressed an interest in contributing to the game, so that's a great place to show you how to get started.
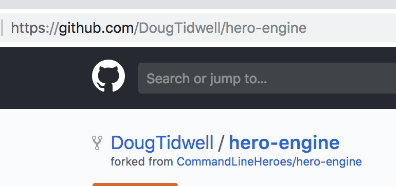
You can find the code at https://github.com/CommandLineHeroes/hero-engine:
When the repo's page loads, you'll need to log in to your GitHub account if you're not already. You'll see the Fork button in the upper right-hand corner, along with a counter that shows how many times this code has been forked. The higher the number, the more active the project and its community:
Click the Fork button and within seconds you'll have a fork that contains all of the code from the original repo:
Now go to the command line and clone your forked repo, the one that's now part of your GitHub account.
doug@ovpn-120-92:~/Developer $ git clone https://github.com/DougTidwell/hero-engine.git
Cloning into 'hero-engine'...
remote: Enumerating objects: 7, done.
remote: Counting objects: 100% (7/7), done.
remote: Compressing objects: 100% (7/7), done.
remote: Total 225 (delta 0), reused 2 (delta 0), pack-reused 218
Receiving objects: 100% (225/225), 754.30 KiB | 2.21 MiB/s, done.
Resolving deltas: 100% (85/85), done.
(Your favorite IDE probably has git support built in, feel free to use whatever tools you like.) We're assuming you have node and npm installed on your machine already. If not, visit nodejs.org to download and install them. Now run npm install to get all of the project's dependencies on to your machine:
doug@ovpn-120-92:~/Developer/hero-engine $ npm install
> fsevents@1.2.4 install /Users/doug/Developer/hero-engine/node_modules/fsevents
> node install
[fsevents] Success: "/Users/doug/Developer/hero-engine/node_modules/fsevents/lib/binding/Release/node-v57-darwin-x64/fse.node" already installed
Pass --update-binary to reinstall or --build-from-source to recompile
> git-pre-commit@2.1.4 postinstall /Users/doug/Developer/hero-engine/node_modules/git-pre-commit
> gulp hooks:install
[06:19:02] Using gulpfile ~/Developer/hero-engine/node_modules/git-pre-commit/gulpfile.js
[06:19:02] Starting 'hooks:install'...
[06:19:02] Starting 'hooks:clean'...
[06:19:02] "Deleting file: /Users/doug/Developer/hero-engine/.git/hooks/pre-commit,/Users/doug/Developer/hero-engine/.git/hooks/pre-commit.js,/Users/doug/Developer/hero-engine/.git/hooks/pre-commit-utils/"
[06:19:02] Finished 'hooks:clean' after 18 ms
[06:19:02] Starting 'hooks:install-pre-commit-files'...
[06:19:02] Starting 'hooks:install-util-files'...
[06:19:02] Finished 'hooks:install-pre-commit-files' after 25 ms
[06:19:02] Finished 'hooks:install-util-files' after 19 ms
[06:19:02] Starting 'hooks:pre-commit-permissions'...
[06:19:02] Finished 'hooks:pre-commit-permissions' after 13 ms
[06:19:02] Finished 'hooks:install' after 60 ms
> phaser@3.14.0 postinstall /Users/doug/Developer/hero-engine/node_modules/phaser
> node scripts/support.js
❤ Please help support Phaser development ❤
https://www.patreon.com/photonstorm/
added 726 packages from 491 contributors and audited 4840 packages in 10.165s
found 5 vulnerabilities (1 low, 4 high)
  run `npm audit fix` to fix them, or `npm audit` for details
All of those dependencies require roughly 14,000 new files and directories. (Seriously. We're not exaggerating. Fourteen K.) Just another day in the life of a node developer.
By the way, in keeping with the rich and storied tradition of laziness we've established in these articles, feel free to ignore any security warnings you get during the install. The message found 5 vulnerabilities (1 low, 4 high) might have caught your eye, for example. Of course, feel free to be a responsible citizen by fixing them in the package.json file and submitting a pull request.
Making a change
If we're going to submit a pull request, we actually have to change something. Start by running the code. Because this is a node project, look in the scripts section of the package.json file to see how to do that:
    "scripts": {
        "test": "npm run eslint",
        "eslint": "./node_modules/.bin/eslint src",
        "eslint-fix": "./node_modules/.bin/eslint --fix src",
        "precommit": "npm run eslint-fix",
        "examples": "node ./node_modules/http-server/bin/http-server examples/ -o"
    },
The examples script seems like a good place for a beginner to start, so type npm run examples to start the code:
doug@ovpn-120-92:~/Developer/hero-engine $ npm run examples
> hero-engine@0.1.0 examples /Users/doug/Developer/hero-engine
> node ./node_modules/http-server/bin/http-server examples/ -o
Starting up http-server, serving examples/
Available on:
  http://127.0.0.1:8080
  http://192.168.1.78:8080
  http://192.168.99.1:8080
  http://10.10.120.92:8080
Hit CTRL-C to stop the server
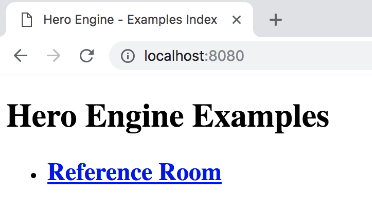
Now you can open a browser and go to localhost:8080 to see this page:
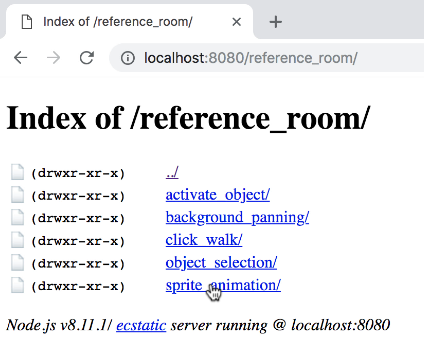
Take the Reference Room link to see the various examples:
Now take the sprite_animation link:
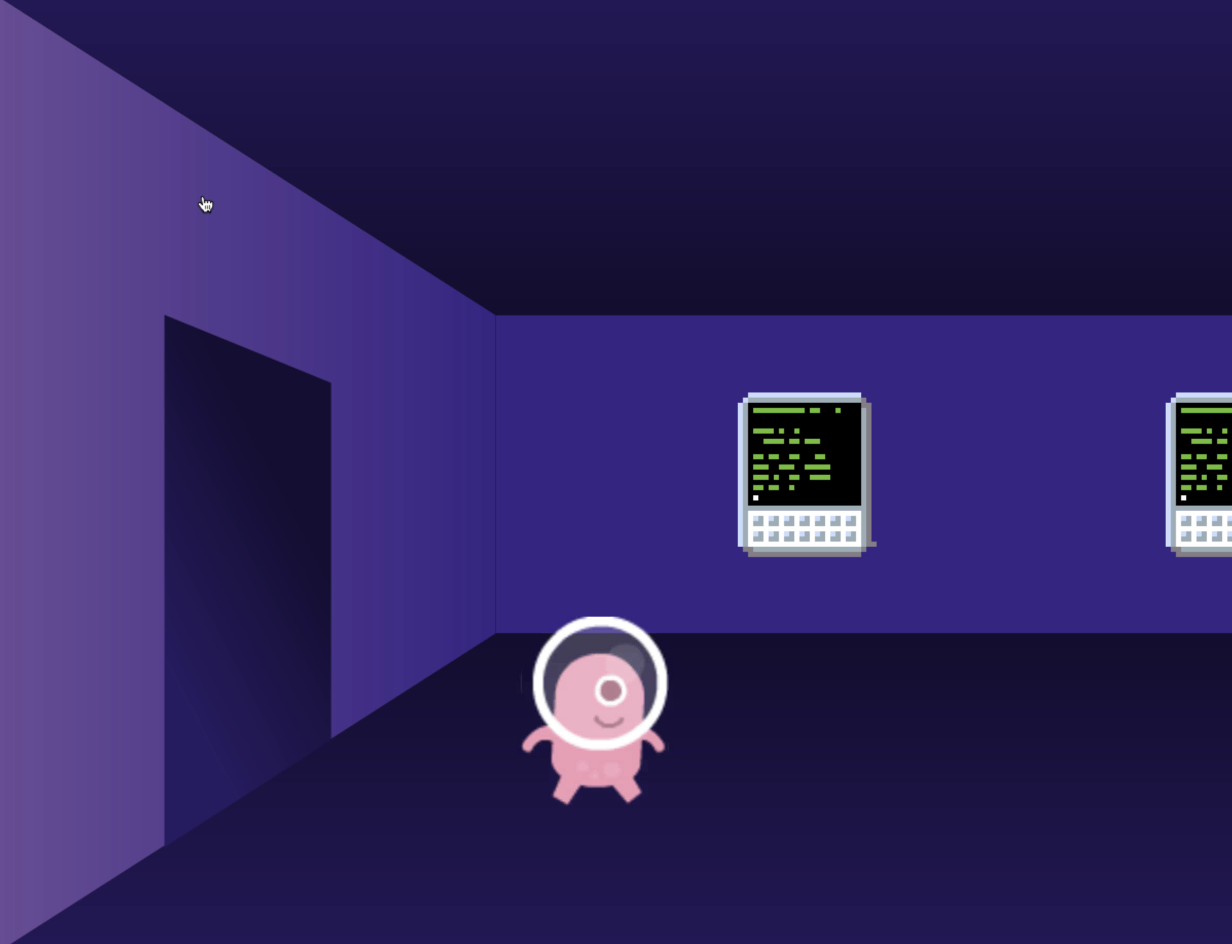
As you can see, this features a pink, minion-y figure bouncing across the room. After watching this little thing walk back and forth, you decide you'd like him or her (or it) to be much bigger. Soooo, off to the code we go!
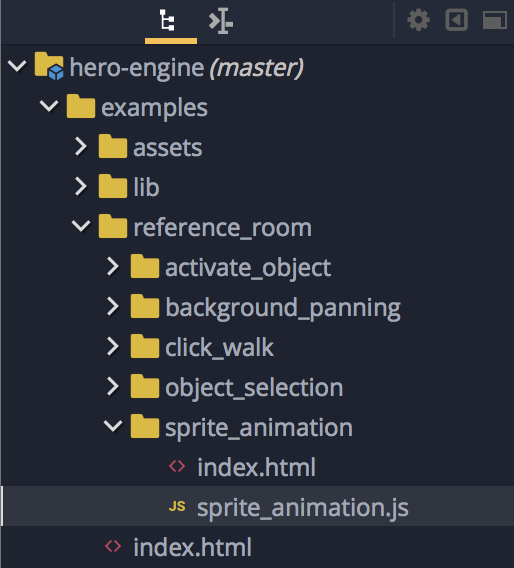
A big part of contributing to any open source project is learning how the code base works. Take a look at the file structure:
There is a directory named examples. That sounds promising, so look there. Now you'll find something called reference_room. Since that's the name of the link you took to get to the examples, go a level deeper. And there's a directory called sprite_animation. It seems reasonable that the page you saw came from these files. Looking at index.html, that's basically just a shell that imports some JavaScript files. So take a look at sprite_animation.js. There's obviously a great deal of knowledge about the gaming libraries and other code behind this, but as you scroll down, you can see that this code is nicely commented:
    ...

    // Create the player sprite animation config
    let config = {
        key   : 'walk',
        frames: this.anims.generateFrameNumbers('player_sheet', {}),
        repeat: -1,
    };
    // Create the walk animation
    this.anims.create(config);
    // Create the player sprite
    player = this.add.sprite(300, 700, 'player');
    // Make player a bit bigger
    player.scaleX = 4;
    player.scaleY = 4;
    // Start the walking animation
    player.anims.play('walk');
    // Camera follows the target image
    this.cameras.main.startFollow(player);
    ...
Well-commented code shortens the learning curve for any kind of project, and it's a great way to help newcomers become part of an open source community. There's a comment that says Make player a bit bigger, followed by setting the variables scaleX and scaleY to 2. Change them to 4, save the file, and rerun the code.
Now when you go to the sprite animation room, sure enough, the character is bigger:
Pleased with yourself for changing the code successfully, and, at least in your opinion, making things better, it's time to submit your pull request.
Creating the PR
It's showtime!
First, make sure you do a git add / commit / push to put your changes into the forked repo:
doug@ovpn-120-92:~/Developer/hero-engine $ git add examples/reference_room/sprite_animation/sprite_animation.js
doug@ovpn-120-92:~/Developer/hero-engine $ git commit -m "Supersized the minion-y thing."
> hero-engine@0.1.0 precommit /Users/doug/Developer/hero-engine
> npm run eslint-fix
> hero-engine@0.1.0 eslint-fix /Users/doug/Developer/hero-engine
> eslint --fix src
[master d9db6ea] Supersized the minion-y thing.
 1 file changed, 2 insertions(+), 2 deletions(-)
doug@ovpn-120-92:~/Developer/hero-engine $ git push
Counting objects: 6, done.
Delta compression using up to 8 threads.
Compressing objects: 100% (6/6), done.
Writing objects: 100% (6/6), 524 bytes | 524.00 KiB/s, done.
Total 6 (delta 4), reused 1 (delta 0)
remote: Resolving deltas: 100% (4/4), completed with 4 local objects.
To https://github.com/DougTidwell/hero-engine.git
   1920e0e..d9db6ea  master -> master
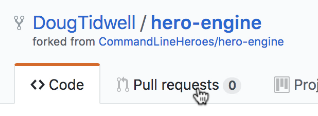
Now go back to your browser and the GitHub page for your fork. At the top, click the Pull requests link:
From there, click the green New pull request button. This takes you to the original repo and assumes that you'd like to create a pull request from your forked repo:
You can change forks and branches, but the default is what you want here.
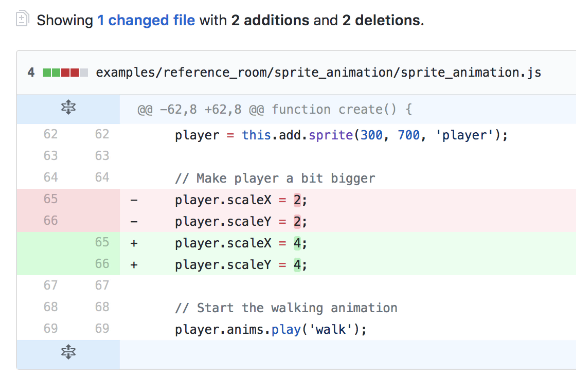
GitHub shows you that the only changes here are the two variables in the sprite_animation.js file:
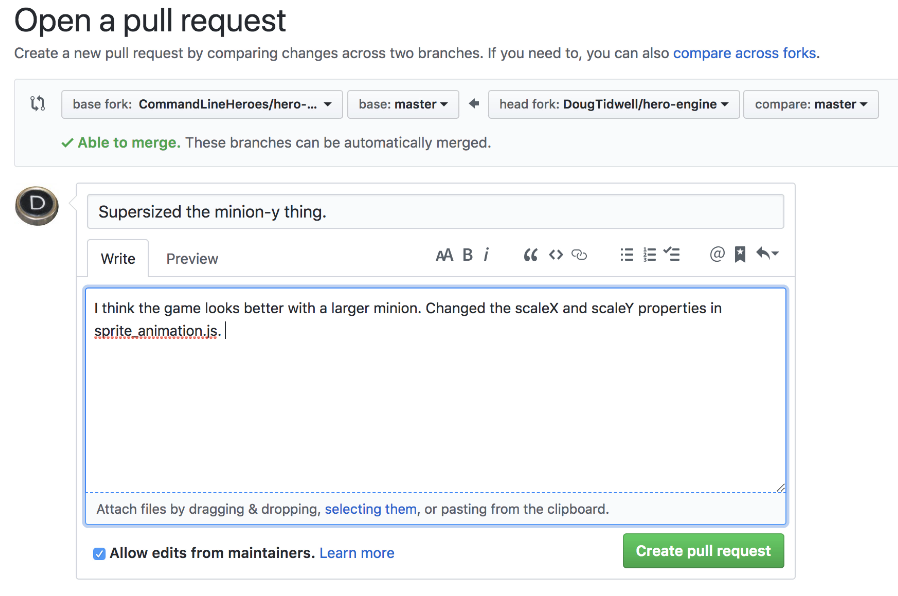
Now click the green Create pull request button to create the pull request:
The title of your pull request is whatever commit message you used when you pushed your code into the forked repo. Beneath the title, you should add a description of exactly what you changed and why you think those changes are a good idea. If you fixed a bug, describe the problem you found and how you solved it. If you updated the documentation, describe what you changed.
In our case here, you're making an aesthetic change, so try to justify the larger size of the minion-y thing. You can use markdown in the text area, and you can also also attach files if you think they'll help. When you've made a good case for your changes, click the green Create pull request button and you're all set.
And now....
The waiting is the hardest part
Now that you've created your PR, the next step is waiting for a response. We'll discuss the four possible outcomes here.
1. Nothing
The first possible response is, well, no response at all. Crickets. You're a ghost. Don't take that personally, and be as patient as you can. Lots of maintainers are volunteers who balance managing a community with a full-time job and a family. Maybe the maintainer is on vacation. Maybe it's their kid's birthday. Maybe they're swamped at work and can't give your PR the time it deserves. In an active community, you'll probably get a response within a work day or two, but always try to think the best of the maintainers while you're waiting.
2. Rejection
Another possible response, of course, is a rejection. In this example, you're just making a change because you think the bigger minion looks better. That's a matter of taste, and the maintainer isn't obligated to value your artistic opinions over their own. Whatever the situation, hopefully the maintainer is gracious and thoughtful in rejecting your request.
3. Acceptance
The third thing that might happen is victory. The maintainer thinks your changes are a swell idea, so they accept the PR and make your changes part of the code base. Your awesomeness is now manifest, but try to stay humble for the sake of your interpersonal relationships with others. And realize that your next request might not go so smoothly.
D. Request for changes
The fourth option, however, is that the maintainer sends you a request for changes. Maybe your suggested change gives the maintainer an idea. Instead of making the minion larger by default, maybe the minion's size should change at certain points in the game. The maintainer might ask you to make the minion's X- and Y-dimensions parameters to the function. For the sake of the community, that's the best possible outcome. You made a simple change, that change gave the maintainer an idea to expand the functionality of the project, and you get the chance to make that change. Everybody wins. Hopefully the maintainer loves your updated PR and accepts it, but there could still be more iterations before you're through.
Pull requests throughout history
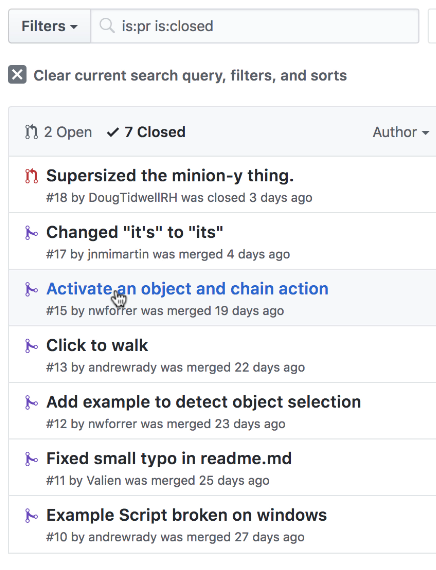
One thing to keep in mind is that however a PR is resolved, it lives on in the repo. Let's take a look at the pull request history for this project, accessed by selecting everything with a status of Closed (a filter of is:pr is:closed):
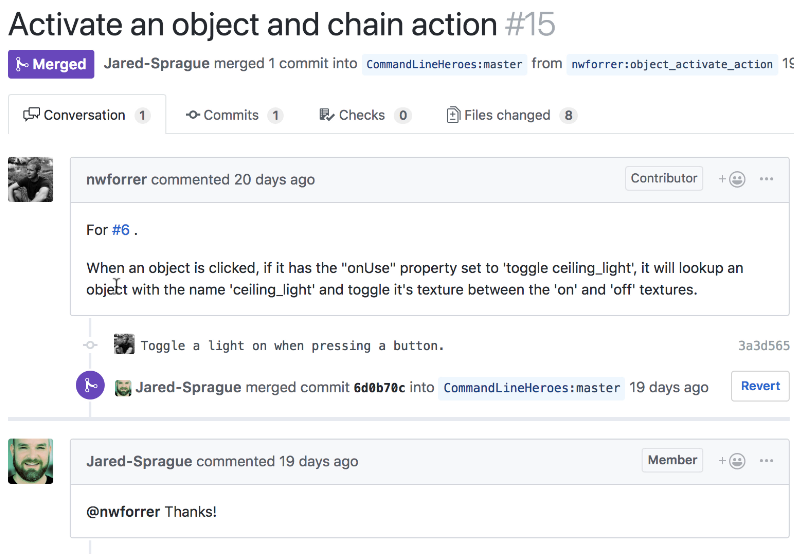
Here's PR #15 in the project:
User nwforrer added to the code so that clicking on an object can turn the ceiling light on and off. As you can see, Jared happily accepted the request.
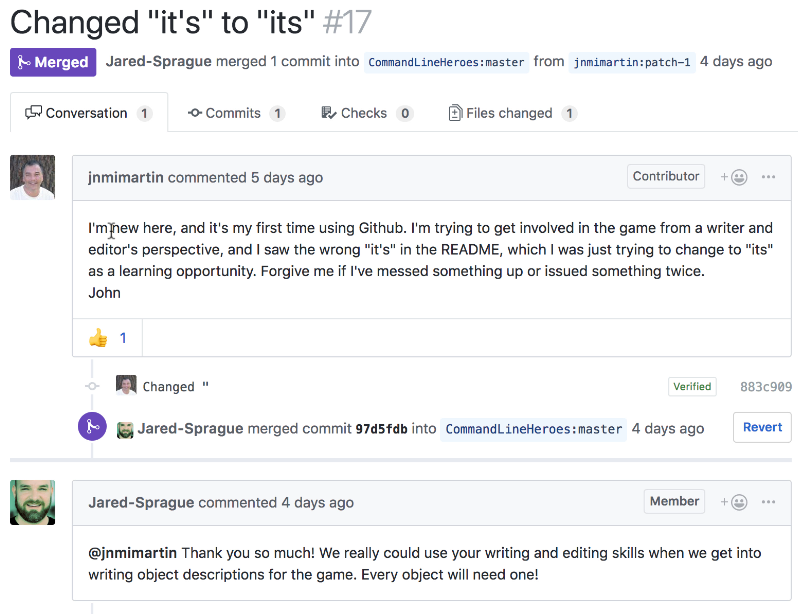
Request #17 was a fix to the documentation:
It's important to remember that there are lots of ways to contribute to an open source project beyond code. Every project needs documentation, and the Command Line Heroes game needs artwork as well. Jared's gracious response here is a great model for maintainers everywhere.
Time to get started!
Those are the basics of creating a pull request, your first step towards becoming an active member of an open source community. It's not hard to do. The trick is to find a project you care about and find a way to make it better. You might be creating or fixing code, documentation, artwork, or something else, but now, you're a contributor.
We encourage you to keep an eye on the hero-engine repo. Watch the game as it evolves, and don't hesitate to join the community and contribute. Or join any community you care about, just get started.
There's no limit to what you and a great community can accomplish. Good luck, and have fun!
Last updated: June 10, 2025


