In Red Hat Developer Hub using Red Hat OpenShift Virtualization, developers can build and deploy their applications and build new virtual machines (VMs) by creating a component and choosing a pre-defined template.
Platform engineers and operations can extend self-service of creating VMs for developers and enable each software template via RBAC.
In the previous article in this series, we demonstrated how Red Hat OpenShift Virtualization and Red Hat Developer Hub can increase developer productivity by building virtual machines with a click of a button. In this article, we showcase the user experience for developers when building a new virtual machine based on the definitions of platform engineering and operations. We will define the developer experience, such as how much a developer can control and define during the VM creation, from deciding the VM's name to the VM's disk size. In this case, the developers can only configure the VM's name. The user experience is defined with the software templates, in the following sections we will show how to build for VMs Red Hat Enterprise Linux (RHEL) 9 medium. In this article, the same experience applies to the VMs Red Hat Enterprise Linux (RHEL) 9 large.
Build a RHEL 9 VM medium size from Red Hat Developer Hub
To begin, ensure you are logged in to the Red Hat Developer Hub UI. From the left menu, click Create.
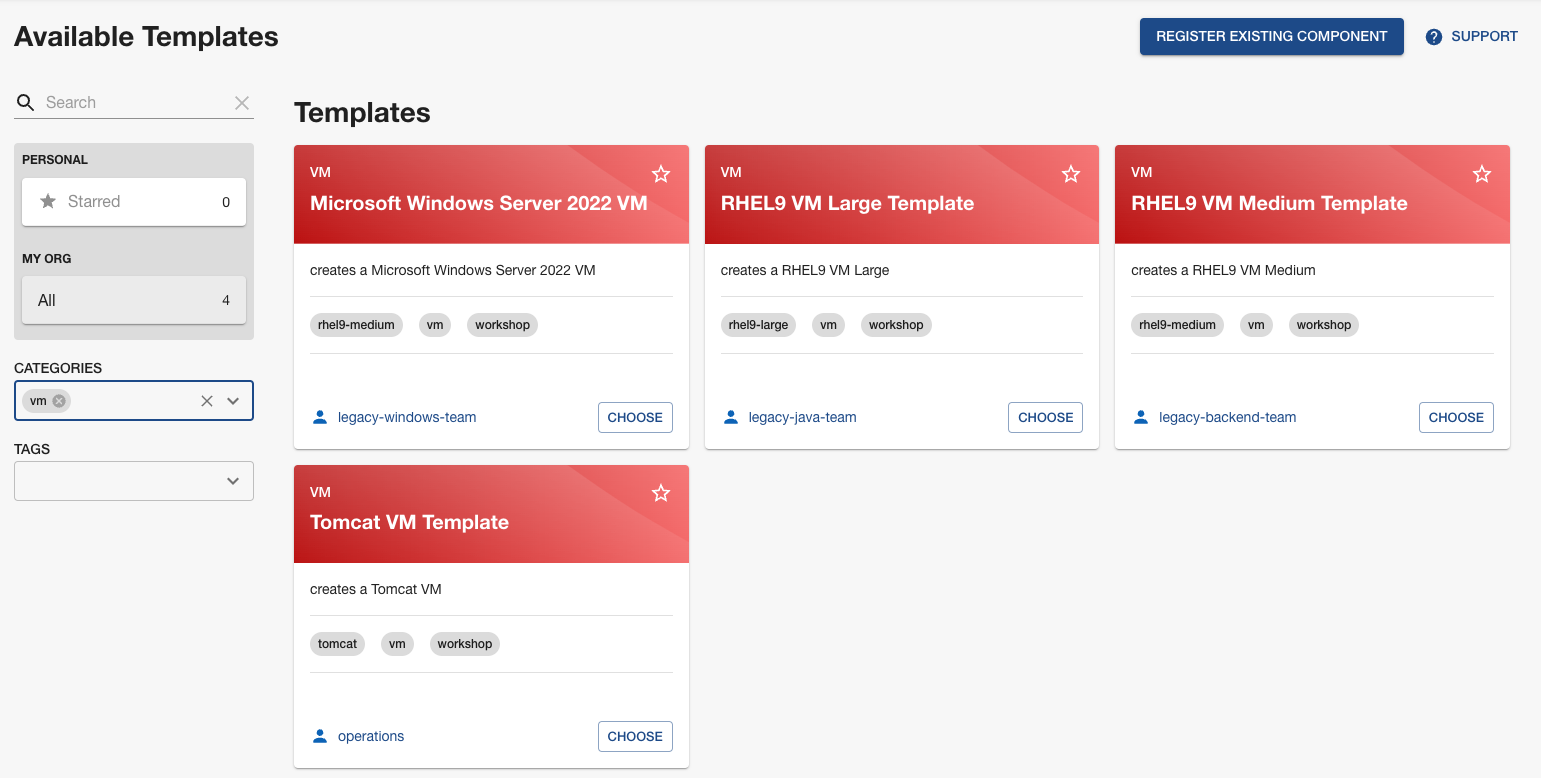
Select RHEL9 VM Medium Template using software templates, as shown in Figure 1.
Step 1: Provide information about the source code location
In this case Red Hat Developer Hub is already integrated with GitLab. Repo Host is the GitLab domain already installed in Red Hat OpenShift. Developer Hub will use this input data to upload the source repository and manifests. See Figure 2.

Step 2: Provide information about the environment information
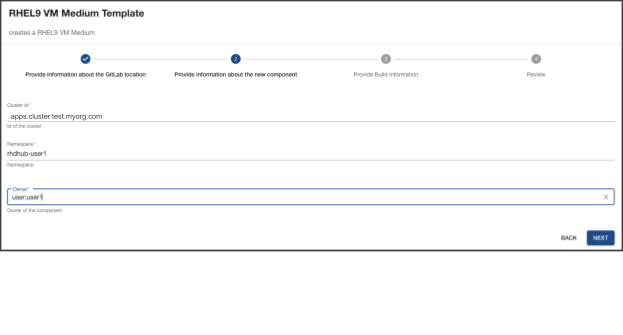
Fill in the fields (depicted in Figure 3) as follows:
- Cluster ID: the OpenShift domain. Red Hat Developer Hub will use this input data to build and deploy the application. In this case, ".apps.cluster.test.myorg.com".
- Namespace: the OpenShift namespace. Red Hat Developer Hub will use this input data to create the VM in that namespace. In this case, "rhdhub-user1".
- Owner: your user ID. Red Hat Developer Hub will use this input data for the build process. In this case, "user:user1".
Step 3: Provide the desired VM's name
The Component ID is the VM’s name, which in this case is "app-legacy". Red Hat Developer Hub will use this input data to create the VM. See Figure 4.

Step 4: Review and create
Congratulations! You have successfully built a virtual machine into OpenShift. Now you can explore the new virtual machine from the Overview page shown in Figure 5.
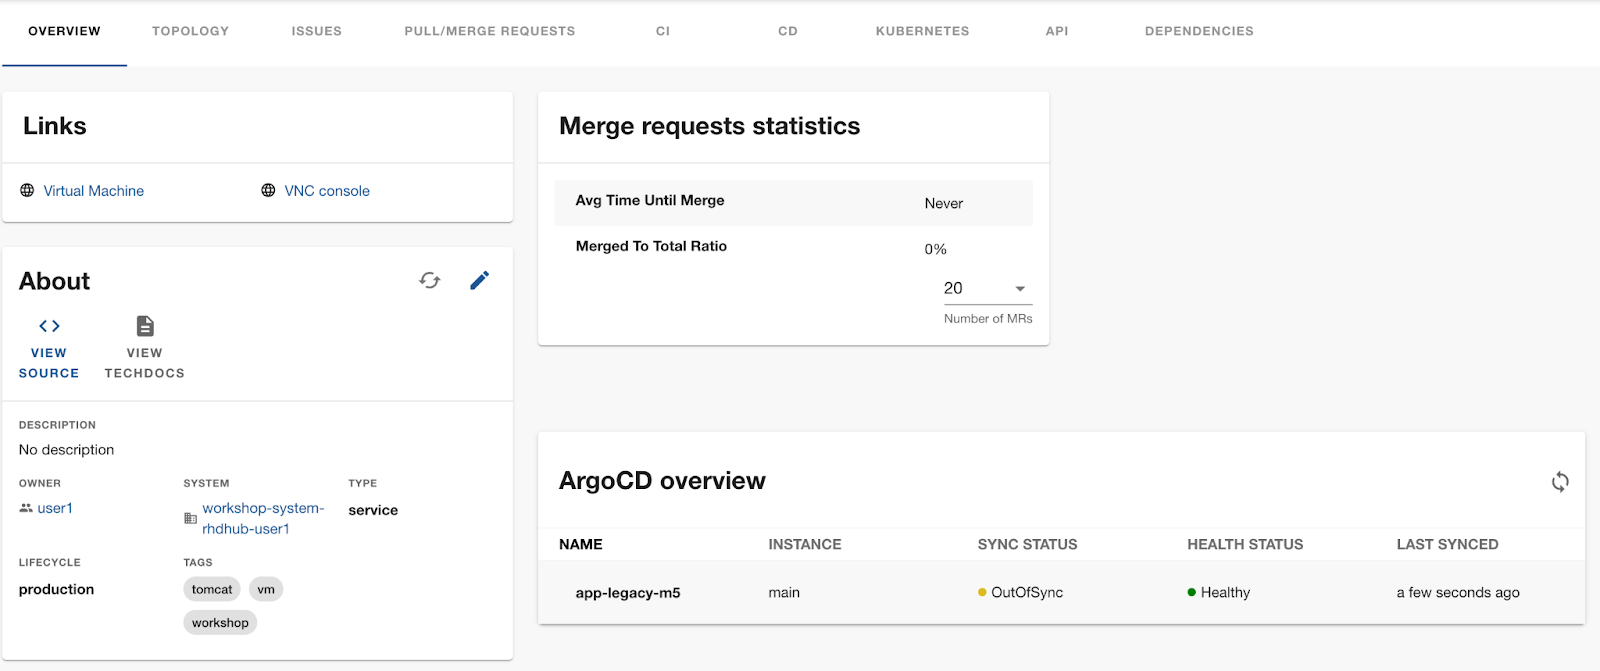
The links on this page point to the OpenShift Console to access the VM’s details as well as the VM’s VNC Console.
By clicking VirtualMachines, I’m able to navigate to the VM in the OpenShift Console, as shown in Figure 6.
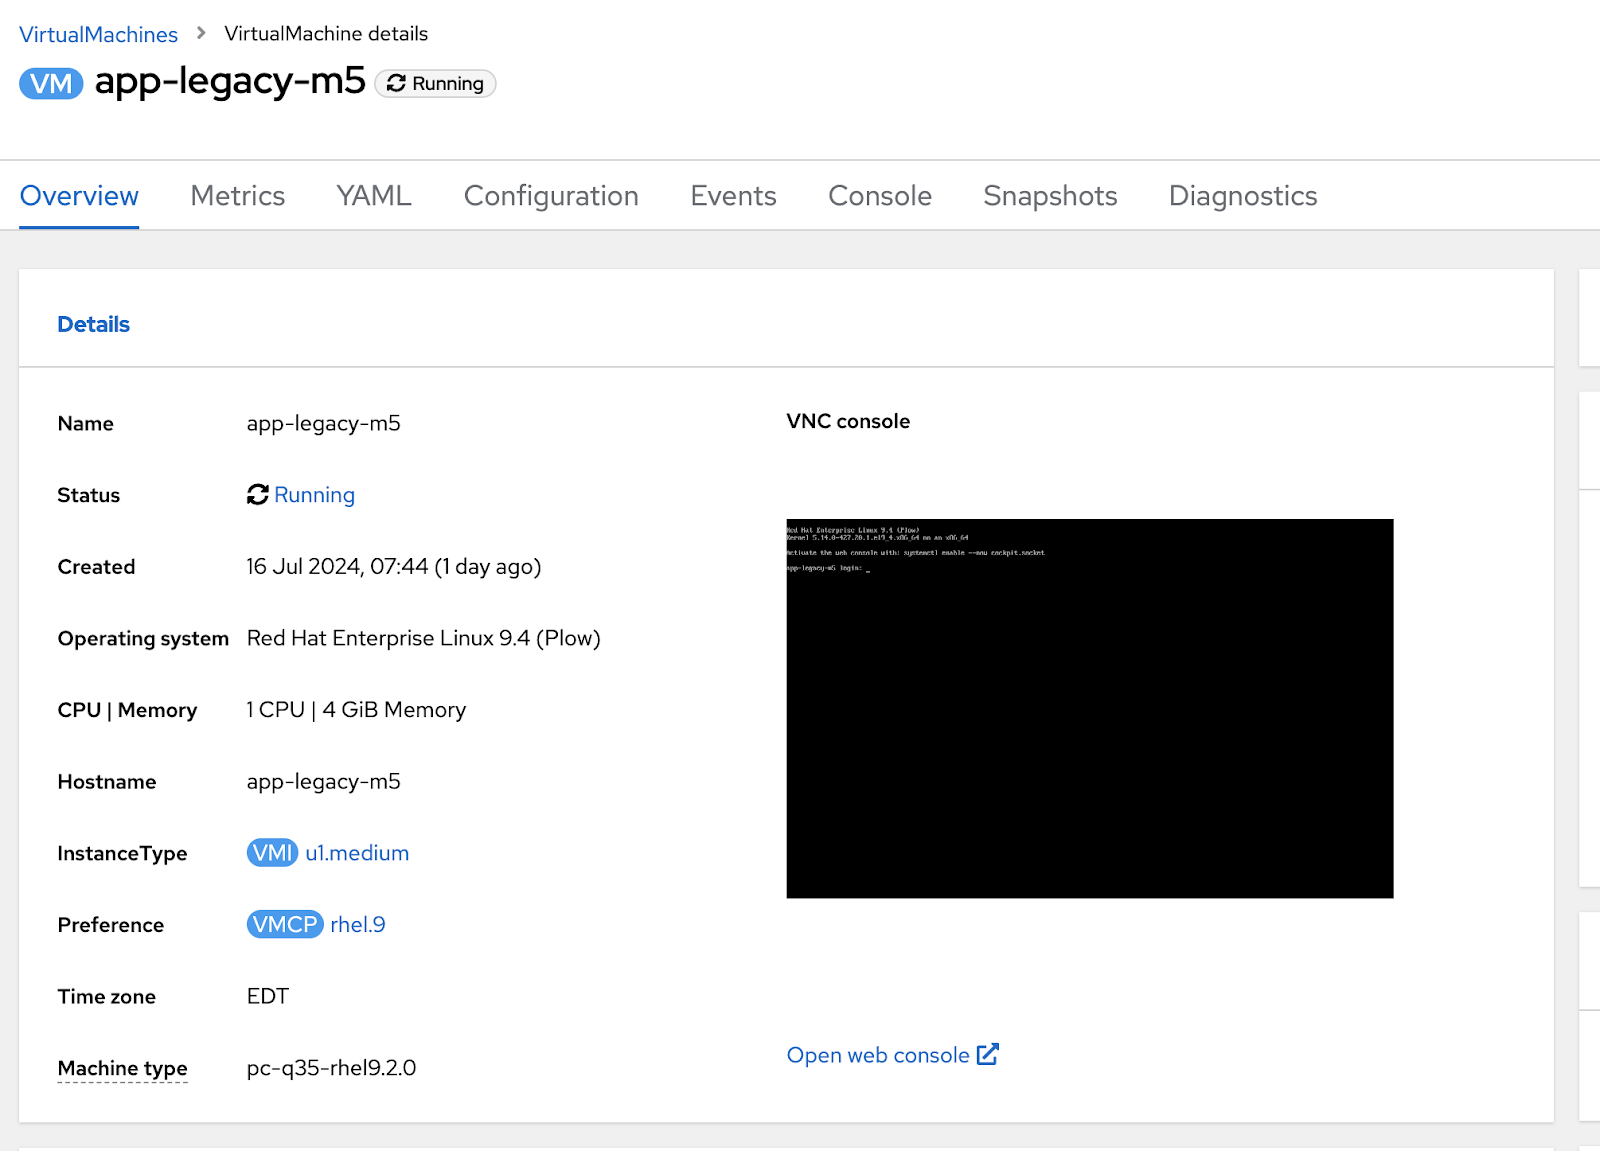
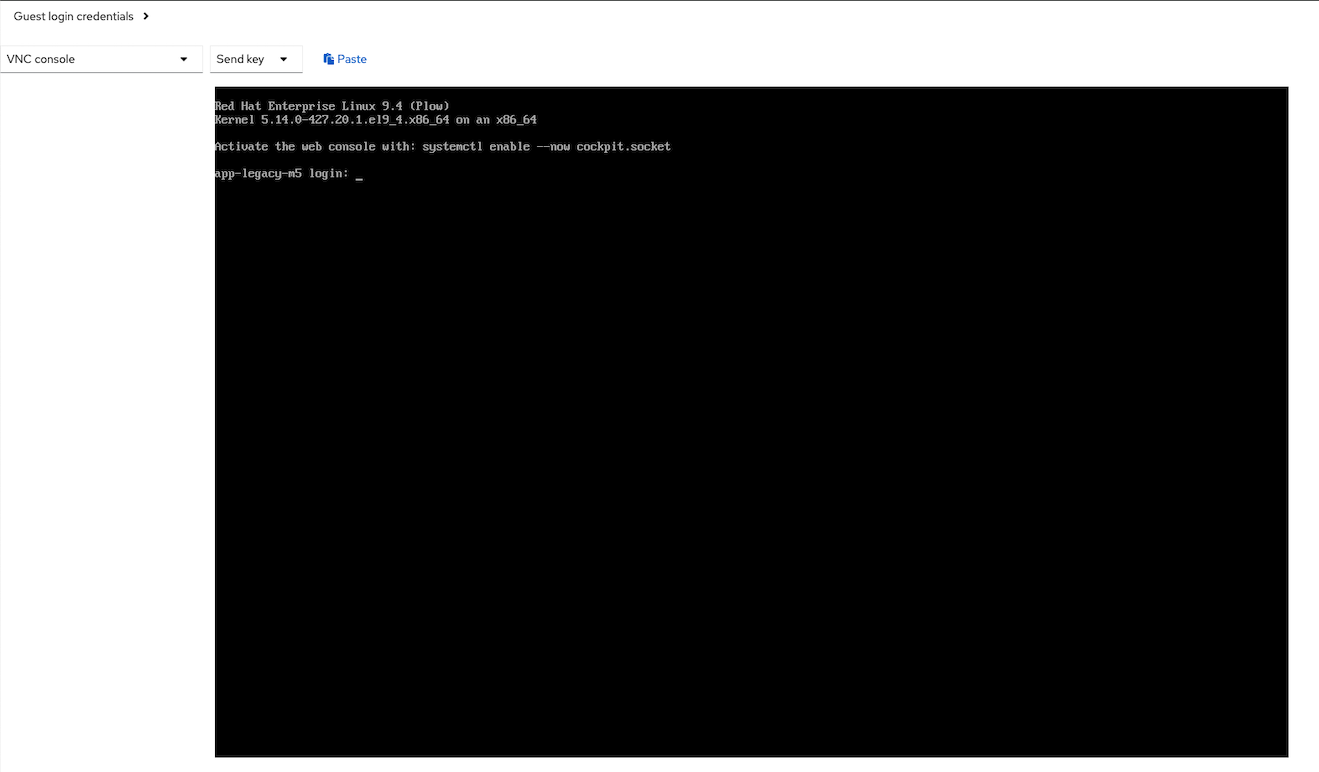
By clicking VNC Console I can navigate and access the VM’s VNC, as shown in Figure 7.
Then, review the VM’s Pods from Developer Hub (Figure 8).

Conclusion
Developers can create many instances from VMs' pre-defined software templates with just a few clicks. Software template customizations will determine how many templates will need to be available for developers to access the different types of VMs required.
Next
Continue reading Part 3 of this series: Create software templates for VMs with OpenShift Virtualization.
Last updated: September 12, 2024