The JDK Mission Control (JMC) agent is a powerful tool that allows users to inject custom JDK Flight Recorder (JFR) events into running applications without restarting the Java Virtual Machine. The new release of Cryostat 2.2 now offers a graphical user interface for communicating with the JMC Agent in containerized applications that support it. This article introduces the Cryostat JMC agent plugin and enhancements made in version 2.2.
Prerequisites
To start using the JMC agent with Cryostat, you’ll need the JMC agent jar as well as a target to connect it. The JMC Agent can be built from the source or downloaded from Adoptium’s JMC-Overrides page and must be present in the same container as the target application. Once there, the target application must start with the agent:
-javaagent:/path/to/jmc-agent.jar
With the Agent present in the same container and the target application started with it, Cryostat can now be used to inject custom JFR events into the target.
JMC agent integration demo
For this demonstration, we will run Cryostat with the JMC agent enabled. You can do this by copying the agent into the Cryostat image. Then modify the entry point script to launch Cryostat with the agent:
-javaagent:/clientlib/agent.jar
As Cryostat starts, the logs will show the agent running as follows:
Oct 25, 2022 9:10:40 PM org.openjdk.jmc.agent.Agent printVersion

INFO: JMC BCI agent v1.0.0
Once we have a target running with the agent, we can open up Cryostat’s web interface and select it from the list. In Figure 1, the events page displays the agent options.
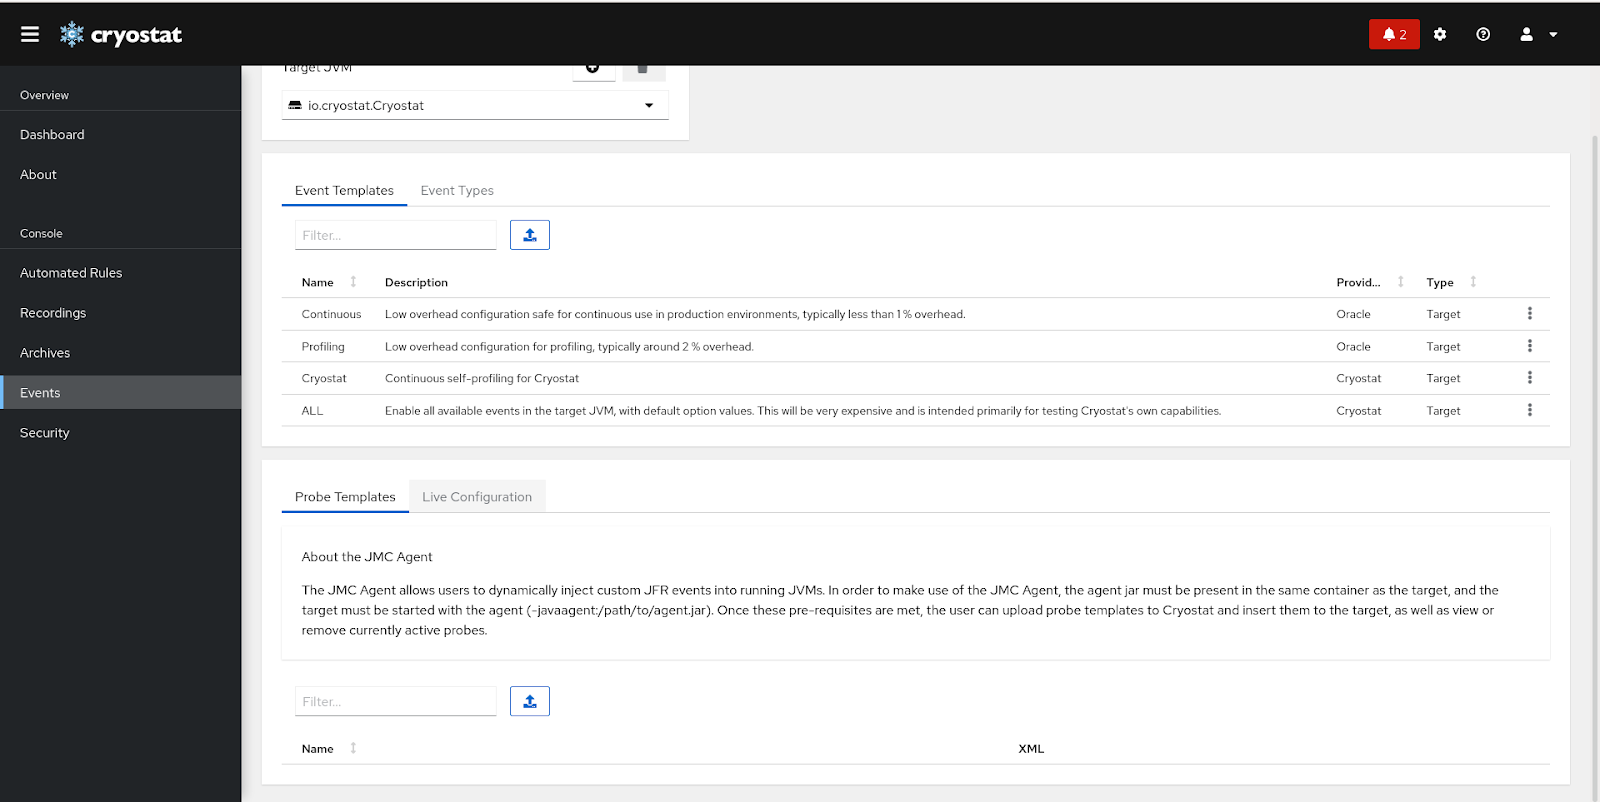
The Probe Templates tab allows us to upload a template to Cryostat detailing the events we want to inject and where to inject them. For an example template, consider the following:
<jfragent>

    <!-- Global configuration options -->

    <config>

       <classprefix>__JFREvent</classprefix>

       <allowtostring>true</allowtostring>\

       <allowconverter>true</allowconverter>

    </config>

       <events>

           <event id="cryostat.demo.jfr.event9">

               <label>Cryostat Agent Plugin Demo Event</label>

               <description>Event for the agent plugin demo</description>

               <path>io/cryostat/demo/events</path>

               <stacktrace>true</stacktrace>

               <class>io.cryostat.core.agent.AgentJMXHelper</class>

               <method>

                   <name>retrieveEventProbes</name>

           <descriptor>()Ljava/lang/String;</descriptor>

               </method>

            <location>WRAP</location>

        </event>

    </events>

</jfragent>
This configuration will inject a custom flight recorder event called a Cryostat agent plugin demo event and have it emitted whenever the retrieveEventProbes method in AgentJMXHelper is called. This means that whenever Cryostat asks the agent for the currently active probes, it will also emit the custom JFR event. More information about this configuration can be found in this article.
With an XML configuration ready, we can get started with injecting it into a target. Clicking the upload button will give us a dialogue to upload the template, as illustrated in Figure 2:

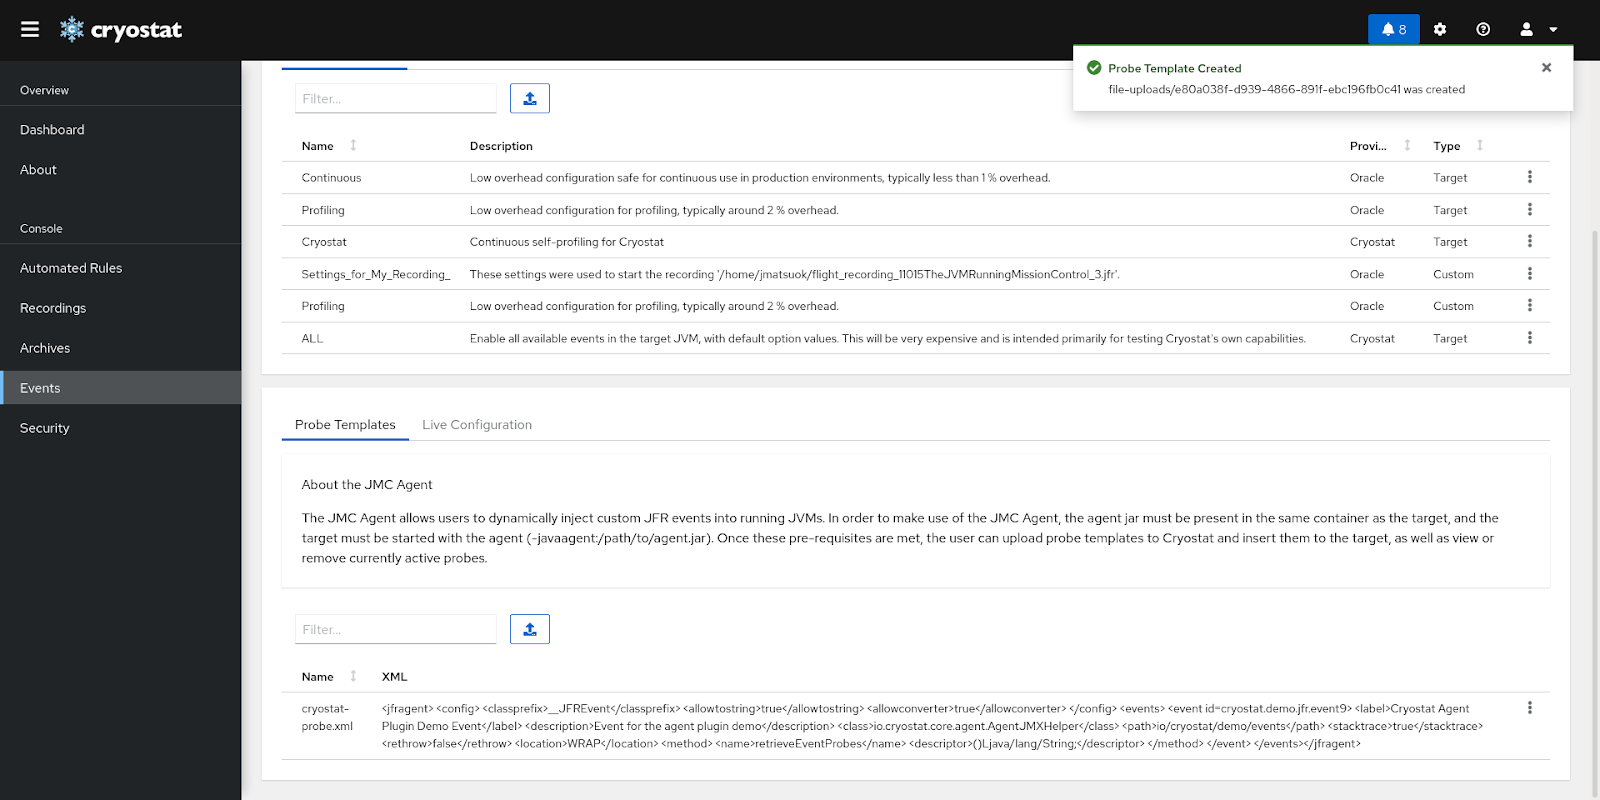
Once it is uploaded, we’ll be able to see it in the table in Figure 3:
Once we have a template in the table, we can apply it by clicking on the three dots, then selecting insert probes. We can see the active probes on the Live Configuration tab, as shown in Figure 4:

Check the Event Types table to confirm that they have been injected (Figure 5):

If we decide we no longer need the probes, we can remove them by selecting the Remove All Probes button.
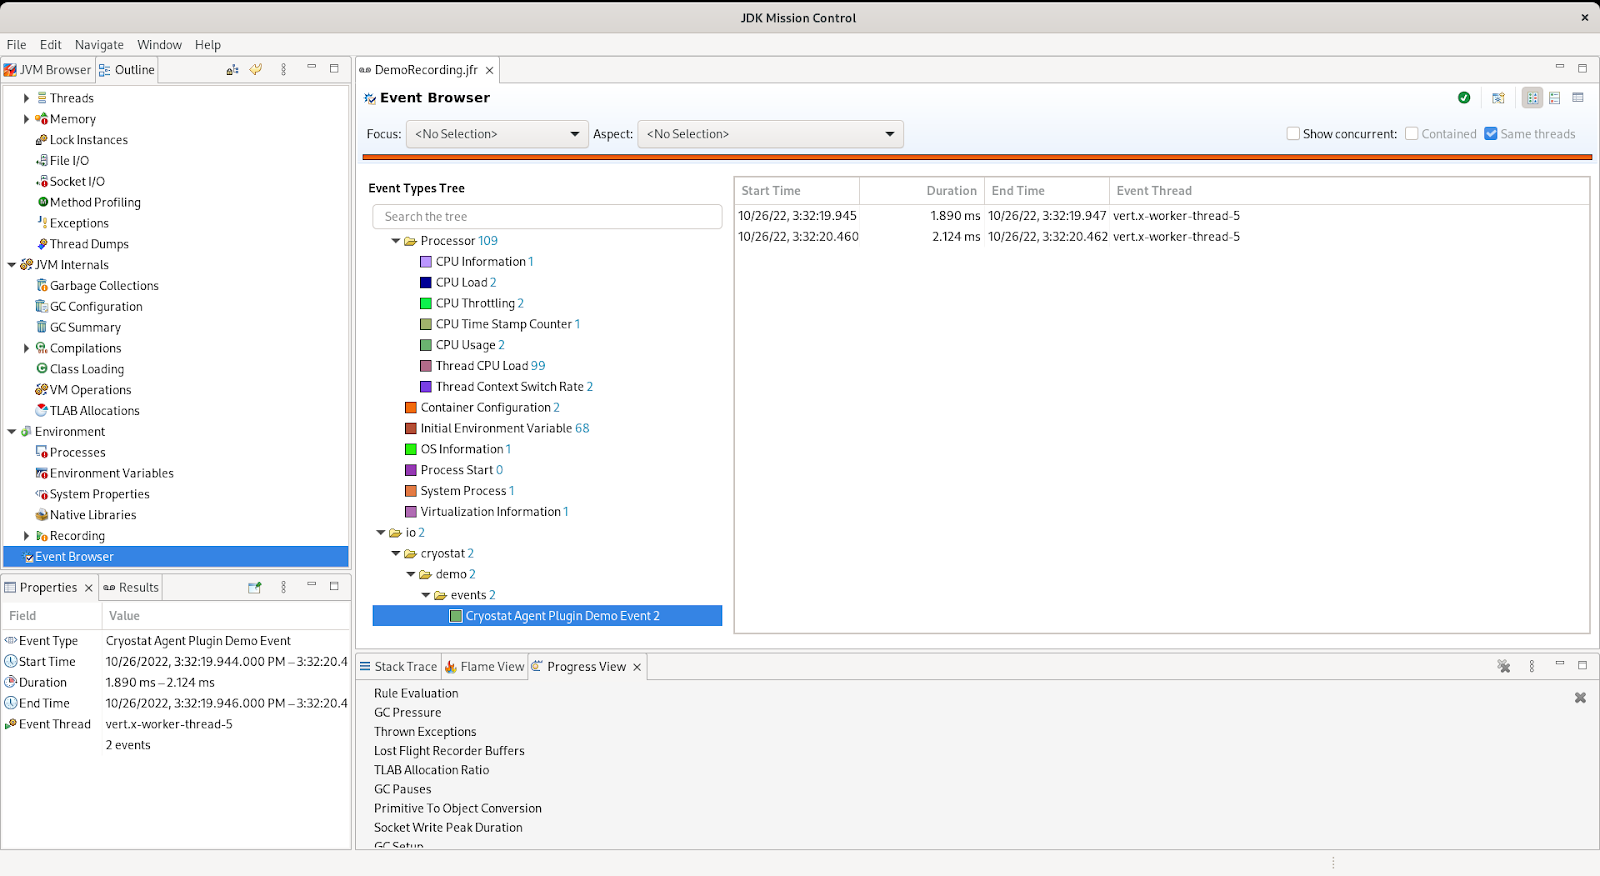
With the probes active, we can start a recording (see this article for how to do this). If we refresh this table a few times to trigger calls to retrieve the event probes, we can check our recording when it finishes and find the custom events have been emitted, as shown in Figure 6:
JMC agent and Cryostat are powerful diagnostic tools
Cryostat and the JMC agent form a powerful set of tools for diagnosing issues with applications at runtime. The JMC agent offers the capability to inject custom flight recorder events into running JVMs without the need to restart, while Cryostat offers the capability to start and retrieve those flight recordings. These tools work together to greatly improve the monitoring experience. With the release of Cryostat 2.2, it is now easier than ever to take advantage of these tools for a seamless monitoring and troubleshooting experience.