This is the second and final article in a series about simplifying management of services offered for Kubernetes by Amazon Web Services (AWS). The first article, How to use Operators with AWS Controllers for Kubernetes, introduced Amazon's AWS Controllers for Kubernetes (ACK) and the related Operators in Red Hat's OperatorHub. This article gets services up and running. We install Operators for EC2 and S3 into a Red Hat OpenShift cluster, then create a bucket in S3 to show how to do AWS work with the Operators.
The ideas behind these articles, and a demo showing their steps, appear in my video Using AWS Controllers for Kubernetes (ACK) with Red Hat OpenShift.
How to get Operators to use AWS Controllers for Kubernetes
In the first article in this series, you set up your AWS environment and fulfilled basic Kubernetes requirements; please go through the steps in that article before attempting the examples in this one. After your setup is complete, you're ready to install ACK service controllers from OperatorHub. You could potentially achieve this with a graphical user interface, a command-line interface (CLI), or an API; this article will use the GUI to best illustrate the process.
The magic here is in the simplicity of OperatorHub. Log in to your OpenShift UI. Under the Administrator view, go to the OperatorHub (select Operators→OperatorHub). Type AWS into the Filter by keyword … search box to turn up available Operators (Figure 1).

The page shows all the ACK Operators available to you. A "Community" label appears on each tile. That's because the AWS Controller Operators are Community Operators that have not been vetted or verified by Red Hat; Red Hat provides no support for them. Community Operators should be used with caution because their stability is unknown. You'll be reminded of this risk when you install each Operator.
Install an Operator
In the first article of this series, you attached policies to two AWS services: S3 and EC2. Now you'll install the respective Operators for each service. The Operators won't work yet because you have not applied the policies to them. This section provides an example for EC2, but other Operators follow the same process.
To start, click the tile for the EC2 Operator (Figure 2).
Acknowledge that you viewed the Community operator message (Figure 3).

Review the details of the Operator and choose Install (Figure 4). We are accepting all the defaults offered.

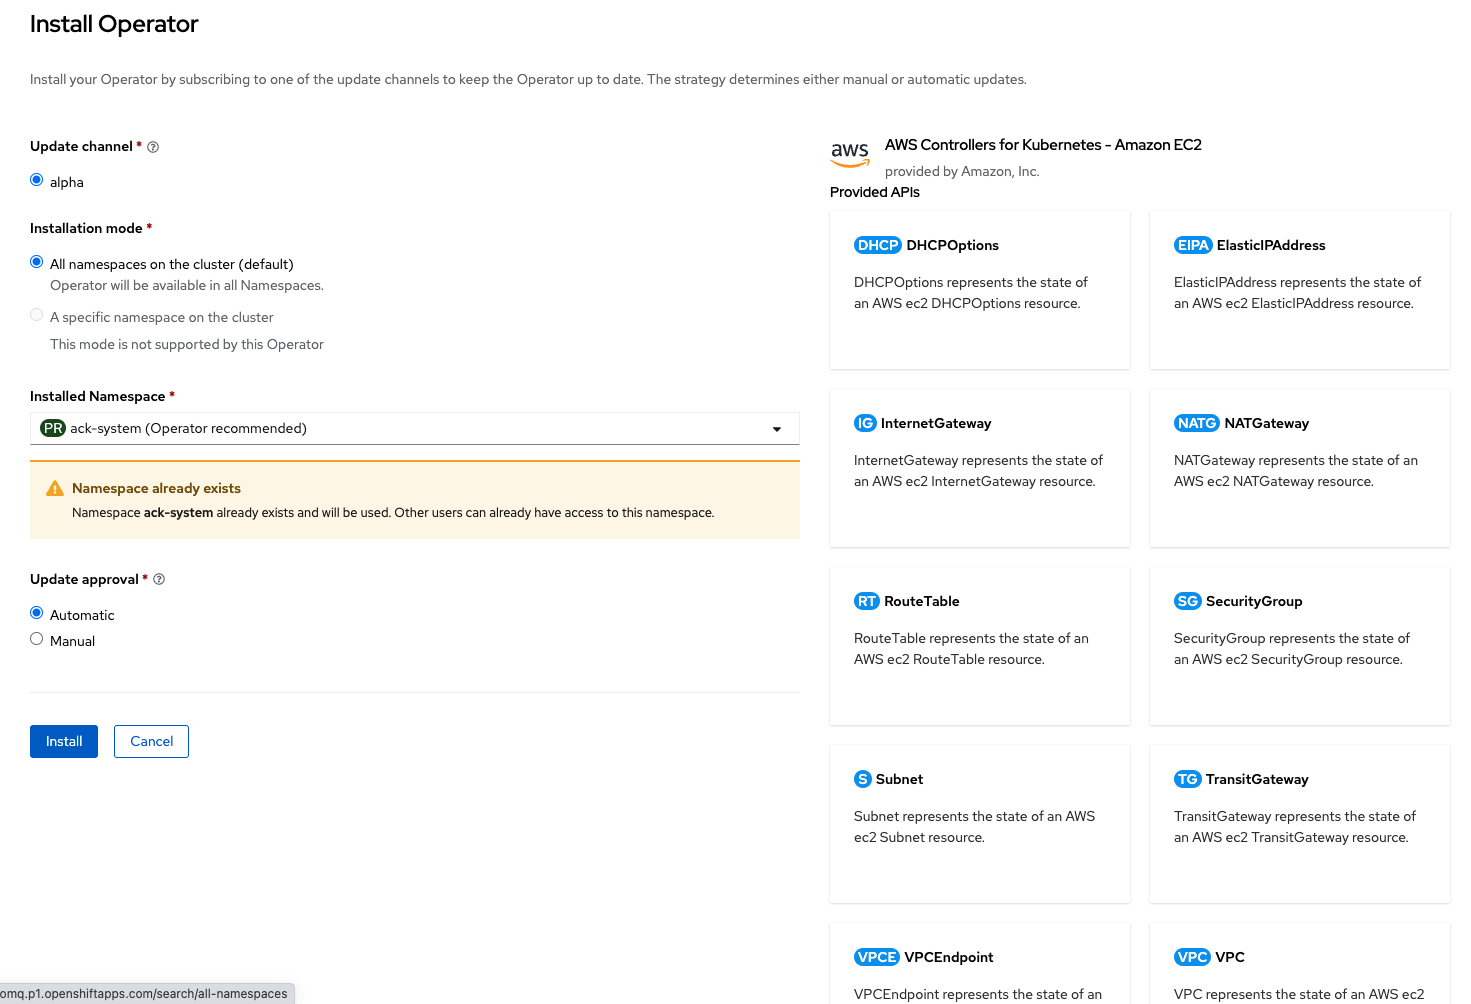
You can now review each Operator's details and see the APIs it provides. EC2 provides APIs for many familiar EC2 constructs. Notice that the preferred namespace is the one you created in the first part of this series. Leave all the defaults and choose Install (Figure 5).
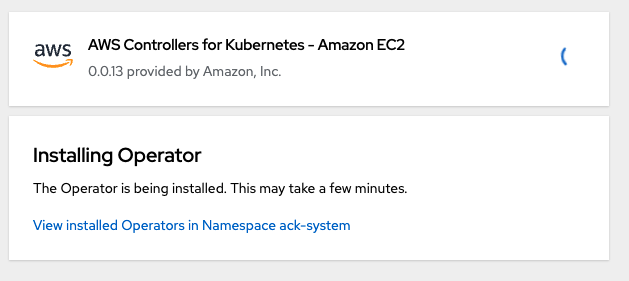
An installation progress dialog should appear (Figure 6).
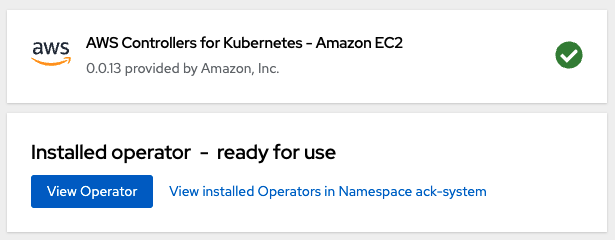
You can then inspect the Operator to see more information about it by clicking View Operator (Figure 7).
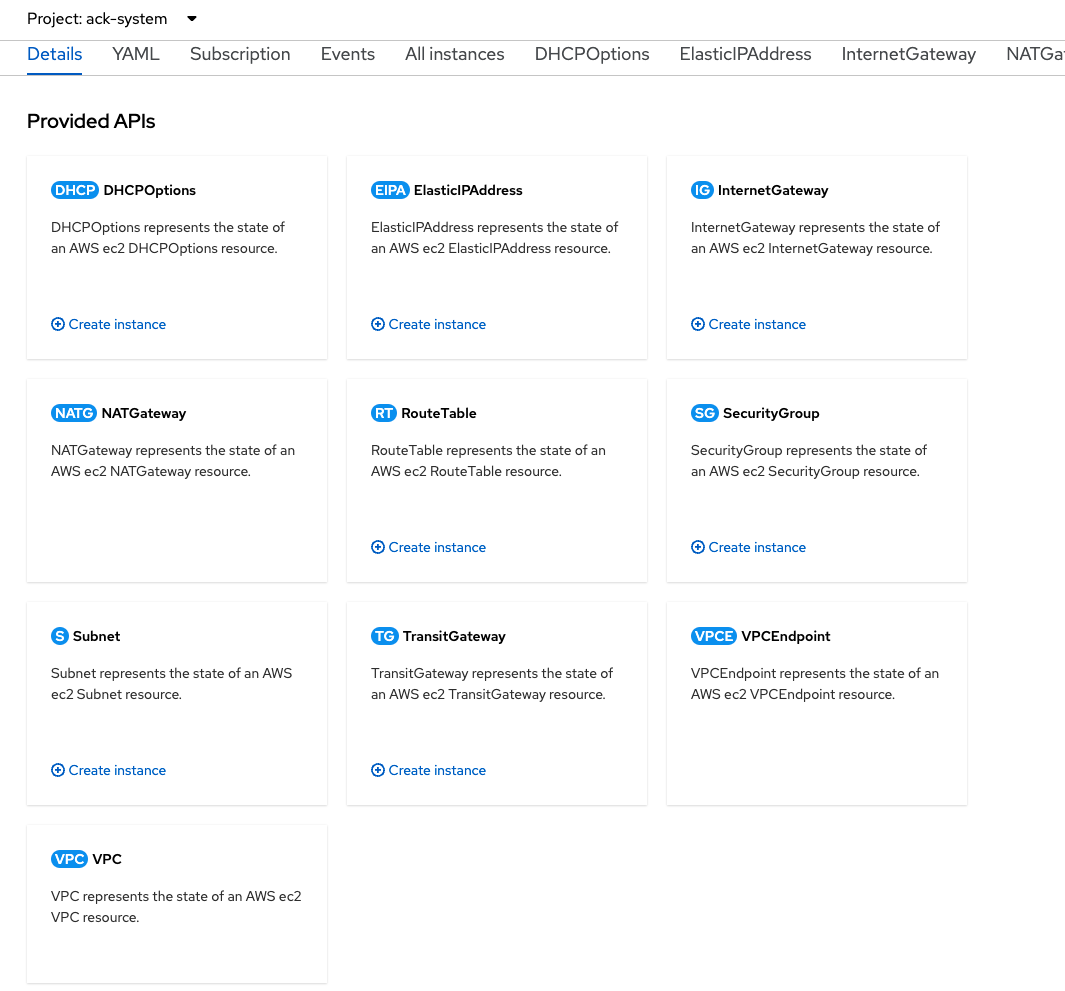
In short, the controller for EC2 allows you to do a lot of things with EC2 inside Kubernetes. You can create Elastic IP addresses, subnets, a VPC, and a lot more. And since there are many different ACKs to choose from, the controllers cover a lot of the AWS ecosystem. Feel free to click around on the Operator to see the features it provides (Figure 8).
Where do Operators fit into the AWS architecture?
To make full use of these controllers and Operators, you should understand the basics of the architecture they work within.
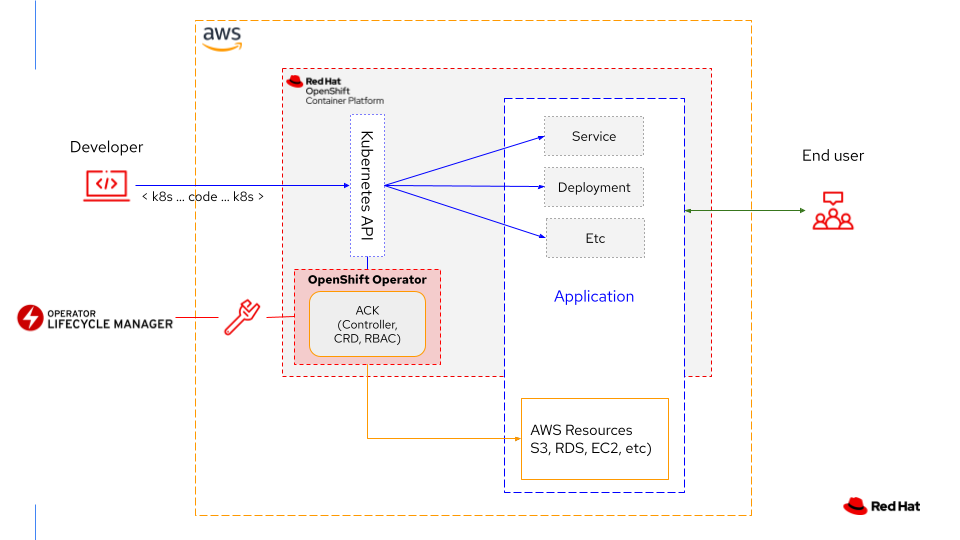
ACK sits between Kubernetes and AWS, translating Kubernetes code into AWS API requests (Figure 9). The ACK controller monitors its resource and ensures that it remains managed and in sync. Developers can create custom resources (CRs) to utilize the installed custom resource definitions (CRDs) that the controller installs and maintains.
Let's quickly take a look at what's happening around the cluster now that you've installed the Operator. By checking the pods running in the ack-system namespace, you can view the components of the controller:
$ oc -n ack-system get all
NAME                                      READY   STATUS    RESTARTS   AGE
pod/ack-ec2-controller-69ff7f65c7-hcvvg   1/1     Running   0          5m12s

NAME                              TYPE       CLUSTER-IP      EXTERNAL-IP   PORT(S)          AGE
service/ack-ec2-metrics-service   NodePort   172.30.85.132   <none>        8080:30416/TCP   5m13s

NAME                                 READY   UP-TO-DATE   AVAILABLE   AGE
deployment.apps/ack-ec2-controller   1/1     1            1           5m13s

NAME                                            DESIRED   CURRENT   READY   AGE
replicaset.apps/ack-ec2-controller-69ff7f65c7   1         1         1       5m13s
The Operator has installed the pods, services, deployment, and replica sets needed to get things running. You have access to the EC2 API through the controller using a bunch of installed CRDs:
$ oc get crd | grep aws
dhcpoptions.ec2.services.k8s.aws                                  2022-04-08T02:28:07Z
elasticipaddresses.ec2.services.k8s.aws                           2022-04-08T02:28:08Z
internetgateways.ec2.services.k8s.aws                             2022-04-08T02:28:08Z
natgateways.ec2.services.k8s.aws                                  2022-04-08T02:28:08Z
routetables.ec2.services.k8s.aws                                  2022-04-08T02:28:07Z
securitygroups.ec2.services.k8s.aws                               2022-04-08T02:28:08Z
subnets.ec2.services.k8s.aws                                      2022-04-08T02:28:08Z
transitgateways.ec2.services.k8s.aws                              2022-04-08T02:28:08Z
vpcendpoints.ec2.services.k8s.aws                                 2022-04-08T02:28:08Z
vpcs.ec2.services.k8s.aws                                         2022-04-08T02:28:08Z
You can see all the services visible in the UI on the Operator's information page. Try inspecting one of these CRDs for all the details about how to create EC2 services directly:
$ oc get crd subnets.ec2.services.k8s.aws -o yaml

apiVersion: apiextensions.k8s.io/v1
kind: CustomResourceDefinition
metadata:
  annotations:
    controller-gen.kubebuilder.io/version: v0.7.0
    operatorframework.io/installed-alongside-a1a9465d95d1001c: ack-system/ack-ec2-controller.v0.0.13
  creationTimestamp: "2022-04-08T02:28:08Z"
  generation: 1
  labels:
    operators.coreos.com/ack-ec2-controller.ack-system: ""
  name: subnets.ec2.services.k8s.aws
  resourceVersion: "65583"
  uid: 8f2a7ee5-336a-41a8-82c7-a508248f00d9
spec:
  conversion:
    strategy: None

<output cut>
You can also ask the Kubernetes kubectl command or the OpenShift oc command to explain aspects of the CRD for further information:
$ oc explain subnets
KIND:     Subnet
VERSION:  ec2.services.k8s.aws/v1alpha1

DESCRIPTION:
     Subnet is the Schema for the Subnets API

FIELDS:
   apiVersion	<string>
     APIVersion defines the versioned schema of this representation of an
     object. Servers should convert recognized schemas to the latest internal
     value, and may reject unrecognized values. More info:
     https://git.k8s.io/community/contributors/devel/sig-architecture/api-conventions.md#resources

   kind	<string>
     Kind is a string value representing the REST resource this object
     represents. Servers may infer this from the endpoint the client submits
     requests to. Cannot be updated. In CamelCase. More info:
     https://git.k8s.io/community/contributors/devel/sig-architecture/api-conventions.md#types-kinds

   metadata	<Object>
     Standard object's metadata. More info:
     https://git.k8s.io/community/contributors/devel/sig-architecture/api-conventions.md#metadata

   spec	<Object>
     SubnetSpec defines the desired state of Subnet. Describes a subnet.

   status	<Object>
     SubnetStatus defines the observed state of Subnet
Example: Create an S3 Bucket from OpenShift
Now that you know a little more about ACK controllers, let's try a very simple example and create an S3 bucket with a Kubernetes configuration.
First, go to OperatorHub and find and install the S3 controller. Review the earlier EC2 example if you need a reminder about the steps.
Once it's installed, you can view it on the cluster and see it running like this:
$ oc get crd | grep aws | grep s3
buckets.s3.services.k8s.aws                                       2022-04-08T02:46:27Z
Try oc explain and oc describe to learn more about the CRD installed. S3 is a very simple example with only one CRD, so it's a great place to start.
Open the AWS S3 console and review the current state of S3 in your account (Figure 10). You can also use the AWS S3 CLI for this task, but I find the UI easier when starting out.
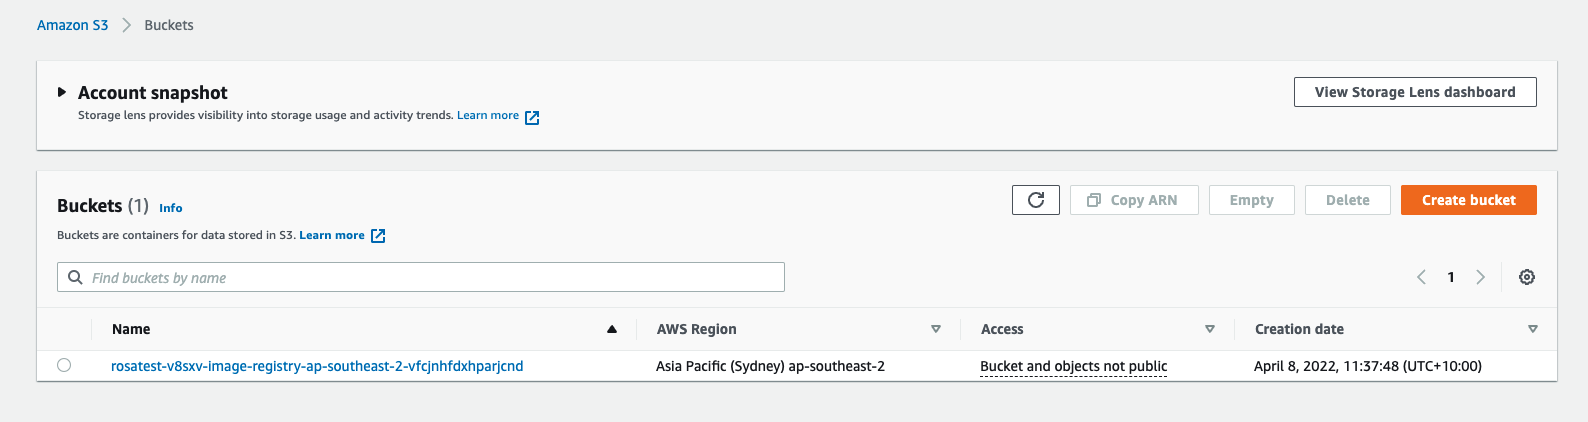
In my environment, I see the S3 bucket that Red Hat OpenShift Service on AWS set up for me to back my internal OpenShift registry.
Next, log in to the Developer view on OpenShift and search for S3 in the Developer Catalog (Figure 11). As with AWS, you can do all this via the CLI. But for clarity in this example, I've chosen to use the OpenShift console.

Choosing S3 leads to a Create Bucket dialog providing a lot of options that reflect what can be done in AWS (Figure 12).
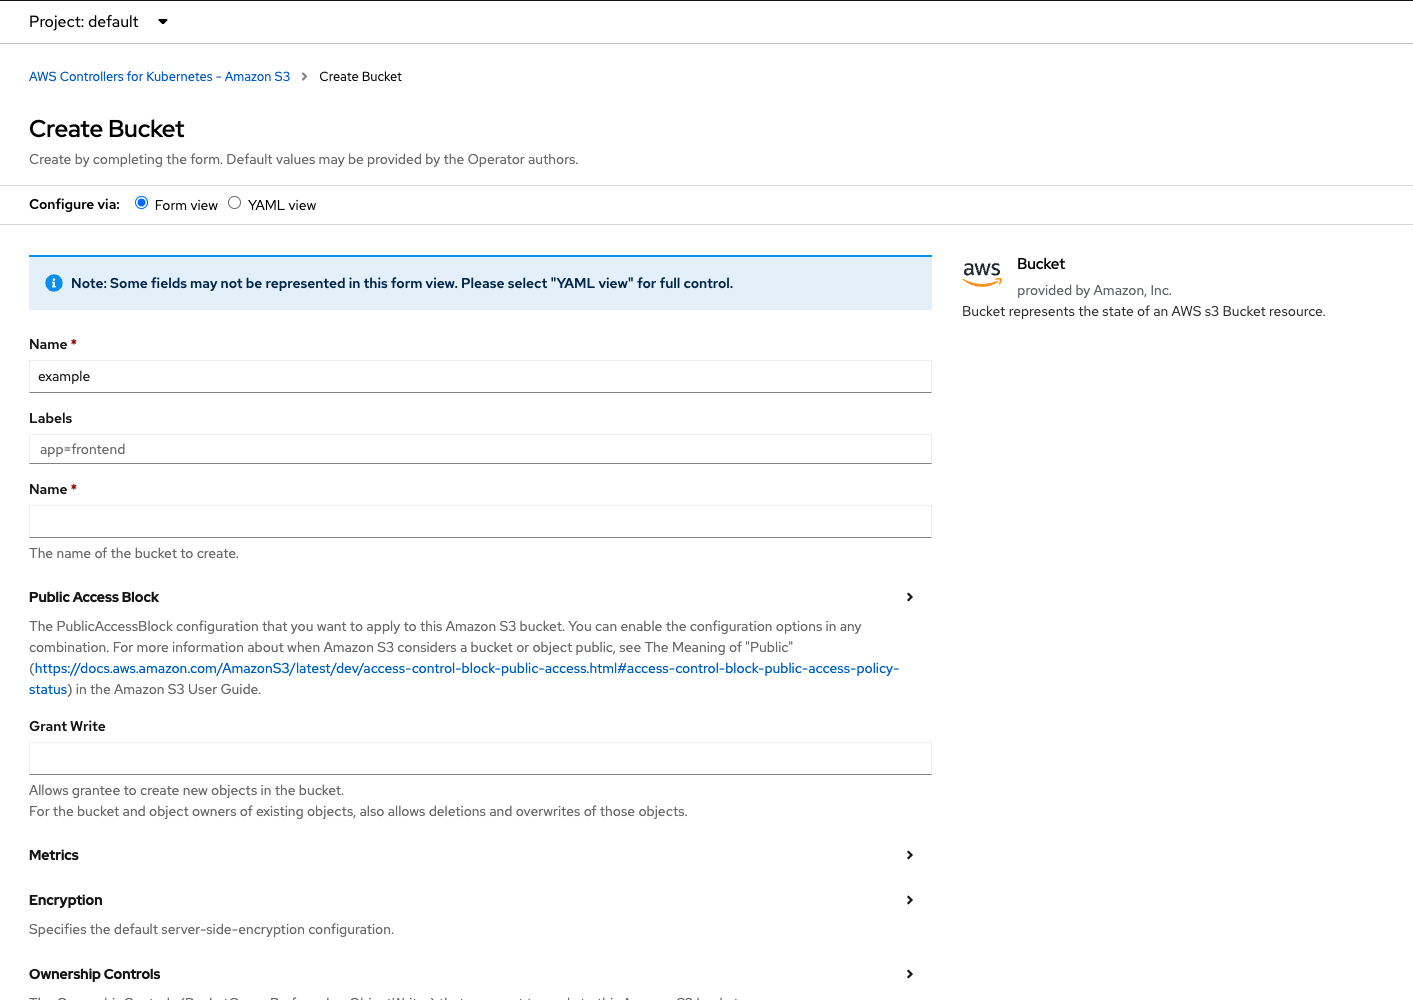
The controller will manage the resource for you, so go ahead and fill out whatever you need. The first Name field is the name represented in the object's metadata. Remember, S3 buckets must be unique in AWS, so pick something more representative of your project than the "example" string shown in Figure 12. For instance, I entered:
example-bucket-for-ackcontroller-demo-12345678
The second Name field is the actual name of the bucket, which must also be unique within S3.
Review the rest of the fields and fill them out as required. There are a lot of options, just like when you create a bucket directly in AWS.
Before you create the bucket, be sure to expose the YAML view and save the details so you can easily create buckets outside the UI. With all the options available in the ACK controllers, I find using the YAML view one of the easiest ways to quickly learn how to create CRs. For instance, this is the bucket that the controller created for me, based on my entries on the form:
apiVersion: s3.services.k8s.aws/v1alpha1
kind: Bucket
metadata:
  name: example-bucket-for-ackcontroller-demo-123456789
  labels:
    Environment: Dev
  namespace: default
spec:
  encryption:
    rules:
      - bucketKeyEnabled: true
  tagging:
    tagSet:
      - key: MyTagKey
        value: Tagged
  name: example-bucket-for-ackcontroller-demo-123456789
Having filled out your form, click Create and the bucket will be created in AWS. Going back to the S3 UI, you should see the bucket (Figure 13).

And looking more deeply into it, you can see the settings from the dialog, such as the tag (Figure 14).

Interacting with AWS services really is that easy. And of course, you're not required to use the UI. You can automate AWS service creation via code and the command line, using the ACK controllers.
What's next?
At the time of this writing, there are 15 AWS controllers available as Operators via OperatorHub, so there are a lot of resources you can create in AWS with ACK. For example, a combination of the EC2 and RDS operators allows you to create database instances directly from Kubernetes, including all the required EC2 components such as a VPC and subnets.
For more great ideas, there are a number of ACK tutorials on the AWS ACK documentation pages, including the RDS example just mentioned.
Keep in mind that the Operators for these controllers are Community Operators and not supported by Red Hat. Because ACK is a rapidly evolving and very active project, you may find you run into problems with certain releases. But these controllers will only get better as more people use them. The project is fully open, cross-vendor, and strongly community driven.
Share your experiences
If you'd like to help, learn more, or just connect in general, head on over to the Kubernetes Slack channel and join us in #provider-aws to say hello to the AWS and Red Hat engineers creating the code, along with various ACK users and even the occasional blog posting author.
We're looking for more good examples of creating complex deployments in AWS via ACK. If you've got a deployment you think would be made easier with ACK, or one you've made better, let us know on the Slack channel or in the comments to this article. We might showcase your work in some upcoming postings and videos.
Last updated: May 18, 2023