Page
Create an application using a DeploymentConfig

Red Hat OpenShift’s Source-to-Image (S2I) function lets you deploy an application using a DeploymentConfig.
In order to get the full benefit from taking this lesson, you need to:
- Be familiar with the OpenShift dashboard.
In this lesson, you will:
- Use the OpenShift dashboard to add an application from source code.
- Learn how to choose a
DeploymentConfigas the resource type.
Use the dashboard to import from GitHub
Once you are logged into your Developer Sandbox for Red Hat OpenShift dashboard, confirm that you are in the Developer perspective (Figure 1).

From the Developer perspective (Figure 2, callout 1), select the +Add option (Figure 2, callout 2) and the Import from Git card (Figure 2, callout 3):

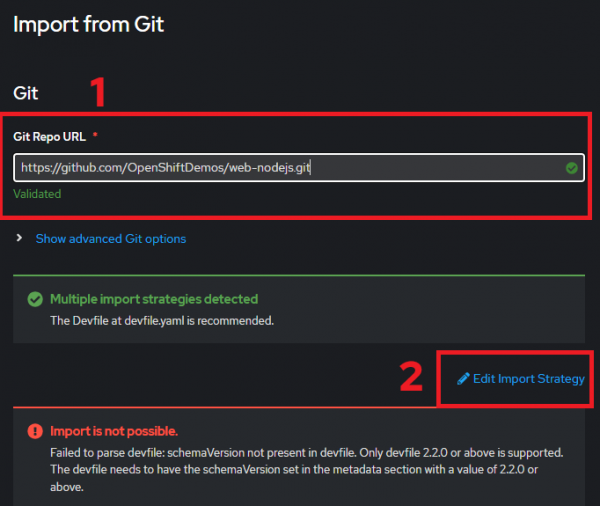
Use the following value for the Git repo (Figure 3, callout 1):
https://github.com/OpenShiftDemos/web-nodejs.gitOpenShift will attempt to discern the best method for building the application from the supplied source code. In this particular case—and this happens from time to time—the import is not possible as-is. Select the Edit Import Strategy option (Figure 3, callout 2) to explicitly guide the Source-to-Image (S2I) process.

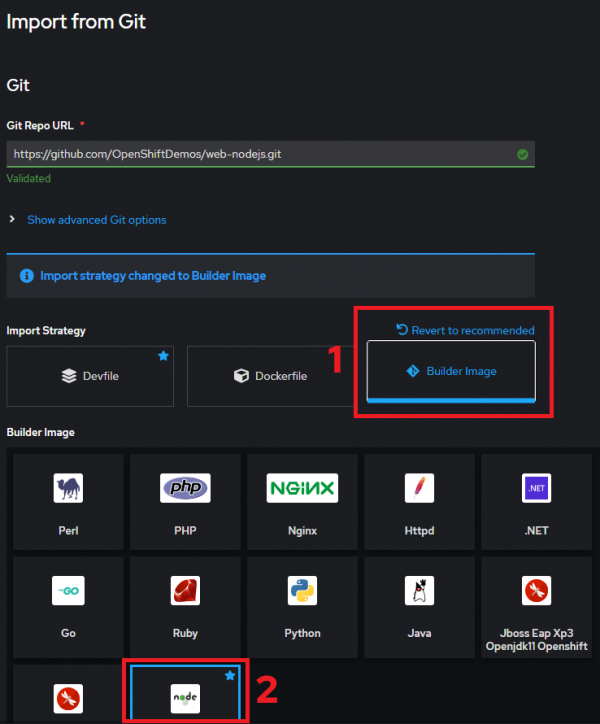
Select the Builder image Import Strategy (Figure 4, callout 1) and the Node.js Builder Image (Figure 4, callout 2).

Select DeploymentConfig as the project type and click Create to build and launch the app (Figure 5).

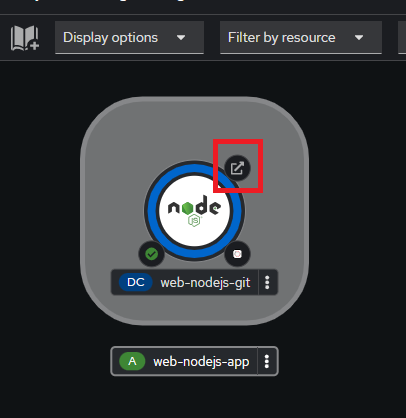
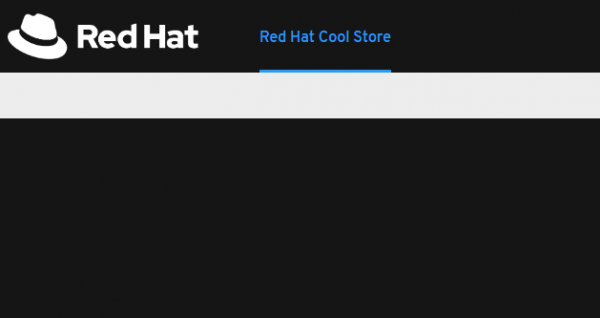
After a few minutes, your application will be up and running. You can click the Open URL icon (Figure 6) to see the results in your browser (Figure 7).


Switch to your command line and run the following command to see the results of this lesson:
oc get dcHere’s an example:
C:> oc get dc
Warning: apps.openshift.io/v1 DeploymentConfig is deprecated in v4.14+, unavailable in v4.10000+
NAME             REVISION   DESIRED   CURRENT   TRIGGERED BY
web-nodejs-git   1          1         1         config,image(web-nodejs-git:latest)
At this point, you have a Node.js front-end application running in your OpenShift sandbox, deployed as a DeploymentConfig. There are no products displayed because you haven’t created and configured a back-end database. Want to do that? Then check out the learning path How to deploy a Java application on Kubernetes in minutes.
Because the DeploymentConfig is deprecated, the next step is to turn this DeploymentConfig into a Deployment.
