Page
Convert a DeploymentConfig into a Deployment

The DeploymentConfig deployment method has been deprecated in OpenShift in favor of the Kubernetes standard, the Deployment object. This lesson will guide you through the conversion of an existing DeploymentConfig into a Deployment.
In order to get the full benefit from taking this lesson, you need to:
- Have access to the OpenShift dashboard.
- Have your editor-of-choice on your PC.
- Have access to the command line on your PC and be logged into your cluster.
- Have completed the lesson, Create an application using a DeploymentConfig.
In this lesson, you will:
- Download a DeploymentConfig, alter it into a Deployment YAML file, and use that file to replace the DeploymentConfig in your OpenShift cluster.
Download the DeploymentConfig
Start by logging into your cluster at the command line. If you are unsure as to how to do this, check out the Logging into an OpenShift cluster learning path.
At the command line, run the following command to see the name of the
DeploymentConfigyou wish to convert to aDeployment:oc get dcNote that
dcis an acceptable abbreviation forDeploymentConfig.Here’s an example:
C:> oc get dc
Warning: apps.openshift.io/v1 DeploymentConfig is deprecated in v4.14+, unavailable in v4.10000+
NAME             REVISION   DESIRED   CURRENT   TRIGGERED BY
web-nodejs-git   1          1         1         config,image(web-nodejs-git:latest)
In this example, the
DeploymentConfigwe wish to replace isweb-nodejs-git. The task is to get that object, in the form of a YAML file, to our PC so we can edit it.Download the
DeploymentConfiginto a file using the following command:oc get dc/web-nodejs-git -o yaml > web-nodejs-git-deployment.yamlThis retrieves the object and creates YAML output, which we’ve redirected into the file
web-nodejs-git-deployment.yaml.
Retrieve the container image
One of the values we need to change in the YAML file is the location and name of the container image. We can retrieve them at the command line.
Run the following command to get the name of the container image:
oc get imagestreamsHere’s an example:
C:> oc get imagestreams
NAME             IMAGE REPOSITORY                                                                                                           TAGS     UPDATED
golang           default-route-openshift-image-registry.apps.sandbox-m3.1530.p1.openshiftapps.com/rhn-engineering-dsch-dev/golang           latest   6 days ago
web-nodejs-git   default-route-openshift-image-registry.apps.sandbox-m3.1530.p1.openshiftapps.com/rhn-engineering-dsch-dev/web-nodejs-git   latest   22 hours ago
Save this value to be used later.
Edit the YAML
The next step is to edit the YAML file and transform it into a deployment. Open the file in your favorite editor and make the following changes:
- Change the scalar value at
apiVersionfromapps.openshift.io/v1toapps/v1. - Change the scalar value at kind from
DeploymentConfigtoDeployment. - Remove the block
metadata.annotations. - Remove the dictionary
spec.selector.deploymentconfig. - Change
spec.selector.app:web-nodejs.gittospec.selector.matchLabels.app:web.nodejs.git. - Change
spec.strategy.typefromRollingtoRollingUpdate. - Change
spec.template.spec.containers.imagevalue to the value of your image location and name (the value from the previous step; see the Retrieving the container image step). - Delete the entire
spec.template.triggersblock. - Delete the entire
statusblock. - Save the file.
You now have a valid Deployment YAML file for your application.
Delete the DeploymentConfig
At the command line, run the following command:
oc delete dc/web-nodejs-gitHere’s an example:
C:> oc delete dc web-nodejs-git
Warning: apps.openshift.io/v1 DeploymentConfig is deprecated in v4.14+, unavailable in v4.10000+
deploymentconfig.apps.openshift.io "web-nodejs-git" deleted
Create a deployment
Run the following command:
oc create -f web-nodejs-git-deployment.yamlView the results
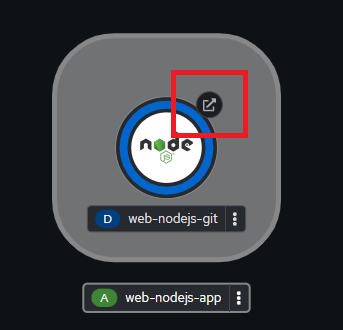
Your application is up and running. In the OpenShift dashboard, you can click the Open URL icon (Figure 1) to see the results in your browser (Figure 2).


Summary
We have walked you through a simplistic example that shows how to convert an existing DeploymentConfig into a Deployment. Using this example will result in some down time for your application.
If you would like to avoid any downtime, consider using the Blue/Green Deployment method. The learning path Perform in-place Kubernetes updates with a Blue/Green Deployment can guide you through this approach.
Want to learn more? Learn more about how to use OpenShift with the Foundations of OpenShift learning path
