Page
Set up your environment
The first step to deploying your application is to set up your environment.
In this lesson, you will:
- Access OpenShift Dev Spaces.
- Start a workspace.
Get familiar with the application
The source code of the application we are going to use for this exercise is available on the GitHub repository. You can find a short description of this application and the microservices in the README.md.
Access Red Hat OpenShift Dev Spaces
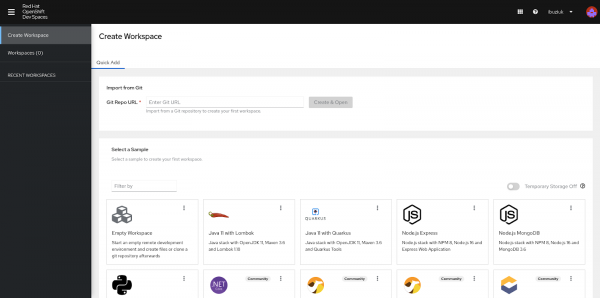
To access OpenShift Dev Spaces, go to the OpenShift workspace which will redirect to the user dashboard (Figure 1).
Start a workspace
Follow these steps to start a workspace:
- Select the Create Workspace tab on the user dashboard.
- Enter this URL to the repository: https://github.com/redhat-developer-demos/northwind-traders
Select Create & Open (Figure 2).
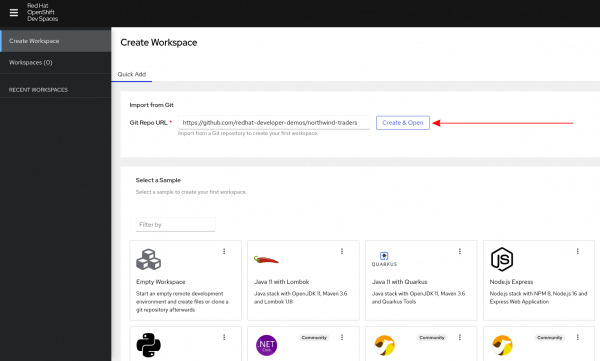
Figure 2: Select Create & Open to start a workspace. During the workspace startup, you will be asked to authorize the GitHub OAuth app configured for each of the Developer Sandbox clusters (Figure 3).
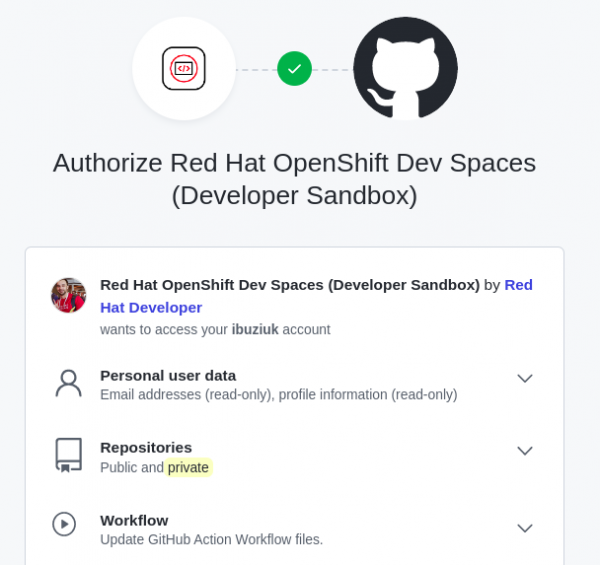
Figure 3: Authorize the GitHub OAuth app configured for each of the Developer Sandbox clusters. This allows users to have full Git access from the workspaces and execute commands like
git pushwithout any setup. Under the hood, once permissions are granted, thegit-credentials-secretis created in the usernamespacewhich stores the token used by OpenShift Dev Spaces. You can always revoke the access at any time from the user dashboard or via GitHub settings.Once the workspace starts you should be able to see our application source code (Figure 4).
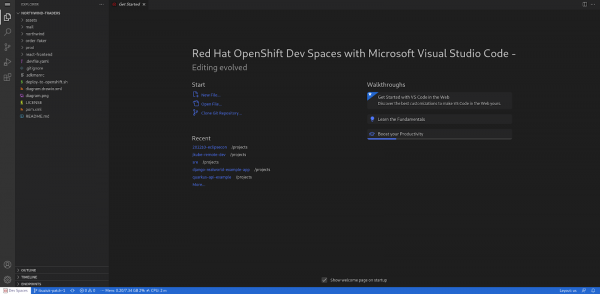
Figure 4: When the workspace starts, you should see your application source code.
The workspace contains the source code and the runtime with all the dependencies for building, running, and debugging the application. This allows you to start coding instantly. Repeatable and fast development environments are a major benefit of OpenShift Dev Spaces. If you try cloning the same repository locally and try to build it, most likely you will get multiple errors due to missing dependencies. For example, to build and deploy the application, it requires Java 17, JBang, and oc CLI, which might not be installed on your local machine.
With OpenShift Dev Spaces, the development environment, including the commands for building and deploying the application, is defined in a declarative way using the .devfile.yaml in the root of the repository. Devfile is a CNCF sandbox project which provides an open standard, defining containerized development environments. Learn more about Devfile from the official documentation.
Deploy the application
Now we are ready to deploy the application.
To do that in the workspace (Figure 5), enter the following commands:
Terminal -> Run Task -> devfile -> 2. Deploy.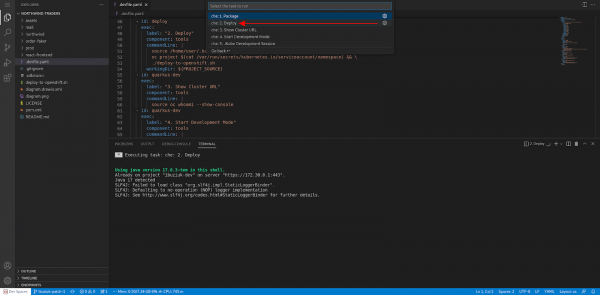
Figure 5: Deploy the application in a workspace with Terminal -> Run Task -> devfile -> 2. Deploy. It may take a couple of minutes before the deployment command is complete. After that, you can navigate to the OpenShift cluster and access the application (Figure 6). The easiest way to get the cluster URL is by entering the following commands:
Terminal -> Run Task -> devfile -> Show Cluster URL.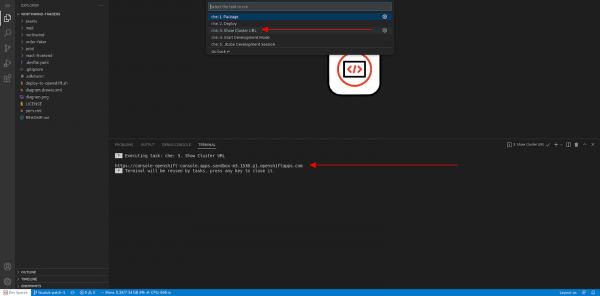
Figure 6: To get the cluster URL, click on Terminal -> Run Task -> devfile -> Show Cluster URL. In the terminal, you will see the URL that takes you to the OpenShift cluster. In the Topology view of the Developer perspective, you will see all the microservices of the application (Figure 7).
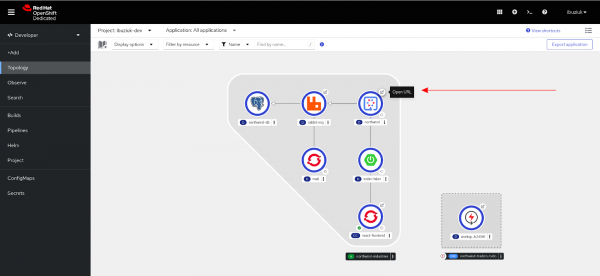
Figure 7: In the Topology view of the Developer perspective, you will see all the microservices of the application.
Congratulations. You can now try the newly deployed application. Let's move on to Lesson 2 and implementing Quarkus.
