Page
Deploy a MySQL database with configured environment variables

A MySQL database is needed for the application, and because this is a lesson (versus production), the ephemeral version of MySQL will be used.
In order to get full benefit from taking this lesson, you need to:
- Have access to the OpenShift dashboard
In this lesson, you will:
- Create a deployment of an ephemeral instance of MySQL
- Set the environment variables for credentials and database name
Creating the deployment
The Pet Clinic application uses a MySQL database to store data, and this lesson creates that MySQL installation and the necessary database (petclinic) in the same OpenShift project as the Pet Clinic app.
Info alert: While this lesson is specific to the Pet Clinic application, the same steps are used for any application for which you wish to use a MySQL database in OpenShift.
- Begin by logging into the Developer Sandbox. The dashboard will appear in your browser.
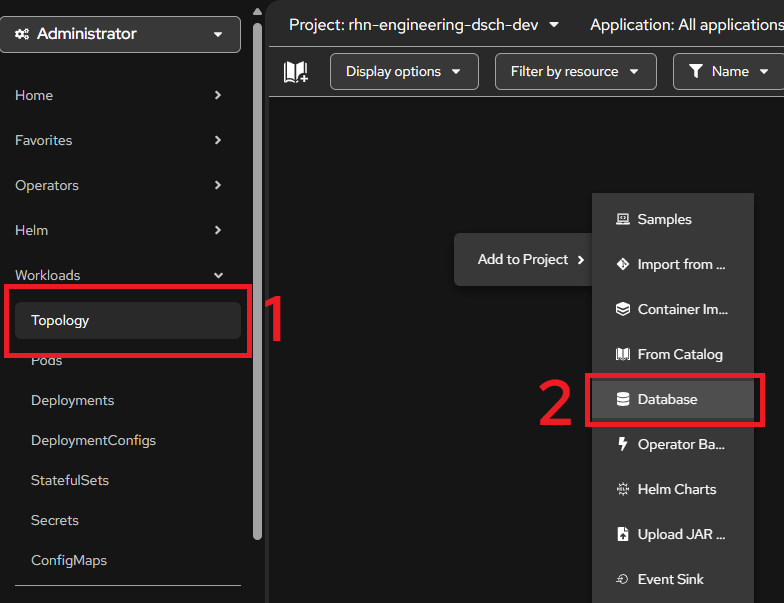
Select the Topology view (Figure 1, Callout 1), then right-click to reveal the Add to Project menu and select the Database option (Figure 1, Callout 2).

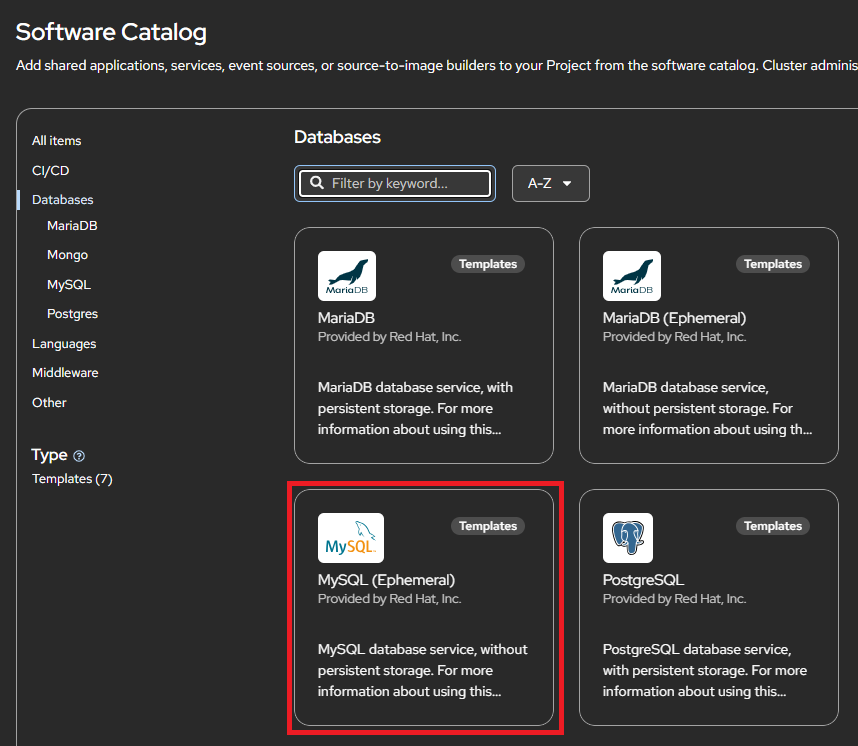
Figure 1: Prepare to install the database using the web-based dashboard. The Databases section of the Developer Catalog is displayed. Click on the MySQL (Ephemeral) panel (Figure 2).
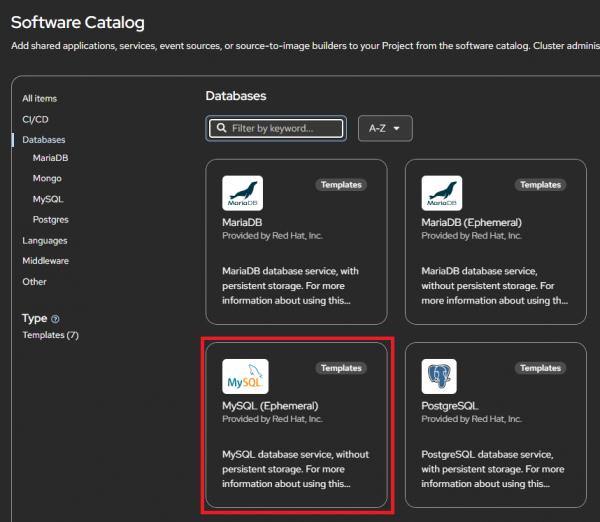
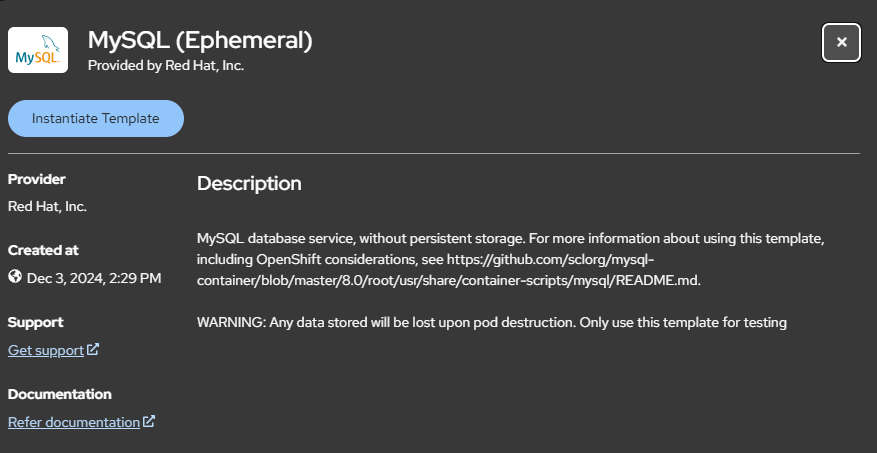
Figure 2: Selecting the MySQL Ephemeral database. The description of the MySQL Ephemeral database is displayed. Click the Instantiate Template button to continue (Figure 3).

Figure 3: Brief description of MySQL Ephemeral database instance. - The Instantiate Template panel is displayed. There are several options.
- Supply the following four values (Figure 4):
- MySQL Connection Username: petclinic
- MySQL Connection Password: petclinic
- MySQL root user Password: petclinic
- MySQL Database Name: petclinic
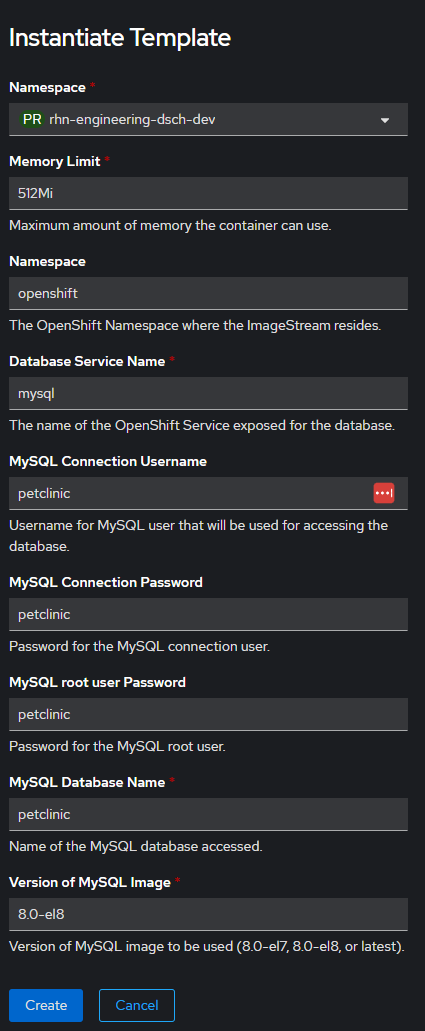
Click Create and the installation will happen. You will see the icon in your dashboard (Figure 5).
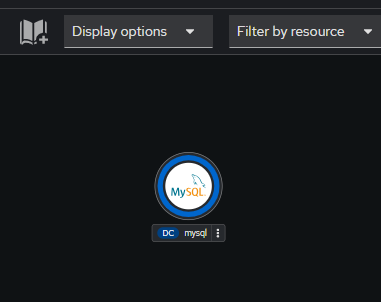
Figure 5: MySQL is up and running.

That's it. The ephemeral instance of MySQL is up and running as an OpenShift service (named mysql). In the next lesson, you will create the Spring Pet Clinic application that uses this database.