Page
Ansible lint integration with the Ansible VS Code extension

Now that we have seen features such as auto-completion and syntax highlighting, let's look at how we can enable and use ansible-lint within the extension.
In this lesson, you will:
- Learn about integration of ansible-lint in the Ansible extension for VS Code.
Overview
The integration of ansible-lint in the Ansible extension for VS Code brings a significant set of advantages while enhancing your Ansible Playbook development experience, including:
- Identifying best practices violations:
ansible-lintchecks your Ansible code against a series of best practice rules, helping you adhere to recommended guidelines and standards. This ensures your playbooks are more reliable, readable, and maintainable. - Early error detection: By highlighting issues in real time as you write your Ansible playbooks,
ansible-linthelps you identify and rectify syntax errors, deprecated features, and other potential pitfalls before runtime. This early detection saves you time and effort during the debugging and execution phases. - Improved code quality: The linting process encourages you to write cleaner, more efficient Ansible code. It points out areas where your code can be improved, leading to better overall performance and manageability of your automation scripts.
- Streamlined development workflow: Integrating
ansible-lintinto your VS Code workflow allows you to check your code without leaving the editor. This seamless experience aids in maintaining focus and productivity, as you can instantly see and address linting feedback. - Customizable rules:
ansible-lintallows you to enable, disable, or customize rules based on your project's requirements. This flexibility ensures that the linting process aligns with your specific coding standards and practices. - Consistency across teams: When working in team environments, ansible-lint helps enforce a consistent coding standard across all team members. This uniformity is crucial for collaborative projects, ensuring that everyone adheres to the same set of rules and practices.
- Educational value: Especially for new Ansible users, ansible-lint provides educational insights into the Ansible best practices and common pitfalls. It's an excellent way for users to learn and adopt good habits in Ansible Playbook development.
Ansible lint prerequisites
Please ensure that you have the latest version of ansible-lint (Ansible lint) package installed. Check Lesson 1 for more details on how to install different Ansible development tools.
Ansible lint settings in extension
To find the ansible-lint related settings in the Ansible VS Code extension, go to Code -> Settings/Preference ->Settings, search for ansible validation, and enable both Ansible validation and Ansible validation lint. Also type ansible-lint in the path for ansible-lint, as shown in Figure 1.

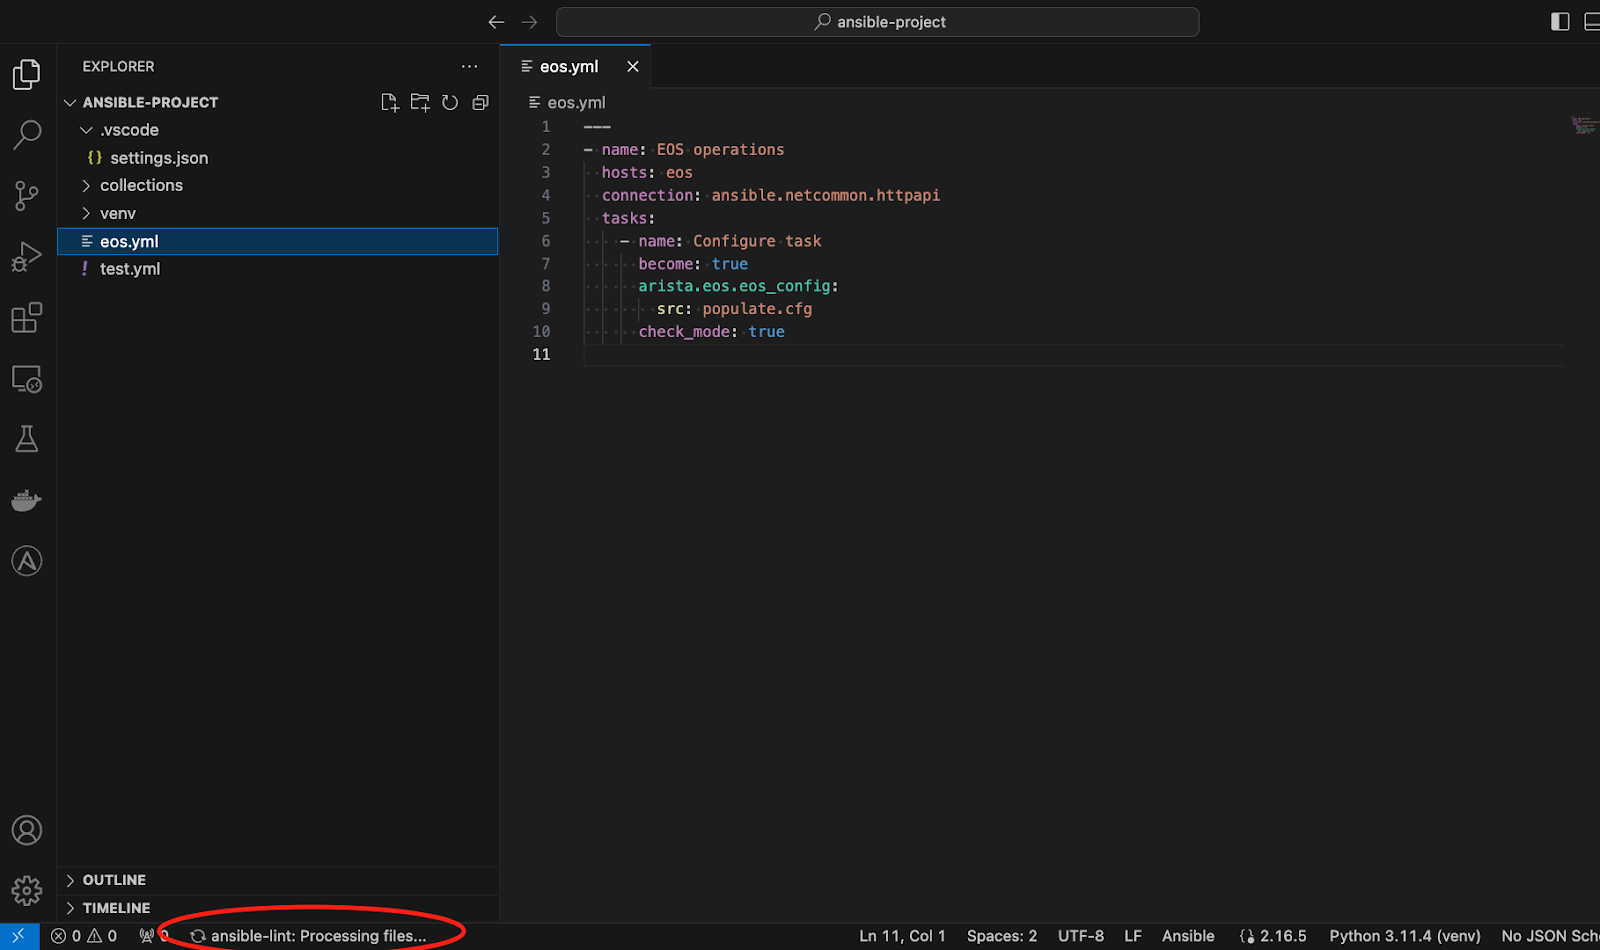
As soon as you save your Ansible playbook, the lint validations will start running. Figure 2 shows this.
Info alert: If you are using the ansible-dev-tools execution environment in the extension settings, ansible-lint will be used from within the execution environment.
Passing arguments to ansible-lint run
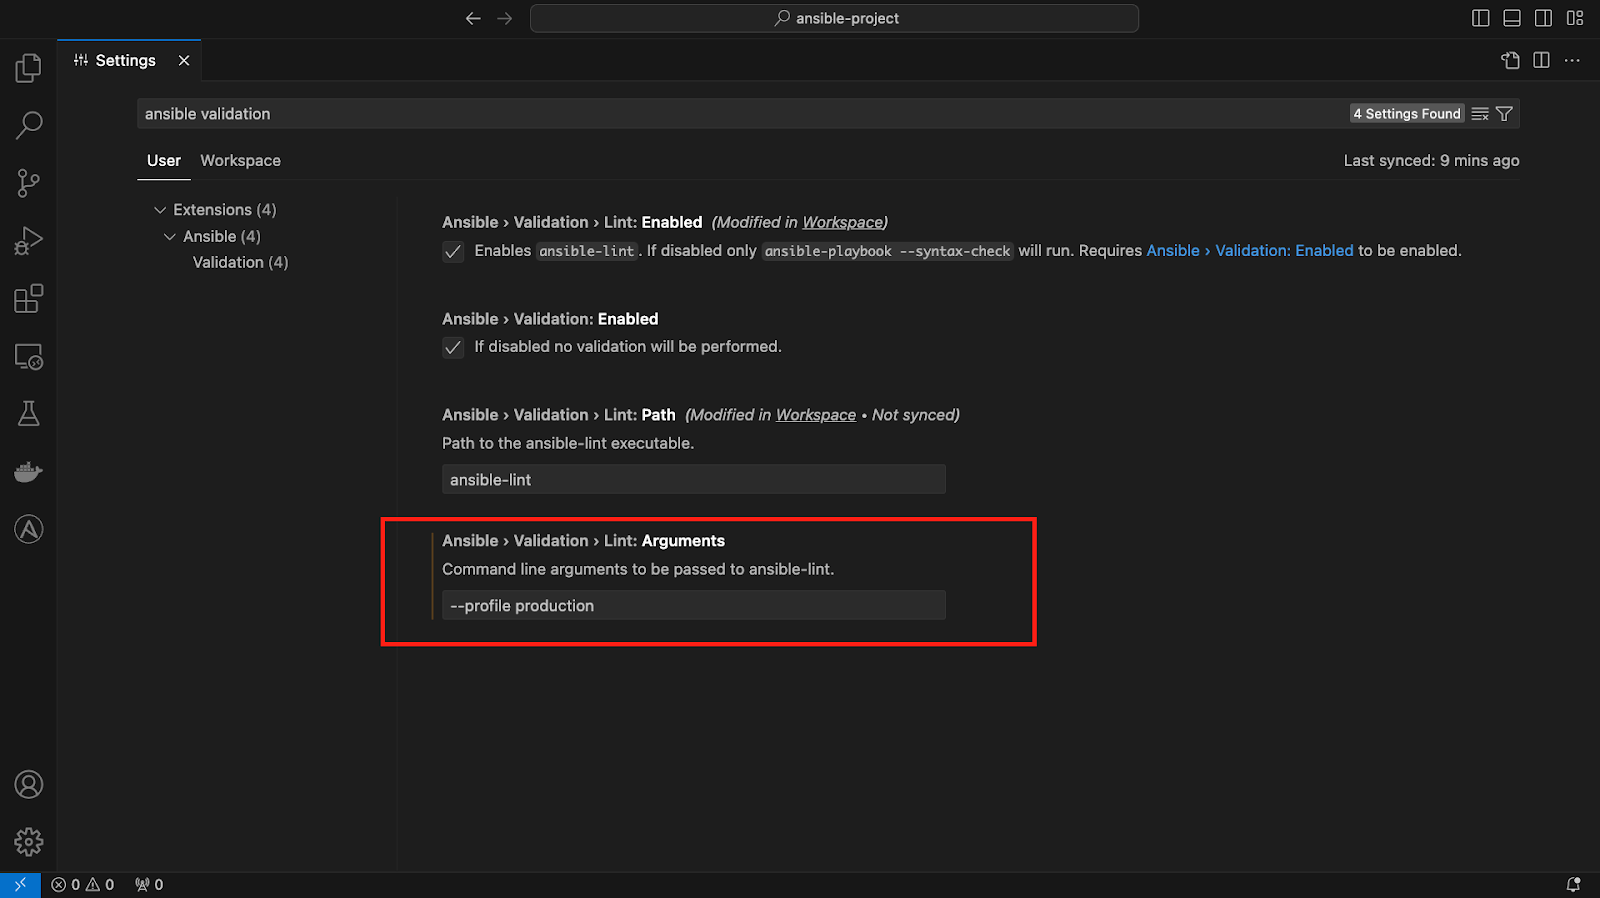
As part of the ansible-lint validation, you can also add additional arguments to the validation based on the CLI argument of ansible-lint. These can range anything from specifying a lint configuration file to running validation against a specific profile such as productions. You can just add the arguments in the extension settings, as shown in Figure 3, on your next ansible-lint run. The validation will happen after the addition of those new arguments.
If you add the ansible-lint configuration file in the root of your Ansible project, it will be automatically picked up by the ansible-lint validation run. This can be helpful when your organization wants to maintain a similar ansible-lint validation policy. At that point, you just need to add the configuration file like .ansible-lint, .config/ansible-lint.yml, or .config/ansible-lint.yaml.
Ansible lint is an important tool to incorporate in your automation creation workflow and this chapter covered how you can get real time linting feedback from the Ansible VS Code extension. If you want to understand ansible-lint in more detail, please go through its documentation.
