In this article, we show you how to install Red Hat JBoss Enterprise Application Platform (JBoss EAP) XP 1.0.0.GA and enable Eclipse MicroProfile support on JBoss EAP. Once you have MicroProfile support enabled, you can start using the quickstart examples or start developing your own application.
You can find a demo video at the end of this article.
Installing JBoss EAP XP 1.0.0.GA
To install JBoss EAP XP 1.0.0.GA:
-
Download the following software from the product download page:
- JBoss EAP XP manager
- JBoss EAP 7.3.1 GA patch
- JBoss EAP XP 1.0
-
Apply the JBoss EAP 7.3.1 GA patch:
$ patch apply /DOWNLOAD/PATH/jboss-eap-7.3.1-patch.zip -
Set up JBoss EAP XP manager using the following CLI command:
$ java -jar jboss-eap-xp-1.0.0.GA-CR1-manager.jar setup --jboss-home=/INSTALL_PATH/jboss-eap-7.3
-
Apply the JBoss EAP XP 1.0 patch using the following management command:
$ patch apply /DOWNLOAD/PATH/jboss-eap-xp-1.0.0.GA-patch.zip
Configure CodeReady Studio
To enable Eclipse MicroProfile support on JBoss EAP, we first need to register a new runtime server for JBoss EAP XP 1.0.0 (which we just installed). For this, we will create a new JBoss EAP 7.3.0 server called Red Hat JBoss EAP 7.3 XP 1.0.
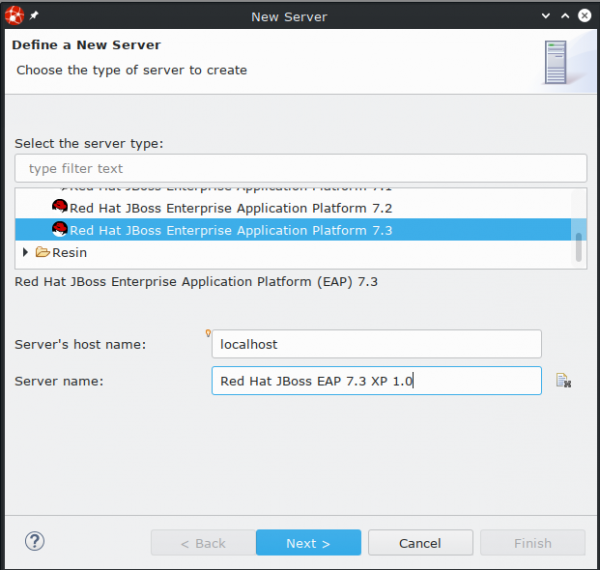
This server will use a newly created JBoss EAP 7.3 XP 1.0 Runtime that points to the newly installed runtime and uses the standalone-microprofile.xml configuration file. Set up the New Server dialog box as shown in Figure 1:
- Select server type Red Hat JBoss Enterprise Application Platform 7.3.
- Set Server's host name to
localhost. - In Server name, enter
Red Hat JBoss EAP 7.3 XP 1.0. - Click Next.
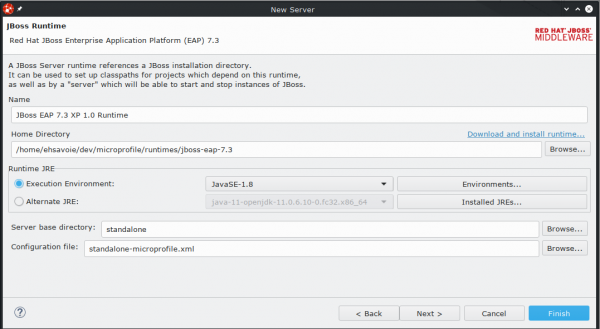
In the next dialog box, configure your new server as shown in Figure 2:
- Set the Home Directory if you don't want to use the default setting.
- Make sure your Execution Environment is set to JavaSE-1.8.
- Change the settings for Server base directory and Configuration file if you don't want the defaults.
- Click Finish.
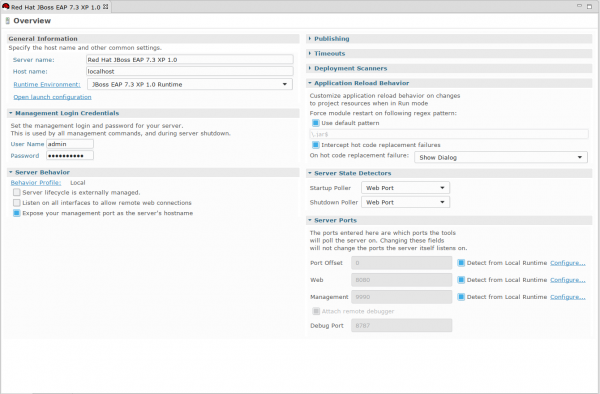
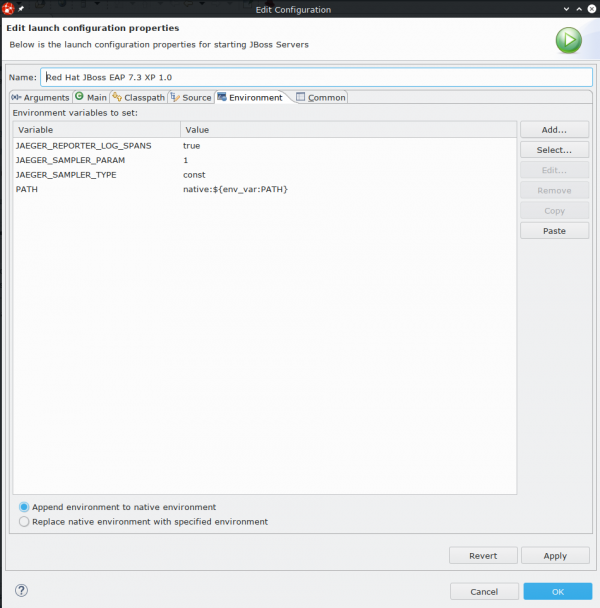
In order to use the microprofile-opentracing quickstart (Figure 5) we need to set environment variables on our runtime. To do so, in the Red Hat JBoss EAP 7.3 XP 1.0 server Overview dialog box shown in Figure 3, click Open launch configuration.
In particular, you need to create three environment variables as shown in Figure 4:
JAEGER_REPORTER_LOG_SPANSset totrueJAEGER_SAMPLER_PARAMset to1JAEGER_SAMPLER_TYPEset toconst
Use the quickstarts
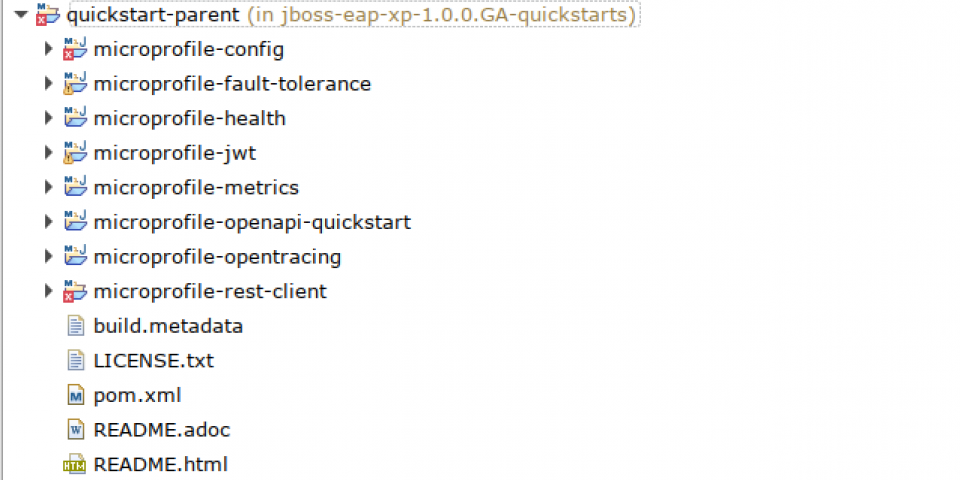
Select the Quickstart Parent pom.xml to import it as shown in Figure 5, and you are ready to go.
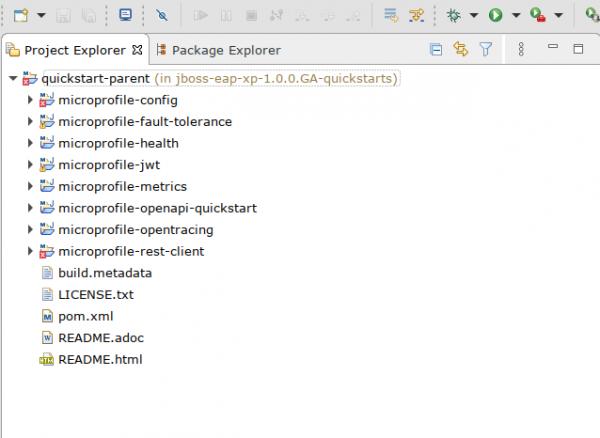
With the kickstarts turned on, you have simple examples that you can run and test on your installed server covering:
- Eclipse MicroProfile Config
- Eclipse MicroProfile Fault-tolerance
- Eclipse MicroProfile Health
- Eclipse MicroProfile JWT
- Eclipse MicroProfile Metrics
- Eclipse MicroProfile OpenAPI
- Eclipse MicroProfile OpenTracing
- Eclipse MicroProfile REST Client
For more information about Eclipse MicroProfile take a look at the specifications, check out MicroProfile Starter. If you prefer to watch a demo, check it out here:
