Red Hat now supports Microsoft SQL Server running on RHEL Server. However, Red Hat doesn't provide an official docker image for MS SQL Server on RHEL. This post explains how to create a docker image for MS SQL Server on RHEL and run it on Red Hat OpenShift.
Create a docker image for SQL Server on RHEL
Microsoft provides an official docker image for SQL Server on Linux, however it's an Ubuntu based image.
OpenShift doesn't restrict running Ubuntu based container image, but for those who prefer RHEL based image for reasons such as support, there is a Dockerfile in Microsoft Repository. Currently there are some importing pull requests that have no been merged yet. To make things easier, I've provided a Dockerfile with those changes in my personal GitHub repository. You can build a docker image as follows:
$ git clone https://github.com/tanaka-takayoshi/mssql-docker-rhel.git
$ cd mssql-docker-rhel/cu
$ docker build .
To run this docker image on OpenShift, you have to push this image to OpenShift internal image registry by following this document.
Create an OpenShift secret to store the password
To avoid hard coding the password for the database's SA (sysadmin) user in a configuration file, you can specify that the password is stored in an environment variable. You can set environment variables in deploymentconfig. However, any user who can read the deploymentconfig can see the password. to provide secure credential storage, OpenShift secrets are available. To create a secret, define a yaml file:
apiVersion: v1
kind: Secret
metadata:
  name: mssql-env
stringData:
  MSSQL_SA_PASSWORD: SpecialStr0ngP@ssW0rd
Then create a secret.
$ oc create -f mssql-env-secret.yaml
It'll be used when deploying a image.
Run an SQL Server image on OpenShift
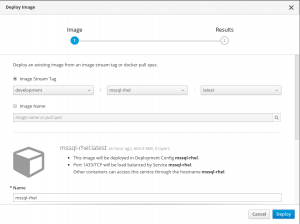
Now you can run the image on OpenShift. I chosen to use the OpenShift 3.7 Web Console. Alternatively you can use the oc command line tool, Click Add to Project | Deploy Image menu on the Web Console. Then select Image Stream Tag and input the image stream tag name when you pushed an image.
In the Environment Variable section, click Add Value from Config Map or Secret and the name of the secret.
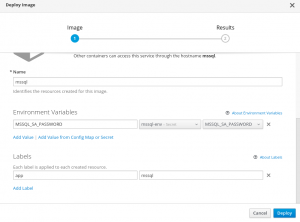
OpenShift will start a new pod after you click the Deploy button.
Connect to SQL Server
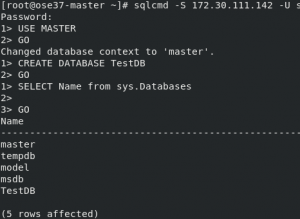
You can connect to SQL Server pod with the service IP from within the OpenShift cluster network. By default, for security reasons, SQL Server doesn't remote connections. Follow this document and install SQL Server command-line tools. Then get a Service IP and connect to the database.

Use a persistent volume to store data
By default, anything written inside of a container will be lost when the pod has died. You can use a Persistent Volume to store data permanently. Since I'm running OpenShift 3.7 on Azure, I decided to use Azure Disk for my Persistent Volume. OpenShift 3.7 supports dynamic provisioning with Azure Managed Disk. Create a storage class by following this document.
kind: StorageClass
apiVersion: storage.k8s.io/v1
metadata:
  name: managedhdd
provisioner: kubernetes.io/azure-disk
parameters:
  storageaccounttype: Standard_LRS
  kind: Managed
$ create -f managedhdd.yaml
apiVersion: v1
kind: PersistentVolumeClaim
metadata:
 name: pvc-mssql
 annotations:
   volume.beta.kubernetes.io/storage-provisioner: kubernetes.io/azure-disk
spec:
 accessModes:
  - ReadWriteOnce
 resources:
   requests:
     storage: 10Gi
 storageClassName: slow
$ oc create -f pvc-mssql.yaml
If you configured it correctly, the persistent volume claim (PVC) will be in a bound state. It means OpenShift created a new managed disk for this PVC.

Then, move on to the deployment in Web Console and click Actions | Add Storage menu.

Select created PVC and input /var/opt/mssql in the Mounted Path.
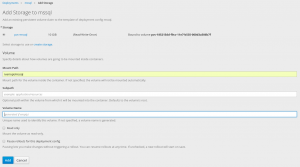
Now the data is stored on the Azure Disk and it won't be removed even though the pod has died. Let's delete a pod to confirm! The below screenshot shows the pod will restart on a new node when the existing pod mssql-2-k5r8q has been deleted.

You can also confirm to connect by the same service IP address.

