Welcome back, here we will continue with the second part of my post, where we will work with Red Hat Cloudforms. If you remember, in our first post we spoke about Red Hat OpenStack Platform 11 (RHOSP). In addition to the blog article, at the end of this article is also a demo video I created to show to our customers/partners how they can build a fully automated software data center.
Hands-on - Part 2
Well, now we need something that can grant us a single pane of glass to manage our environment.
Something that will manage our hypervisors, private/public cloud, Sdn, Paas granting self-service capabilities, compliance and governance, predicting bottleneck, granting forecast accuracy, chargeback/showback, and deep analyze and the securing of our environment.
Here the product name is Red Hat CloudForms.
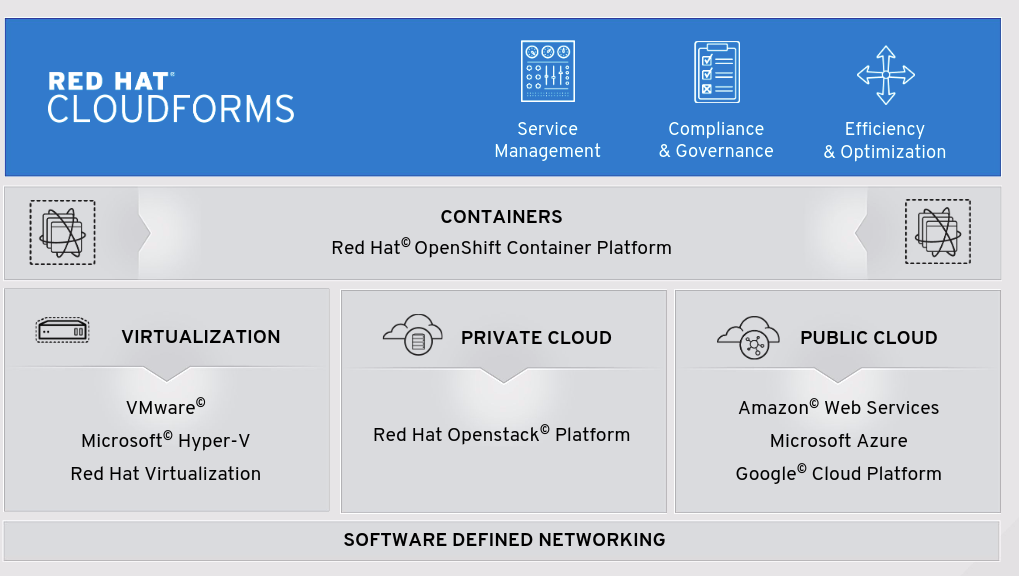
Picture 1
I invite you to read our blog and our official documentation to fully understand how amazing CloudForms is!
Now let’s start with some geek stuff here.
We would like to grant to our end users the availability of the same heat stack but in a self-service fashion.
CloudForms though the self-service UI is able to show to our users different type of service items (VM provisioning on different providers, heat stack execution, Ansible Playbook as a Service, etc.), combining them in a Service Catalog or a Service Catalog bundle.
In some cases, you would like to present a Self Service Dialog composed of a simple text box or a checkbox or a drop-down list or more or less whatever you want to grant to your users a simple UI to order their services with a few clicks!
Let me show you in practice what I mean.
You need to download the Red Hat CloudForms appliance (qcow2 format) from the Red Hat customer portal and then import it on KVM.
Remember to setup CF using the appliance_console textual menu and to add a dedicated disk for the VMDB (postgres) as pointed out here. [1]
Please be aware that CloudForms is fully supported on RH-V, OpenStack, Vmware Vsphere, Azure, Amazon EC2...but not on rhel + kvm so DON’T use this configuration for a production environment.
A full list of platforms able to host CloudForms appliance is available here. [2]
Let’s start importing our heat stack inside CloudForms from the administrative interface.
From Services -> Orchestration Templates -> Configuration -> Create New Orchestration Template you will be able to create your stack.
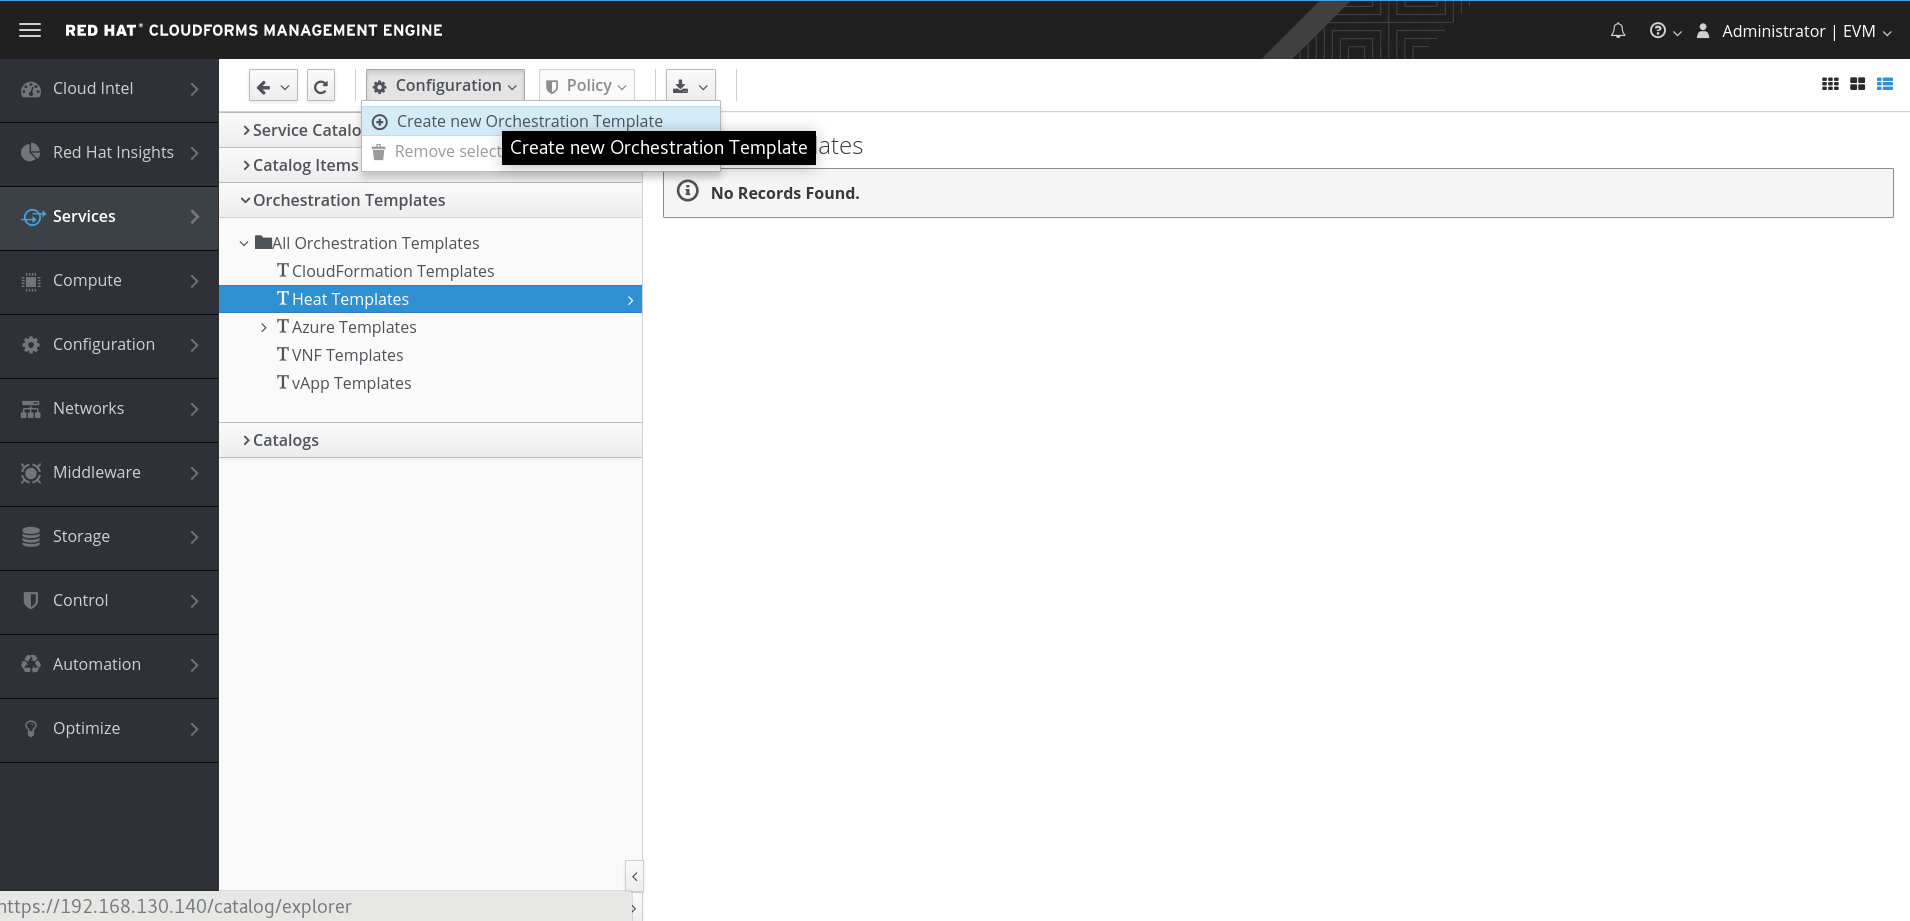
Picture 2
A Name, Description, and our stack content are required; then you can click on Add.
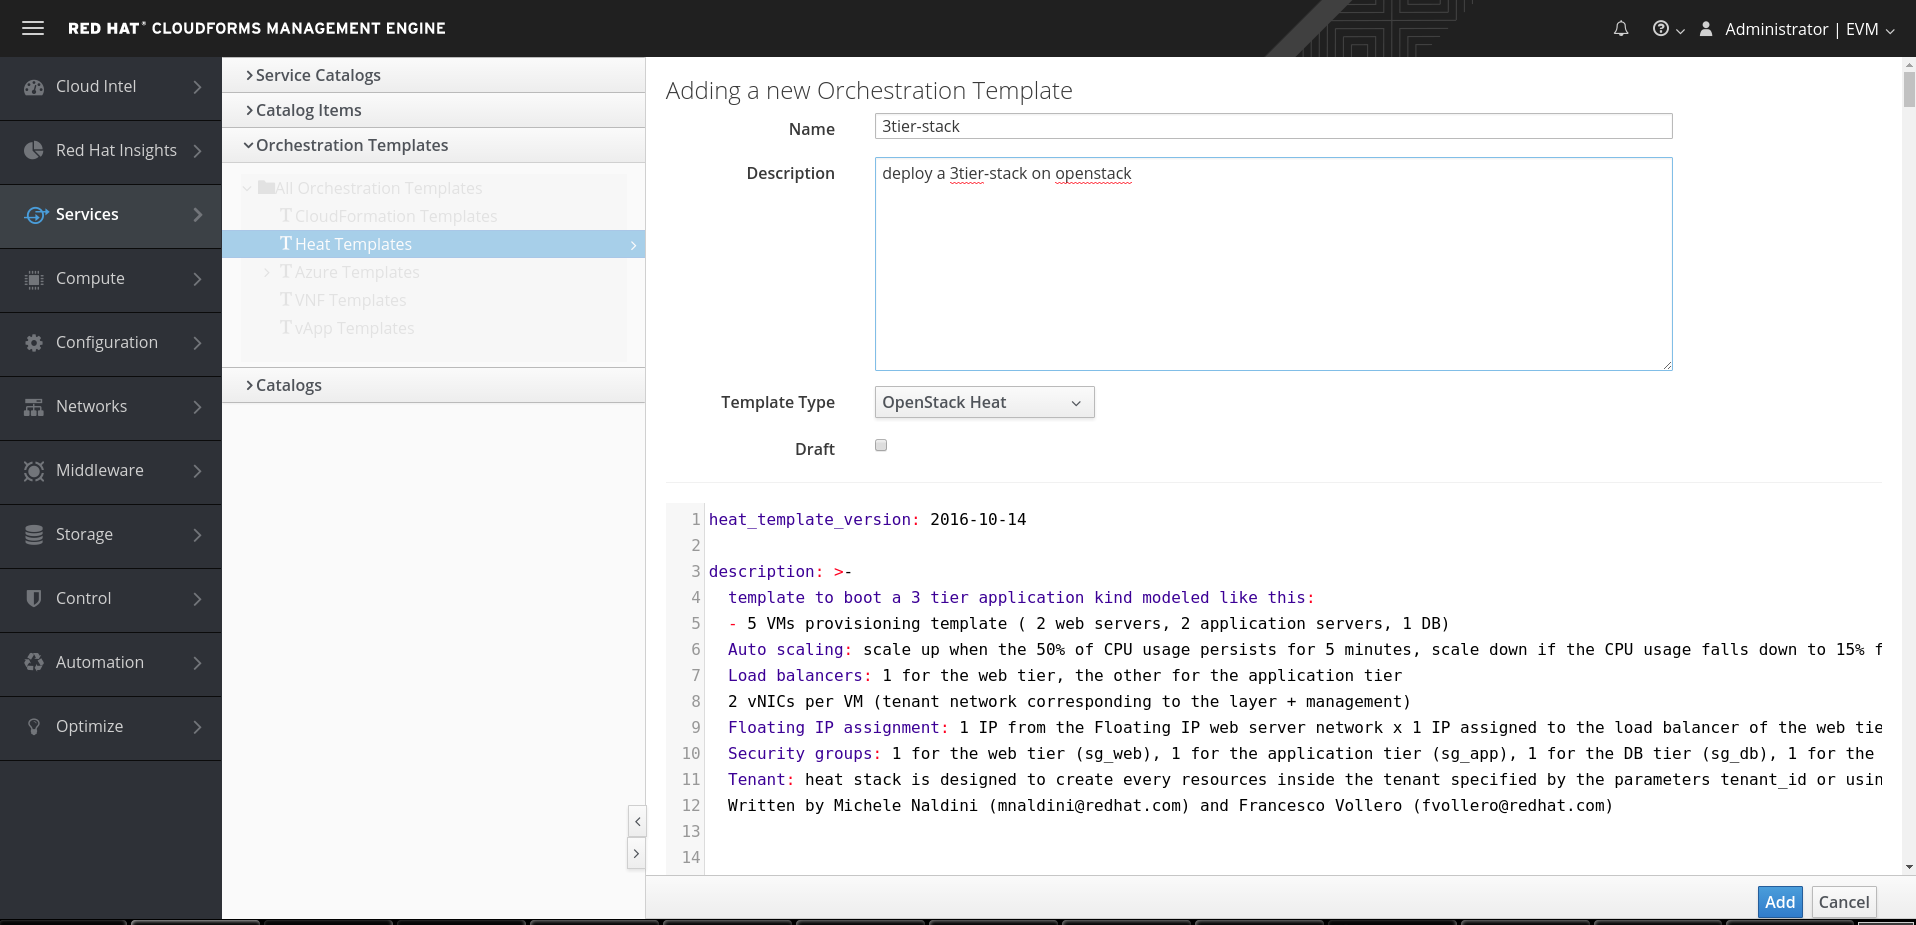
Picture 3
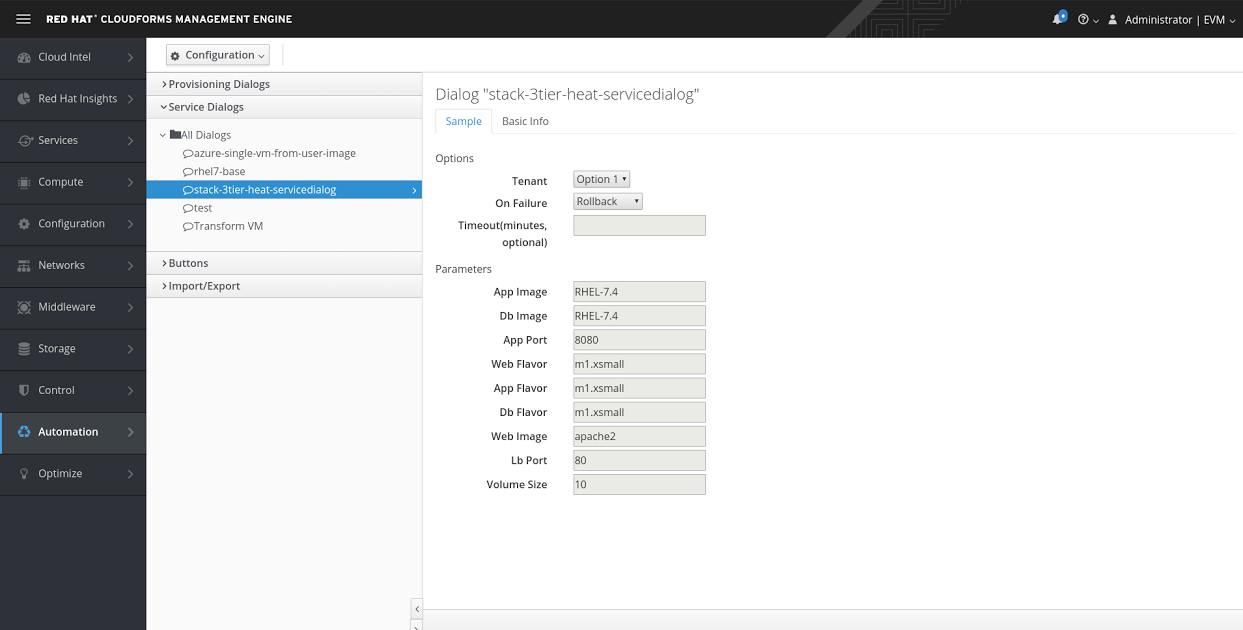
Now we have to create our Service Dialog to manage input parameters of our stack.
From Configuration -> Create Service Dialog from Orchestration Template, name your dialog e.g stack-3tier-heat-service dialog.
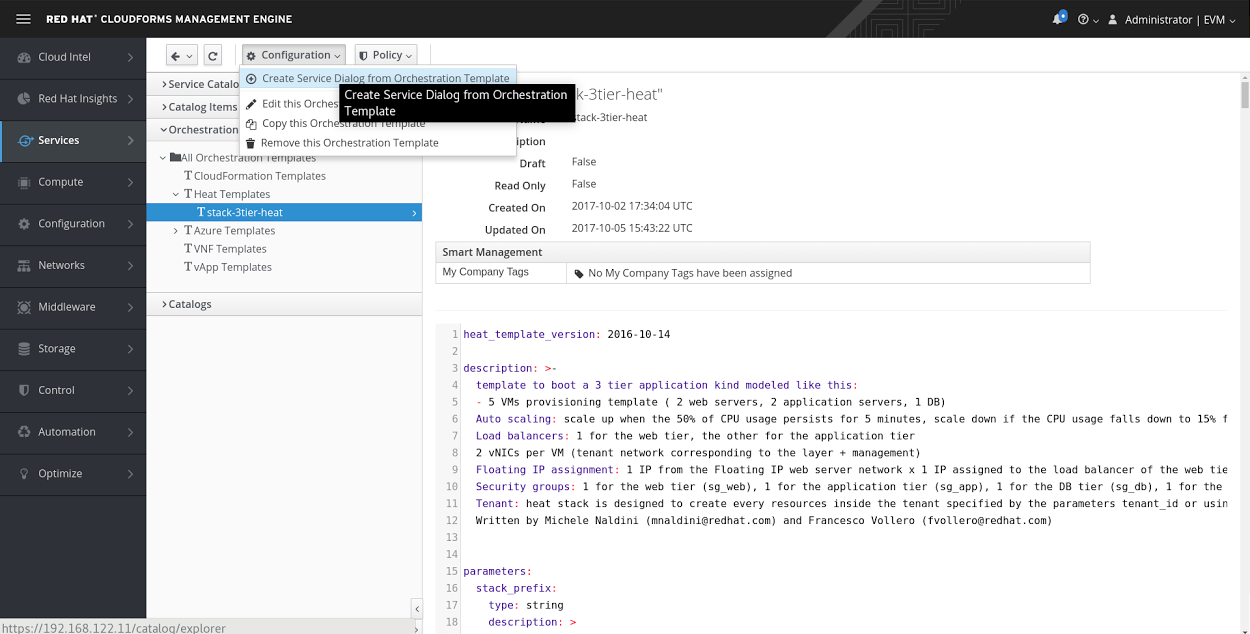
Picture 4
Now, let’s go to Automation -> Automate -> Customization to verify if the service dialog was correctly created.
Picture 5
Click on Configuration -> Edit.
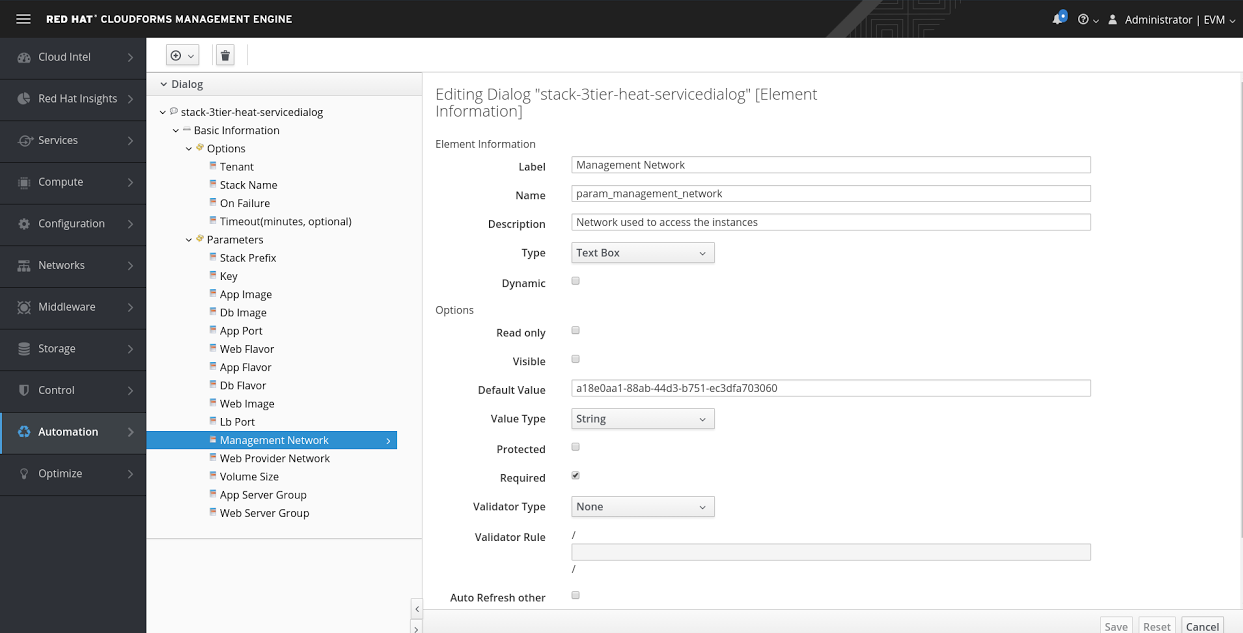
We would like to hide some input parameters because usually your customers/end users are not aware of the architectural details (for instance the stack name or tenant_id or the management/Web Provider network id).
So let’s edit at least these values by unselecting the checkbox Visible and Required and putting a Default Value.
Below is an example of the stack name that will be called "demo-3tier-stack" and will not be shown to the end user.

Picture 6
Repeat the same configuration at least for Stack Prefix, Management Network, and Web Provider Network.
Please be aware that Management Network and Web Provider Network will be attached to our OpenStack External Network so here we need to put the correct network ID.
In our case, from our all-in-one rhosp, we can get this value with this command:
[root@osp ~(keystone_admin)]# openstack network list -f value -c ID -c Name | grep FloatingIpWeb
a18e0aa1-88ab-44d3-b751-ec3dfa703060 FloatingIpWeb
Picture 7
After doing our modification, we’ll see a preview of our Service Dialog.
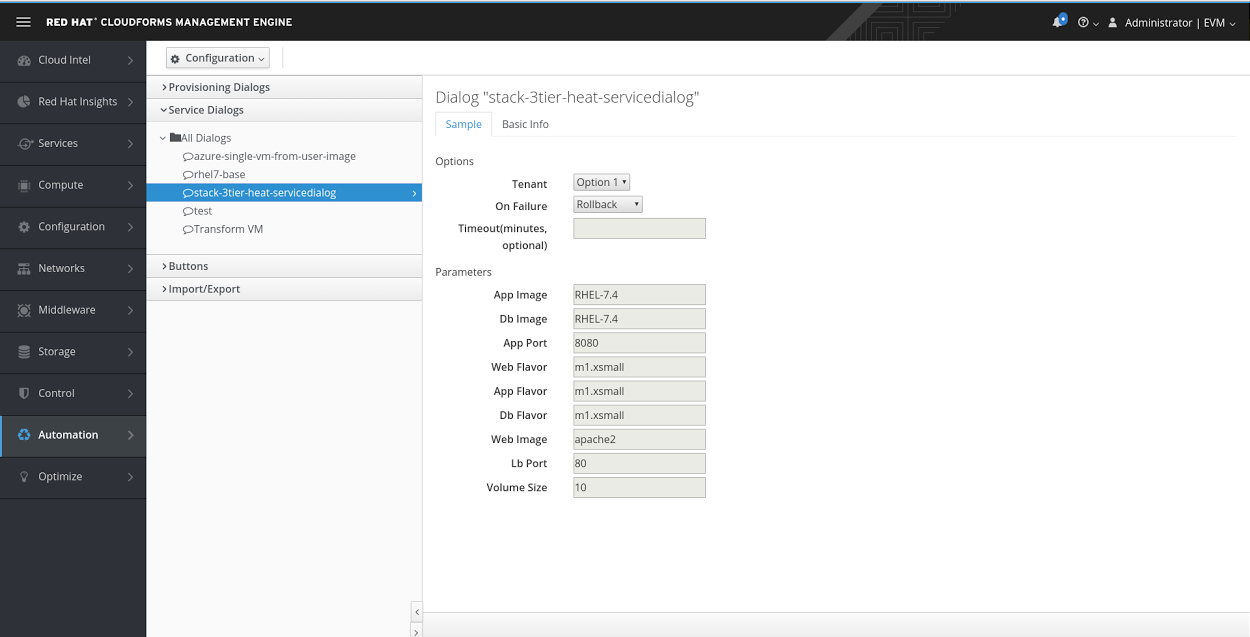
Picture 8
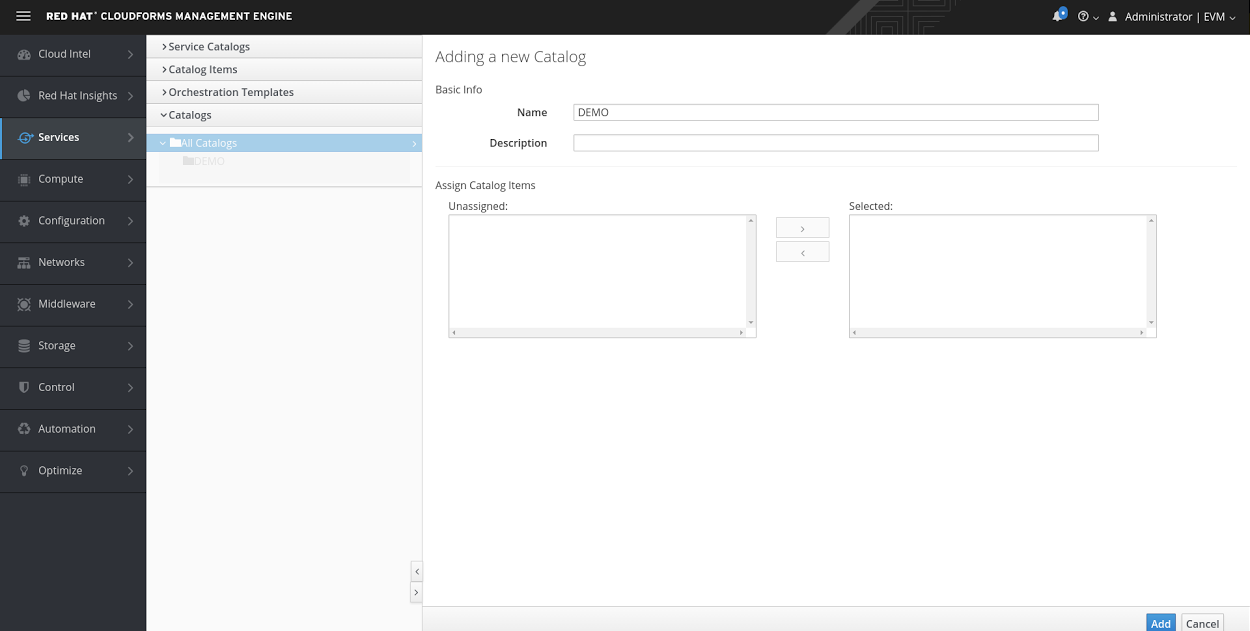
Cool! Now that we have created our orchestration template and a service dialog let’s create our service catalog going to Services -> Catalog -> Catalogs ->All Catalogs.
Now click on Configuration -> Add a New Catalog.
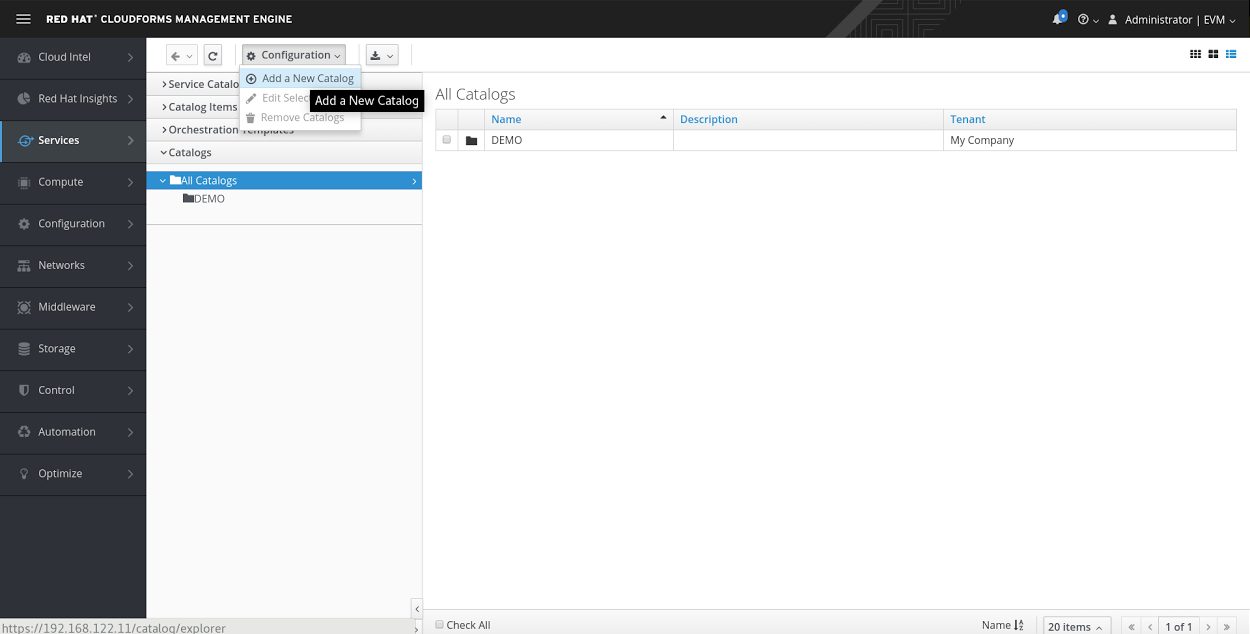
Picture 9
Picture 10
We have to add the last thing, the service catalog item to be created under our "DEMO" service catalog.
Go to Services -> Catalogs -> Catalog Items and select our "DEMO" Catalog.
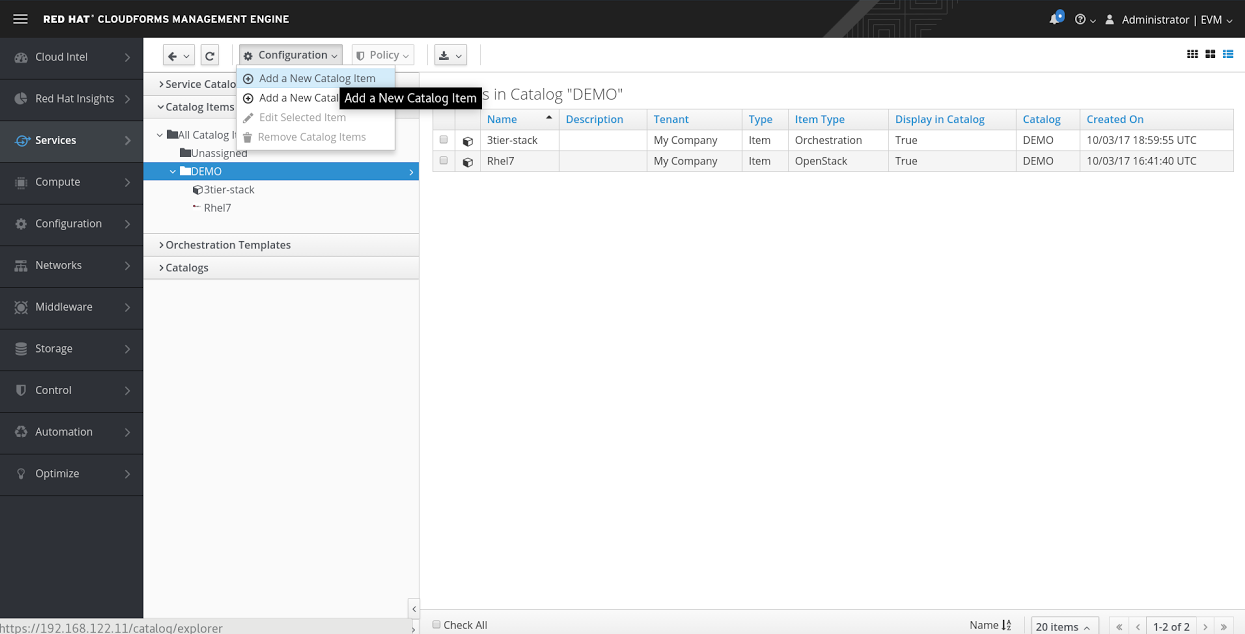
Picture 11
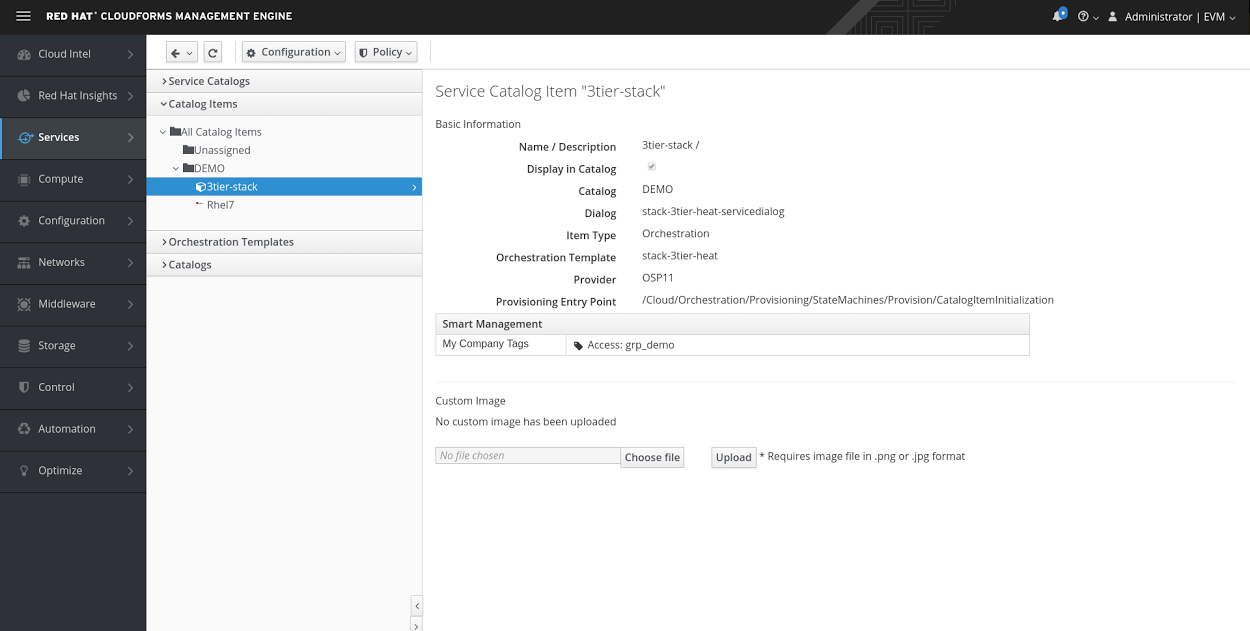
Select the Orchestration as Catalog Item Type and fill the required fields (Display in Catalog is very important).
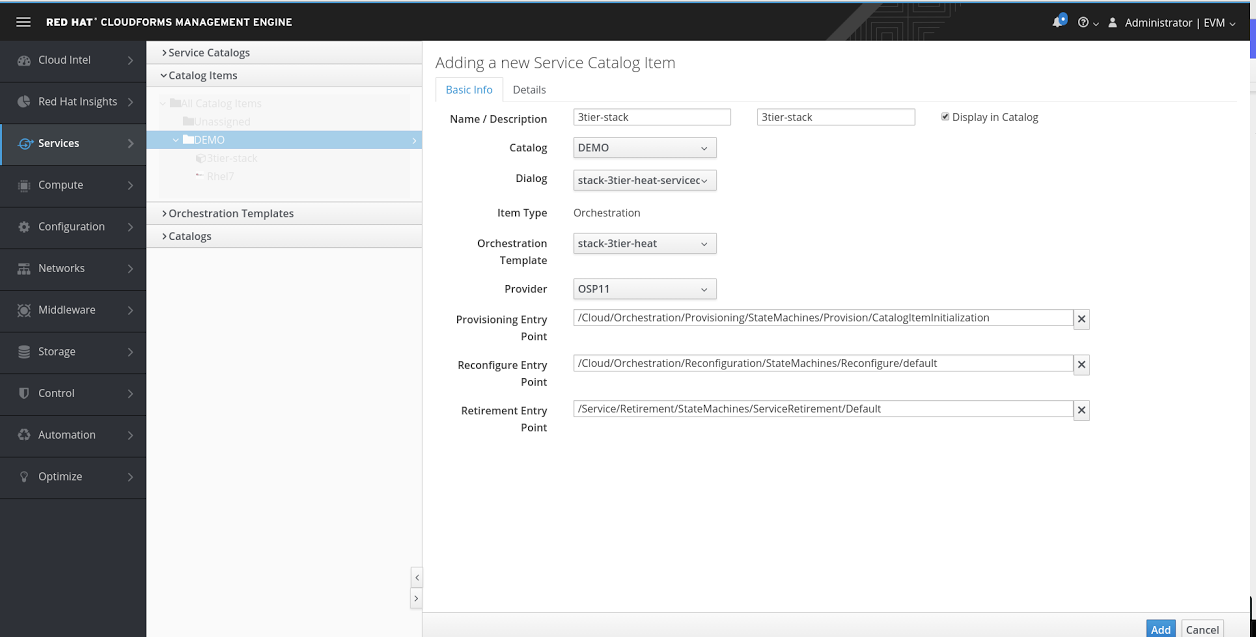
Picture 12
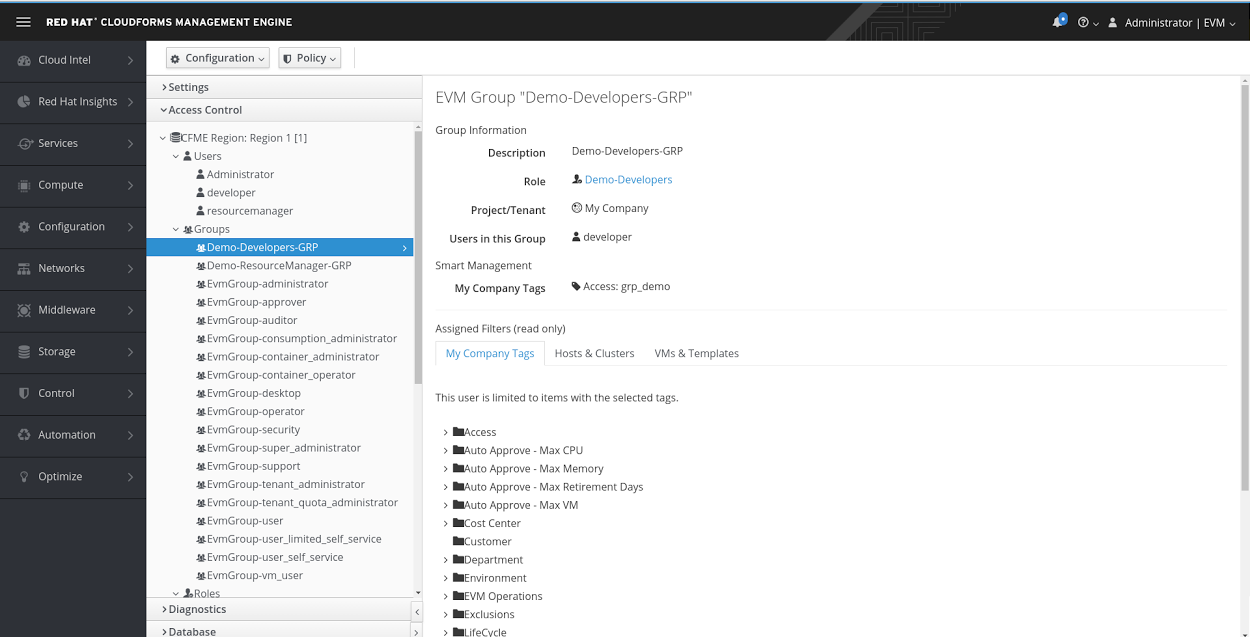
If you want to restrict the visibility of the service catalog item you can select a tag to be assigned from Policy -> Edit Tags.
In this case, I’ve previously created a user (developer) member of a group (Demo-developers-grp) with a custom role called "Demo-Developers".
Picture 13
Picture 14
I have granted the custom role, Demo-Developers only access to the Services Feature so our developer users will be able to order, see, and manage services items from the self-service catalog.
In addition, I have extended the rbac capabilities of our group assigning a custom tag called "Access" to the user group (Picture 13) and to the service item (Picture 8).
This map permits to the users' member of the Demo-Developers group to request and manage service items tagged with the same value (Note the My Company tags value on the previous images).
Now we can order our service catalog item so let’s switch to Self Service User Interface (SSUI) pointing the url https://[IPADDRESS]/self_service and log in as a developer we’ll see our 3 tier-stack service item.
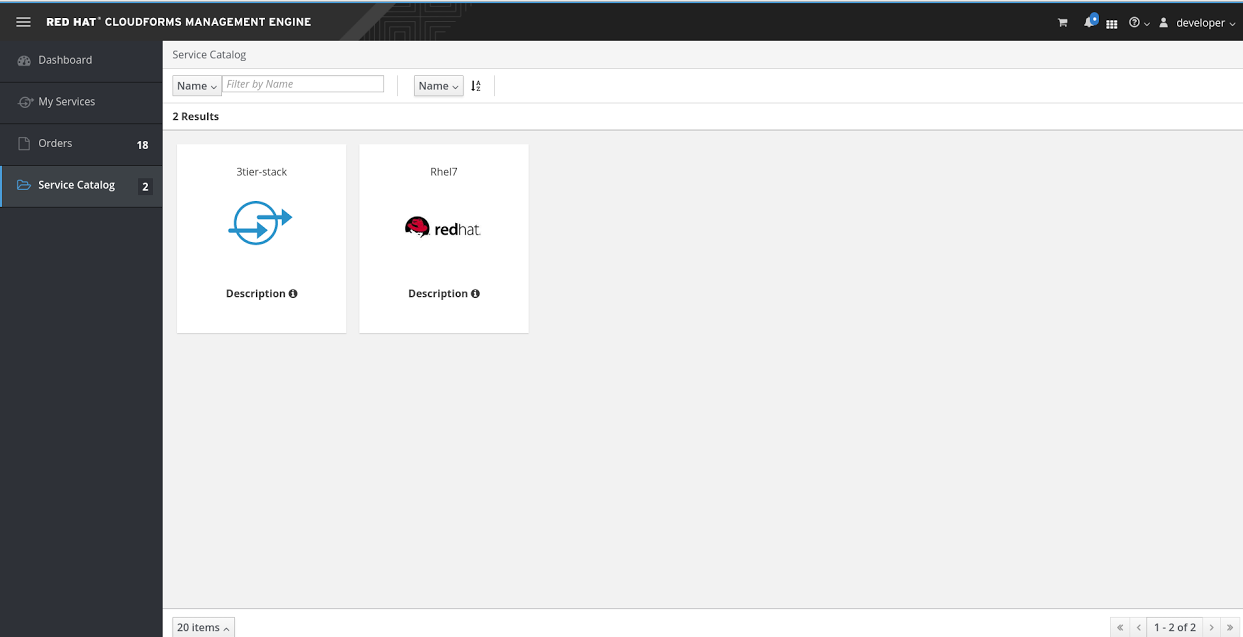
Picture 15
Click on the service then select the CloudForms tenant (tenant mapping in this setup is enabled so cloudform tenants map exactly our OpenStack tenants). If you want to change input parameters or leave them as default.
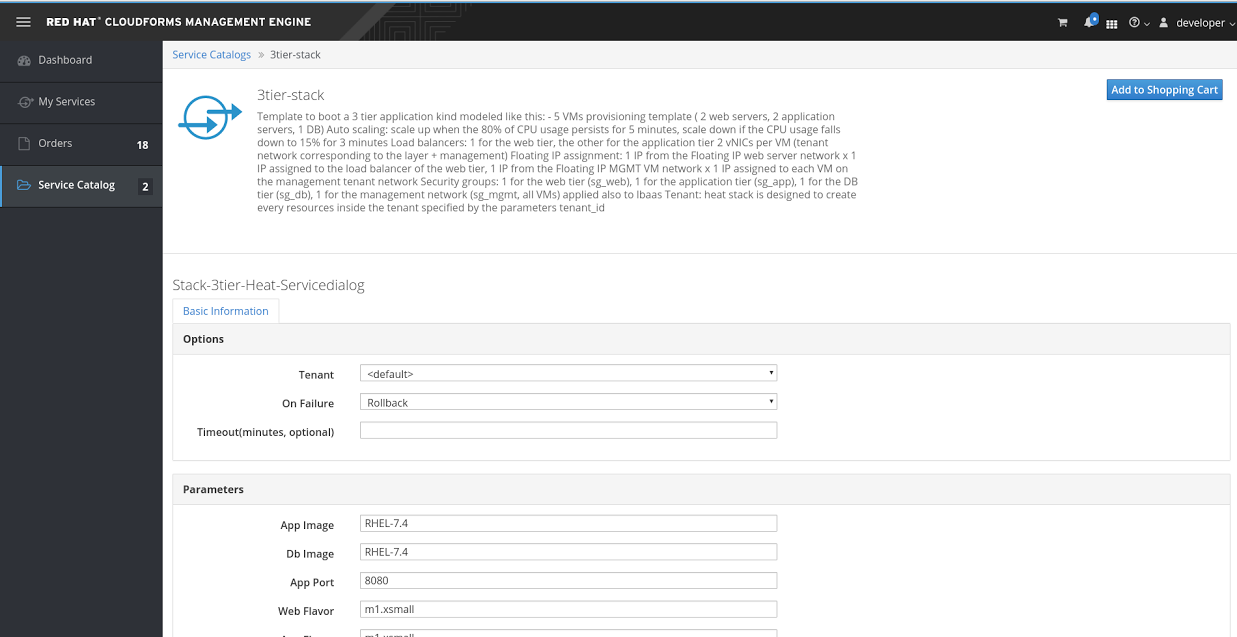
Picture 16
Let’s proceed to order our service item clicking on Add to Shopping Cart and then on Order.
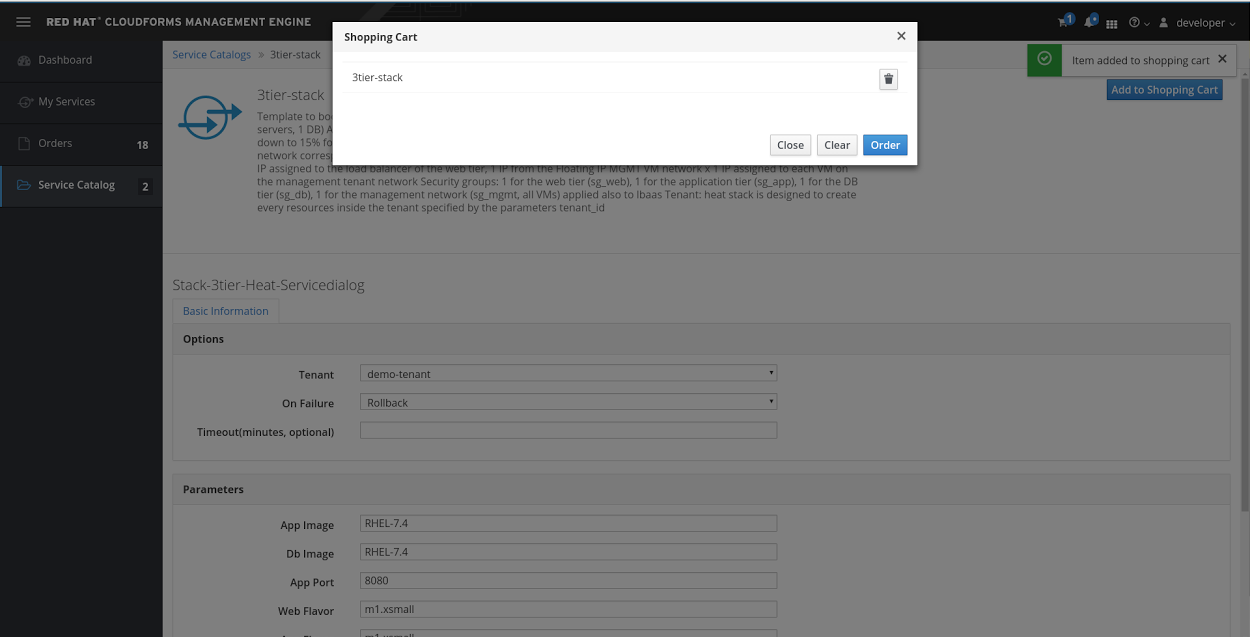
Picture 17
I have edited the standard Service Provision method to request approval in case the request comes from the Developer Group, so as admin and from the web admin interface, approve the request from Services -> Requests.
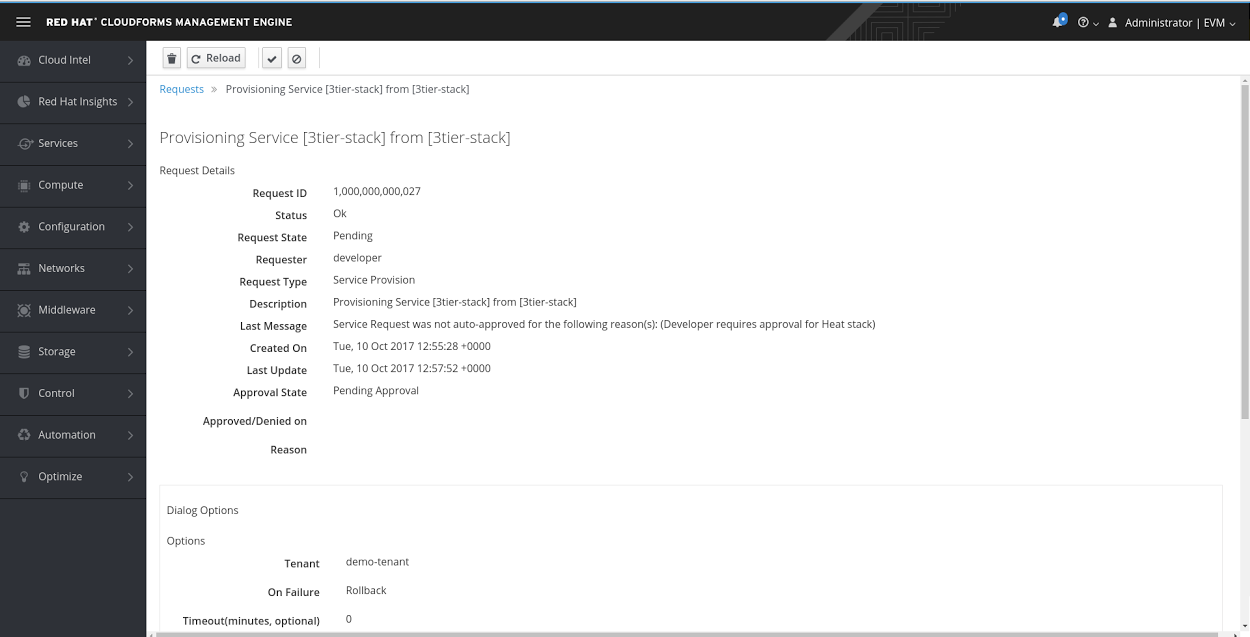
Picture 18
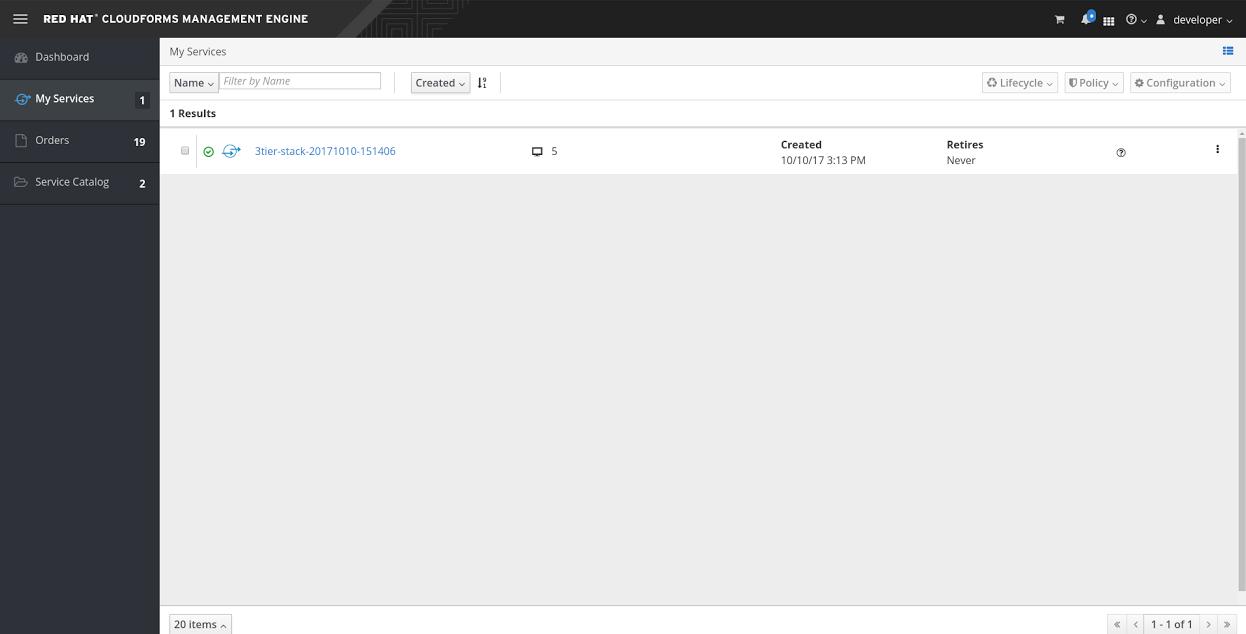
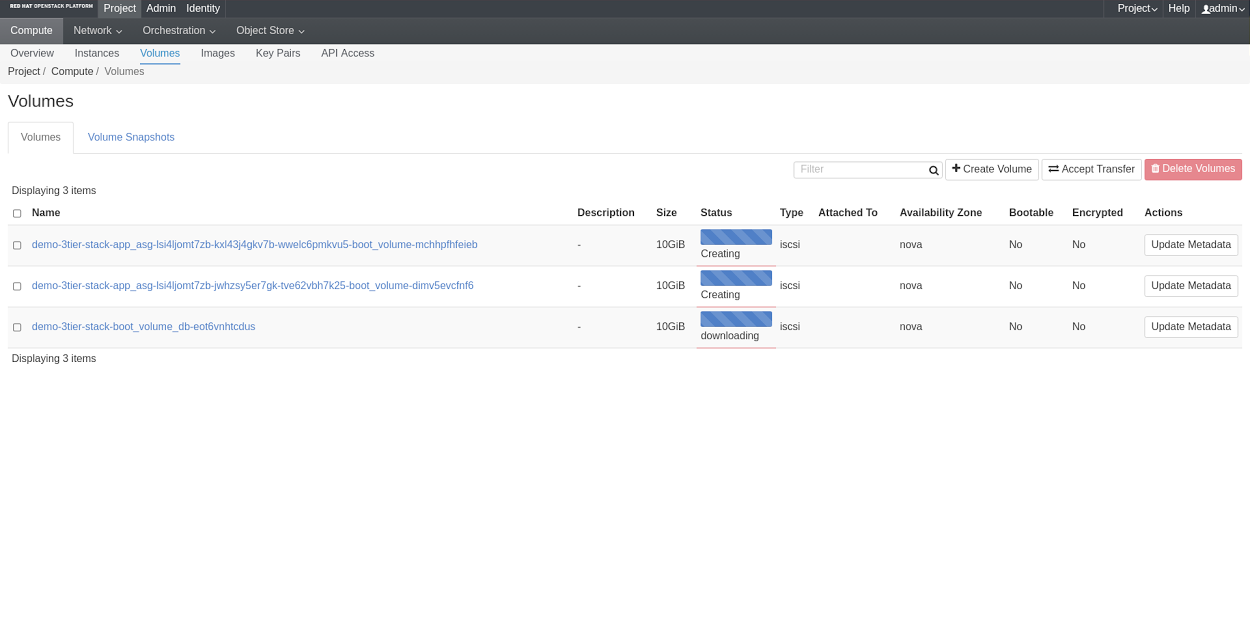
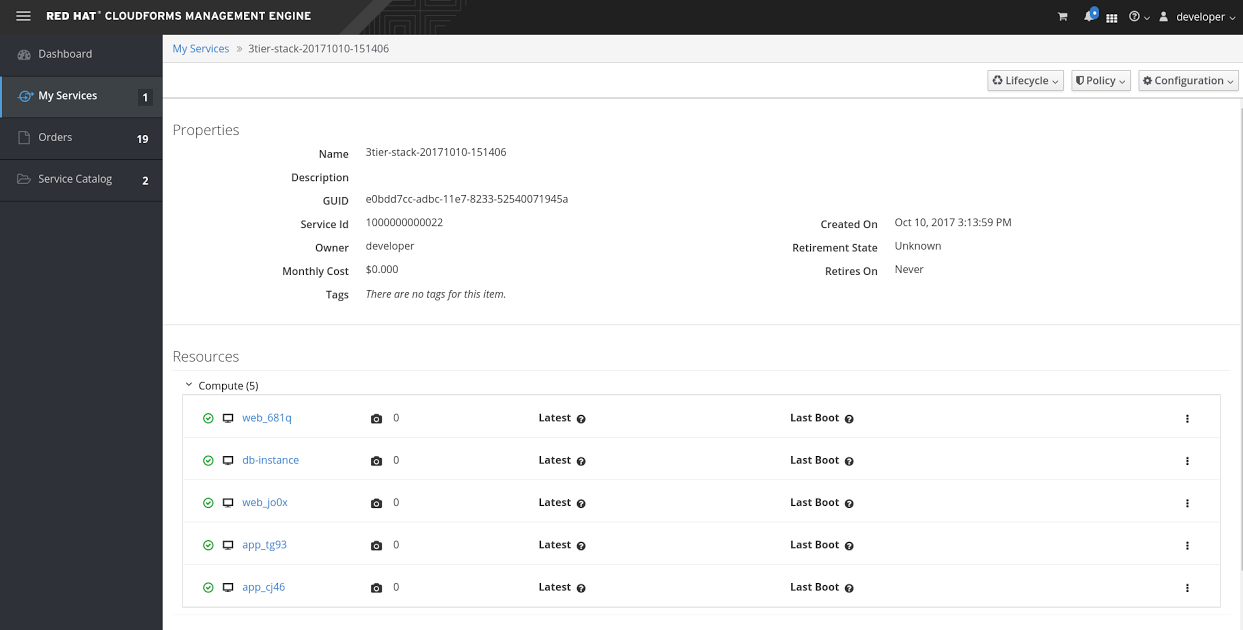
After the approval, we can switch back to the Self Service UI where we’ll find under My Services what we have ordered and in a few minutes all the cool stuff created inside OpenStack.
Picture 19
 Picture 20
Picture 21
Demo Video
[video width="1920" height="1080" mp4="https://developers.redhat.com/blog/wp-content/uploads/2017/11/buildsddc_blog.mp4"][/video]
Conclusions
This is a just an example of how you can create a functional, fully automated, scalable Software Defined Data Center with the help of Red Hat Products and Services
We are more than happy to help you and your organization to reach your business and technical objectives.
This blog highlights part of the job we did for an important transformation project for a big financial customer.
A big THANKS goes to my colleagues Francesco Vollero, Matteo Piccinini, Christian Jung, Nick Catling, Alessandro Arrichiello and Luca Miccini for their support during.
Whether you are new to Linux or have experience, downloading this cheat sheet can assist you when encountering tasks you haven’t done lately.
Last updated: June 6, 2024