(Edit: November 22, 2019) The Node images used in this post, both community centos7 and product, are no longer being updated and maintained. For community images, please use the Universal Base Image (UBI)-based node images located here: registry.access.redhat.com/ubi8/nodejs-10
For a fully supported Product version of Node.js, please check out the Red Hat Software Collections Node.js image, RH SCL Node.js.
Intro
I like Node.js and I like Docker. While I am not an expert on either, I do pretend to be one at work.
Lately, I've been looking at Openshift CDK and how I can develop Node.js apps against it. Specifically, I was looking at the MSA Hello World Demo and the Bonjour microservice.
I also recently wrote about setting up a CDK environment on a freshly re-installed MacBook Pro. I would check it out; it's some good writing.
My initial goal was to figure out how to "containerize" a Node.js application and then put it on my local openshift VM, but when I started to look at it little deeper, I found a few different ways of doing it. Hopefully, this post will go into the different ways.
Basic Node App
Before I started with my containerization, I created a basic Node.js Web App using express. Here is a repo with the app.
'use strict';

const express = require('express');

// Constants
const PORT = 8080;

// App
const app = express();
app.get('/', function (req, res) {
res.send('Hello world\n');
});

app.listen(PORT);
console.log('Running on http://localhost:' + PORT);
Of course, you will need to do an
npm install express --save
to get express.
Then a
npm run start
will start it up.
If you've taken any intro to Node tutorial, this should be very familiar. In fact, the example code is taken from the Nodejs.org guide for dockerizing web apps, you can check that out here: https://nodejs.org/en/docs/guides/nodejs-docker-webapp/
Alternatively, you can read a little more here since I do that dockerized app in this post.
Basic Containerized Node App
Making this code into a basic container image is simple. We will need to create a Dockerfile.
Note: This is taken from the official Node.js docs, the link is above.
First thing, we need a base image to work from, so let's just choose the official node.js image.
FROM node:6.9.5
Now we need a directory inside our image to put our code.
# Create app directory
RUN mkdir -p /usr/src/app
WORKDIR /usr/src/app
Then we need to copy our package.json and our code and run npm install.
# Install app dependencies
COPY package.json /usr/src/app/

# Bundle app source
COPY . /usr/src/app

RUN npm install
Then we need to expose port 8080 so we can get access to our server.
EXPOSE 8080
Then finally we specify a command to run when we finally run the image.
CMD [ "npm", "start" ]
Now we just need to build this image:
docker build -t lholmquist/docker-web-app .
We use the docker build command with the '-t' flag so we can tag it with the name 'lholmquist/docker-web-app' and the '.' is telling docker to build to use our current directory
Running a
docker image list
should output something similar:

Now, that is only an image, so to run it, you can do something like this:
docker run -p 8080:8080 lholmquist/docker-web-app
In addition, you should see something similar to your console:
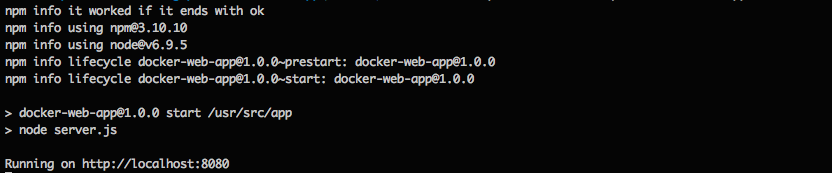
If you go to http://localhost:8080 in a browser, you should see something.
Using Source-to-image
If you don't want to deal with Dockerfiles then you could use the Source-to-image(S2I) tool from Openshift.
S2I will take your code and a compatible S2I image and smash them together to give you a nice container to run.
So how does this work, it sort of sounds like magic? Well, it sort of is.
Let's look at the command we are going to use to build our app's container image. For an example app, we will keep using the basic express example from earlier. This repo https://github.com/lholmquist/s2i-web-app will have the code. So clone the code (download) from GitHub and then on your local machine after the code has been "downloaded", make sure you are in that new code directory since the next few commands will assume you are in that directory.
s2i build . bucharestgold/centos7-s2i-nodejs:7.5.0 s2i-web-app
Let's dissect this.
s2i build
- We are using the build command of the s2i cli tool.
The
.
is telling the tool that we are using our current directories code.
This next part is interesting:
bucharestgold/centos7-s2i-nodejs:7.5.0
Let's look at this from back to front.
7.5.0
is the node version this image uses.
centos7-s2i-nodejs
is the image we are going to use. I'll explain in a minute why we used this one.
bucharestgold
is just the namespace from docker hub.
So if run this command, you will see the base image (the centos7-s2i-nodejs) download like a normal container build would.
Then you will see a message:
---> Installing application source
What this is doing is copying your code in your current directory to a directory in the image.
Then
---> Building your Node application from source
This basically is just running a
npm install -d
Once done, you can then run the similar 'docker run' command we used earlier to create a running container.
docker run -p 8080:8080 s2i-web-app
And if you go to http://localhost:8080 in a browser, you should see something just like the other example.
So the reason we used this image, is because it is already "enabled" to use s2i's features.
Specifically, there's a '.s2i' directory built into the image, that holds some scripts. One of those scripts is the "assemble" script, you can see the contents here: https://github.com/bucharest-gold/origin-s2i-nodejs/blob/master/s2i/assemble
When we do a
docker build
these steps will run. As we saw above, it copies our code and runs.
npm install
Now, this can be used by itself for getting a Node.js app (or really any other language app) into a container quickly, but where this tool shines is when developing Node.js apps for Openshift.
If we take a look at the base images Dockerfile, we can see that actually we drop the root user and change the permissions. This is because, on Openshift, you cannot run the process as root. So creating the docker container this way saves some steps when developing with openshift.
We also provide some "ONBUILD" docker images in case you are in a scenario where you want to use this "bucharestgold/centos7-s2i-nodejs" image and need to use a Dockerfile.
You would just put this in your "FROM" part of your Dockerfile.
FROM bucharestgold/centos7-s2i-nodejs:7.5.0
Lets actually take a look at what that original Dockerfile would look like if we used this image instead.
Here is the original:
FROM node:6.9.5

# Create app directory
RUN mkdir -p /usr/src/app
WORKDIR /usr/src/app
# Install app dependencies
COPY package.json /usr/src/app/

# Bundle app source
COPY . /usr/src/app

RUN npm install

EXPOSE 8080

CMD [ "npm", "start" ]
Now let's see what it would look like if we used the "ONBUILD" image,
FROM bucharestgold/centos7-s2i-nodejs:7.5.0
Yup, that's it. When we run a
docker build
, our base image takes care of the copying and installing, and will set the
CMD
Conclusion
As we saw, there are a few different ways of containerizing our Node.js apps, the best way really depends on your scenario, this post is just showing that there are different ways.
If you want to learn more about S2I and the work we are doing related to Node.js check out our Bucharest-gold repo.
OpenShift Enterprise is now officially known as Red Hat OpenShift Container Platform.
Last updated: August 29, 2023