Welcome to another episode of the series: “Unlock your Red Hat JBoss Data Grid (JDG) data with Red Hat JBoss Data Virtualization (JDV).”
This post will guide you through an example of connecting to Red Hat JBoss Data Grid data source, using Teiid Designer. In this example, we will demonstrate connecting to a local JDG data source. We’re using the JDG 6.6.1, but you can connect to any local or remote JDG source (version 6.6.1) if you wish, using the same steps.
Red Hat JBoss Data Grid Introduction
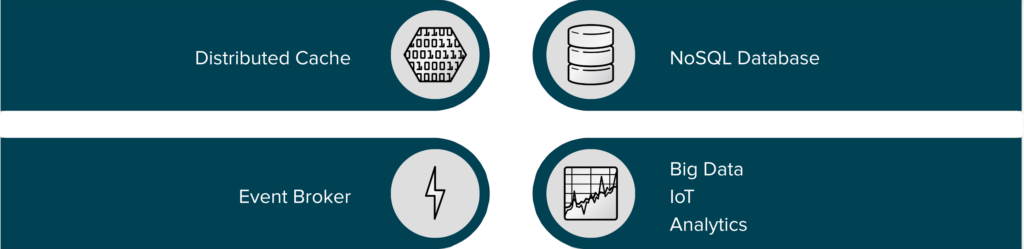
First of all, JDG is a highly capable distributed caching and transient Data Store. This is the most common and basic data grid use case where in-memory data grids are deployed as a speedy in-memory data store to keep the most frequently accessed data. A variation on caching is the use of data grids to store transient data (for example, web sessions and shopping cart data), a common scenario in e-commerce applications. Besides the obvious benefit of huge improvements in performance and scalability, the reduction or offloading workload from expensive DBMS and transactional backends, often implies a reduction in the cost of running these systems.
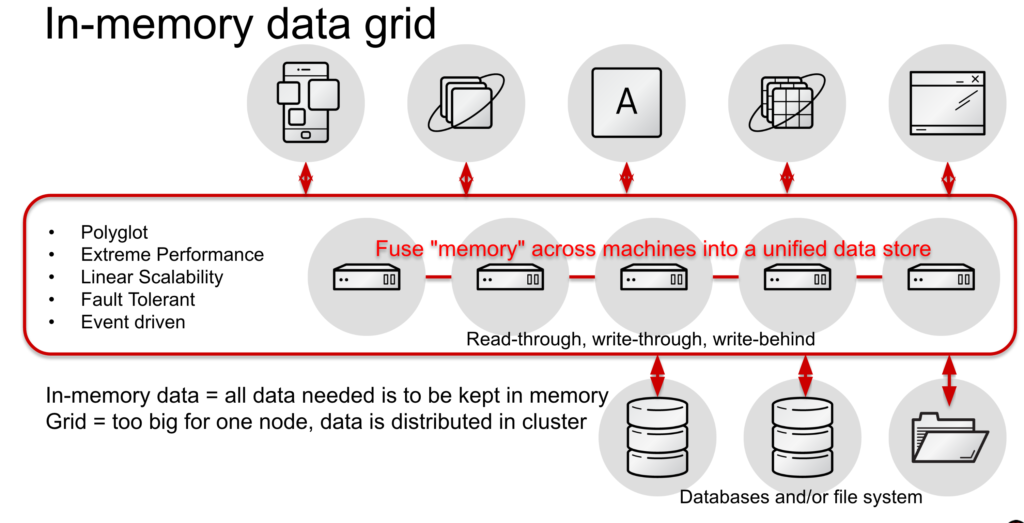
Secondly, JDG is an in-memory, distributed NoSQL Key-Value data store that offers a simple, flexible way to store a variety of data without the constraints of a fixed data model. JDG can be configured to fully participate in transactions. Applications can use data grids as their primary data store, although data may also be persisted for recovery, backup, and archiving reasons. In addition to exploiting fast access to in-memory data, applications can take advantage of advanced functionality to perform parallel-distributed workloads execution, run rich queries, manage transactions, and elastically scale and recover from network or system faults. Most modern applications have these requirements from the get-go. We are seeing this use in more and more organizations where savvy application architects are including in-memory grids from the start.
JDG also supports event-driven computing via listeners and its ability to trigger execution of application logic as data changes in the cluster. Examples of real-time computer and analytics include fraud detection and risk management applications. Bring data physically closer to data processing to help reduce event response latencies as well.
We are also seeing about of JDG for Big Data IoT use cases as well. First, JDG supports the velocity needs of big data. That is, data grid supports hundreds of thousands of in-memory data updates per second. Second, like NoSQL data stores, they can support big data variability. Finally, they can be clustered and scaled in ways that support large volumes of data. Similarly, the "things" in Internet of Things all generate great volumes of data, often at intervals that are more frequent. JDG enables the storage of tens of terabytes of data, faster response times, and almost instant analytics. This makes it feasible to process IoT data at nearly the same speed that it is generated.
In this post, we are using JDG as a Distributed Cache and acts as a data source for JDV using the Hot Rod client protocol. Hot Rod is a binary, language neutral protocol. The reason to use HotRod protocol because it provides the highest performance, automatic load balancing and failover.
Prerequisites
- JDV 6.3 environment
Download: http://developers.redhat.com/products/datavirt/download
Install:https://developers.redhat.com/products/datagrid/overview
We will refer to the installation directory of JDV 6.3 as $JDV_HOME. - JDV 6.3.3 patch
Download: JBoss Data Virtualization Update 03
Install:$ java -jar binaries/jboss-dv-6.3.3-patch.jar --server {{ JDV_HOME }} --update jboss-dv - JDG 6.6.0 environment
Download: Red Hat JBoss Data Grid 6.6.0 Server
Install: http://developers.redhat.com/products/datagrid/hello-world
We will refer to the installation directory of JDG 6.6.0 as $JDG_HOME. - JDG 6.6.1 patch
Download: Red Hat JBoss Data Grid 6.6.1 Server Update
Install:$ cd $JDG_HOME/bin $ ./standalone.sh $ ./cli.sh --connect [standalone@localhost:9999 /] patch apply jboss-datagrid-6.6.1-server-patch.zip
- JDG 6.6.1 Hot Rod Java Client Module for JBoss EAP
Download: Red Hat JBoss Data Grid 6.6.1 Hot Rod Java Client Module for JBoss EAP
Install:$ unzip jboss-datagrid-6.6.1-eap-modules-remote-java-client.zip $ cd jboss-datagrid-6.6.1-eap-modules-remote-java-client $ cp -R modules/ $JDV_HOME
Note: If installing JDG 6.6, one needs to install the JDG 6.6.1 patch that upgrades the infinispan module:
org.infinispan.protostream to protostream-3.0.5.Final.jar - Red Hat JBoss Developer Studio (JBDS) 9.1.0 with Teiid Designer plugins
Download: https://developers.redhat.com/download-manager/file/jboss-devstudio-9.1.0.GA-installer-eap.jar
Install: https://developers.redhat.com/products/datavirt/hello-world/#_set-up-dev-environment
Configure JDG schema
The following table shows the options you have with respect to configuring the schema depending on the version of JDG.
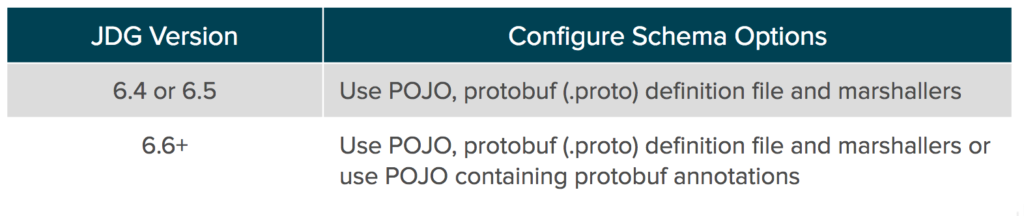
In the steps below, we are using JDG version 6.6.1 and creating a POJO using protobuf annotations generated by Teiid Designer.
-
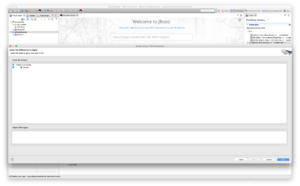
- Start your local JBDS environment.
Start JBDS 9.1.0 and open the Teiid Designer Perspective as shown below.
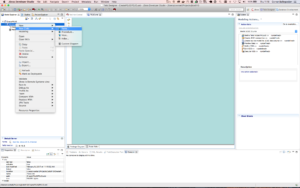
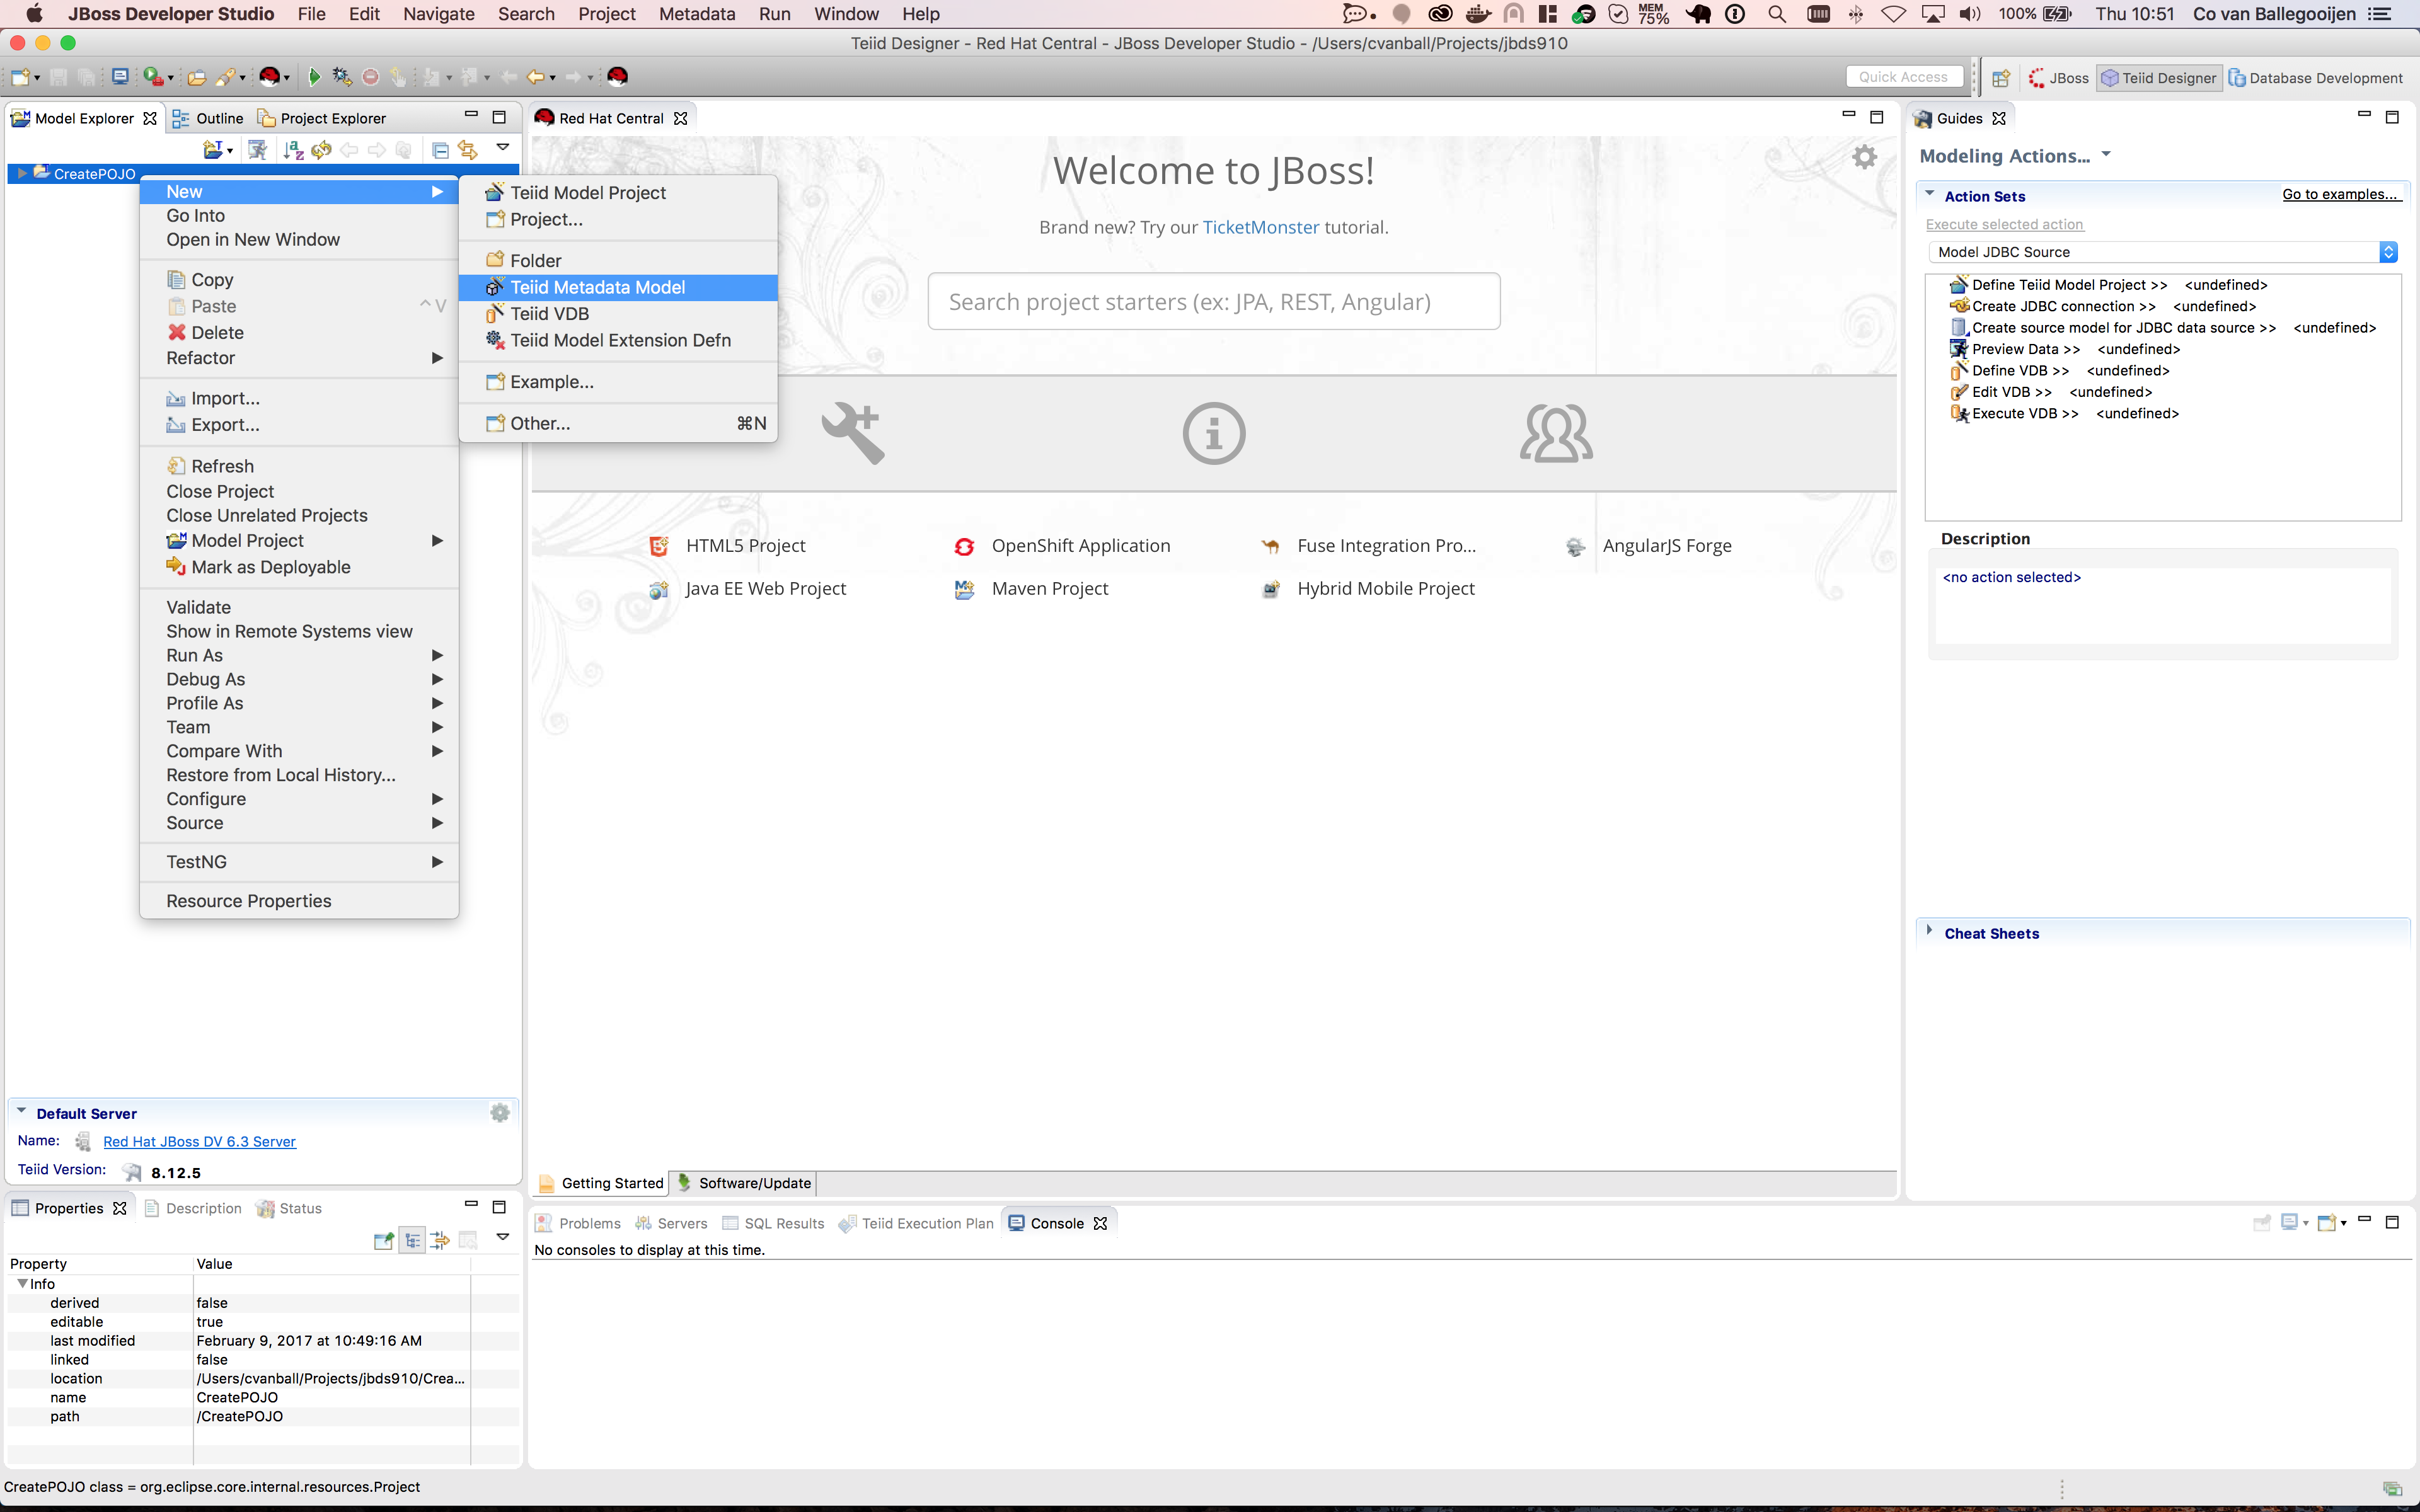
Note: Use the following menu options Window > Perspective > Open Perspective > Teiid Designer to set JBDS in Teiid Designer perspective. - Create Teiid Model Project.
Create a new Teiid Model project using right-click New >Teiid Model Project in the Model Explorer window and name the project CreatePOJO as shown below.
- Create a POJO introduction.
There are two ways to create the POJO:- Using Teiid Designer
- Select view/table then right-click Modeling->Create POJO
- Select view then right-click and select Materialize (this wizard will provide the option to create the POJO)
- Manually
Note: We need to create a POJO jar that will be used by the resource adapter to configure the JDG schema.
The results of these options can be a packaged module zip file that can be used to deploy the POJO to the JDV server environment by unzipping at the $JDV_HOME directory.
In this article, we are using Teiid Designer by selecting the view/table and using Modeling -> Create POJO, which is described in the following steps. - Using Teiid Designer
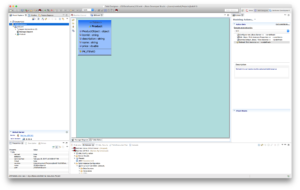
- Create a new Teiid Metadata Model.
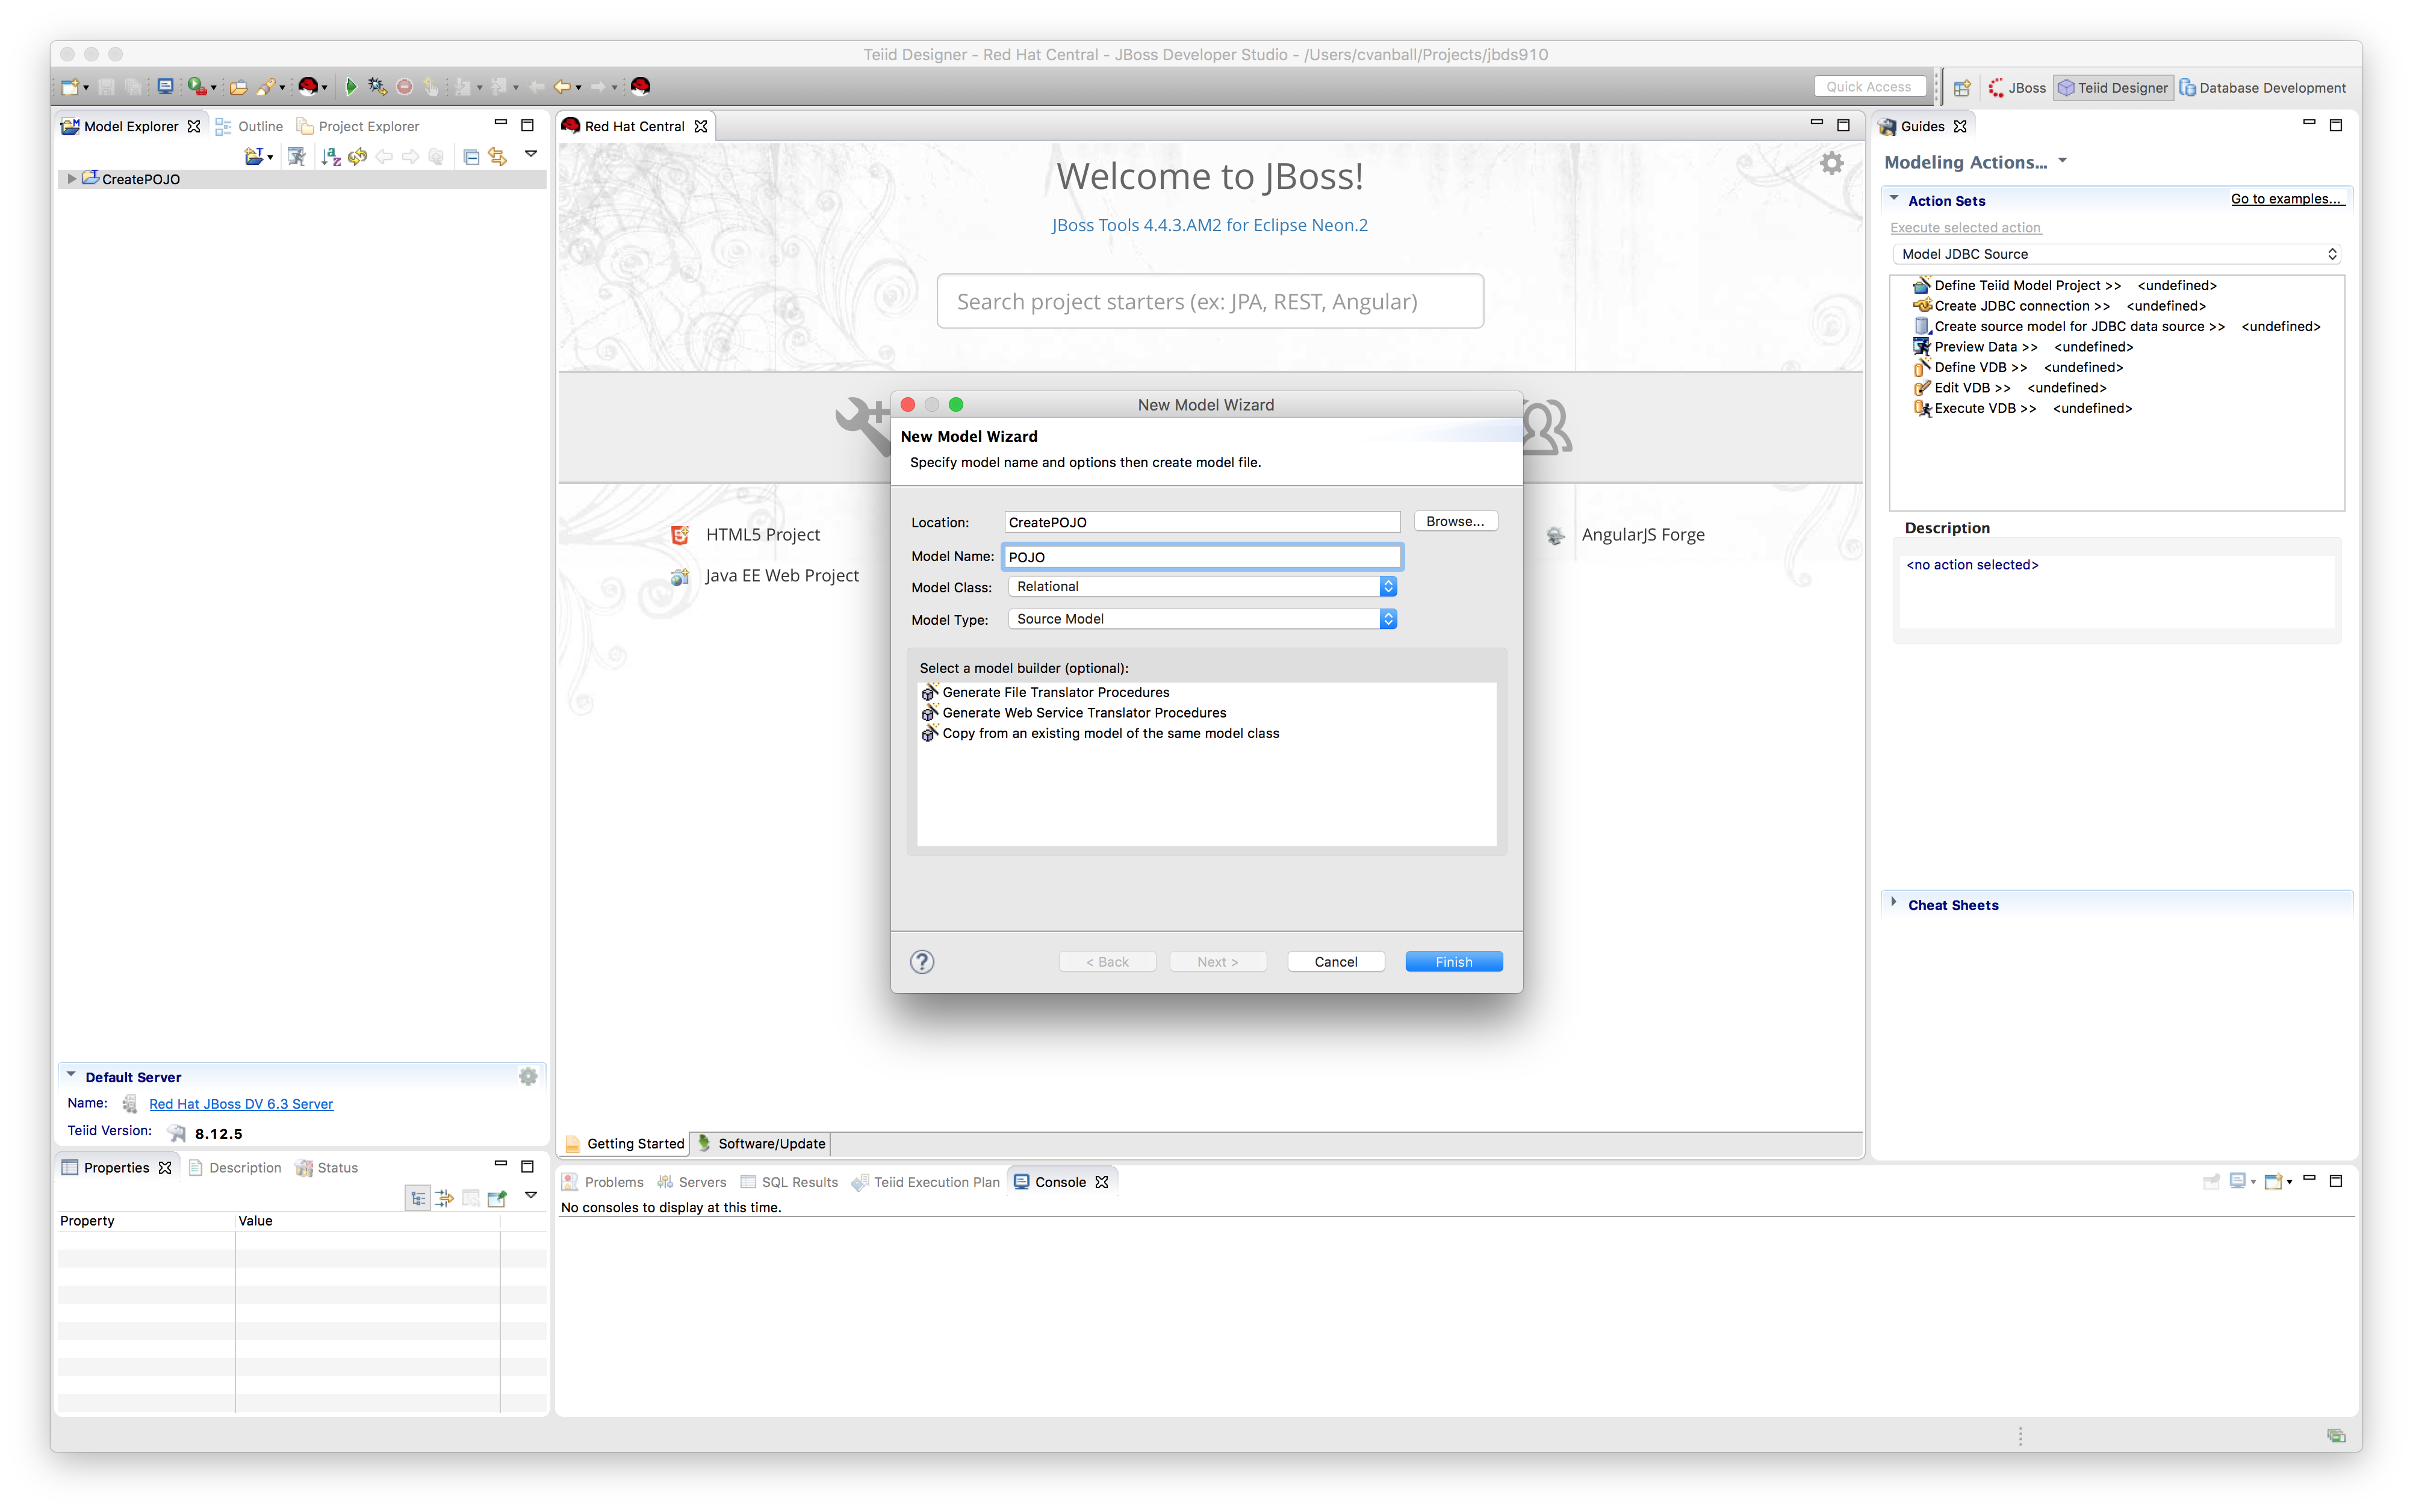
Create a new Teiid Metadata Model project using right-click on the CreatePOJO project and select New >Teiid Metadata Model as shown below.

- Create a new Teiid Metadata Model (cont'd).
New Model Wizard appears as shown.

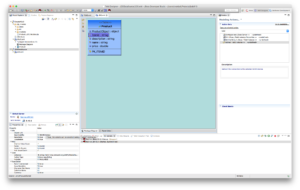
e.g. Model Name: POJO, Model Class: Relational, Model Type: Source Model - Create a new table.
Create a new Table using right-click on source model POJO and select New Child -> Table as shown.
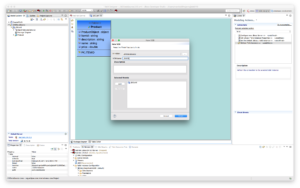
- Create a new table (cont'd).
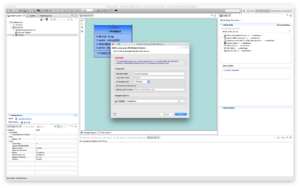
The Create Relational Table dialog appears.
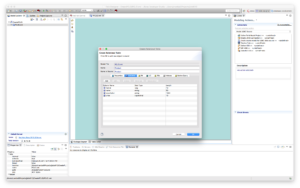
e.g. Name: Product with the following columns (itemId long with length 10, name, string with length 50, description string with length 1024 and price double with length 10) and a Primary key on itemId.
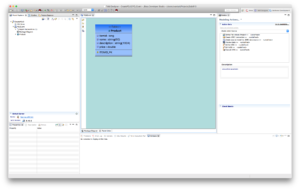
Click Ok and the following screen should appear.
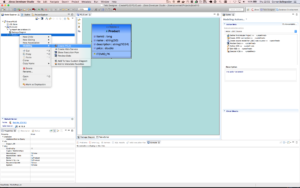
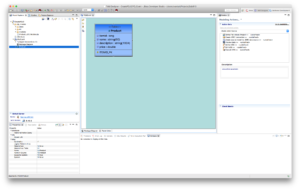
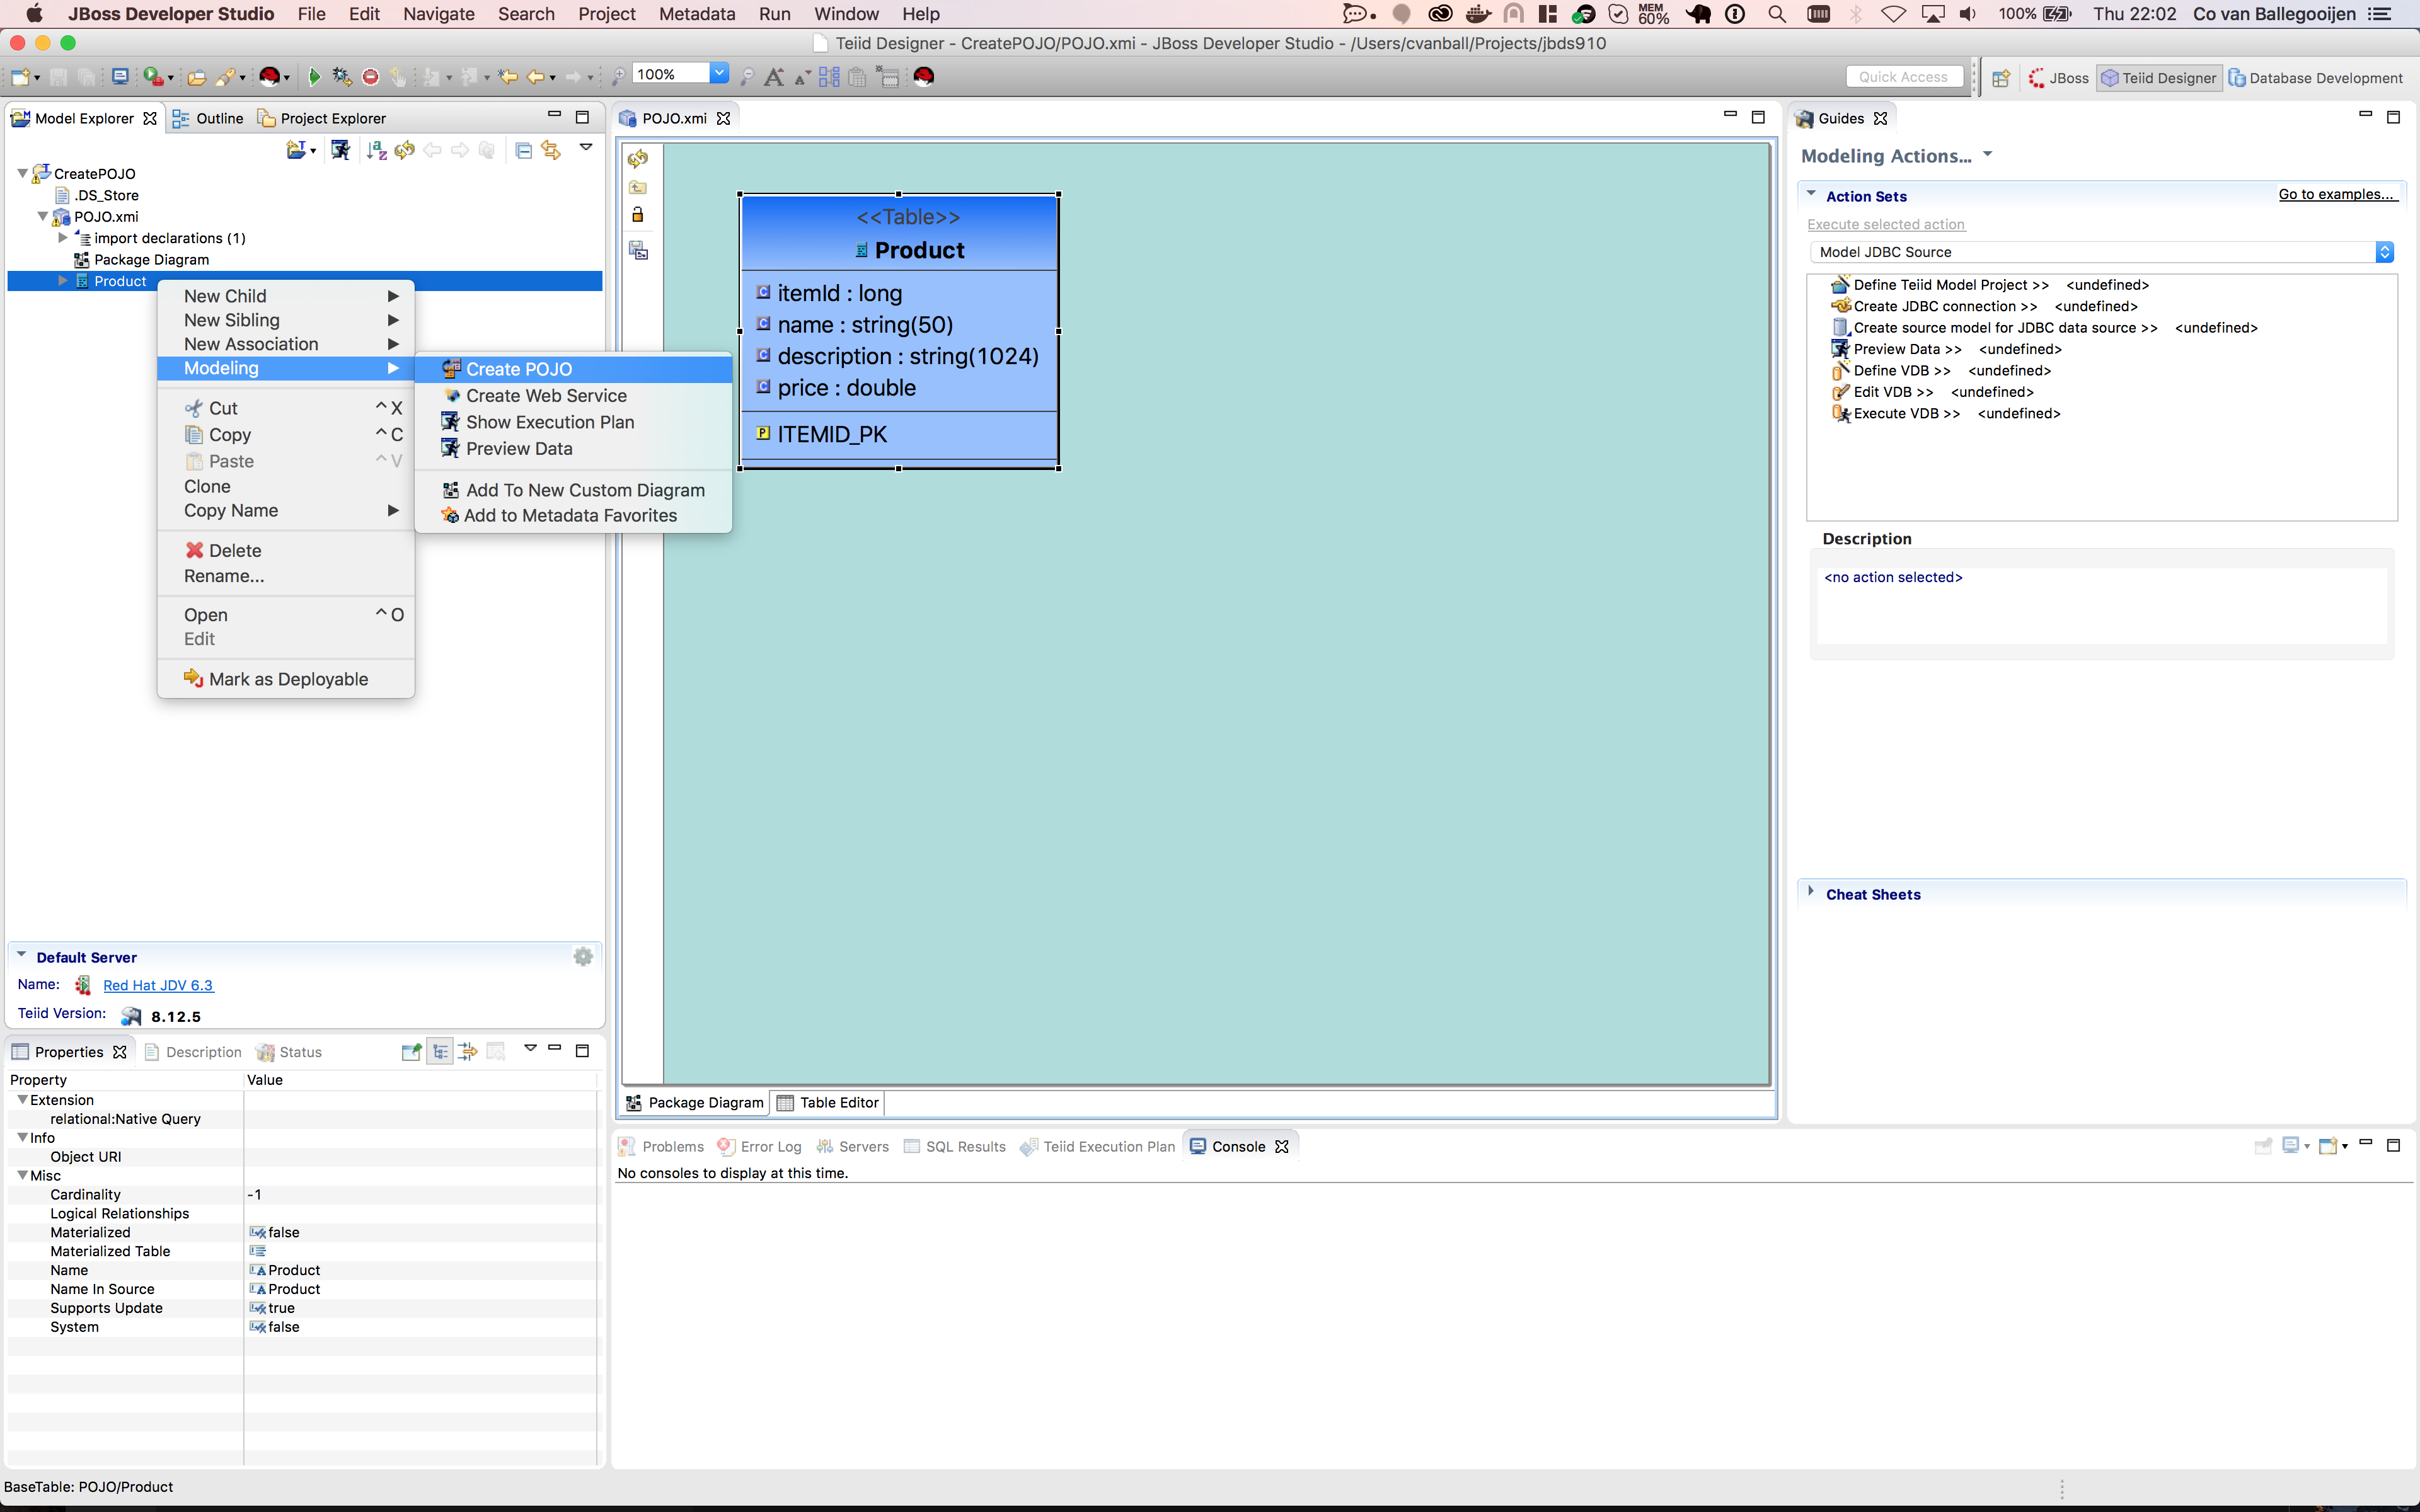
- Create POJO.
Select the source model Product and right-click and select Modeling-> Create POJO.
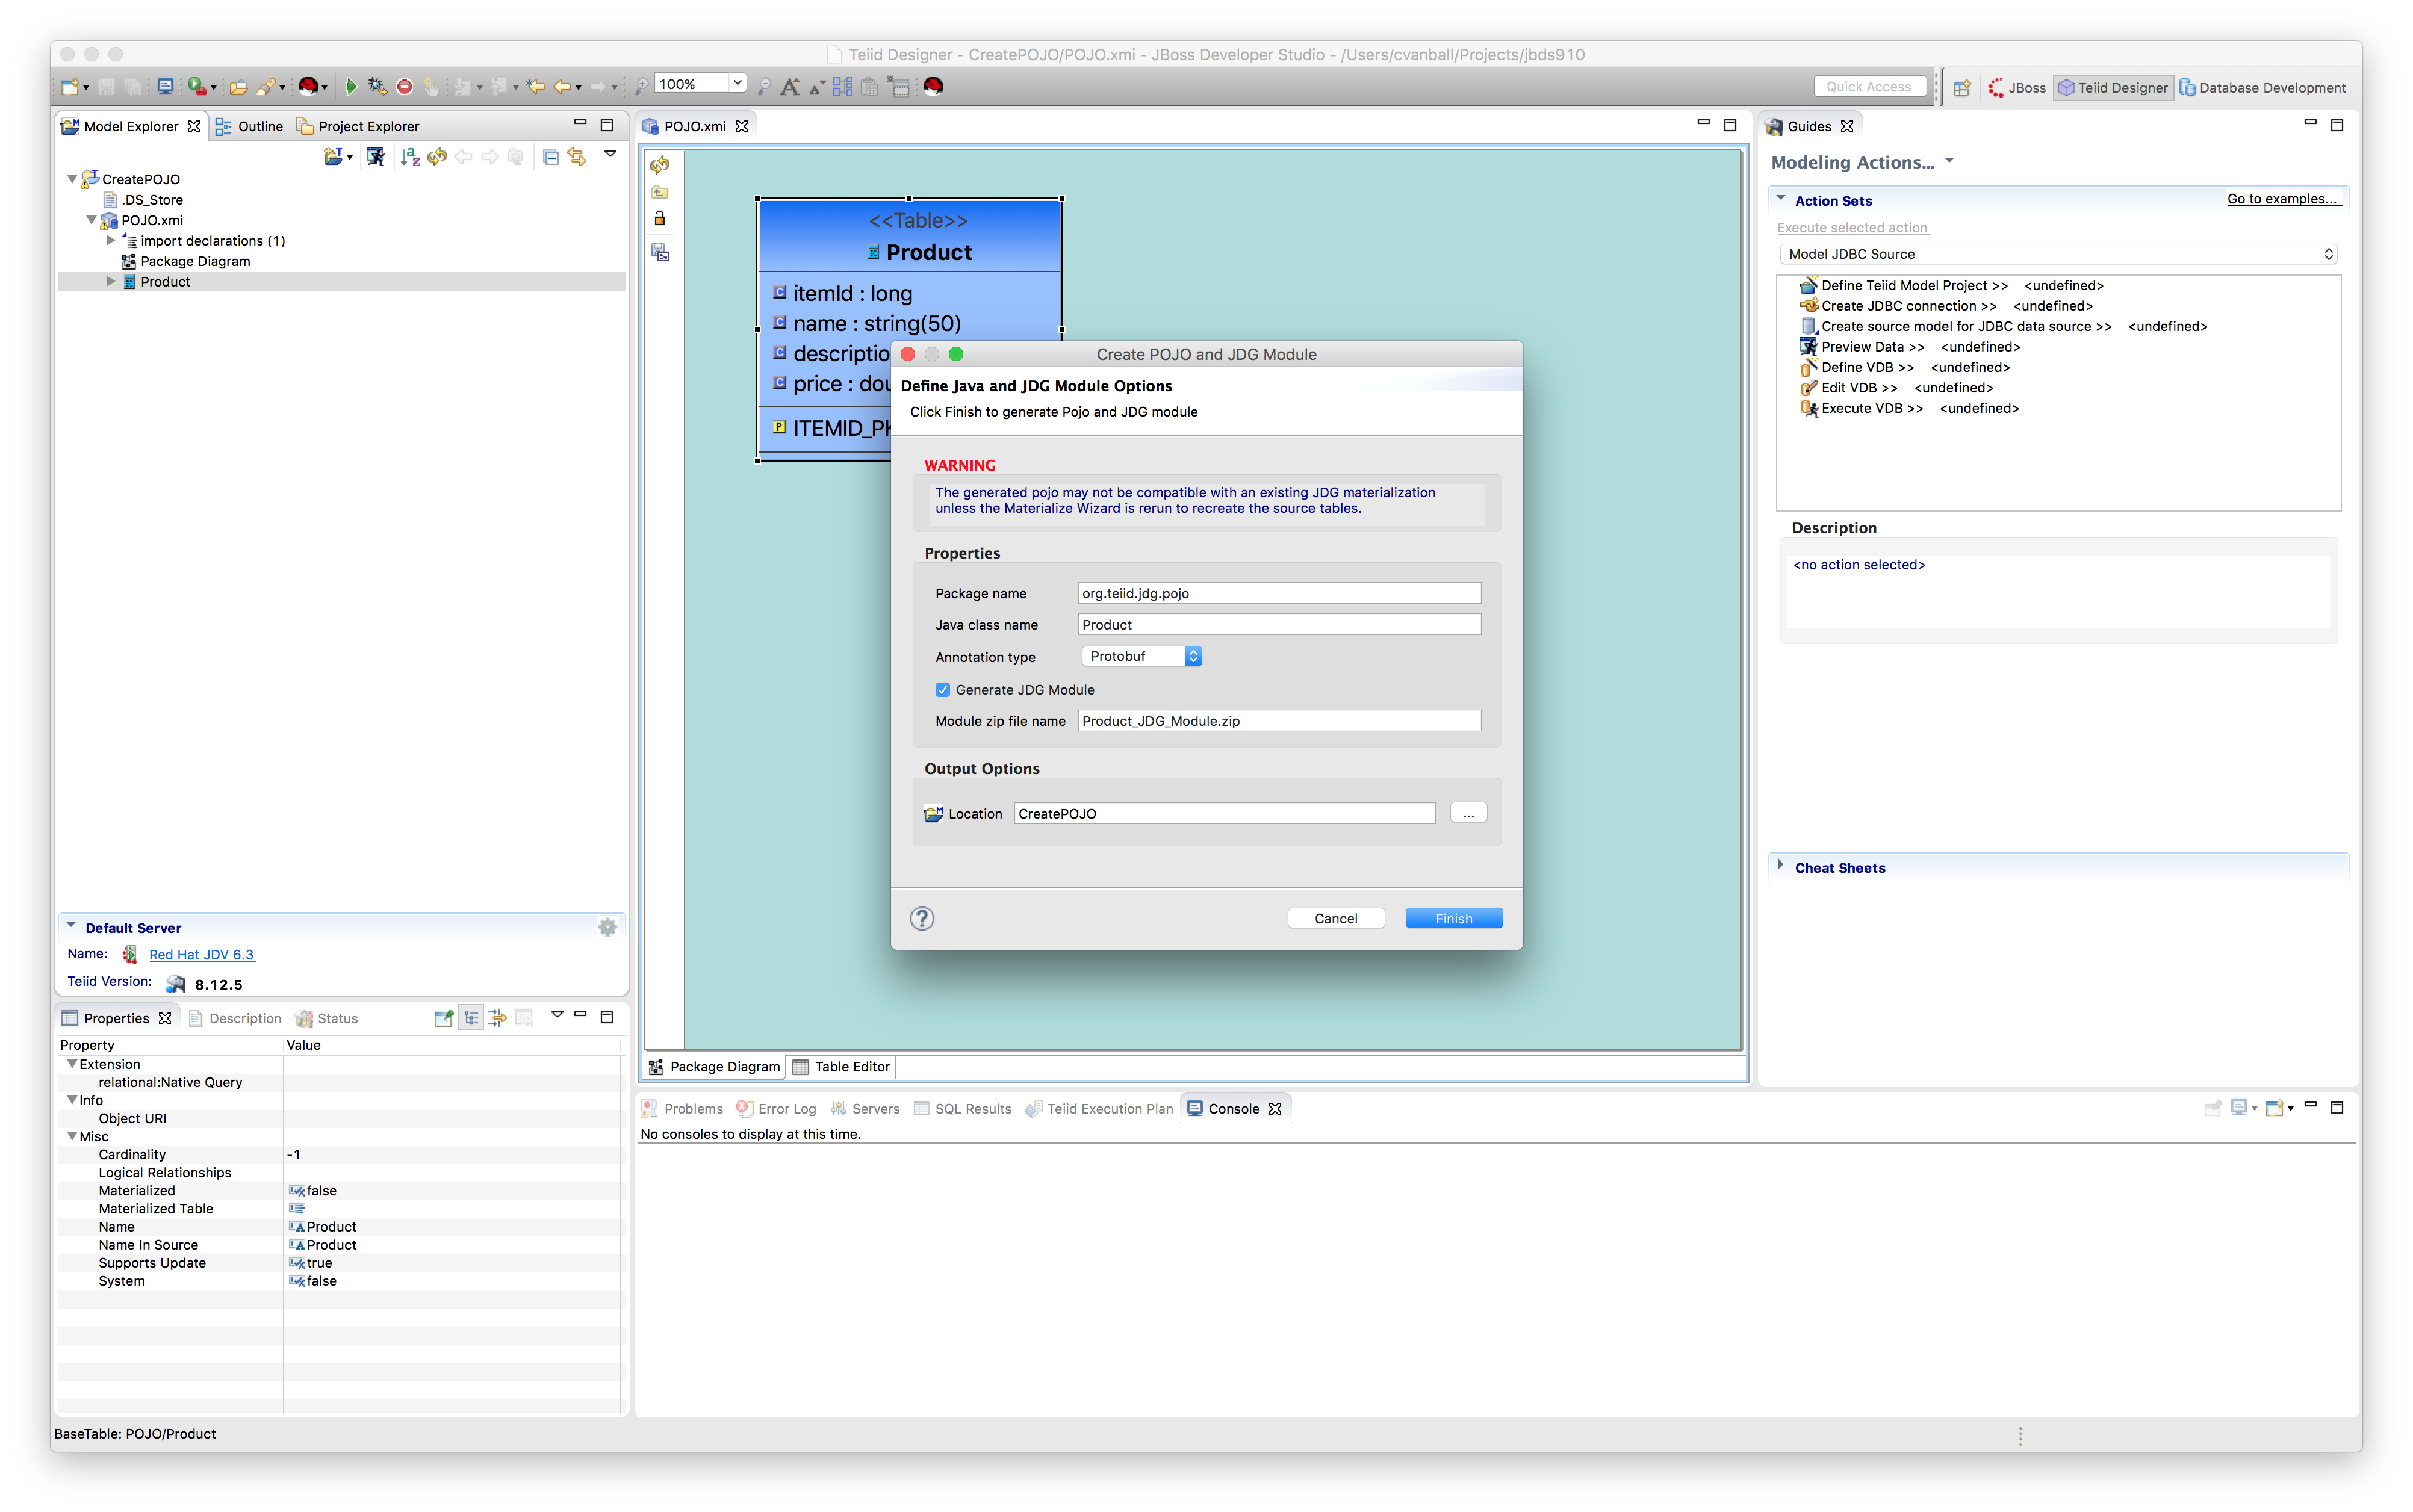
- Create POJO (cont'd).
After selecting the Create POJO menu option the dialog Create POJO and JDG module appears as shown.
Check the Generate JDG Module checkbox and click Finish and the following similar screen appears as depicted below.
- Unzip the previously created zip file in our case Product_JDG_Module.zip into the JDV server environment.
$ unzip Product_JDG_Module.zip -d $JDV_HOME
- Start your local JBDS environment.


Configure
- Start your local JDG server.
$ cd $JDG_HOME/bin
$ ./standalone.sh -Djboss.socket.binding.port-offset=100
Note: We are using port-offset 100 to run JDG on a different port otherwise JDG and JDV will be running on the same port.
- Create a cache in the JDG server environment.
$ cd $JDG_HOME/bin
$ ./cli.sh --connect=localhost:10099
[standalone@localhost:10099 cache-container=local] /subsystem=infinispan/cache-container=local/local-cache=productCache:add(start=EAGER)
- Start the local JDV server.
$ cd $JDV_HOME/bin
$ ./standalone.sh
- Install the JDG translator and JDG resource adapter into the JDV server environment.
$ cd $JDV_HOME/bin
$ ./jboss-cli.sh --connect
[standalone@localhost:9999] batch
[standalone@localhost:9999] /subsystem=teiid/translator=infinispan-cache-dsl:add(module=org.jboss.teiid.translator.infinispan.dsl)
[standalone@localhost:9999] /subsystem=resource-adapters/resource-adapter=productRA:add(module=org.jboss.teiid.resource-adapter.infinispan.dsl)
[standalone@localhost:9999] /subsystem=resource-adapters/resource-adapter=productRA/connection-definitions=productDS:add(jndi-name="java:/productDS", class-name="org.teiid.resource.adapter.infinispan.dsl.InfinispanManagedConnectionFactory", pool-name="productDS",enabled="true", use-java-context="true")
[standalone@localhost:9999] /subsystem=resource-adapters/resource-adapter=productRA/connection-definitions=productDS/config-properties=CacheTypeMap:add(value="productCache:org.teiid.jdg.pojo.Product;itemId")
[standalone@localhost:9999] /subsystem=resource-adapters/resource-adapter=productRA/connection-definitions=productDS/config-properties=Module:add(value="org.teiid.jdg.pojo")
[standalone@localhost:9999] /subsystem=resource-adapters/resource-adapter=productRA/connection-definitions=productDS/config-properties=RemoteServerList:add(value="127.0.0.1:11322")
[standalone@localhost:9999] /subsystem=resource-adapters/resource-adapter=productRA:activate
run-batch
:reload
This will install the JDG cache translator and a JDG resource adapter, which is used by Teiid Designer.
Steps to unlock your JDG data
-
- Start your local JDG 6.6.1 environment.
$ cd $JDG_HOME/bin
$ ./standalone.sh -Djboss.socket.binding.port-offset=100
Note: We are using port-offset 100 to run JDG on a different port otherwise JDG and JDV will be running on the same port.
- Start your local JDV 6.3 environment.
$ cd $JDV_HOME/bin
$ ./standalone.sh
- Start your local JBDS environment.
Start JBDS 9.1.0 and open the Teiid Designer Perspective as shown below.
- Create a new Teiid Model project called JDGDataSource.
- Create a new source model using Import.
File->Import and select the Teiid Connection >> Source Model option and click Next.
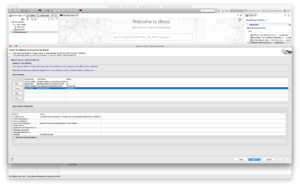
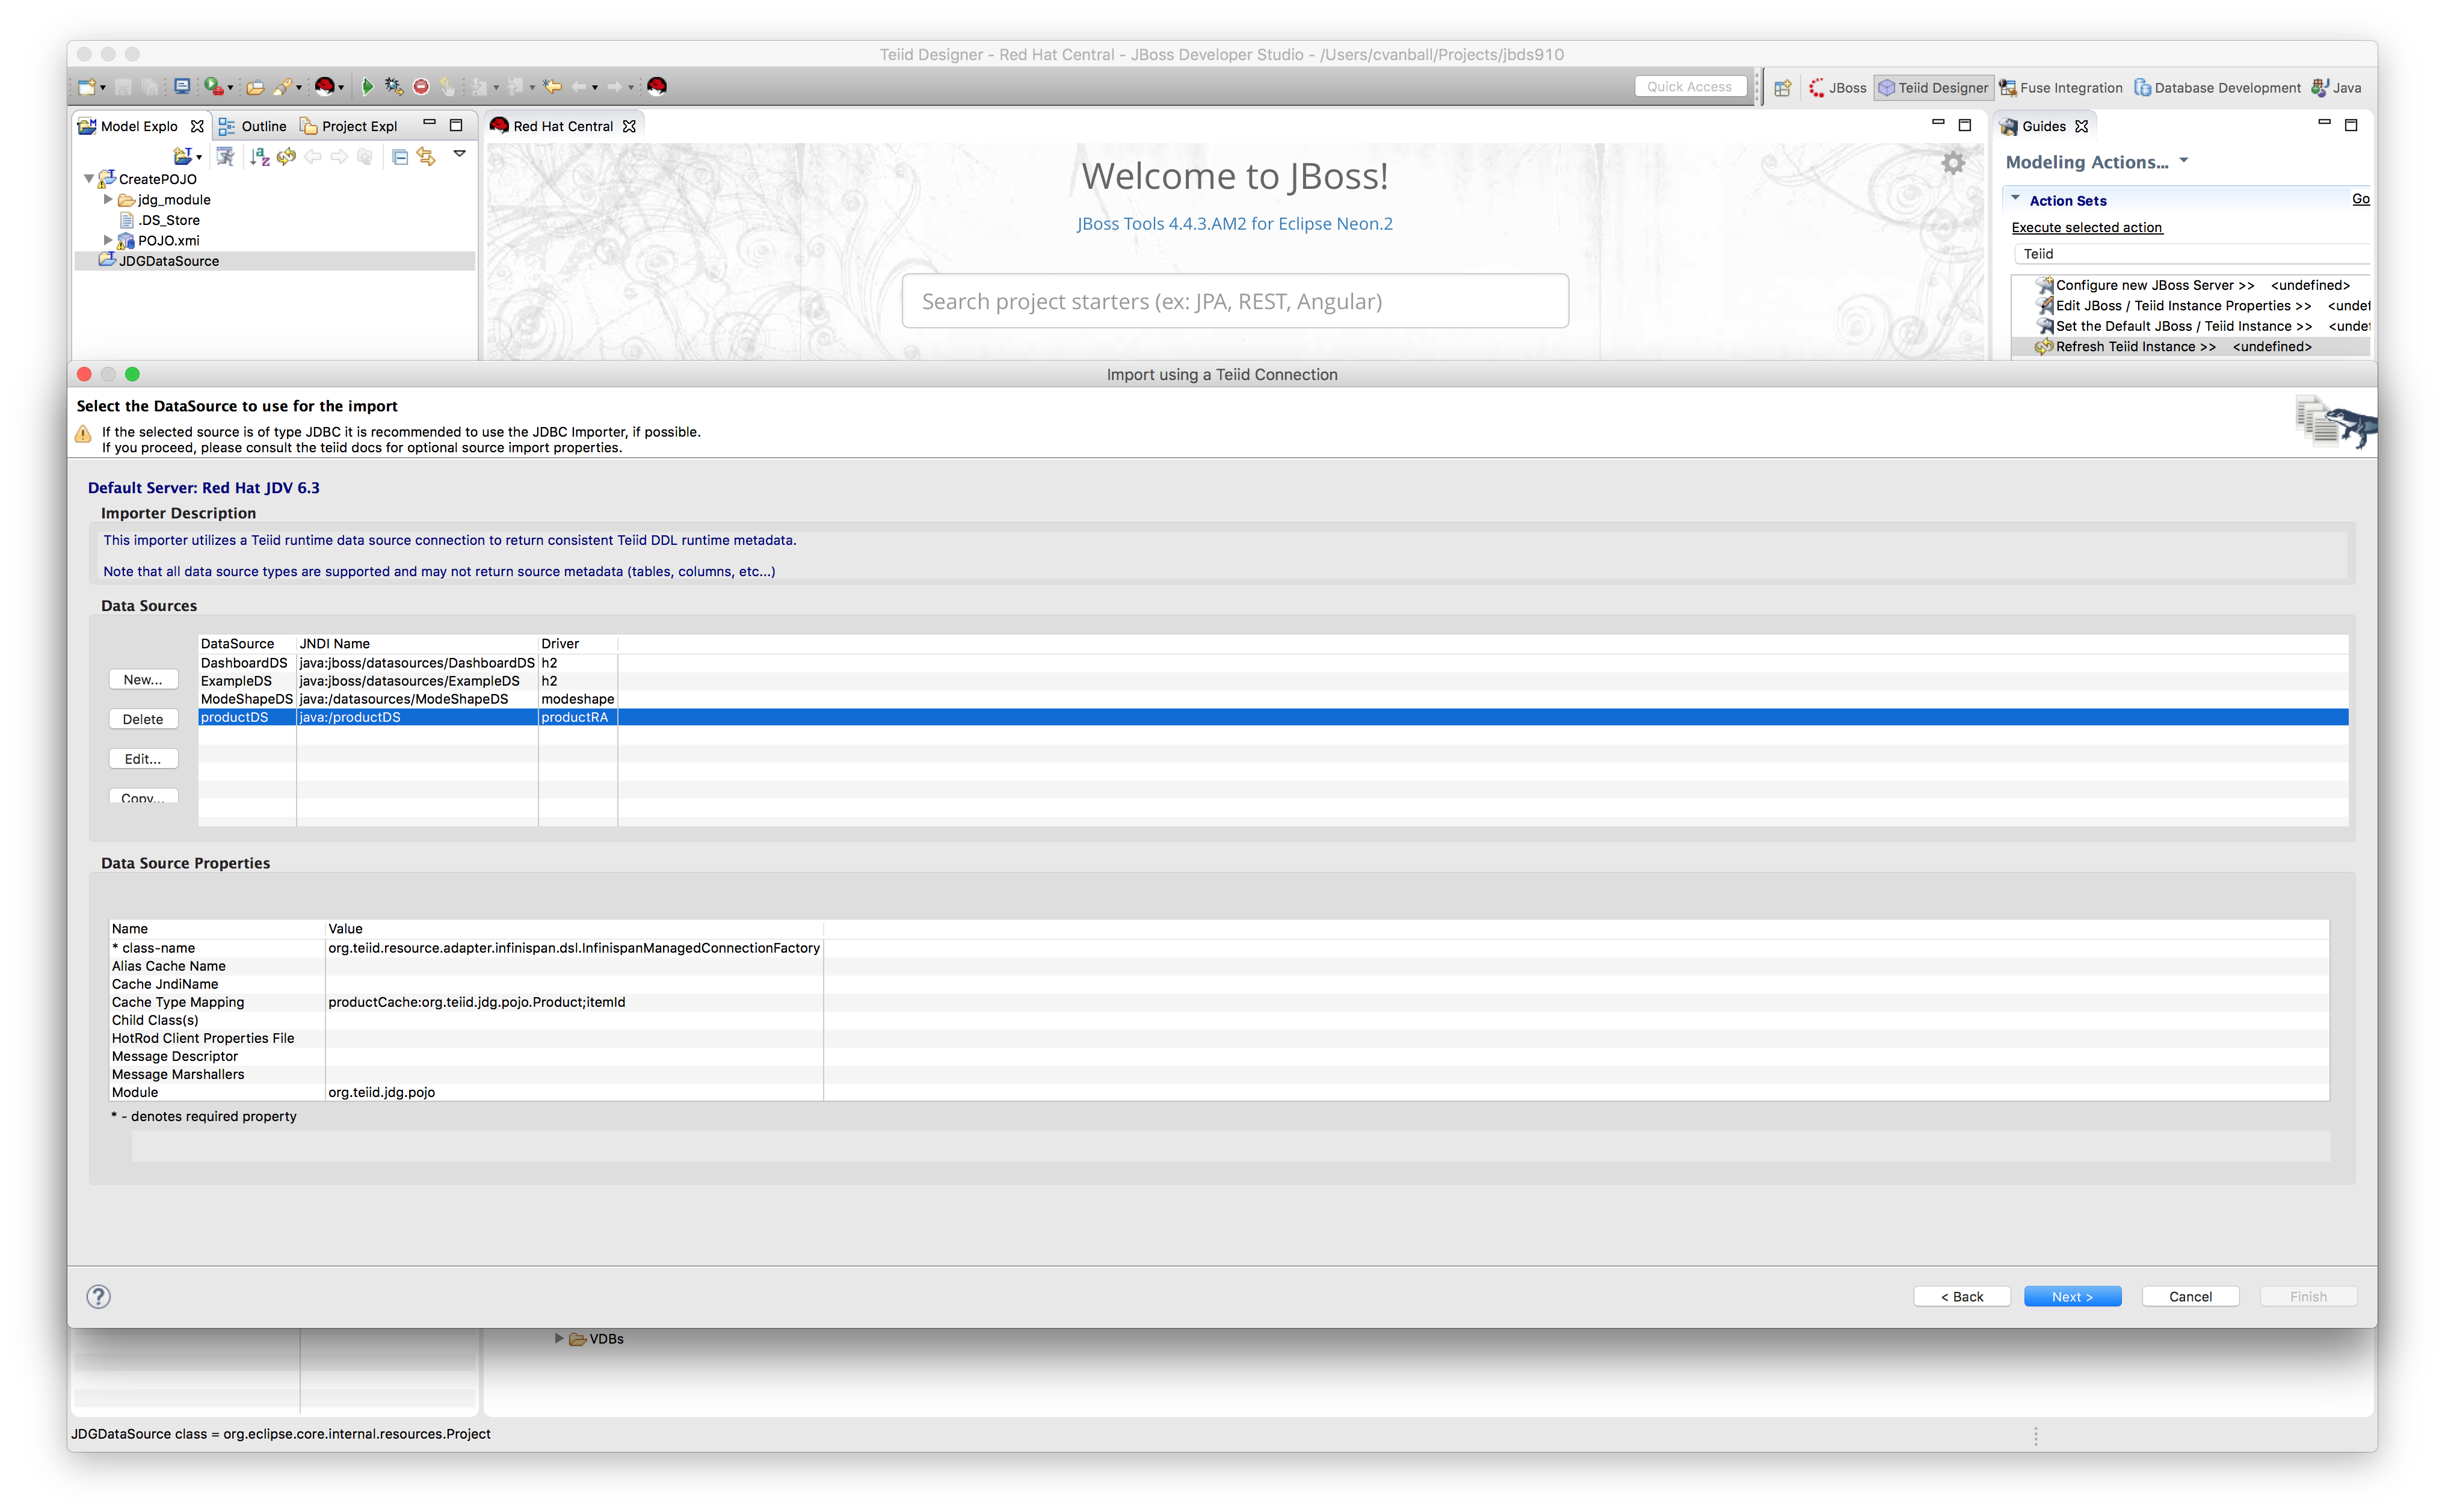
- Select the JDG datasource.
In the configuration phase, we created a resource adapter in the JDV server environment, which connects to a JDG server environment.
Select productDS as depicted below and click Next.
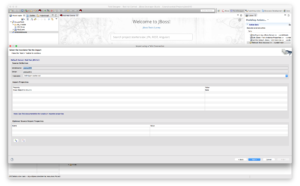
- Update translator.
By default the translator is set to JDBC-ansi, change the translator to infinispan-DSL as depicted below and click Next.
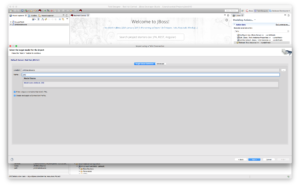
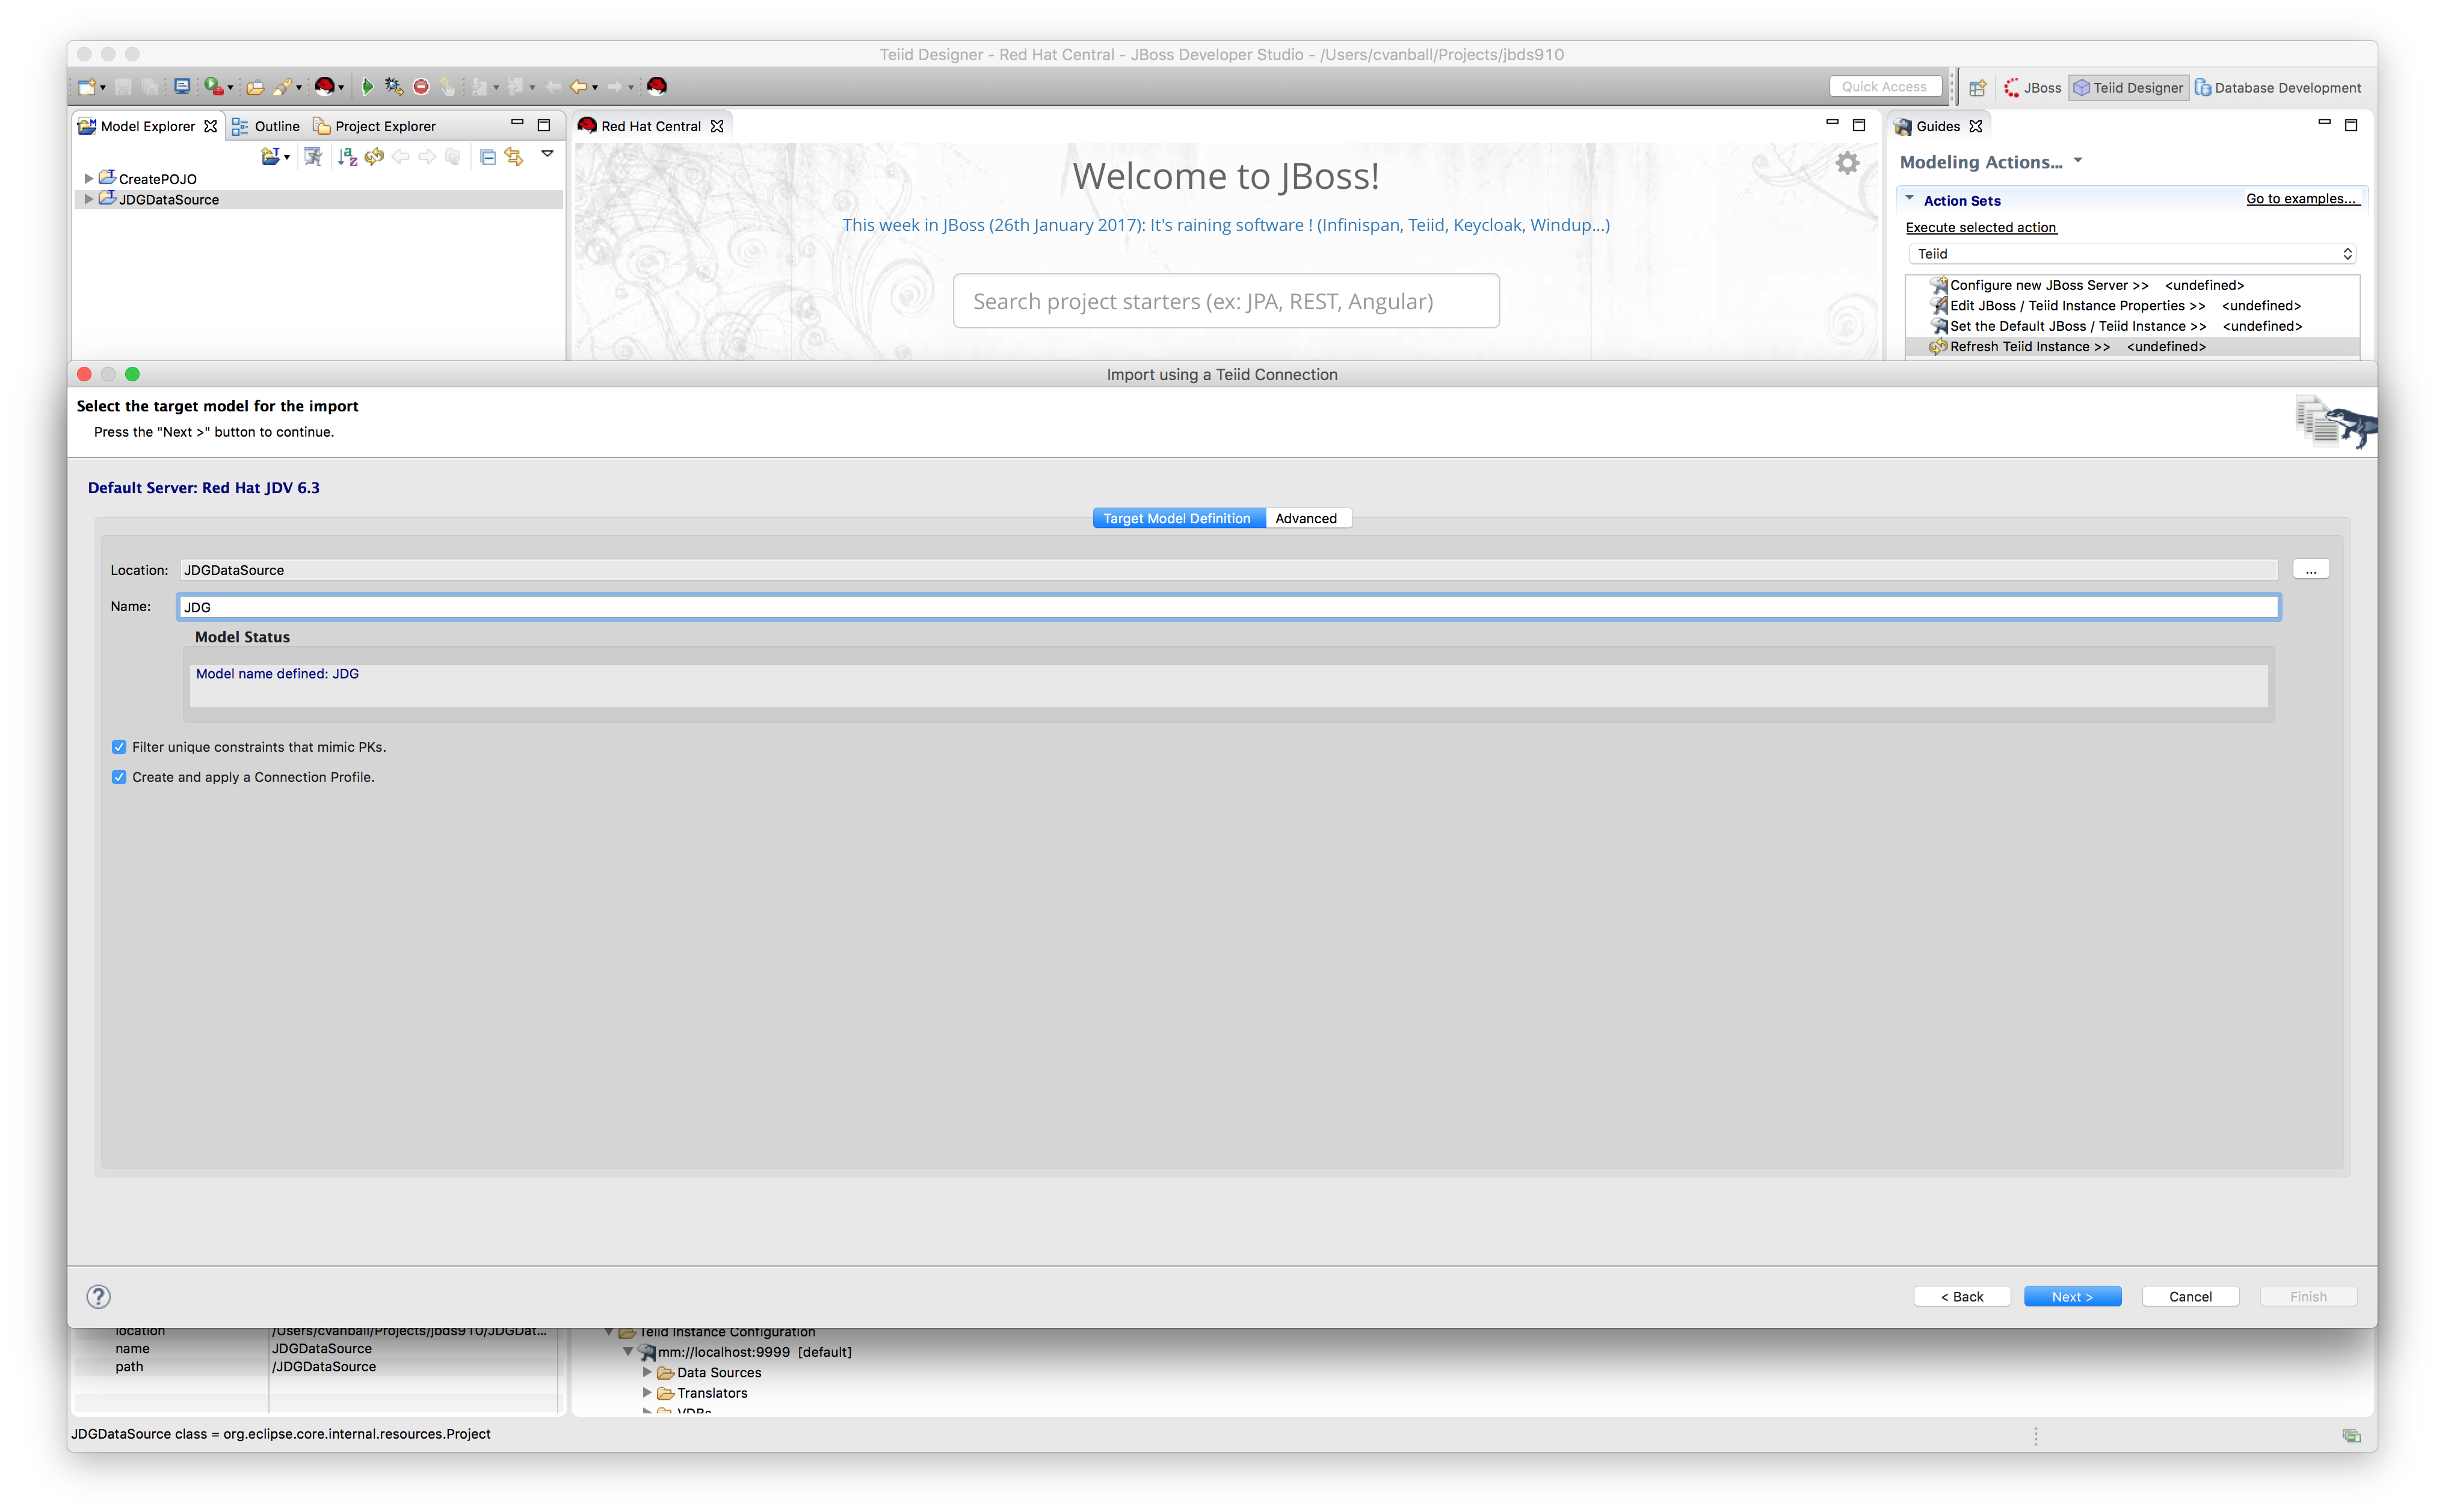
- Set name of target model definition.
In the following screenshot, we name the target model JDG and click Next.
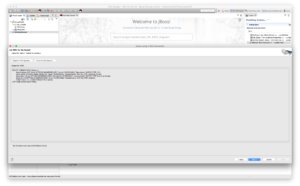
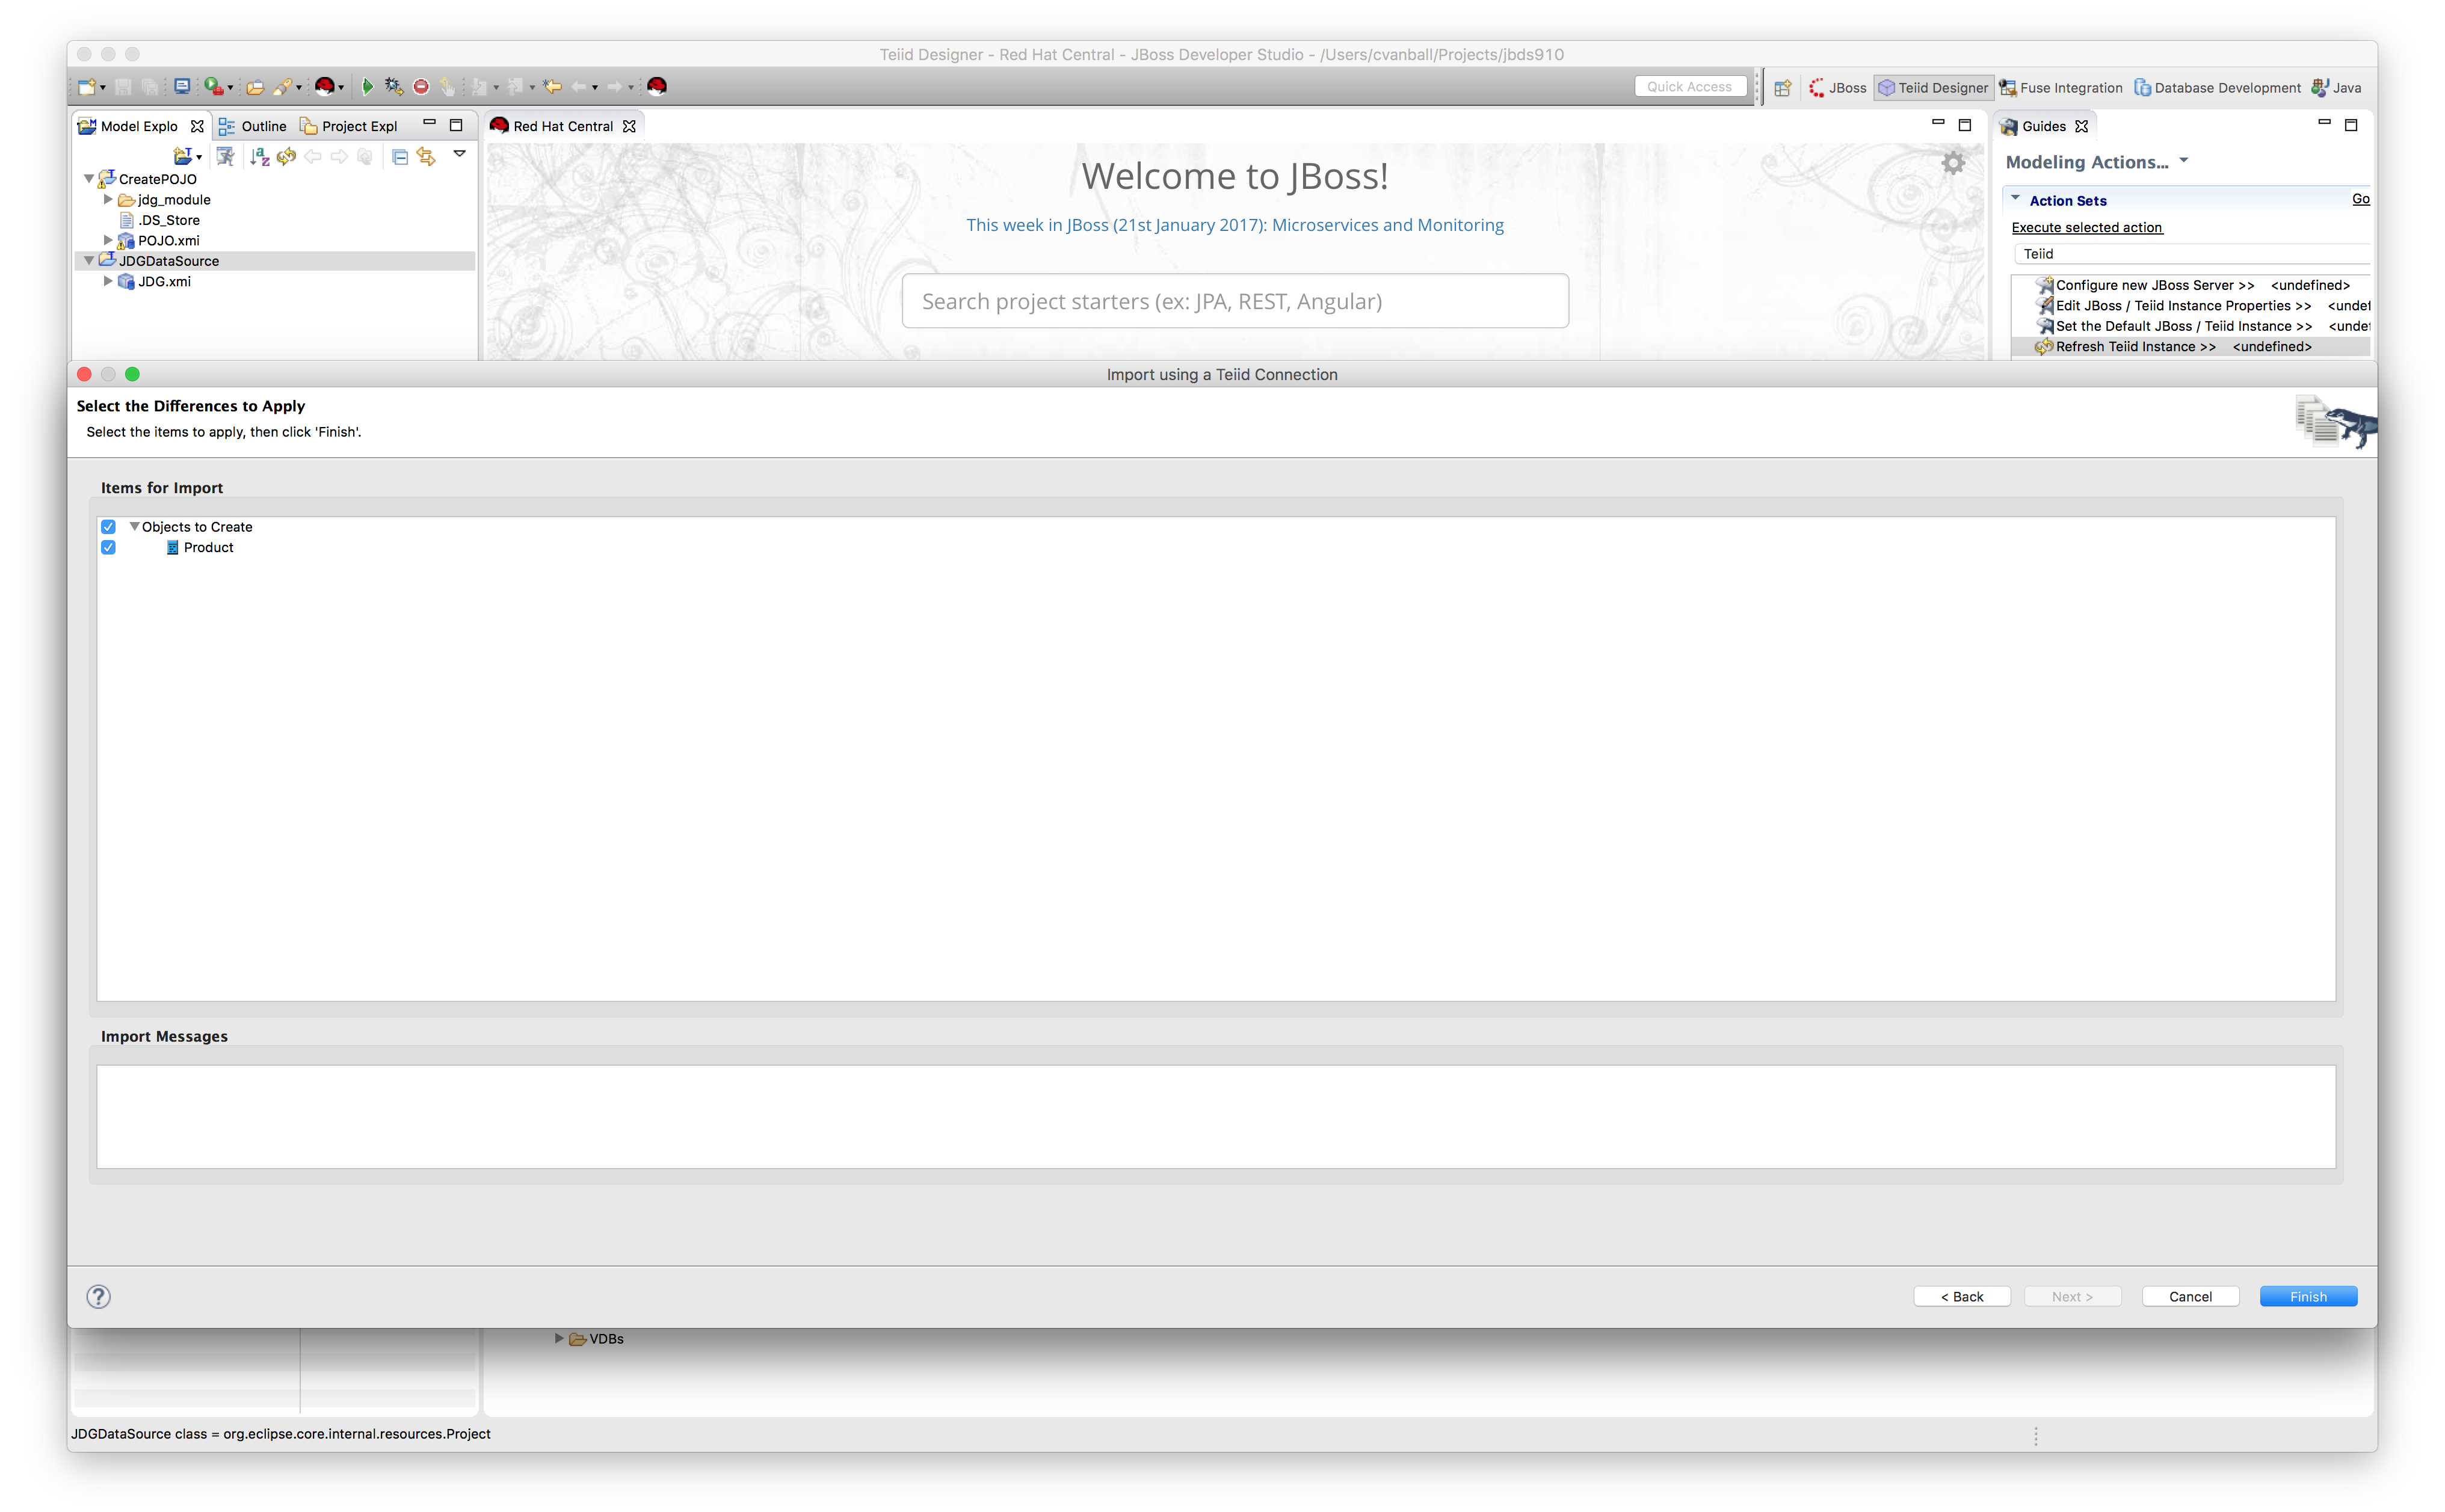
- Finishing touch.
Leave all the default settings as is and press Next, this will show the source model code generated by the wizard as depicted below.
Click Next.
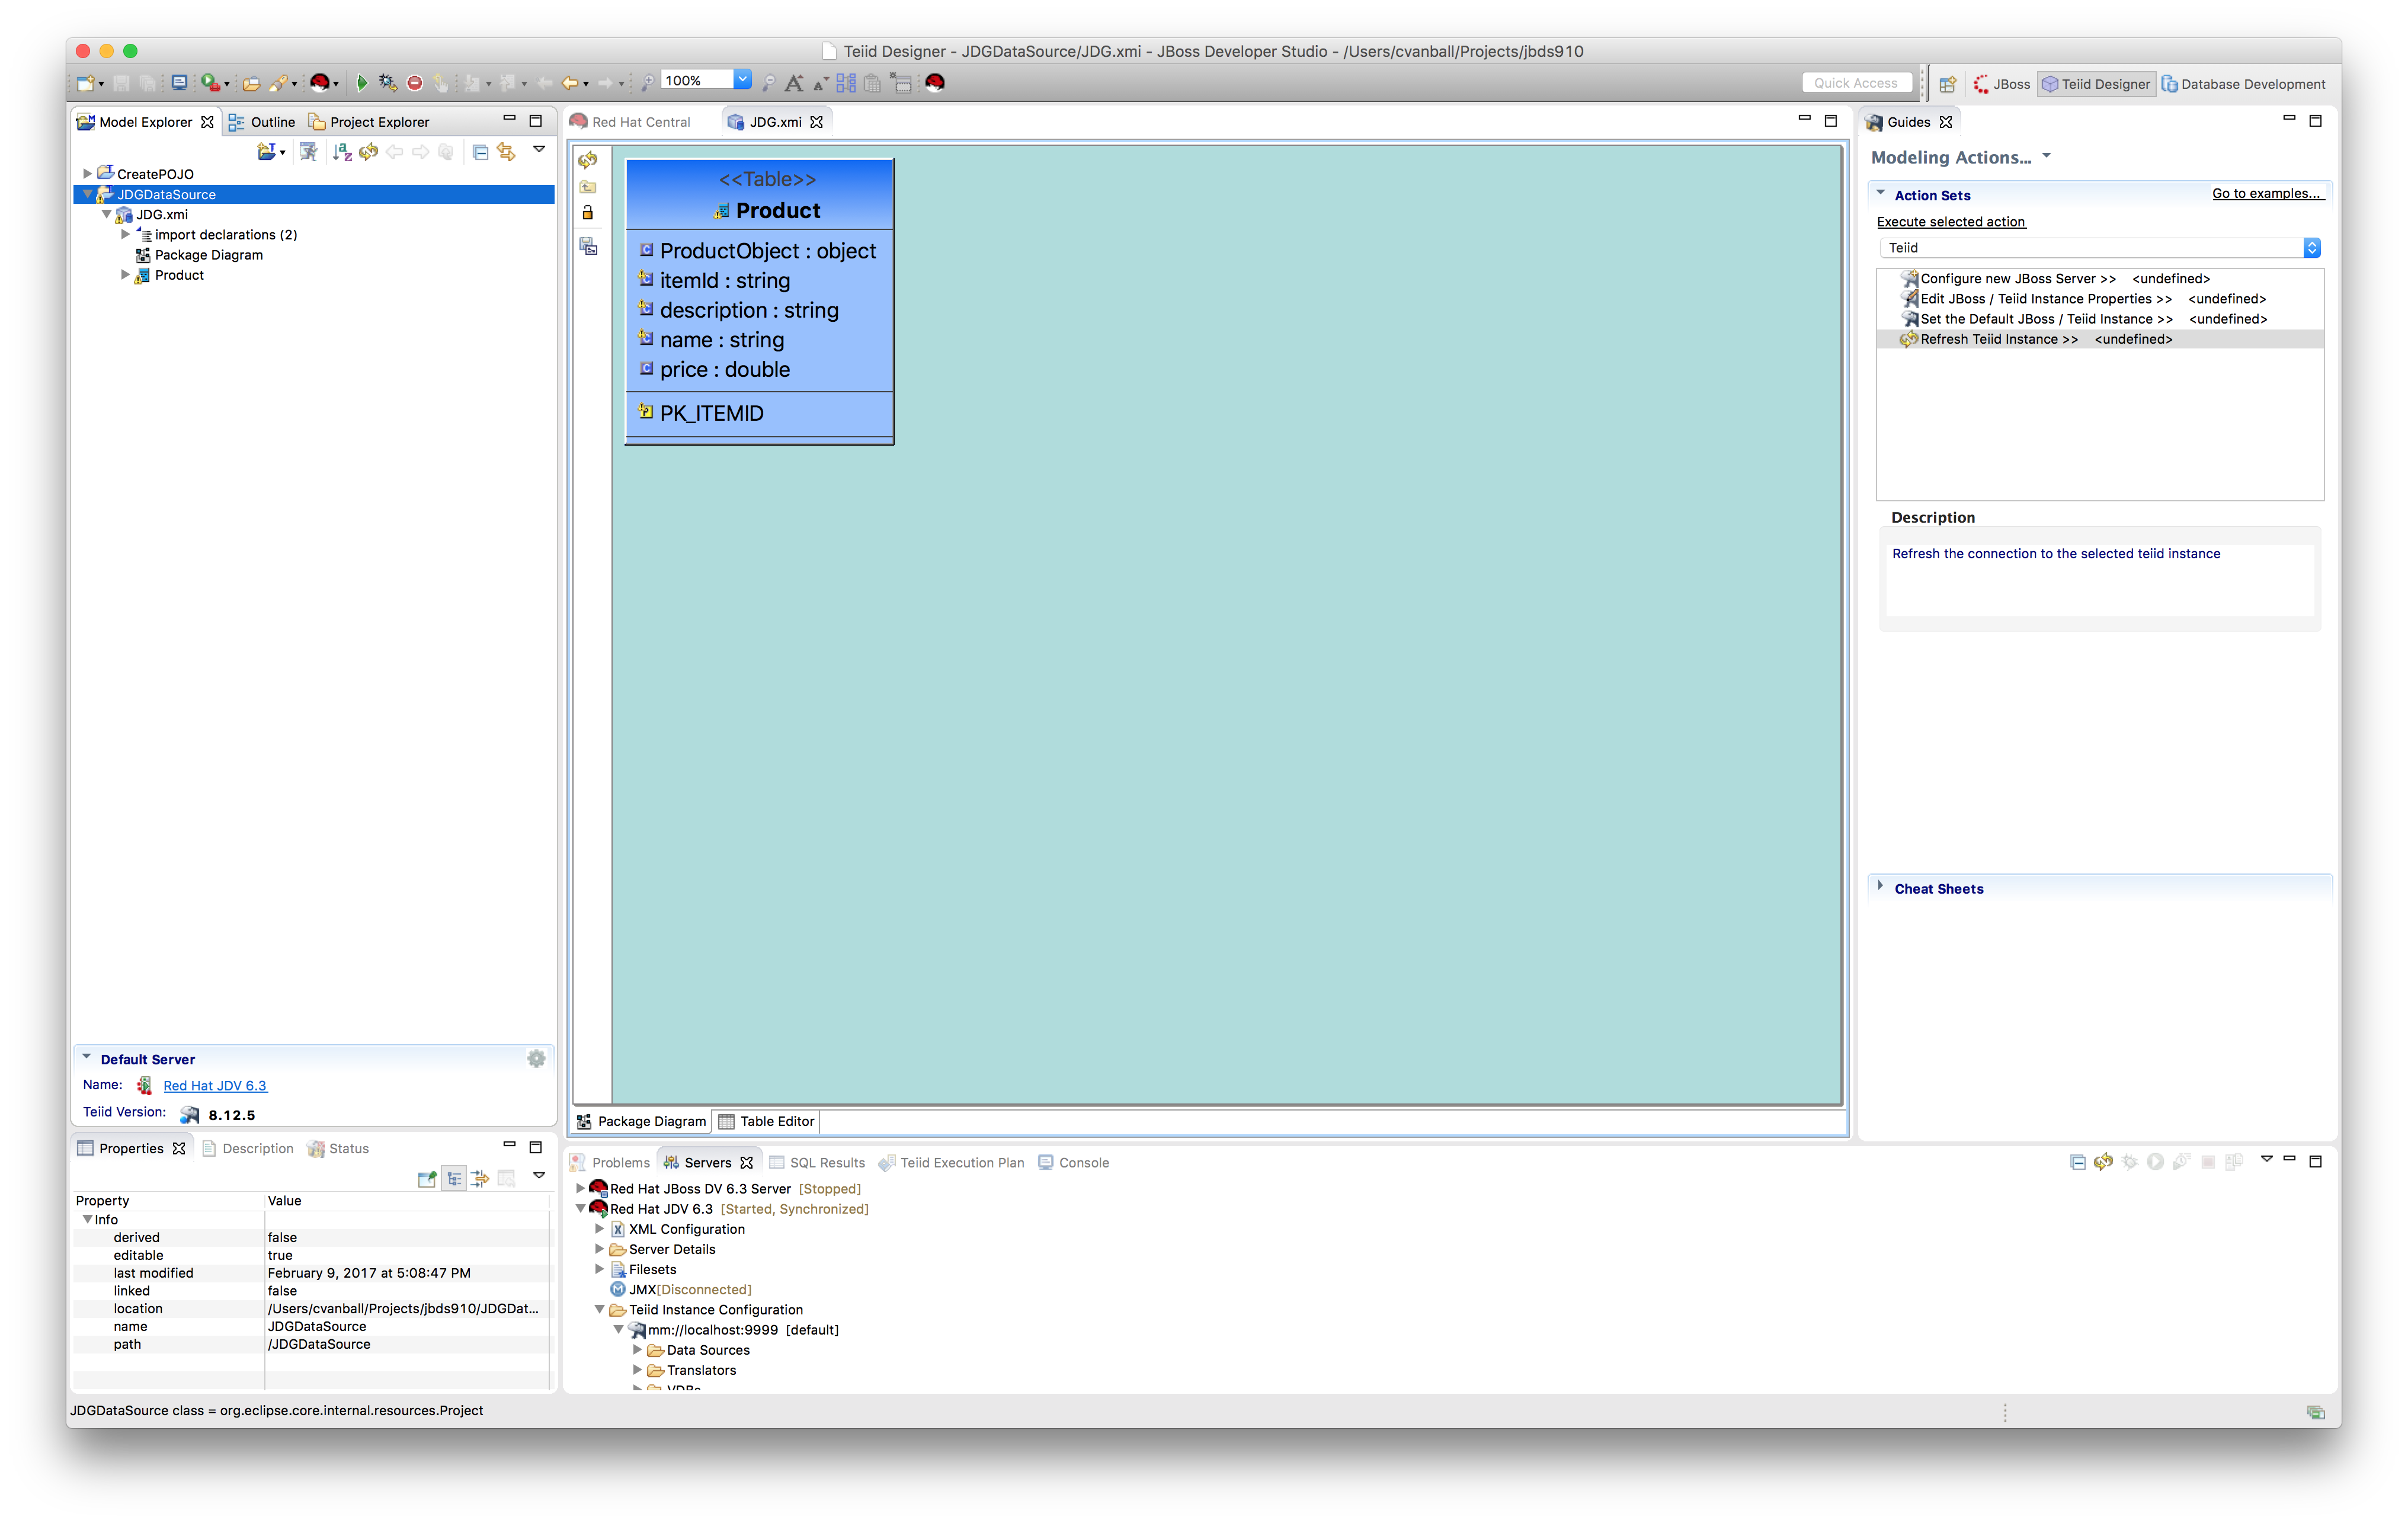
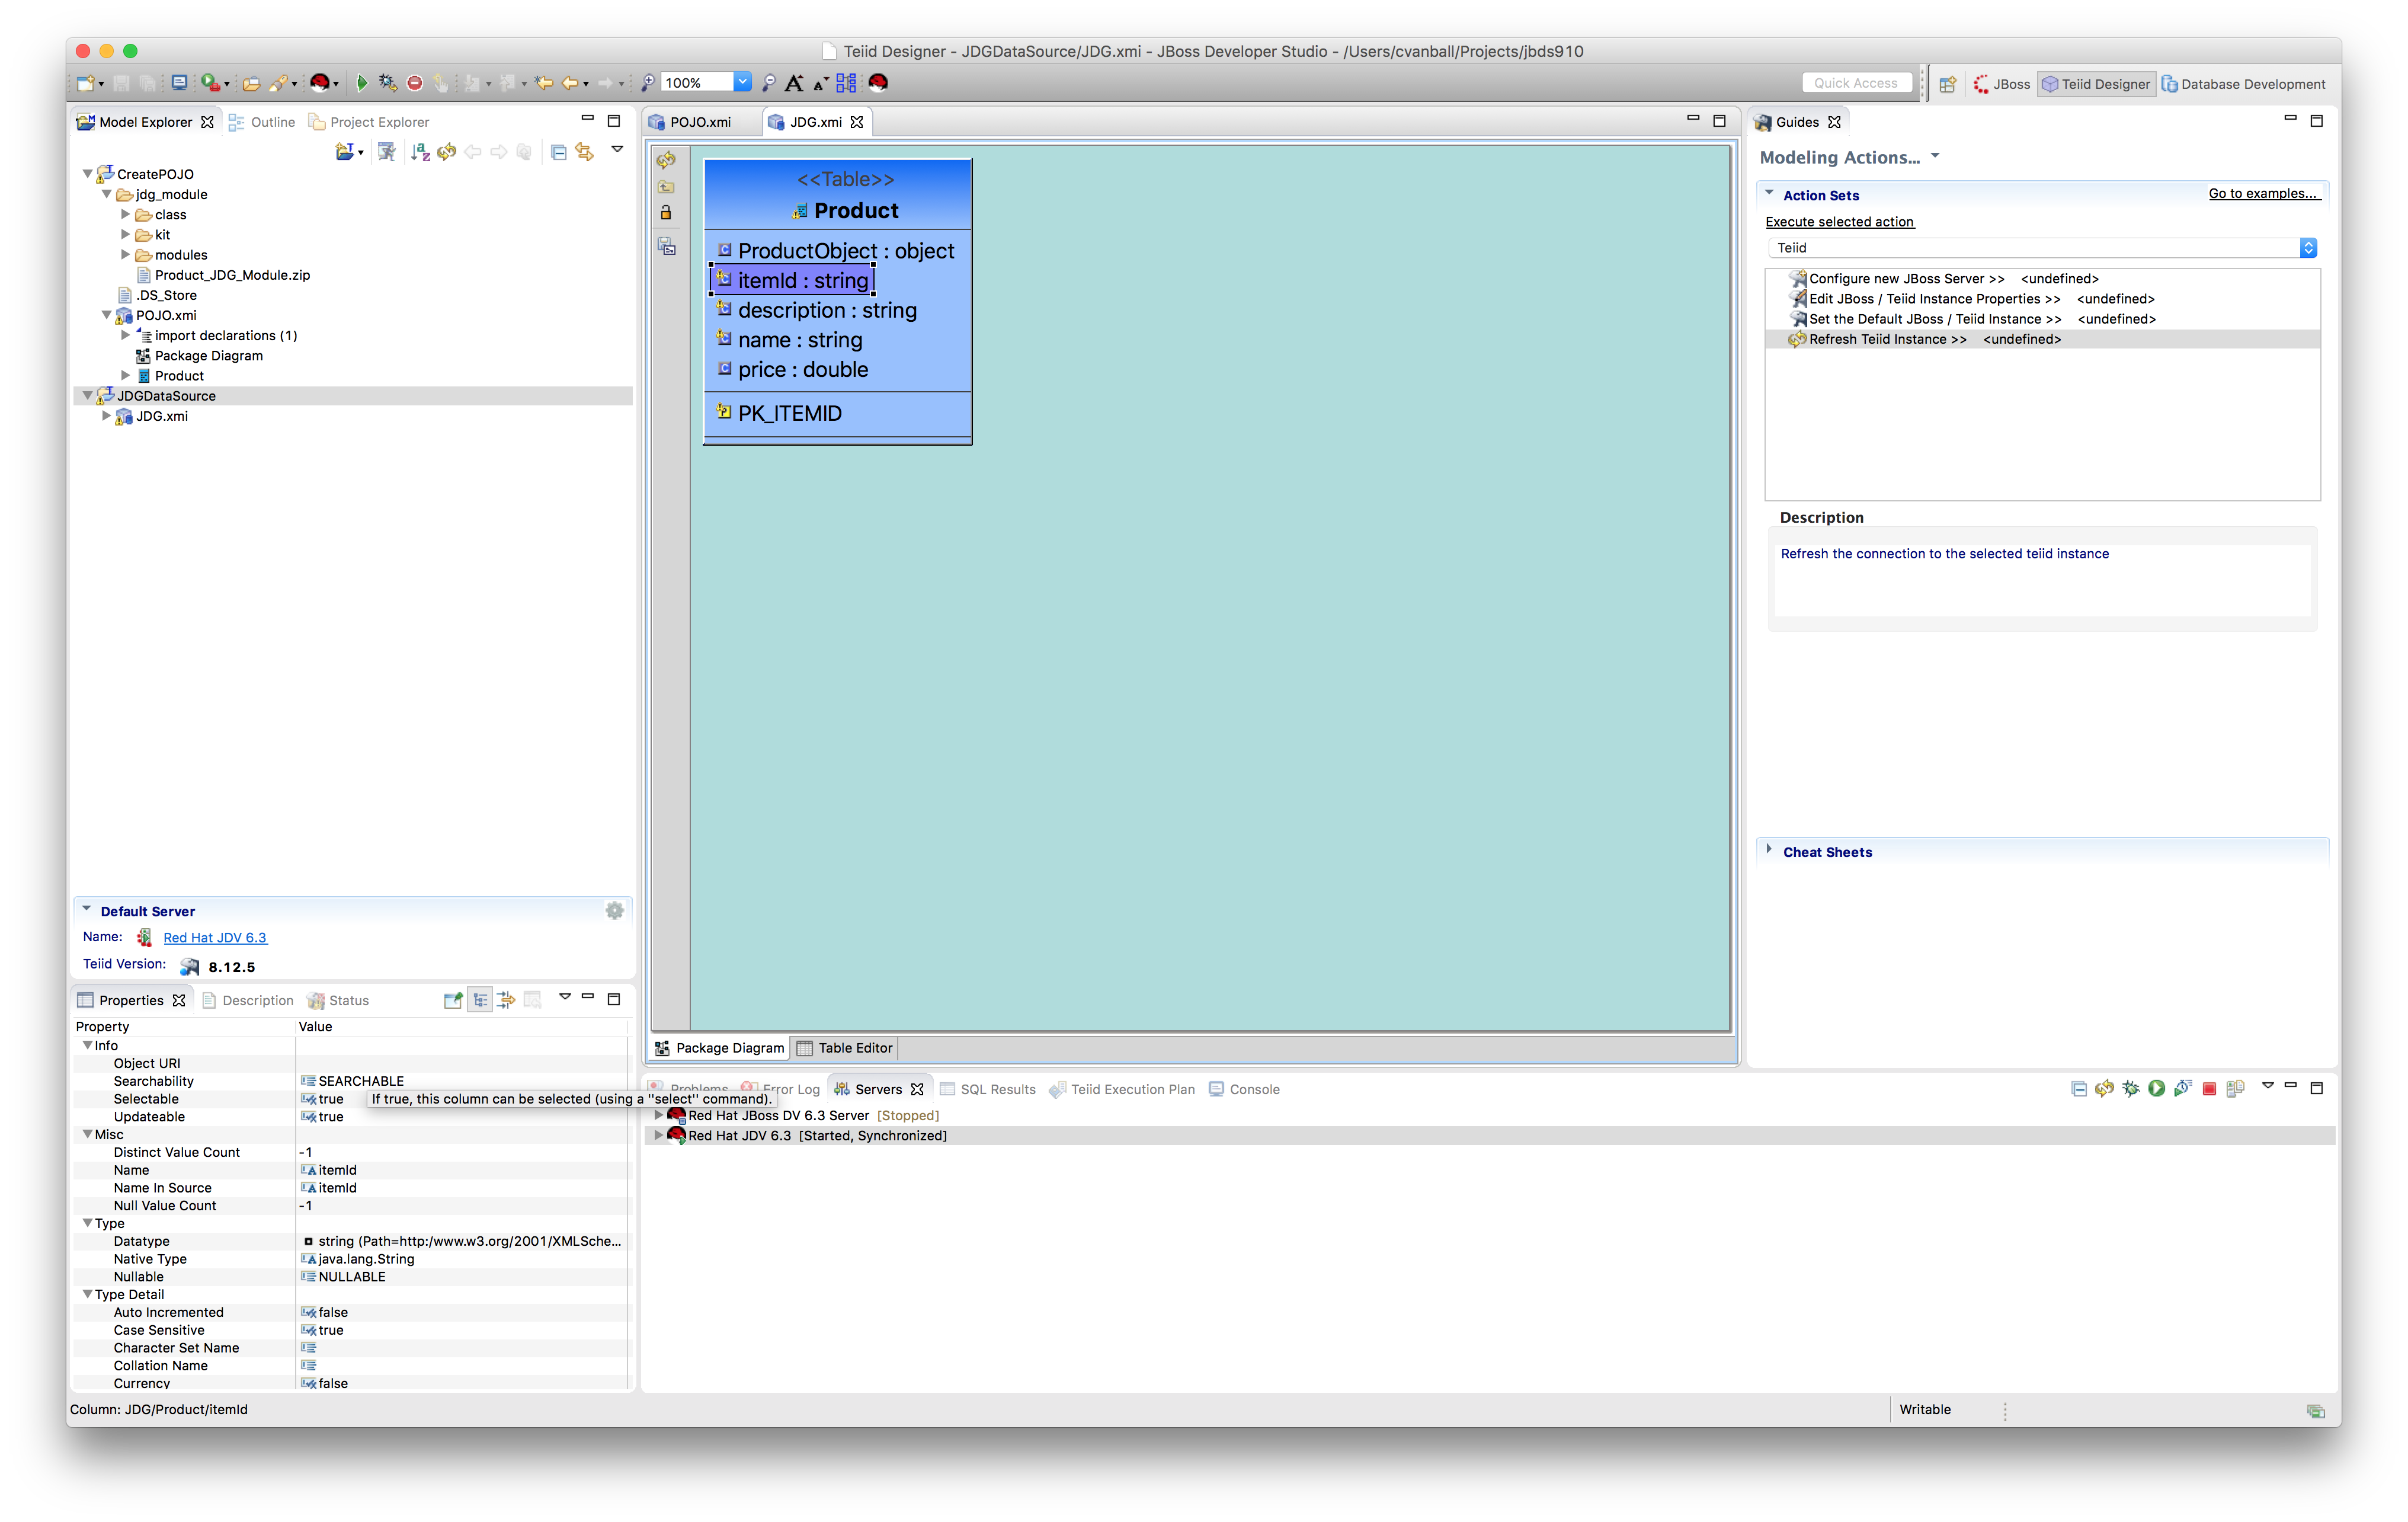
Click Finish. The model is now created and can be used in other view models.
Note: Check the property Selectable of columns itemId, name, description, and price and make sure this is set to true.
- Create VDB.
Create a VDB in the JDGDataSource project using File -> New -> Teiid VDB and name the VDB. In our case, we are creating a VDB called JDGDS and adding the model JDG to this VDB as depicted below.
Right-click on the just created VDB in the Model Explorer and select Modeling -> Deploy. - Deploy VDB and test.
Java Database Connectivity (JDBC) is an application to database connectivity tool. This Application Program Interface (API) enables communication between applications written in Java and data stored in databases providing methods for data querying and updating. JDBC is very similar to Open Database Connectivity (ODBC).
- Start your local JDG 6.6.1 environment.


JDV provides an API that builds on JDBC, allowing client applications to issue SQL queries against deployed virtual databases (VDBs).
Deploy the VDB by using Modeling->Execute VDB, this will open up a SQL scrapbook as depicted below.
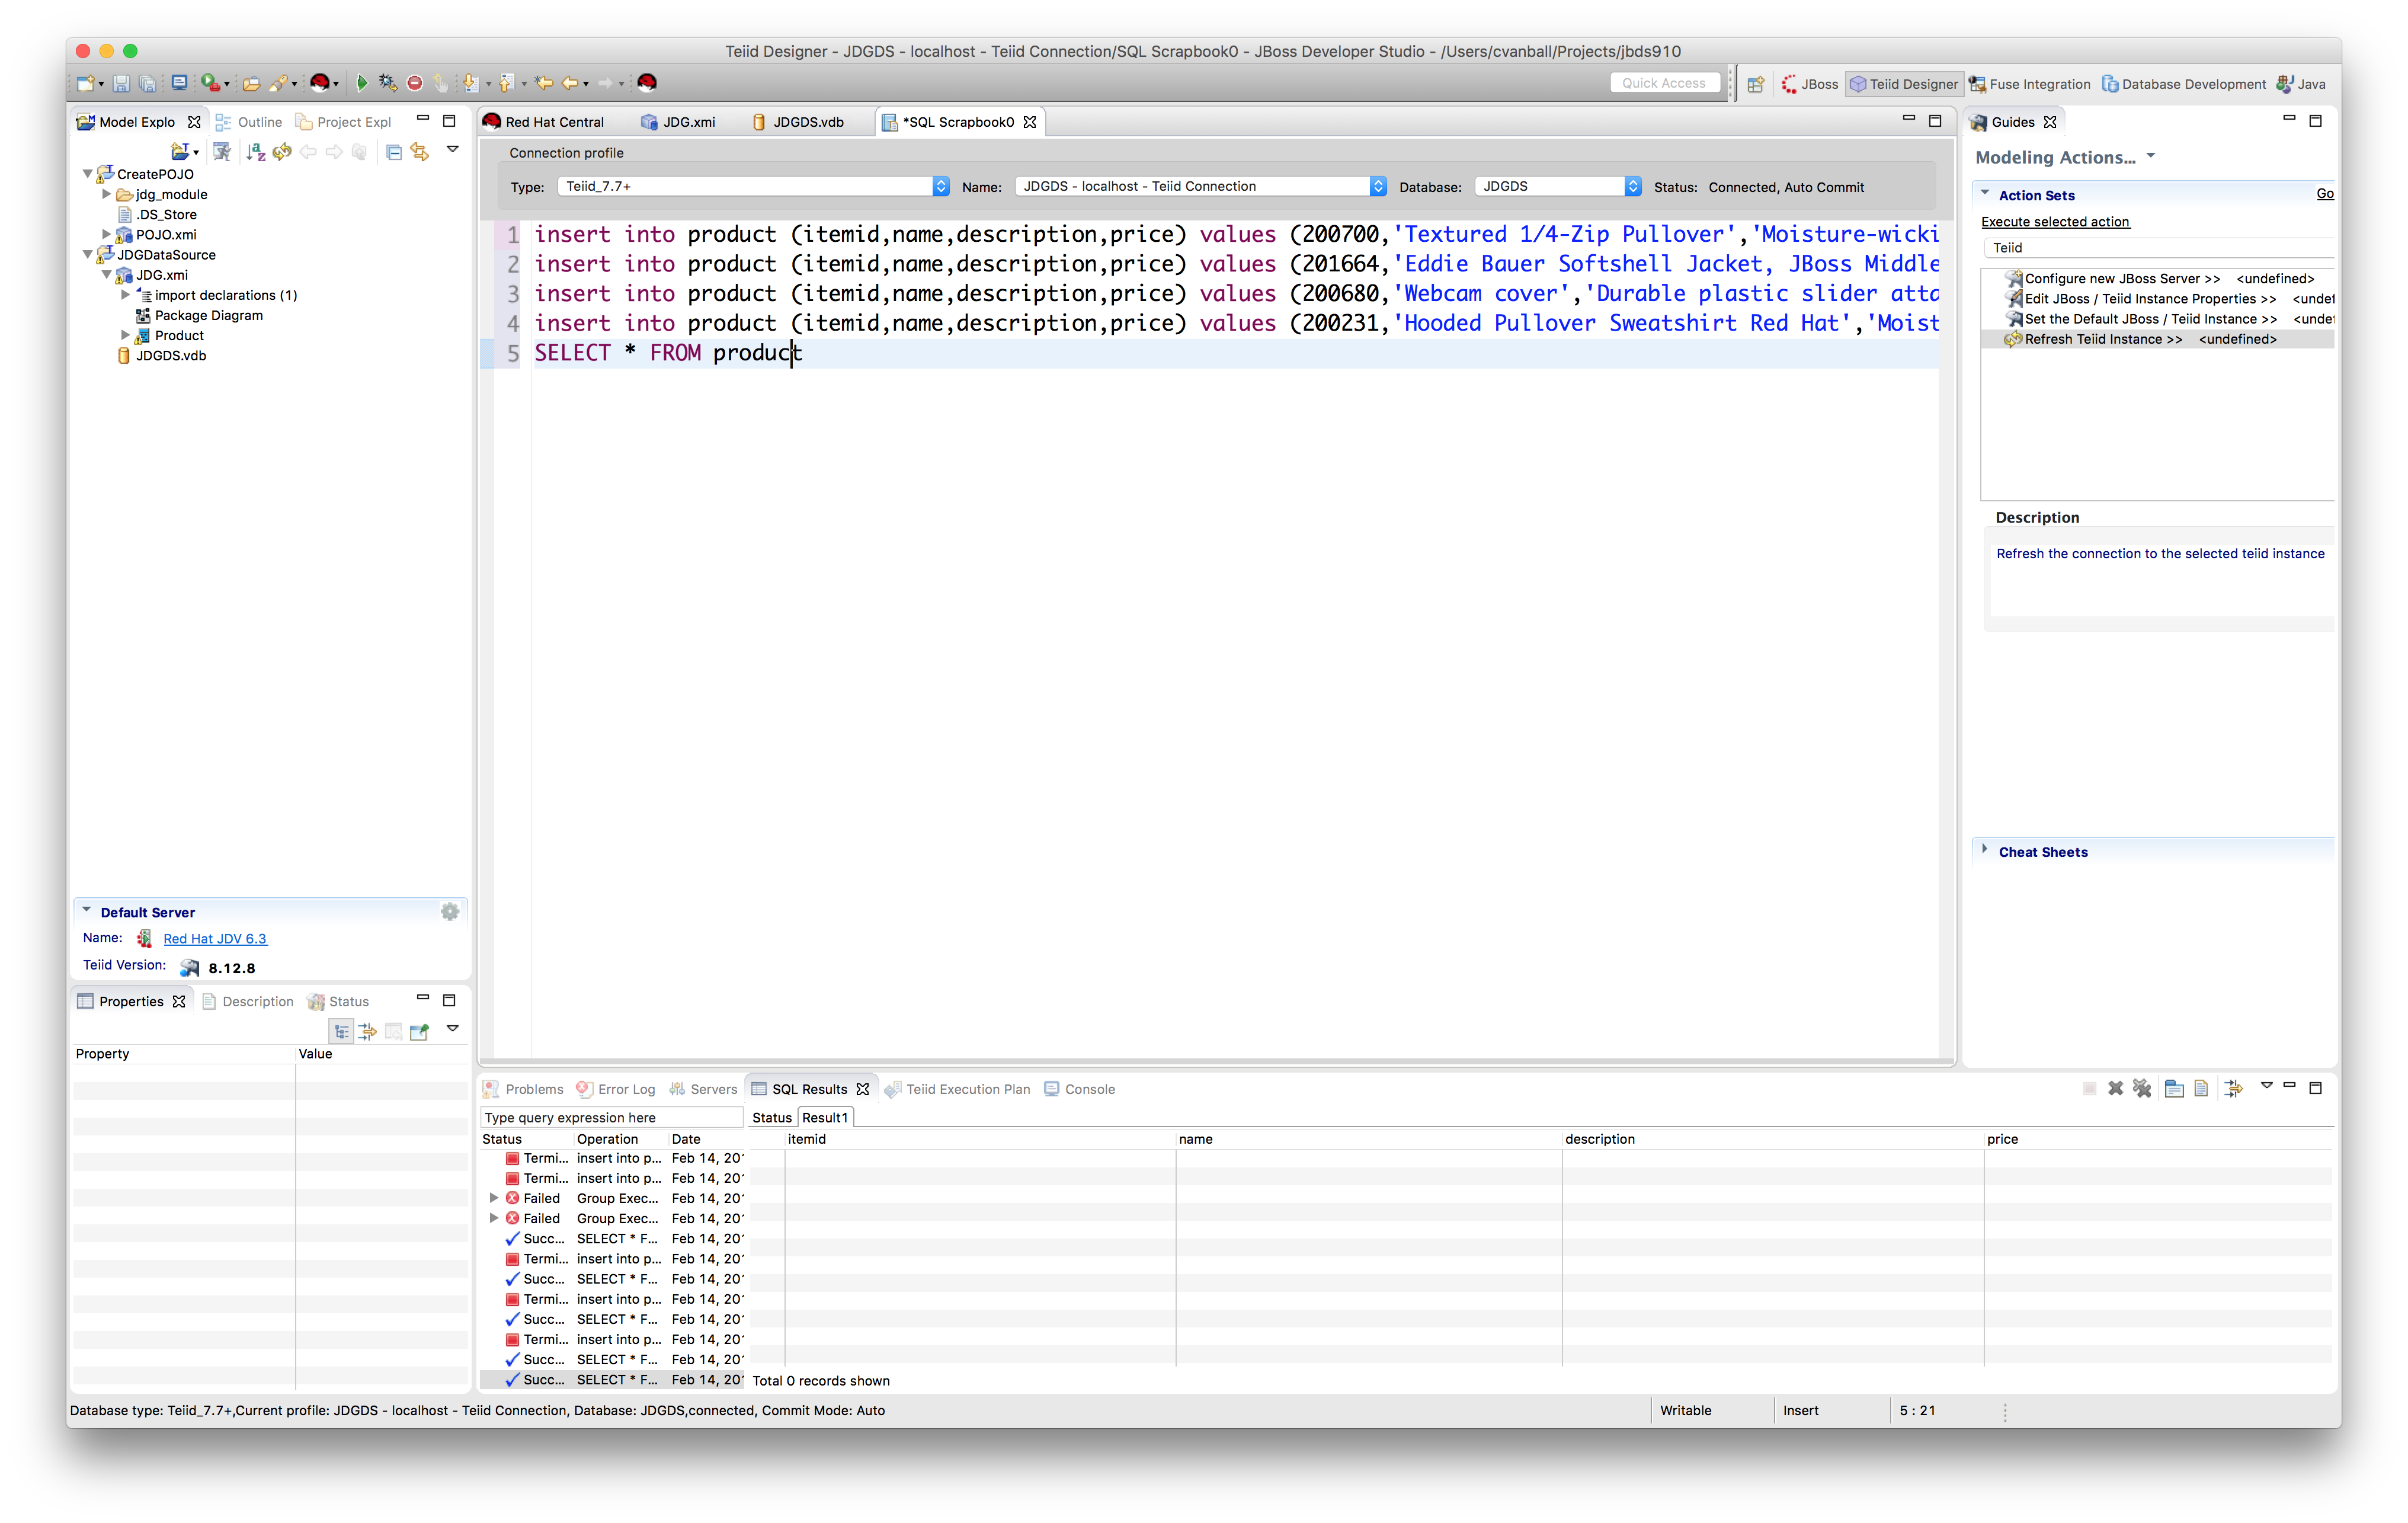
Add some data into the cache by using the following insert statements:
insert into product (itemid,name,description,price) values (200700,'Textured 1/4-Zip Pullover','Moisture-wicking, textured, 6.2 oz., 100% polyester. ',27.2);
insert into product (itemid,name,description,price) values (201664,'Eddie Bauer Softshell Jacket, JBoss Middleware','Water-resistant, breathable three-layer fabric combines 96% polyester/4% spandex and membrane inner layer.',68.84);
insert into product (itemid,name,description,price) values (200680,'Webcam cover','Durable plastic slider attaches to computers, laptops, smart TVs, game consoles and third party webcams with double-sided tape.',3.45);
insert into product (itemid,name,description,price) values (200231,'Hooded Pullover Sweatshirt Red Hat','Moisture-wicking 100% polyester sports fleece with piping and tonal accents. ',41.8);
Retrieve data from JDG using select * from the product.

What about automating configuration?
A question you might ask: Can we automate the above configuration steps?
The answer is yes. we can, with Ansible, by Red Hat.

As you can imagine, I like drinking our own champagne (kool-aid).
Ansible is a radically simple IT automation engine that automates cloud provisioning, configuration management, application deployment, intra-service orchestration, and many other IT needs. It uses no agents and no additional custom security infrastructure, so it’s easy to deploy – and most importantly, it uses a very simple language (YAML, in the form of Ansible Playbooks) that allow you to describe your automation jobs in a way that approaches plain English.
For your convenience, the above steps are automated in an ansible playbook called jdg on GitHub and to run you only need to run one command and you should see a similar output as shown below:
$ cd unlock-your-data/jdg
$ ansible-playbook local.yml
PLAY [Unlock your data with Red Hat JBoss Data Virtualization using Red Hat JBoss Data Grid as datasource] ***

TASK [setup] *******************************************************************
ok: [localhost]

TASK [Install JBoss Data Grid 6.6.0] *******************************************
changed: [localhost]

TASK [Install Red Hat JBoss Data Grid 6.6.1 Server Update] *********************
changed: [localhost]

TASK [Install Red Hat JBoss Data Virtualization 6.3] ***************************
changed: [localhost]

TASK [Install Red Hat JBoss Data Virtualization Server 6.3.3 Update] ***********
changed: [localhost]

TASK [Unzip Red Hat JBoss Data Grid Hot Rod Java Client Module] ****************
changed: [localhost]

TASK [Install the Red Hat JBoss Data Grid Hot Rod Java Client Module into the JDV server] ***
changed: [localhost]

TASK [Execute JDV Management CLI file(s)] **************************************
changed: [localhost] => (item=configure_jdv.cli)

TASK [Execute JDG Management CLI file(s)] **************************************
changed: [localhost] => (item=configure_jdg.cli)

TASK [Unzip JDG Product schema Module in the JDV environment] ******************
changed: [localhost]

TASK [Copy module.xml including module to Product POJO to JDG Resource Adapter]
changed: [localhost]

PLAY RECAP *********************************************************************
localhost : ok=11 changed=10 unreachable=0 failed=0
See http://github.com/cvanball/unlock-your-data/tree/master/jdg for more information.
Conclusion
In this post, we’ve shown the configuration steps one needs to perform in order to unlock your JDG data using Hotrod, with Red Hat JBoss Data Grid and Red Hat JBoss Data Virtualization. We have shown that Ansible is not only targeted at system administrators but that it’s also an invaluable tool for developers, testers, etc. I encourage you to experiment with the simple basics provided in this article and expand the functionality of your playbook gradually to create even more sophisticated provisioning scripts.
Now we are ready to add other data sources from physically distinct systems into the mix such as SQL databases, XML/Excel files, NoSQL databases, enterprise applications and web services etc.
For more information on Ansible, Red Hat JBoss Data Grid and Red Hat JBoss Data Virtualization please refer to the Ansible, Red Hat JBoss Data Grid and Red Hat JBoss Data Virtualization websites:
Last updated: October 26, 2023
