Containers are one of the top trend today. Starting working or playing with them could be really hard also if you've well understood the theory at their base.
With this article I'll try to show you some useful tips and tricks to start into containers world, thanks also to the great web interface provided by the Cockpit project.

Cockpit overview
Cockpit is an interactive server admin interface. You'll find below some a of its great features:
- Cockpit comes “out of the box” ready for the admin to interact with the system immediately, without installing stuff, configuring access controls, making choices, etc.
- Cockpit has (as near as makes no difference) zero memory and process footprint on the server when not in use. The job of a server is not to show a pretty UI to admins, but to serve stuff to others. Cockpit starts on demand via socket activation and exits when not in use.
- Cockpit does not take over your server in such a way that you can then only perform further configuration in Cockpit.
- Cockpit itself does not have a predefined template or state for the server that it then imposes on the server. It is imperative configuration rather than declarative configuration.
- Cockpit dynamically updates itself to reflect the current state of the server, within a time frame of a few seconds.
- Cockpit is firewall friendly: it opens one port for browser connections: by default that is 9090.
- Cockpit can look different on different operating systems, because it’s the UI for the OS, and not a external tool.
- Cockpit is pluggable: it allows others to add additional UI pieces.
Cockpit docker
Cockpit can manage containers via docker. This functionality is present in the Cockpit docker package.
Cockpit communicates with docker via its API via the /var/run/docker.sock unix socket. The docker API is root equivalent, and on a properly configured system, only root can access the docker API. If the currently logged in user is not root then Cockpit will try to escalate the user's privileges via Polkit or sudo before connecting to the socket.
Alternatively you may create a docker unix group. Anyone in that docker group can then access the docker API, and gain root privileges on the system.
Cockpit version
Cockpit project is highly under development, to follow this how-to without incurring in to issue I suggest you to start at least from version 0.117. Starting from this version, it was introduced docker-storage feature. You'll find this version from Fedora 24 and RHEL 7.3.
Cockpit Installation
You've two methods for running cockpit on your system:
- Standard installation through package manager
- Containerized version (for Atomic Host)
I know, this may sound weird: a running container that actually manage other containers. But it works well!
Prerequisites
Following this how-to requires you to have a working docker daemon running on your system.
Cockpit Installation via Package Manager
The installation is quite simple, as any other standard package.
On Fedora you can install it via dnf:
# dnf install cockpit cockpit-docker
On RHEL7 via yum:
# subscription-manager repos --enable rhel-7-server-extras-rpms
# yum install cockpit cockpit-docker
After that you can easily enable and start the cockpit service:
# systemctl enable cockpit.service
# systemctl start cockpit.service
Cockpit Container on Atomic Host
Cockpit container for docker is available through the standard docker's distribution channel: DockerHub.
Supposing you've already configured (as required in prerequisite section) docker, you can pull and run a Cockpit containerized daemon via:
# atomic run docker.io/cockpit/ws
In case you're on Red Hat Atomic Host system, you can use the container provided by Red Hat Registry: "rhel7/cockpit-ws":
# atomic run registry.access.redhat.com/rhel7/cockpit-ws
Cockpit First Login and Containers plugin
Once started, Cockpit Web Service listens by default on the host port 9090. Browse to address https://server_ip:9090
Please note: In the next steps I'll proceed using a Red Hat Enterprise Linux 7.3 system.
You can find below the login page, you can easily access it with any available user in the host:

I'll proceed with root login, but as I wrote before you'll be able any other user with the right privileges for interacting with docker.

As you can see, the welcome page reports various performance infos on the running system.
Without entering in details of all the many Cockpit's features, just click on "Containers" link on the left bar.

The Containers page shows an overview of the current docker's state.
You have in this page all the features you need for managing your containers: managing docker formatted images and containers. In the next section I'll show you a real use case example.
WordPress Example Deployment
In this section I'll show you how to manage a WordPress deployment with two containers:
- Web server -> wordpress:latest
- MariaDB server -> mariadb:latest
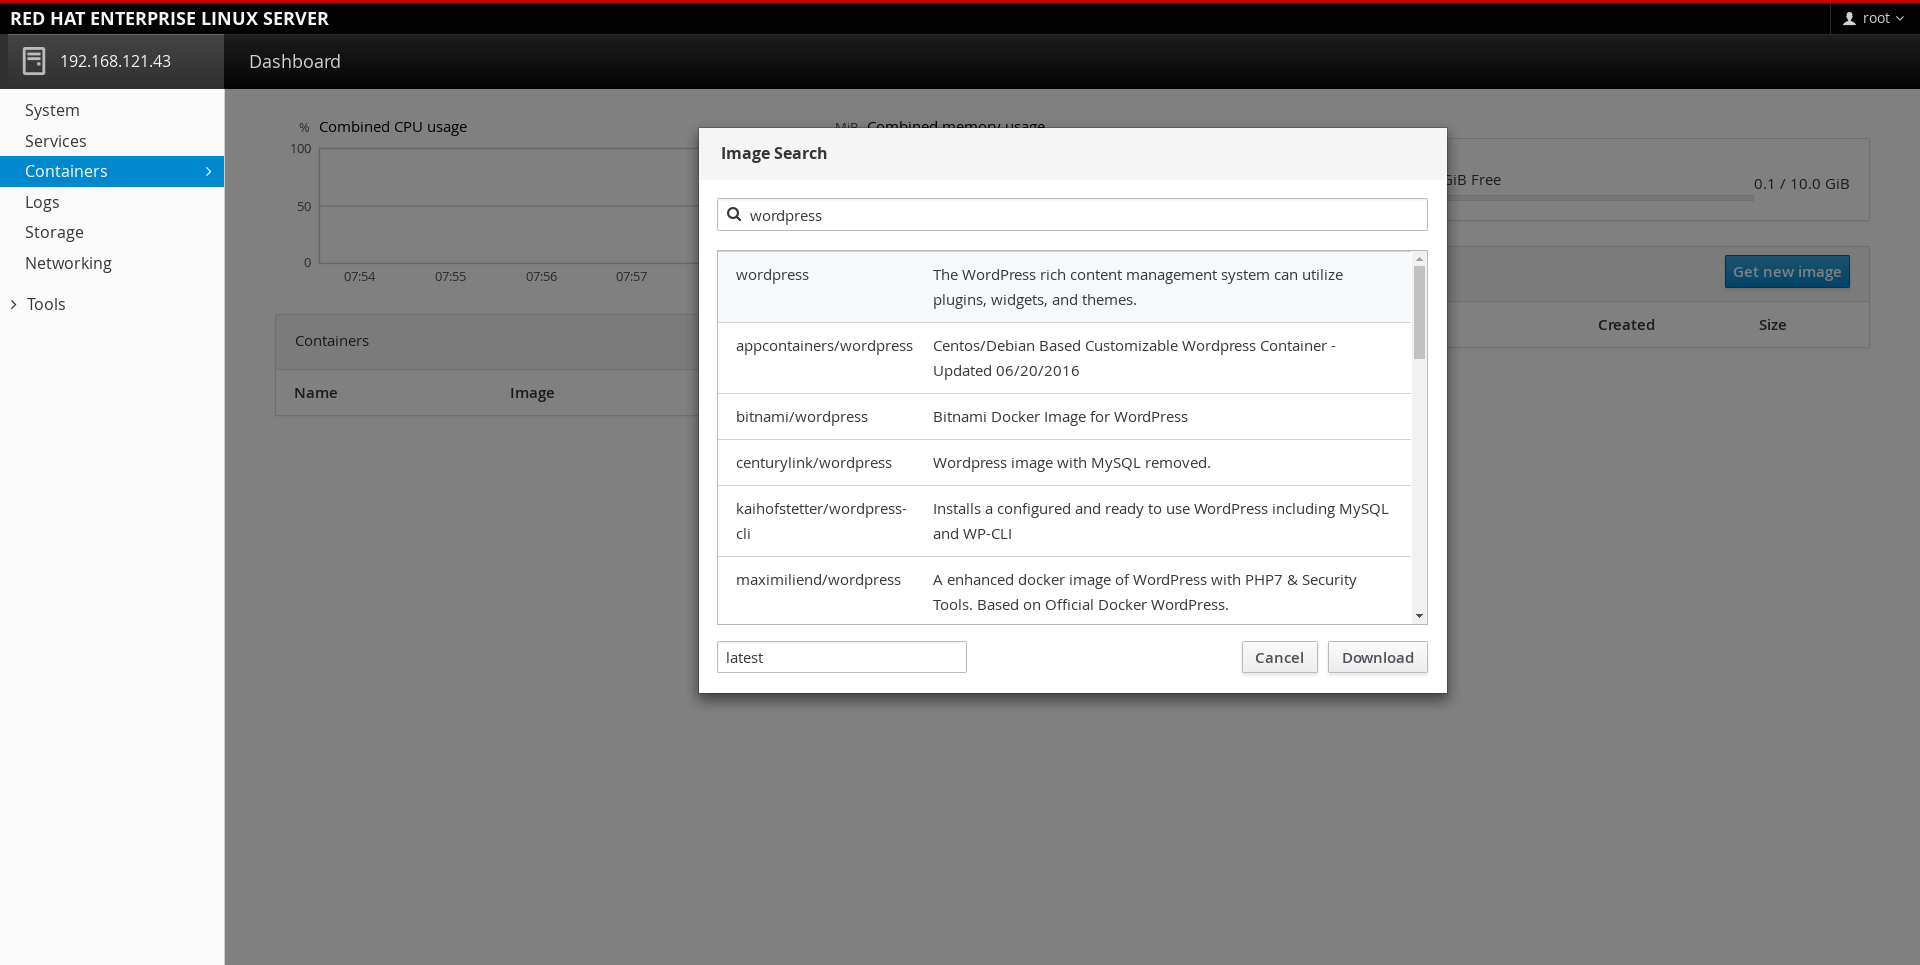
First of all we need to get these two docker formatted images. We can search for them through the "Get new image" button and submitting keywords: "wordpress" first and "mariadb" then.
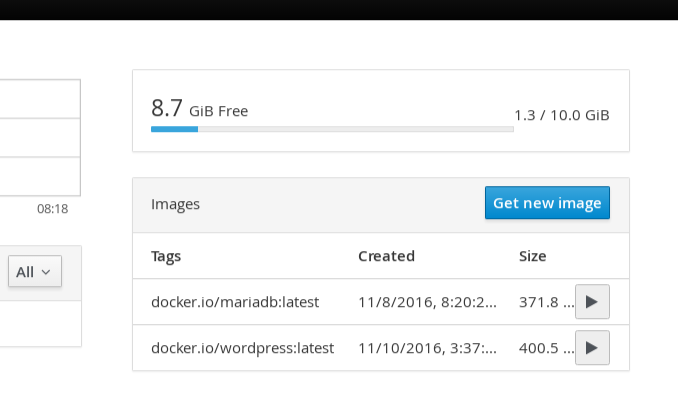
At end of downloads you'll find the list of images under the respective frame:
We're ready to launch them, anyway we need one further step before: creating persistent volumes to attach at running containers.
Access to the running system and create two folder under /mnt/pv:
# mkdir -p /mnt/pv/wordpress
# mkdir -p /mnt/pv/mariadb
Now click on the "Play" button on the mariadb's docker image row and start filling the form's required field.

- Uncheck the "Expose container ports" checkbox (we don't need to expose mariadb port, this container should be connected only to the webserver)
- Add another value/row under the default volume's row (leaving the first as-is): "/var/lib/mysql:Z" -> "/mnt/pv/mariadb"
- We need to create a new value/raw because we need to inform docker that we're using SELinux and we want it set the right SELinux context just before attaching the volume to the container (this is why we've added ":Z" to the "mysql" path)
- In case you've disabled SELinux you can skip the second value/row adding
- Add all the required container's environment variables:
- MYSQL_ROOT_PASSWORD
- MYSQL_DATABASE
- MYSQL_USER
- MYSQL_PASSWORD
- Restart policy: always
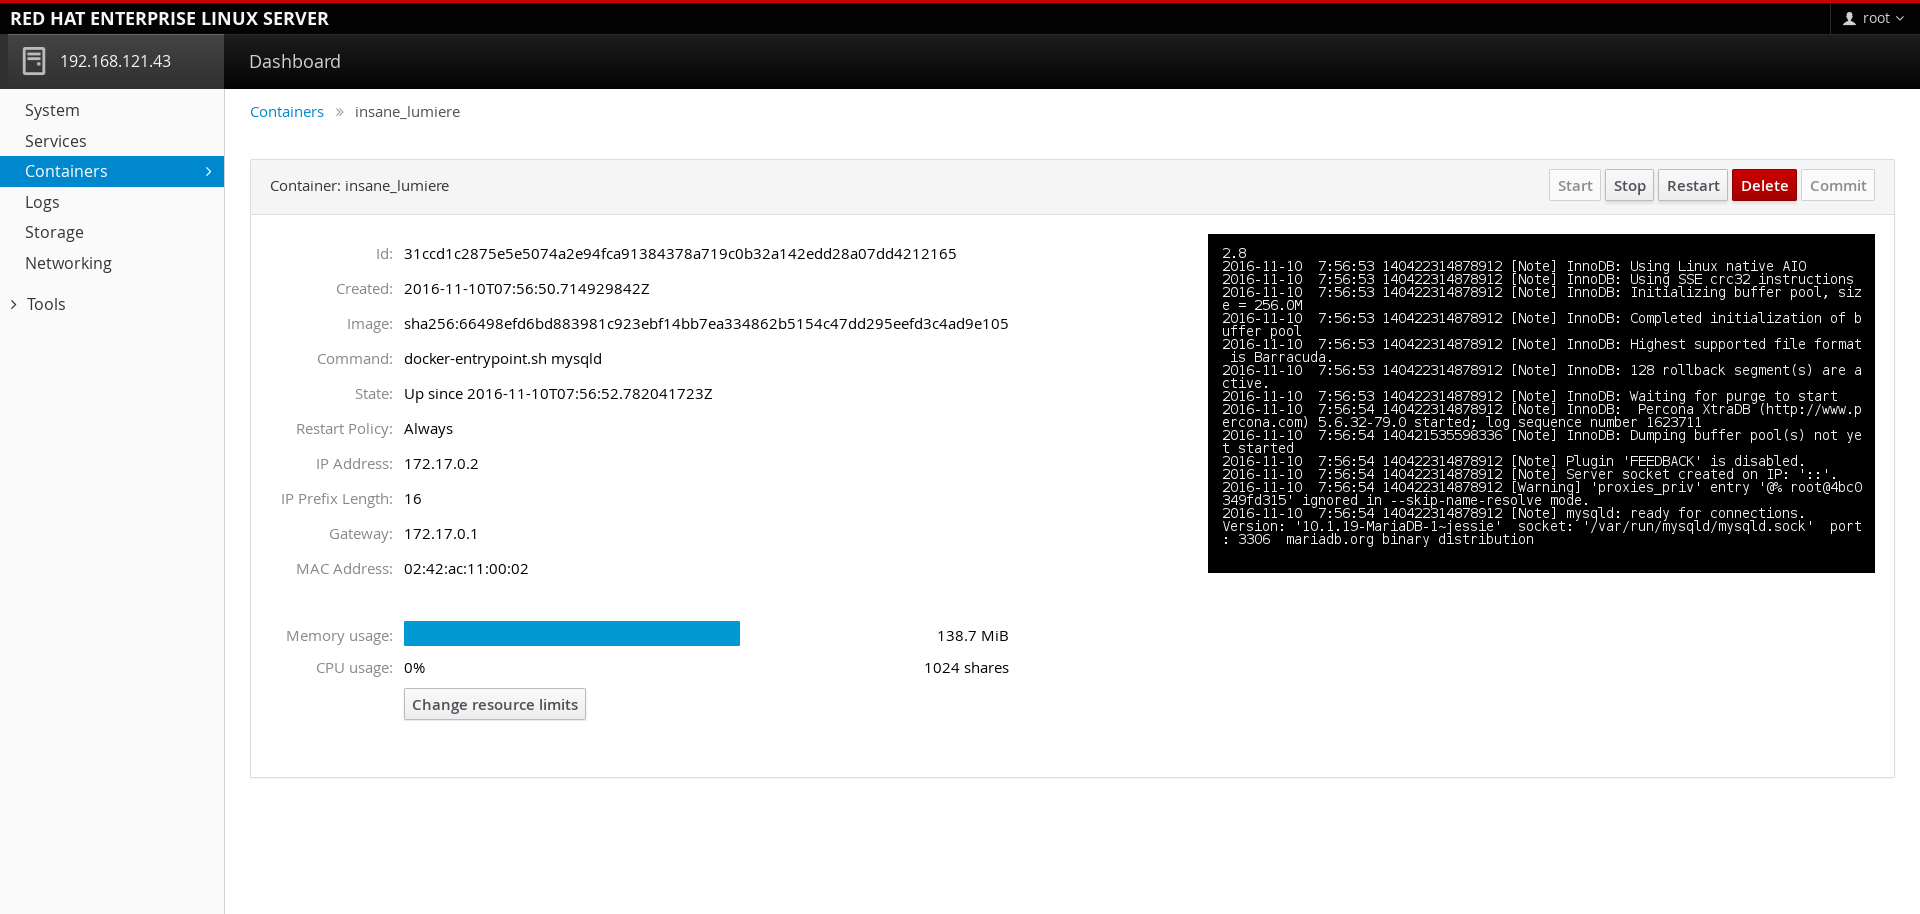
At the end we'll see a row under the Running Containers frame, after clicking on it, we'll see a detailed overview of the running container:
We can now proceed running the second container: wordpress. Press the "Play" button and start compiling the form requested values.
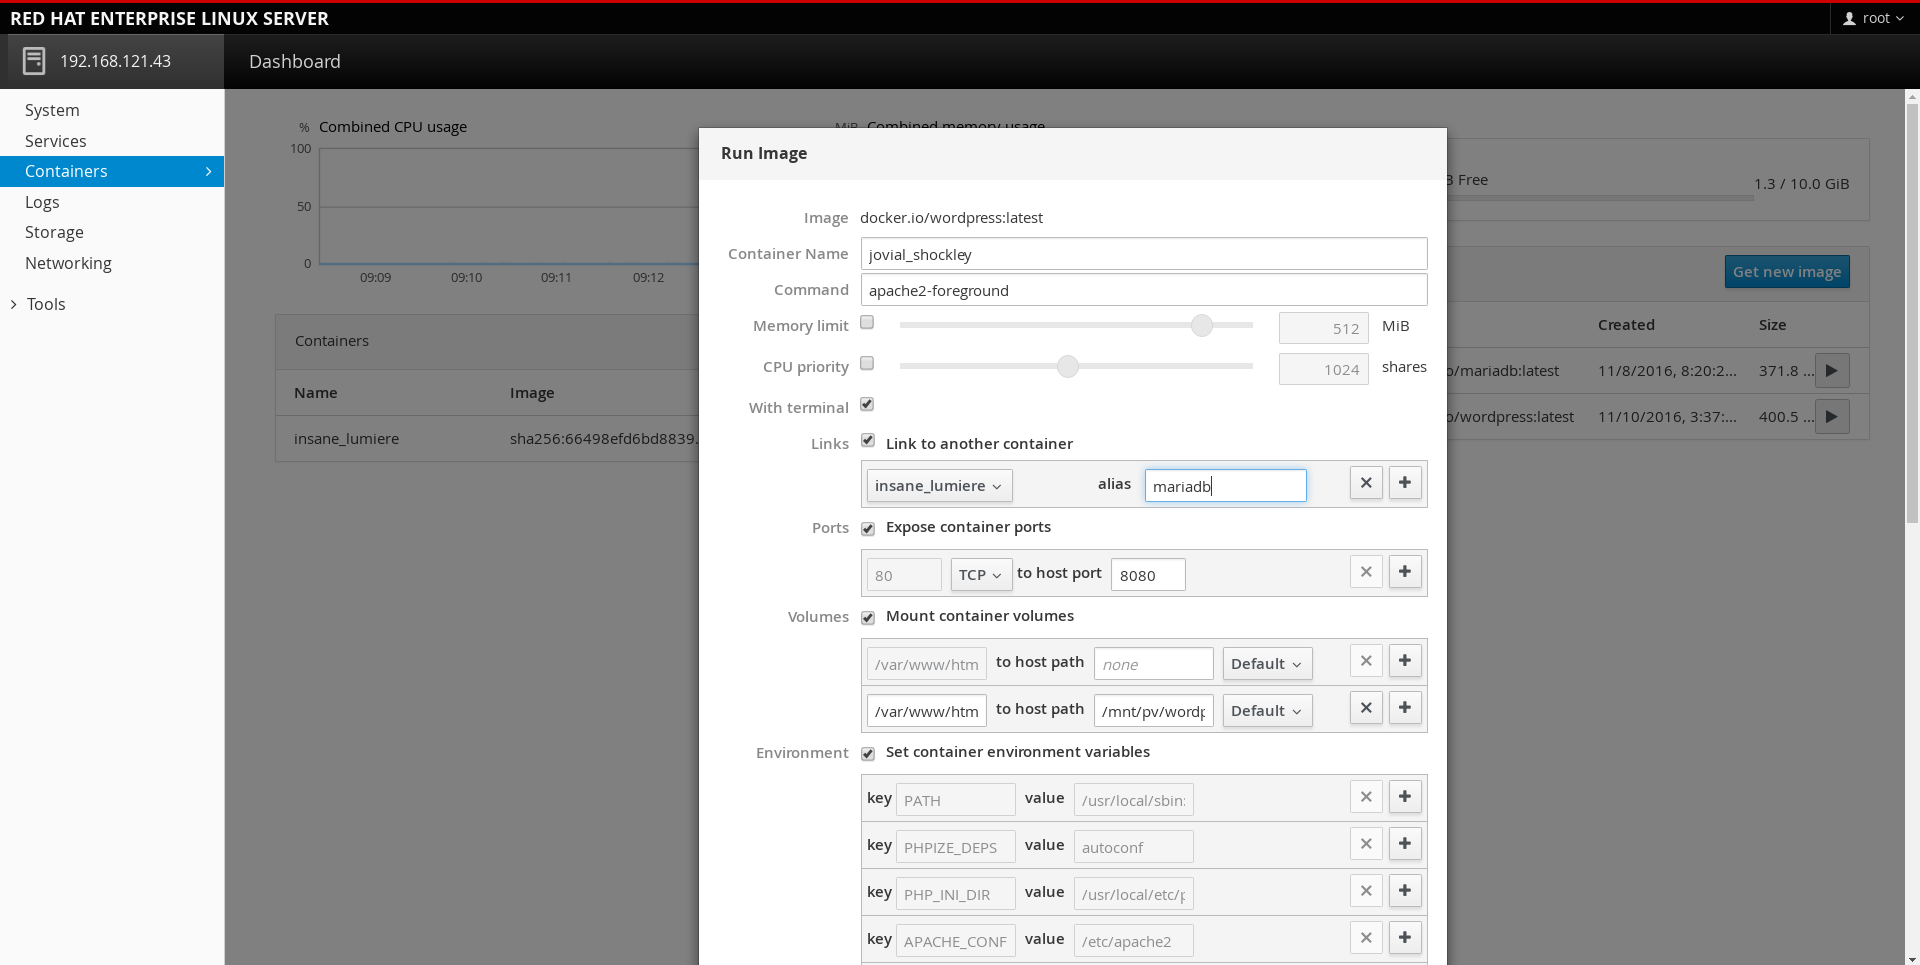
- Check the "Link to another container" checkbox, select the name of the mariadb container and give it an alias ("mariadb" for example)
- Expose container port "80" -> "8080"
- Add another value/row under the default volume's row (leaving the first un-edited): "/var/www/html:Z" -> "/mnt/pv/wordpress"
- We need to create a new value/raw because we need to inform docker that we're using SELinux and we want it set the right SELinux context just before attaching the volume to the container (this is why we've added ":Z" to the "mysql" path)
- In case you've disabled SELinux you can skip the second value/row adding
- Add all the required container's environment variables:WORDPRESS_DB_HOST -> mariadb
- WORDPRESS_DB_USER -> wordpress (Chosen during the configuration of the mariadb container)
- WORDPRESS_DB_PASSWORD -> ***** (Chosen during the configuration of the mariadb container)
- WORDPRESS_DB_NAME -> wordpress (Chosen during the configuration of the mariadb container)
- Restart policy: always
At the end we'll see a new row under the Running Containers frame, after clicking on it, we'll see a detailed overview of the running container:
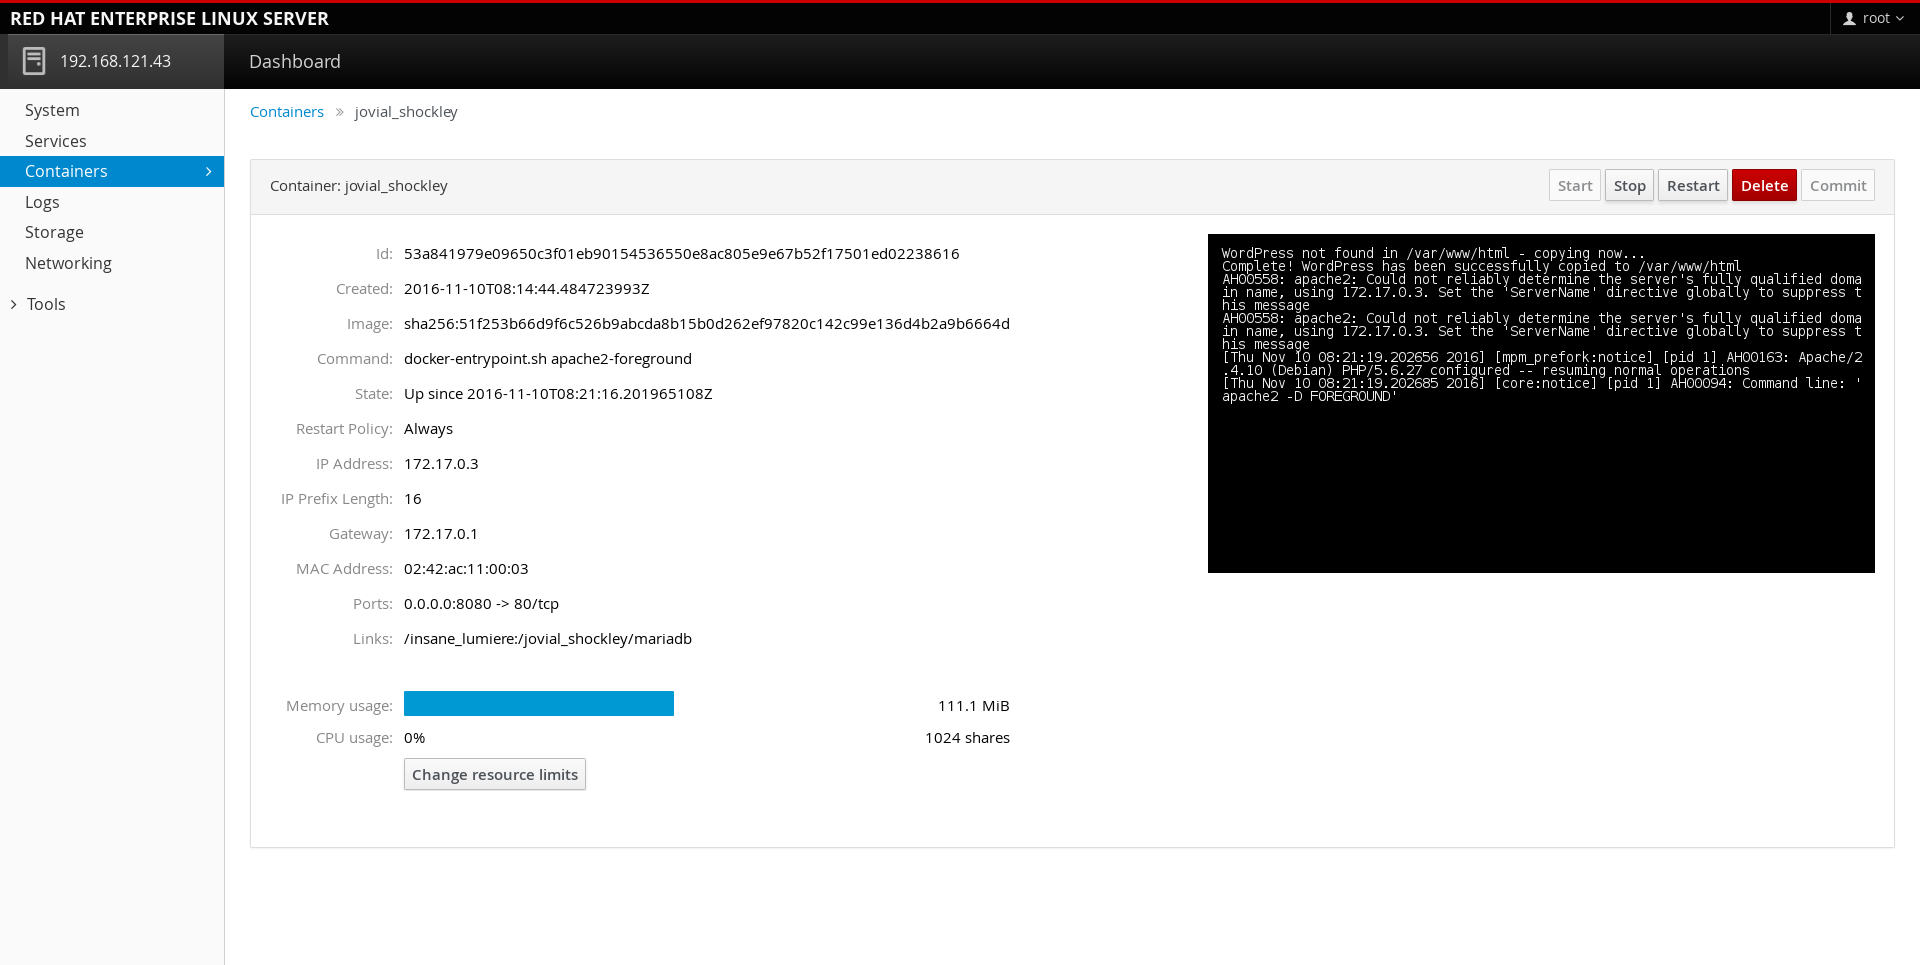
As you can see all should worked fine, the wordpress container is running.
Let's check if the persistent volumes are currently used by containers:
# ls /mnt/pv/
 mariadb/ wordpress/

# ls /mnt/pv/mariadb/
 aria_log.00000001 aria_log_control ibdata1 ib_logfile0 ib_logfile1 multi-master.info mysql performance_schema tc.log wordpress

# ls /mnt/pv/wordpress/
 index.php readme.html wp-admin wp-comments-post.php wp-config-sample.php wp-cron.php wp-links-opml.php wp-login.php wp-settings.php wp-trackback.php
 license.txt wp-activate.php wp-blog-header.php wp-config.php wp-content wp-includes wp-load.php wp-mail.php wp-signup.php xmlrpc.php
We can try browsing to the url: http://your_server_ip:8080, you should see a webpage like the following:

If you see the welcome page of WordPress, all is ok and your containerized LAMP is working fine!
Doubts or troubles? Comment!
About Alessandro

Alessandro Arrichiello is a Platform Consultant for Red Hat Inc. He has a passion for GNU/Linux systems, that began at age 14 and continues today.
He worked with tools for automating Enterprise IT: configuration management and continuous integration through virtual platforms.
He's now working on distributed cloud environment involving PaaS (OpenShift), IaaS (OpenStack) and Processes Management (CloudForms),
Containers building, instances creation, HA services management, workflows build.