AI tool calling, also known as function calling, extends large language models (LLMs) to allow them to perform specific actions instead of just generating text responses. This article dives into a new recipe dedicated to AI function calling with Node.js using the LangGraph.js framework that was recently added to the Podman AI Lab extension.
What is function calling/tool calling?
Before we get into the recipe, it is important to understand what function calling refers to in the AI world. This concept allows a model/LLM to respond to a given prompt by calling a tool or function.
In our example, we are going to define a tool/function that gets the weather for a particular location. We will add this to our LLM and when we ask our question, What is the weather in <location>?, our LLM will use that tool.
An important note here is that the model doesn’t actually call the tool; rather, it sees that there is a function available and then generates the arguments for that function and returns that as the response.
Install Podman AI Lab
Podman Desktop is a great open source option that provides a nice graphical UI to work with containers across a host of operating systems. To get started, download and install Podman Desktop using the instructions on podman-desktop.io.
Once Podman Desktop is started and the dashboard is brought up, you should see a suggestion to install the Podman AI Lab extension, as in the screenshot in Figure 1.
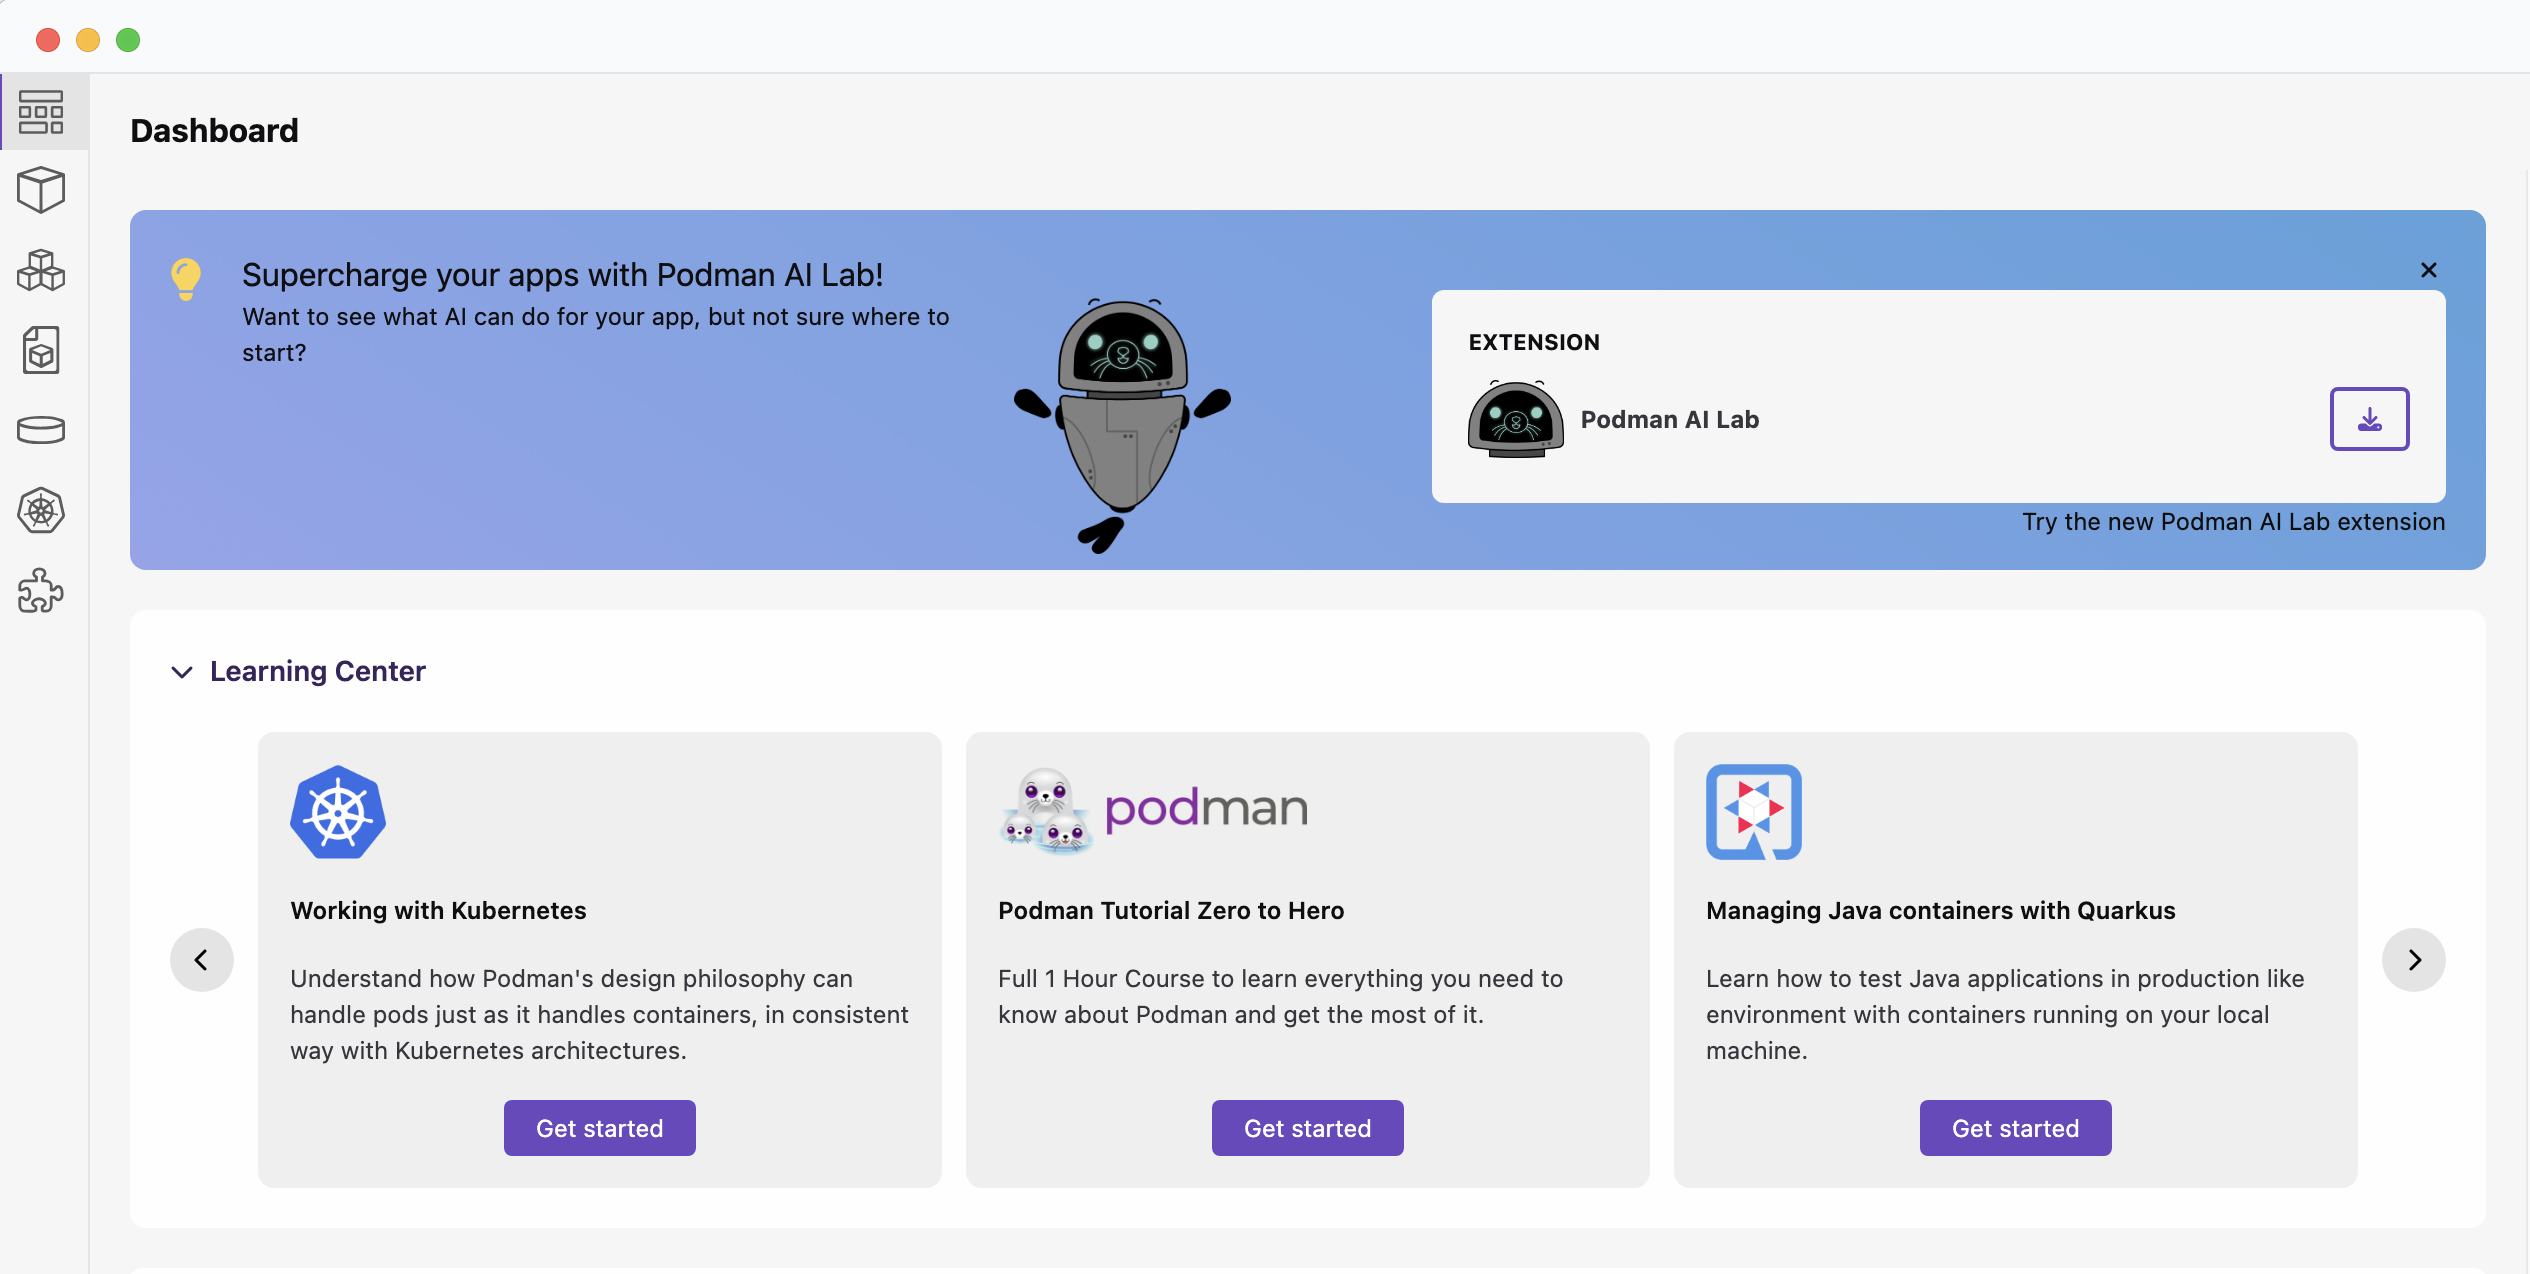
If the suggestion does not appear, you can install the extension by going to the extension page (the puzzle piece in the navigation bar on the left) and then search for Podman AI Lab on the Catalog tab.
Install the Podman AI Lab extension. You will need a recent version of Podman AI Lab, version 1.6.0 or later.
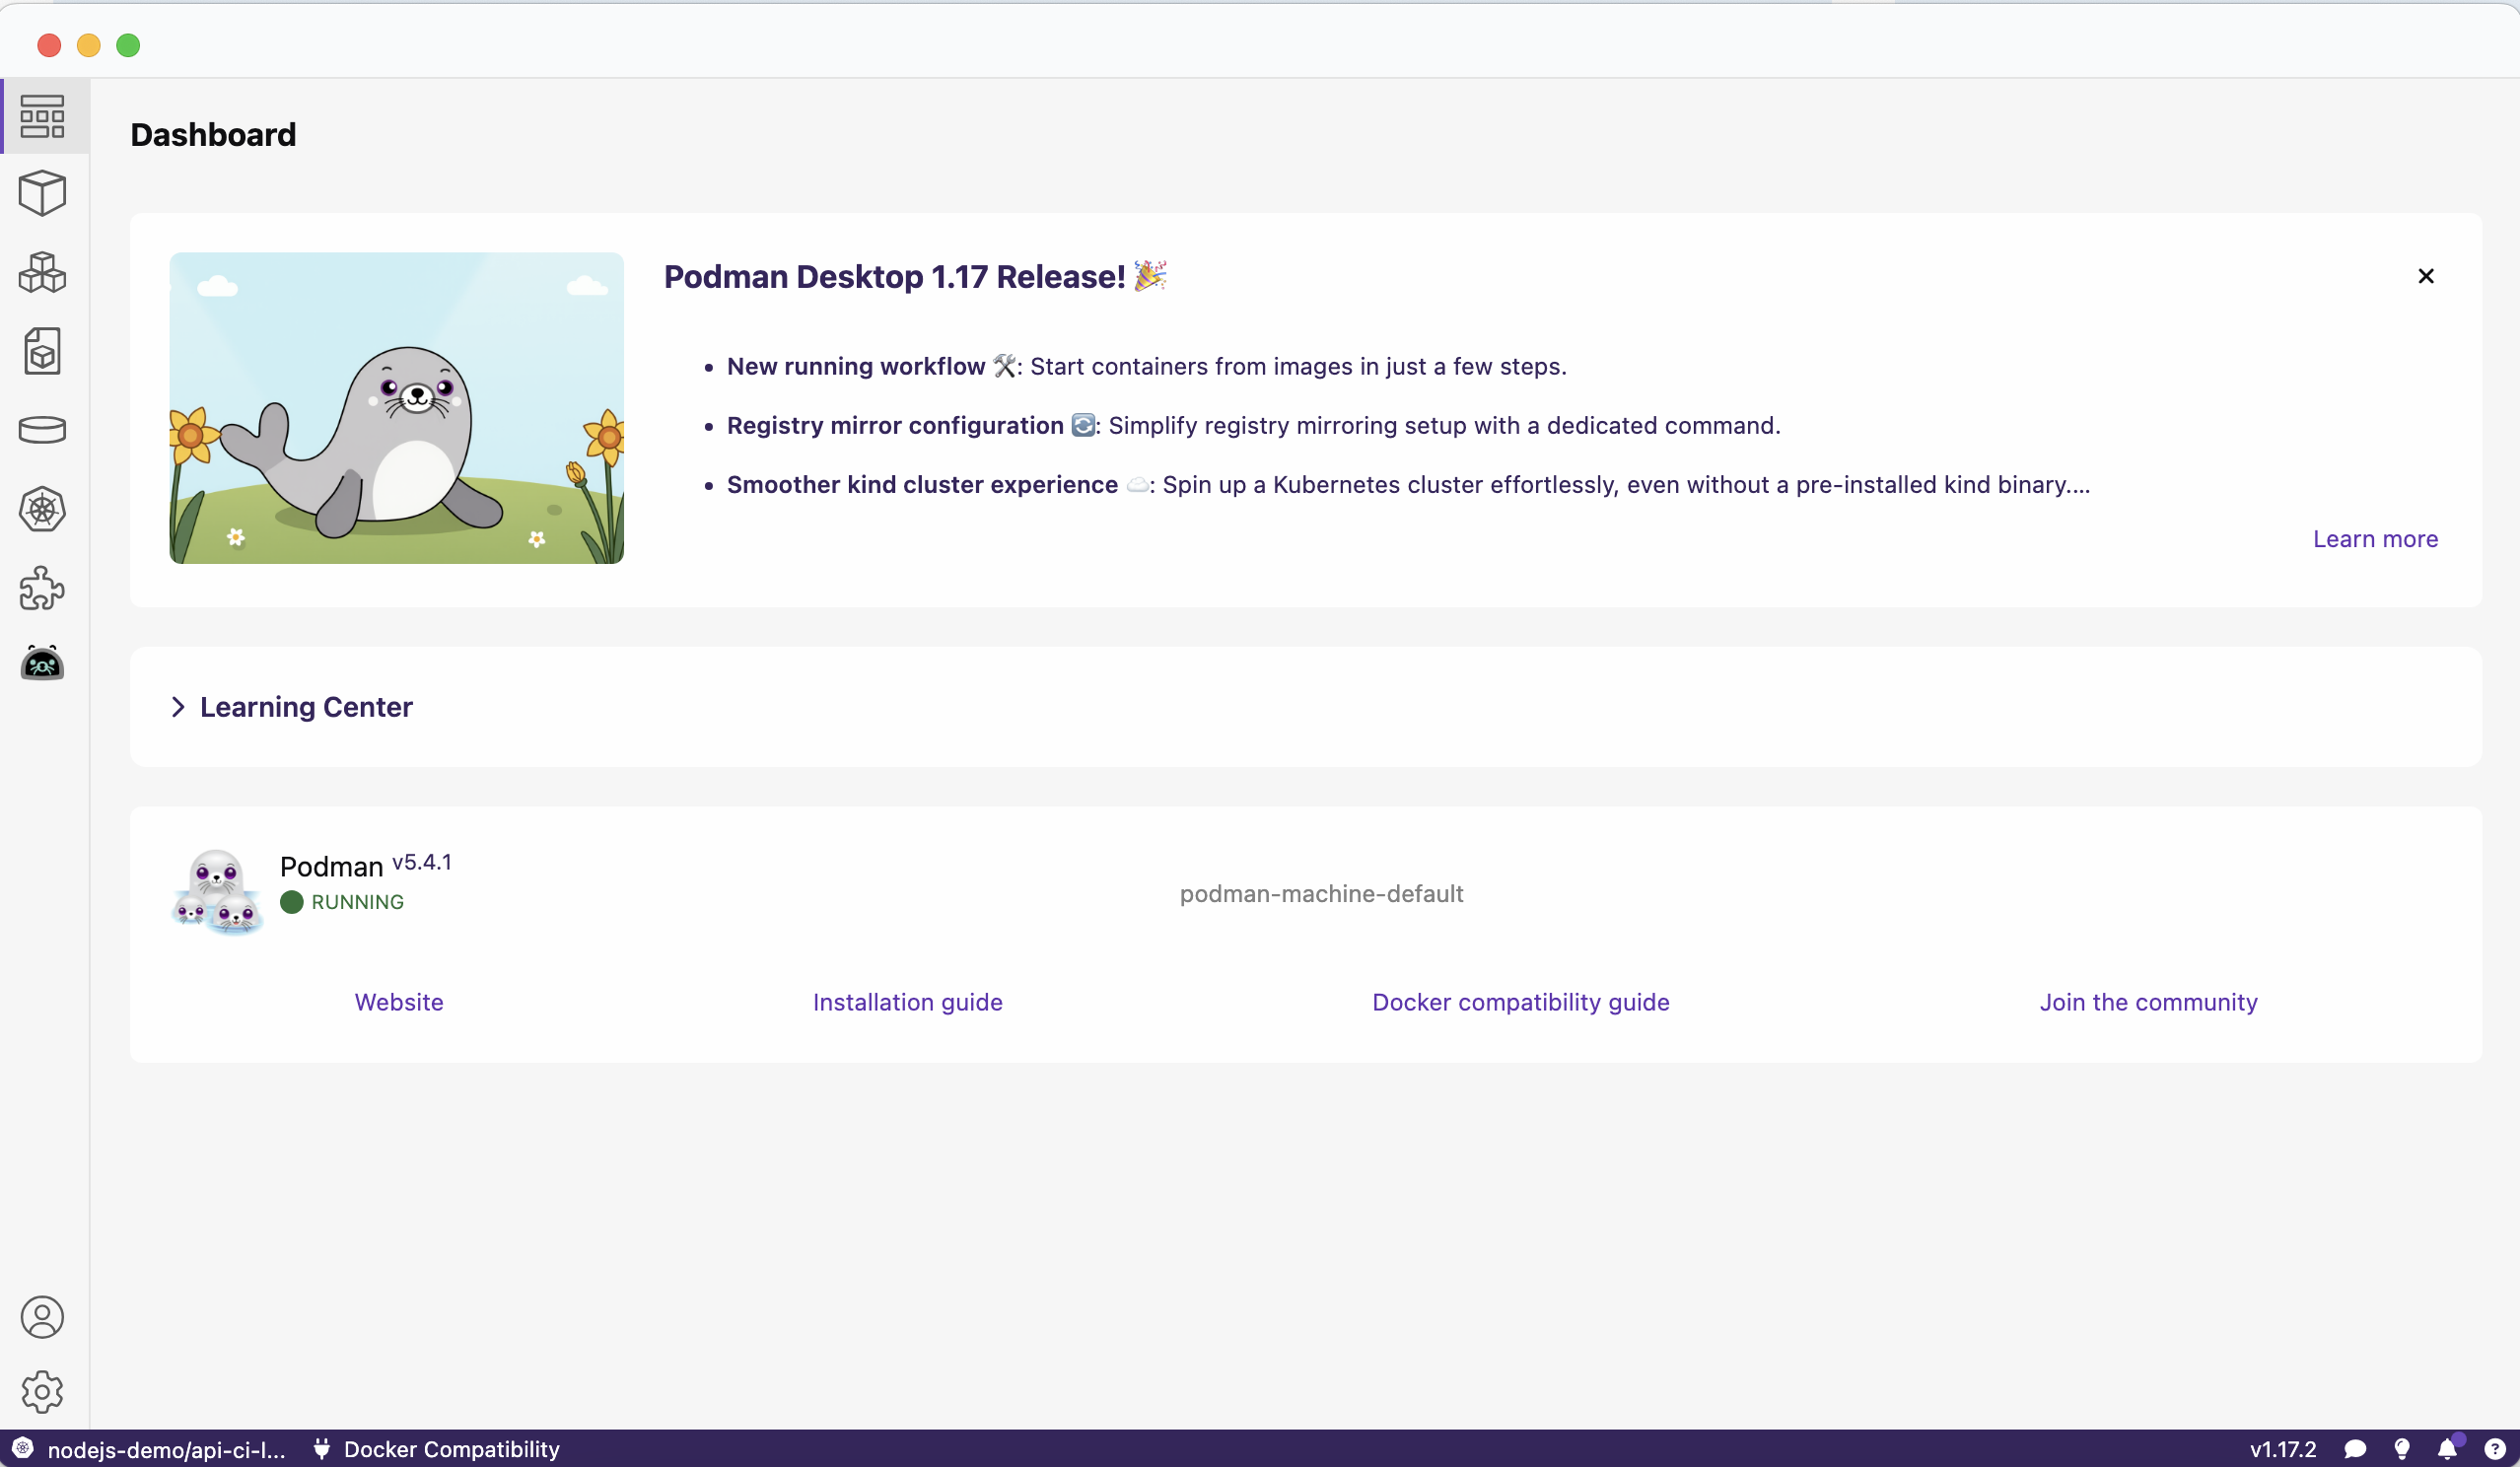
Once installed, you will see an additional icon in the navigation bar on the left, similar to the screenshot in Figure 2.
Once the extension has been installed, you can check out the available recipes by clicking on the Recipe Catalog link on the navigation bar on the left under AI Apps. You can filter the list based on the language; select JavaScript. As of version 1.6.0 of the extension, there are 3 recipes to choose from (Figure 3). Select the one called Node.js Function Calling.

Each recipe provides an easy way to start building an application in a particular category, along with starter code that will let you run, modify, and experiment with that application.
Node.js Function Calling recipe
The Node.js Function Calling recipe lets you quickly get started with an application that utilizes function calling.
Running this recipe will result in running 2 deployed containers:
- A container running the large language model.
- A container running a Fastify-based application using LangChain.js and LangGraph.js.
Running the recipe
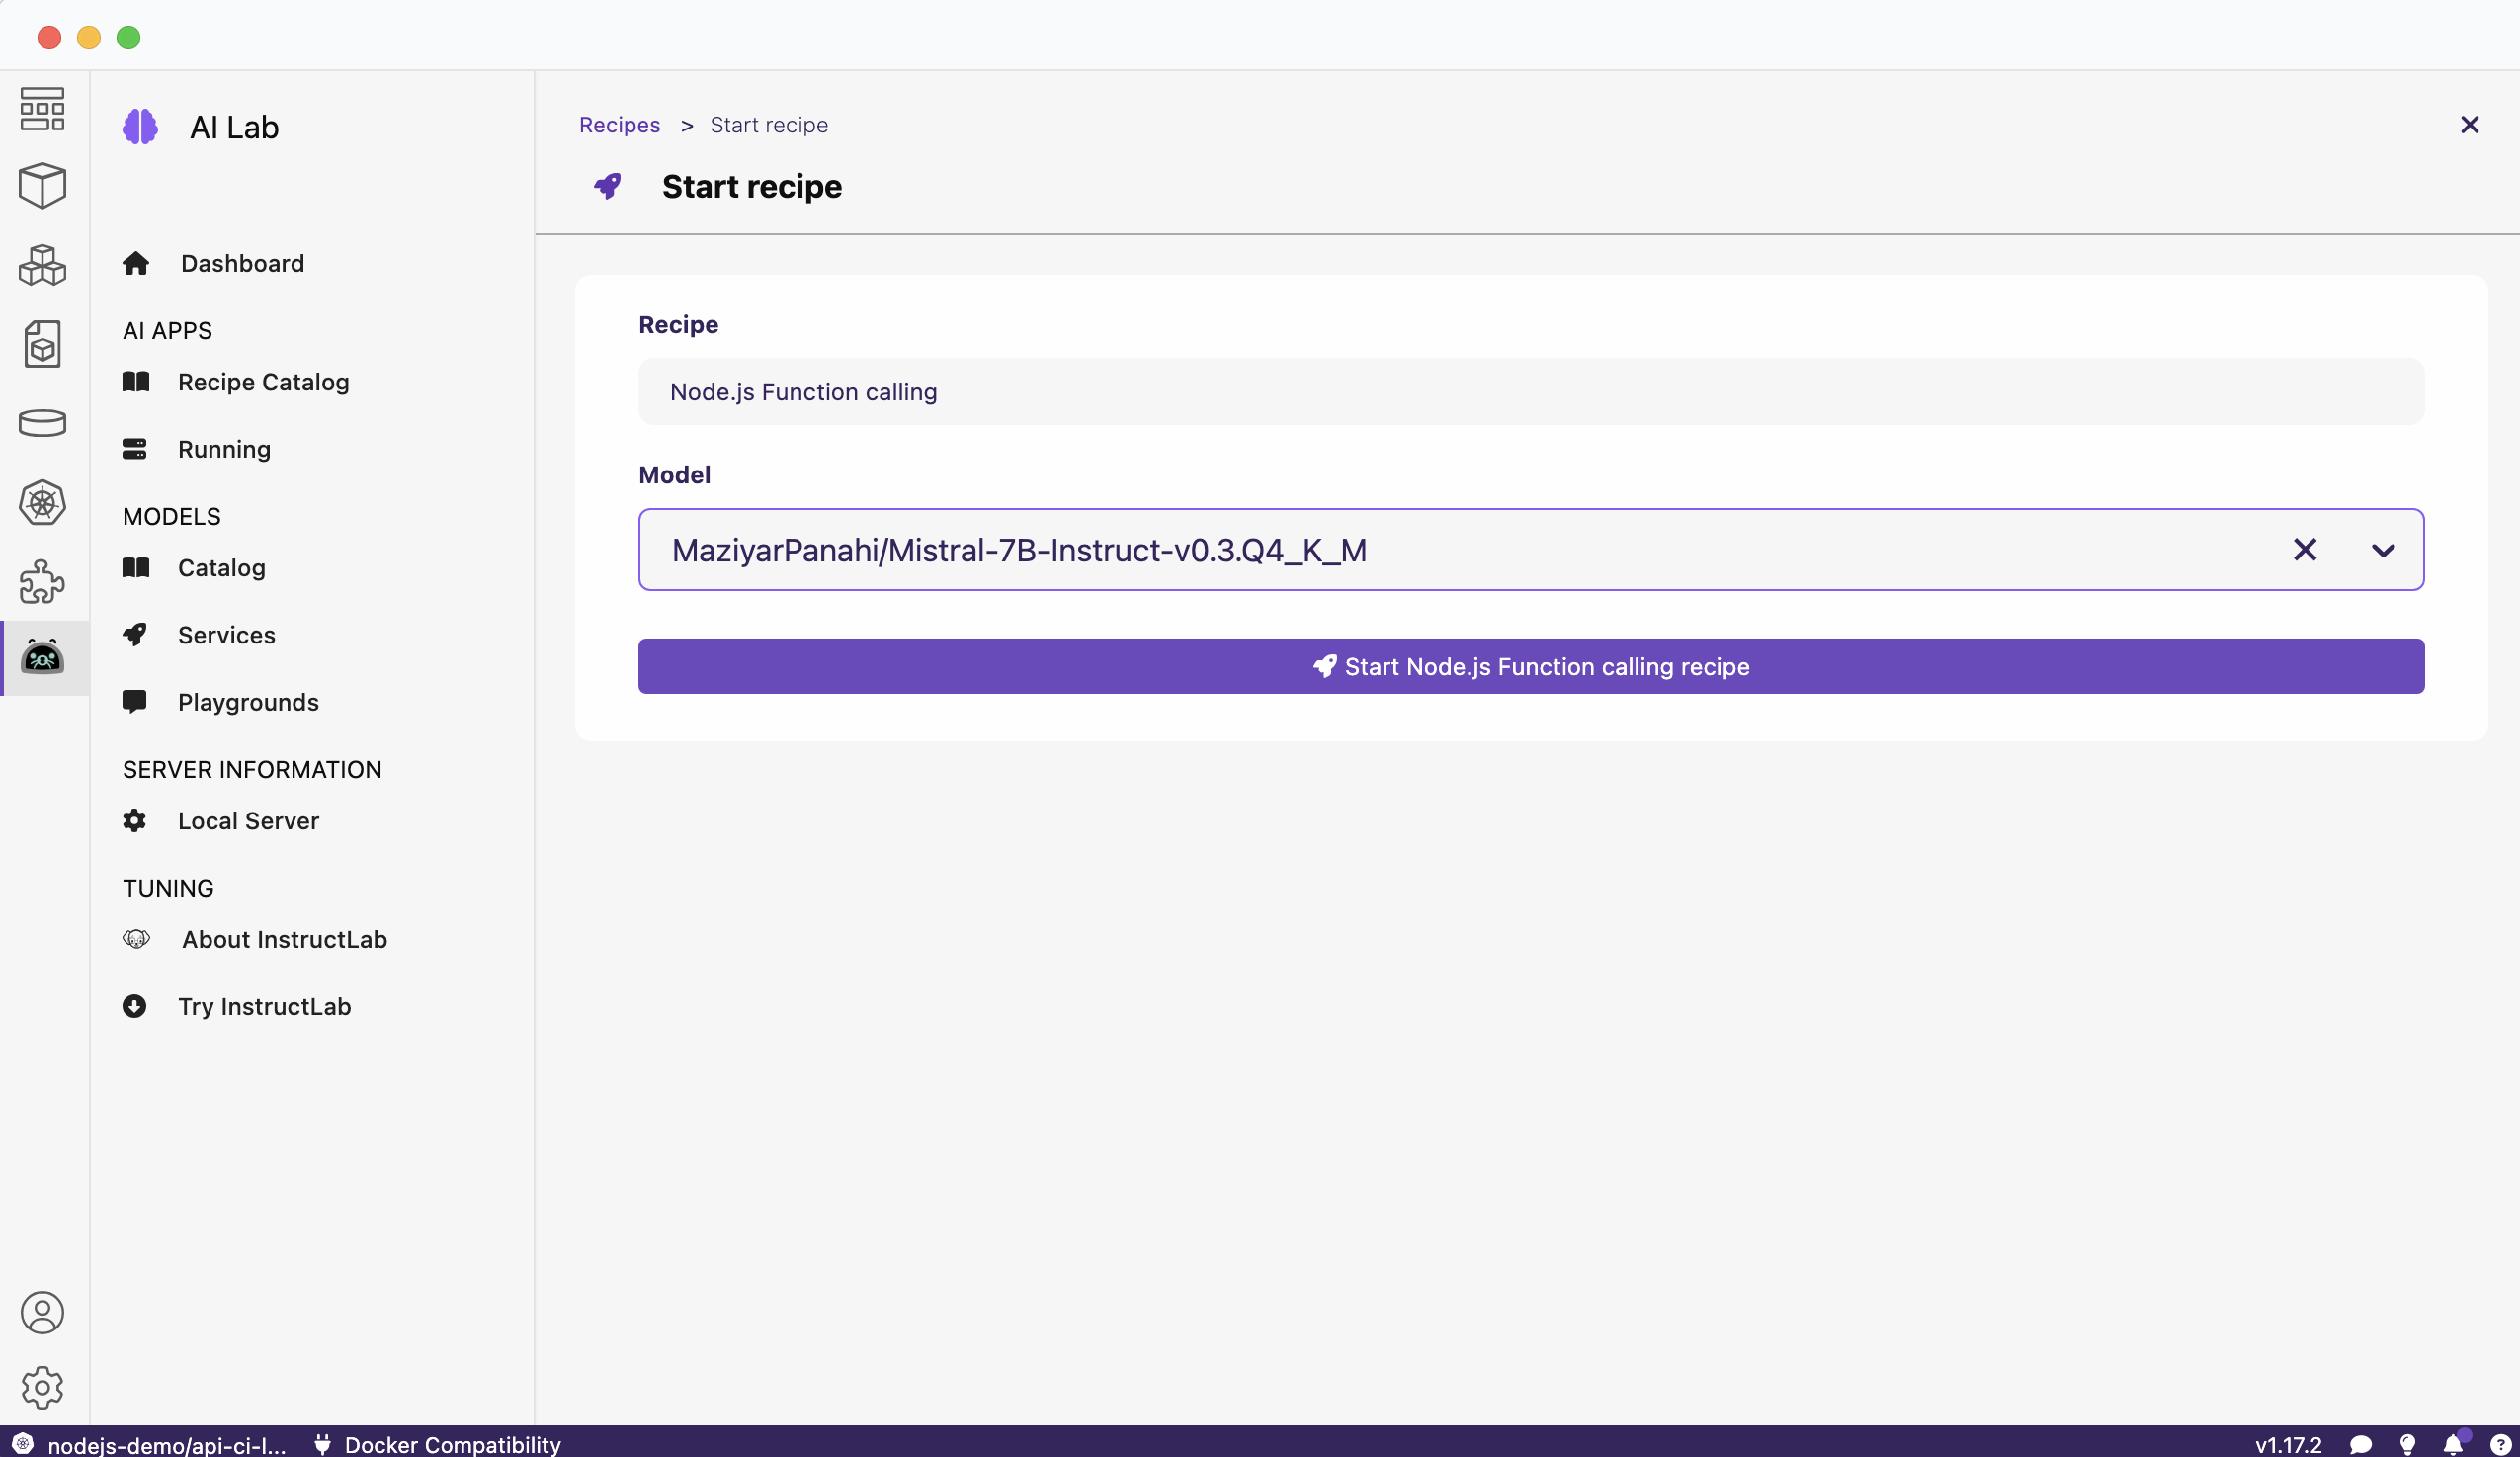
To run the recipe, select More Details on the recipe tile and then click Start, which will be located on the top right. Finally, click Start Node.js Function calling recipe on the Start recipe page (Figure 4).
When you click Start, the containers for the application will be built and then started. This might take a little while. You will get confirmation once the AI app is running (Figure 5).
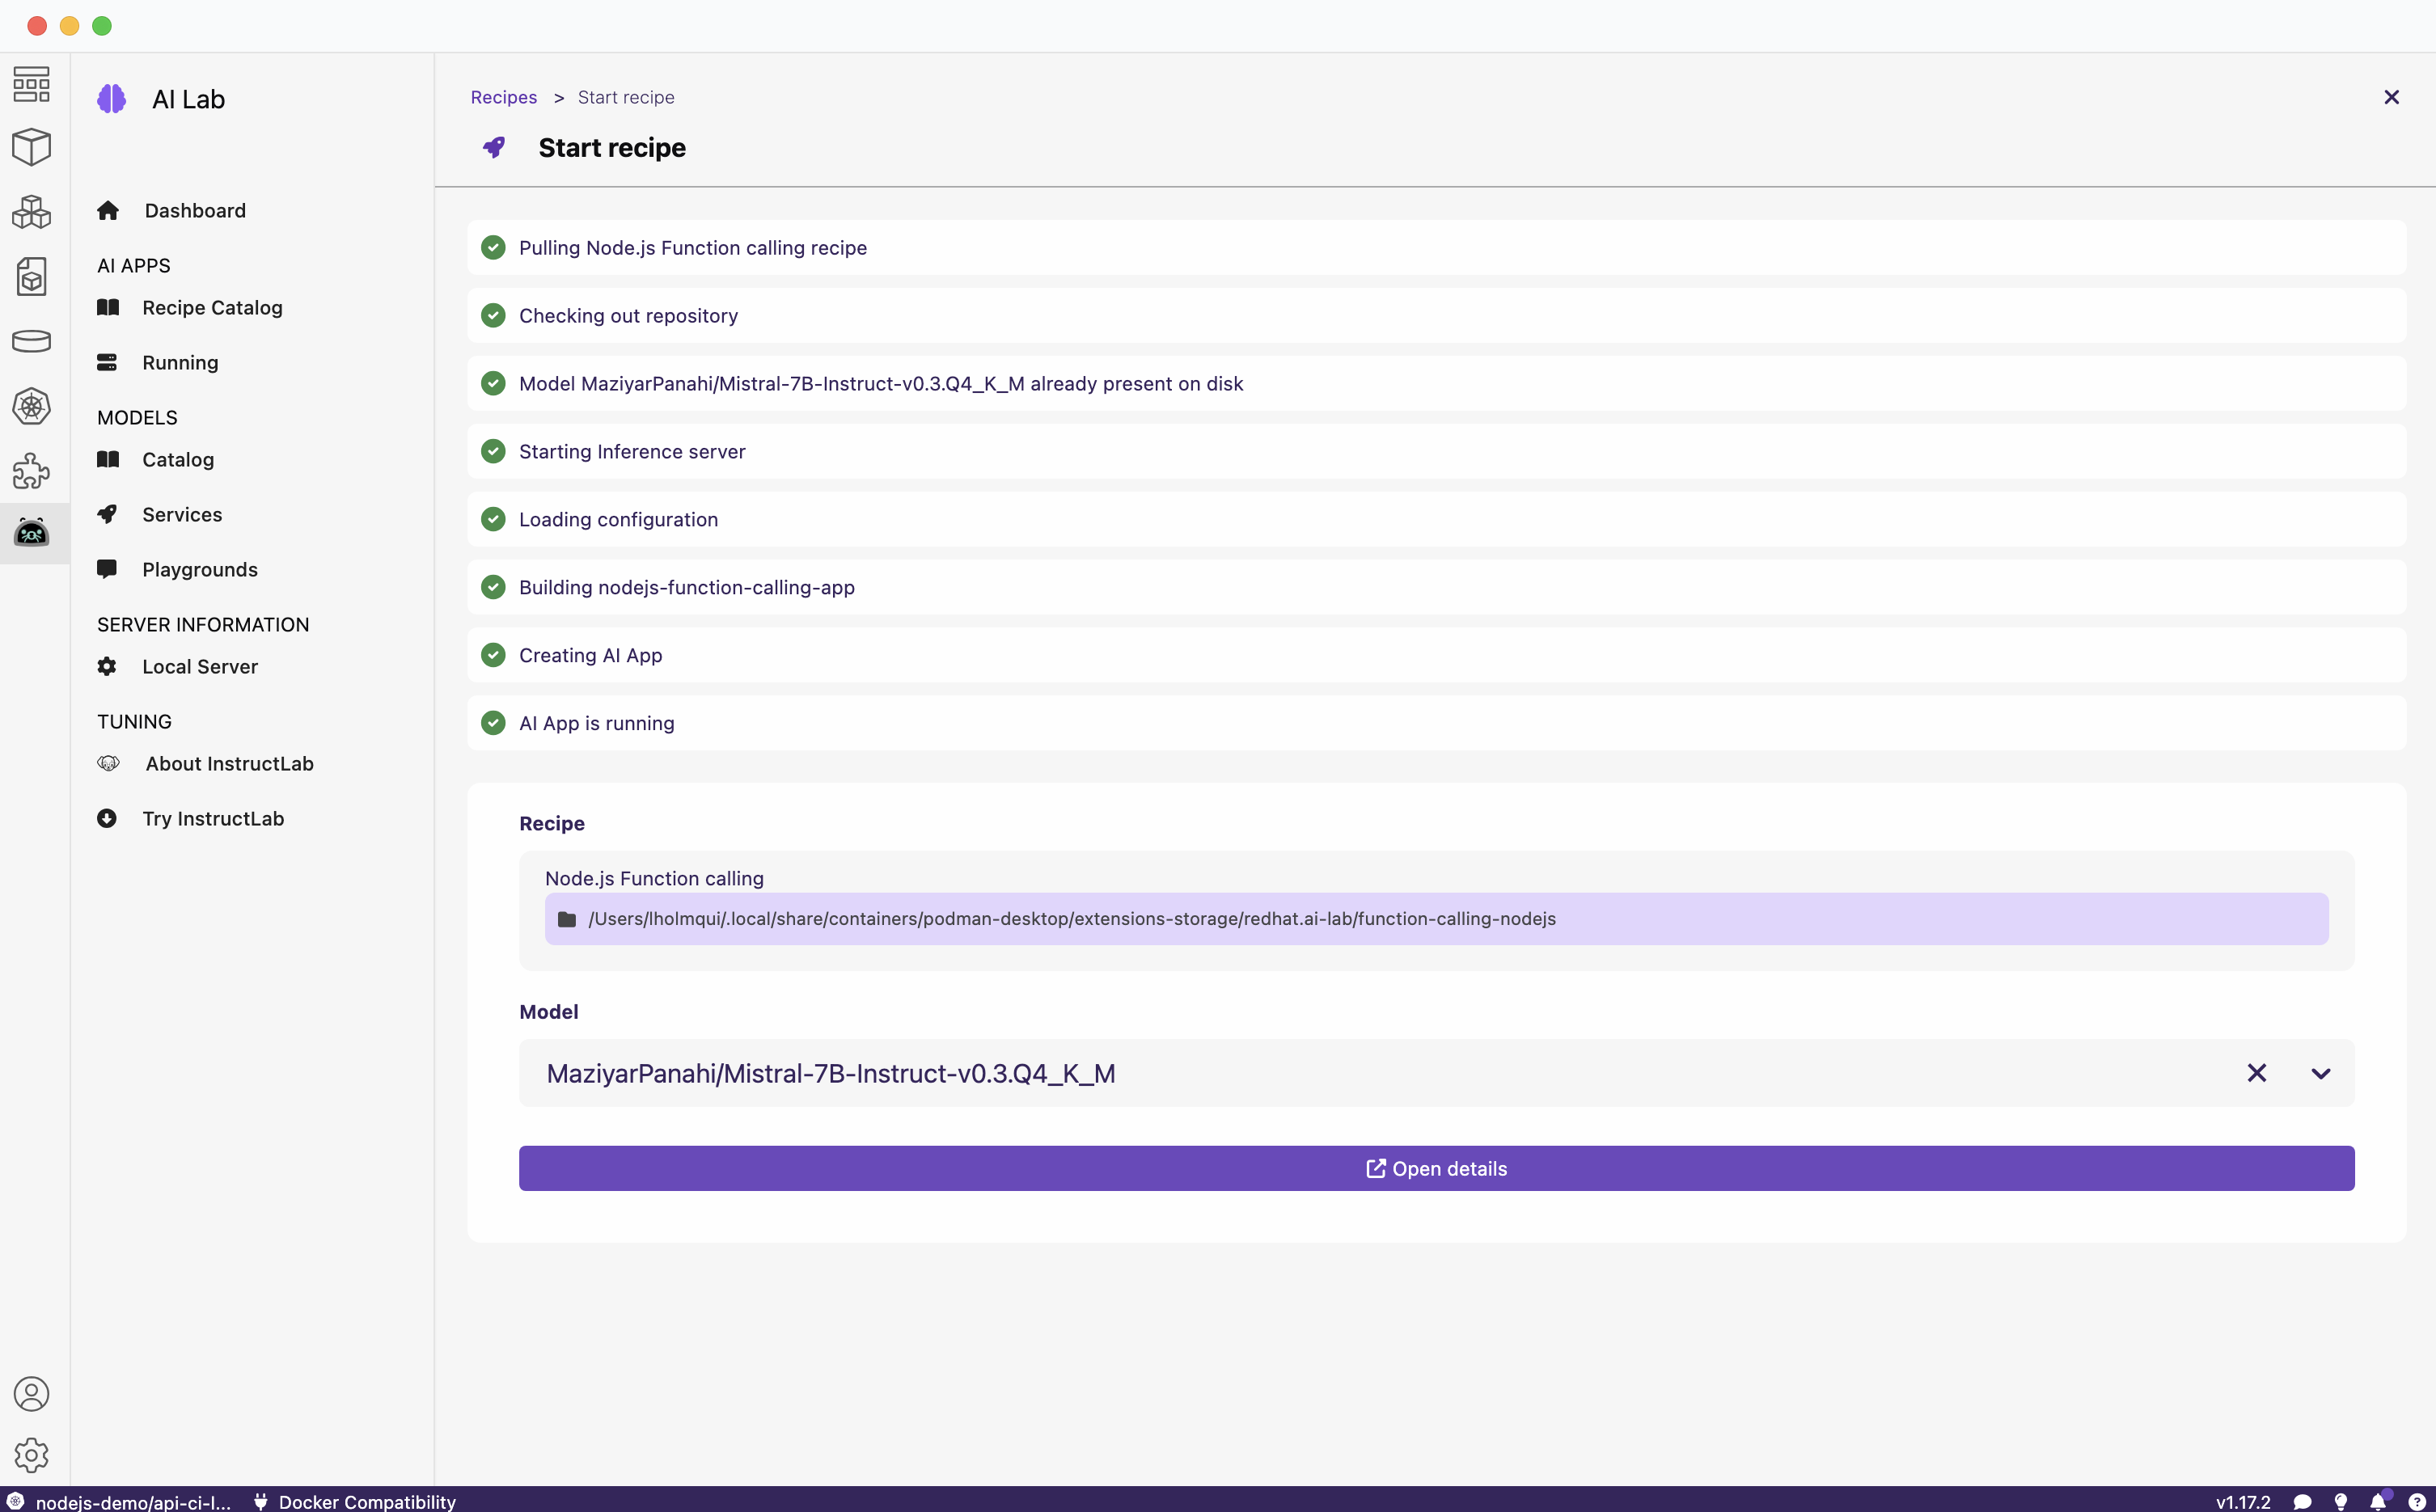
We can see from the summary that the recipe has pulled down the model, started an inference server using that model, and then built and started the container for the application (nodejs-function-calling-app).
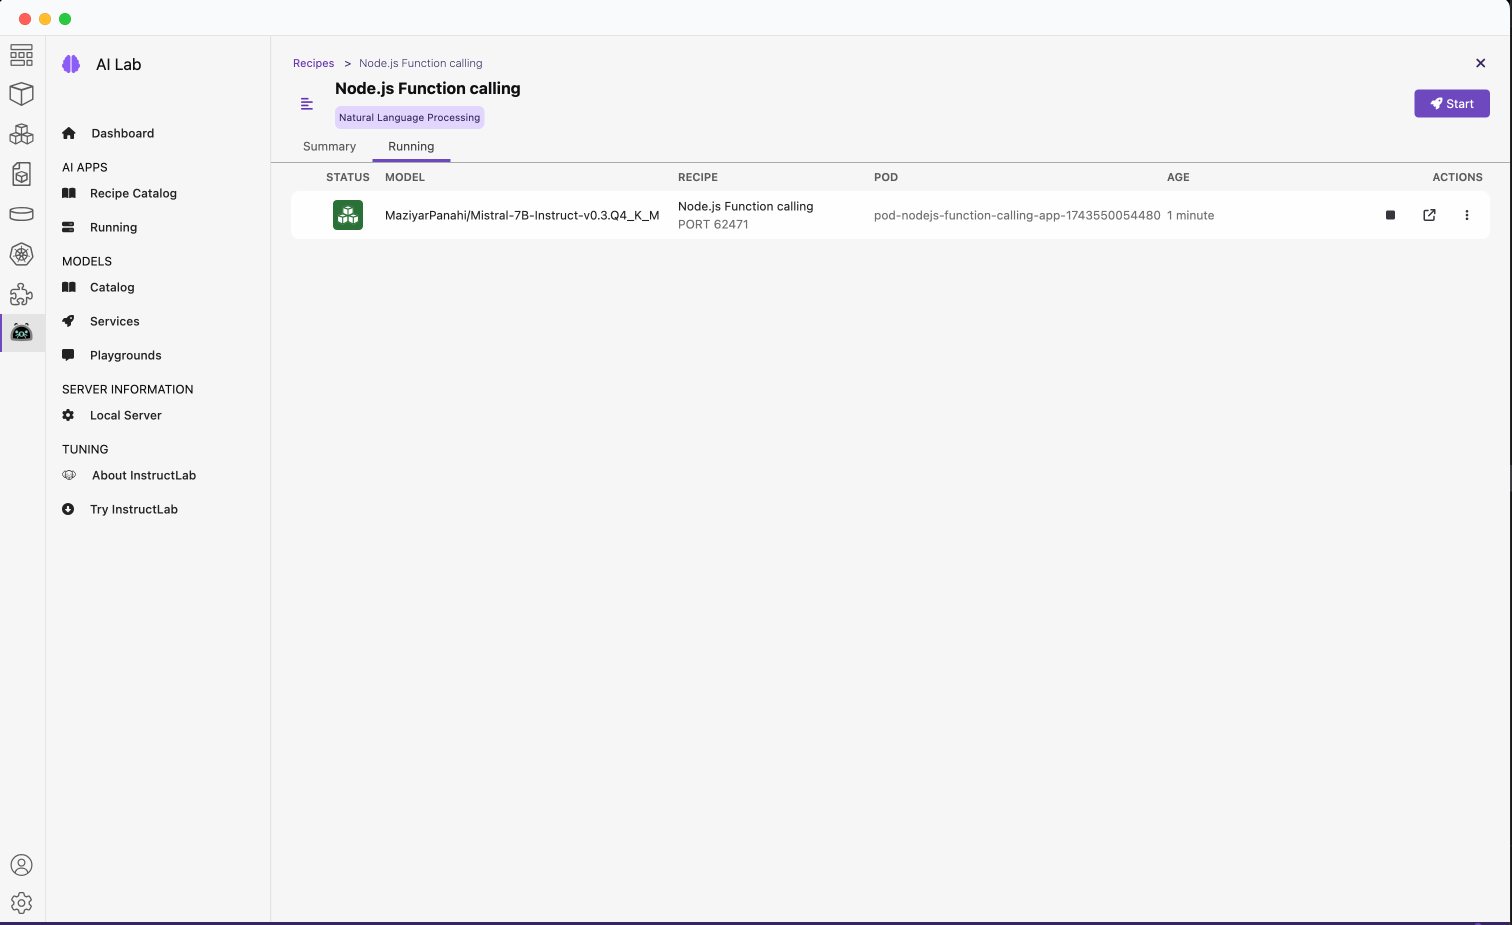
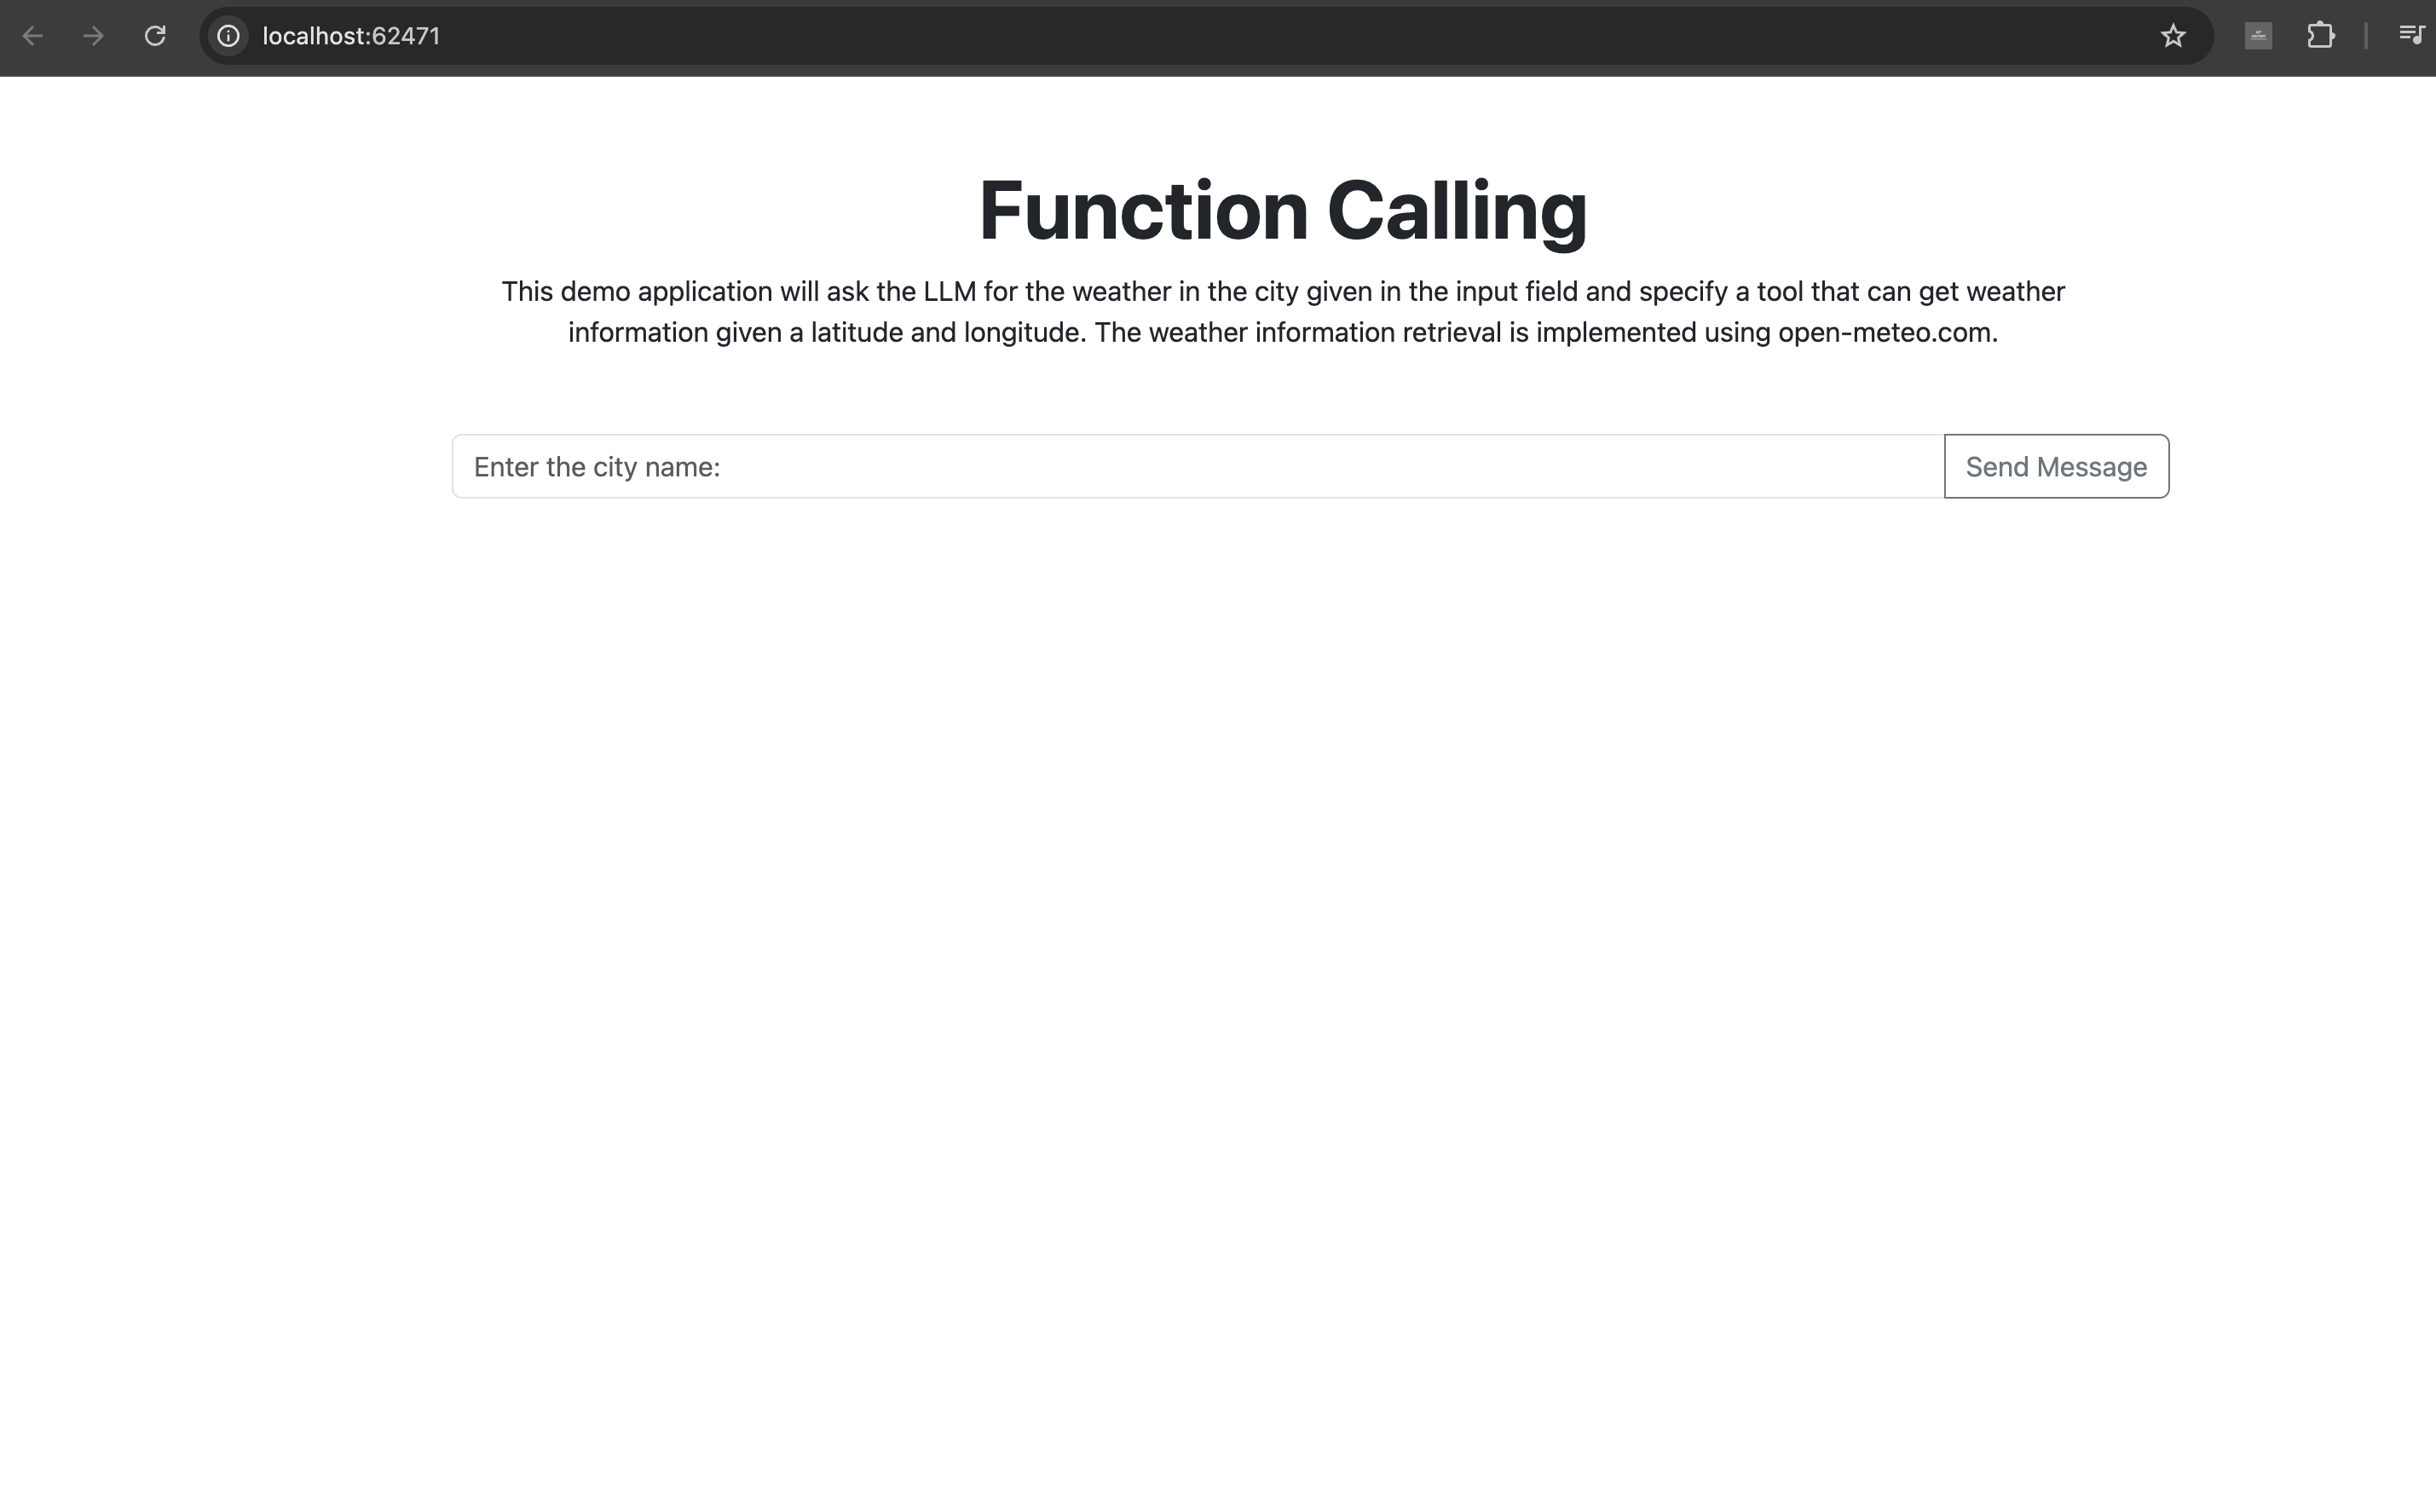
To go to the application, click the Open Details link to see the summary of the running recipes. Click the box with the arrow on the right-hand side (see Figure 6) to open the main page of the application, shown in Figure 7.
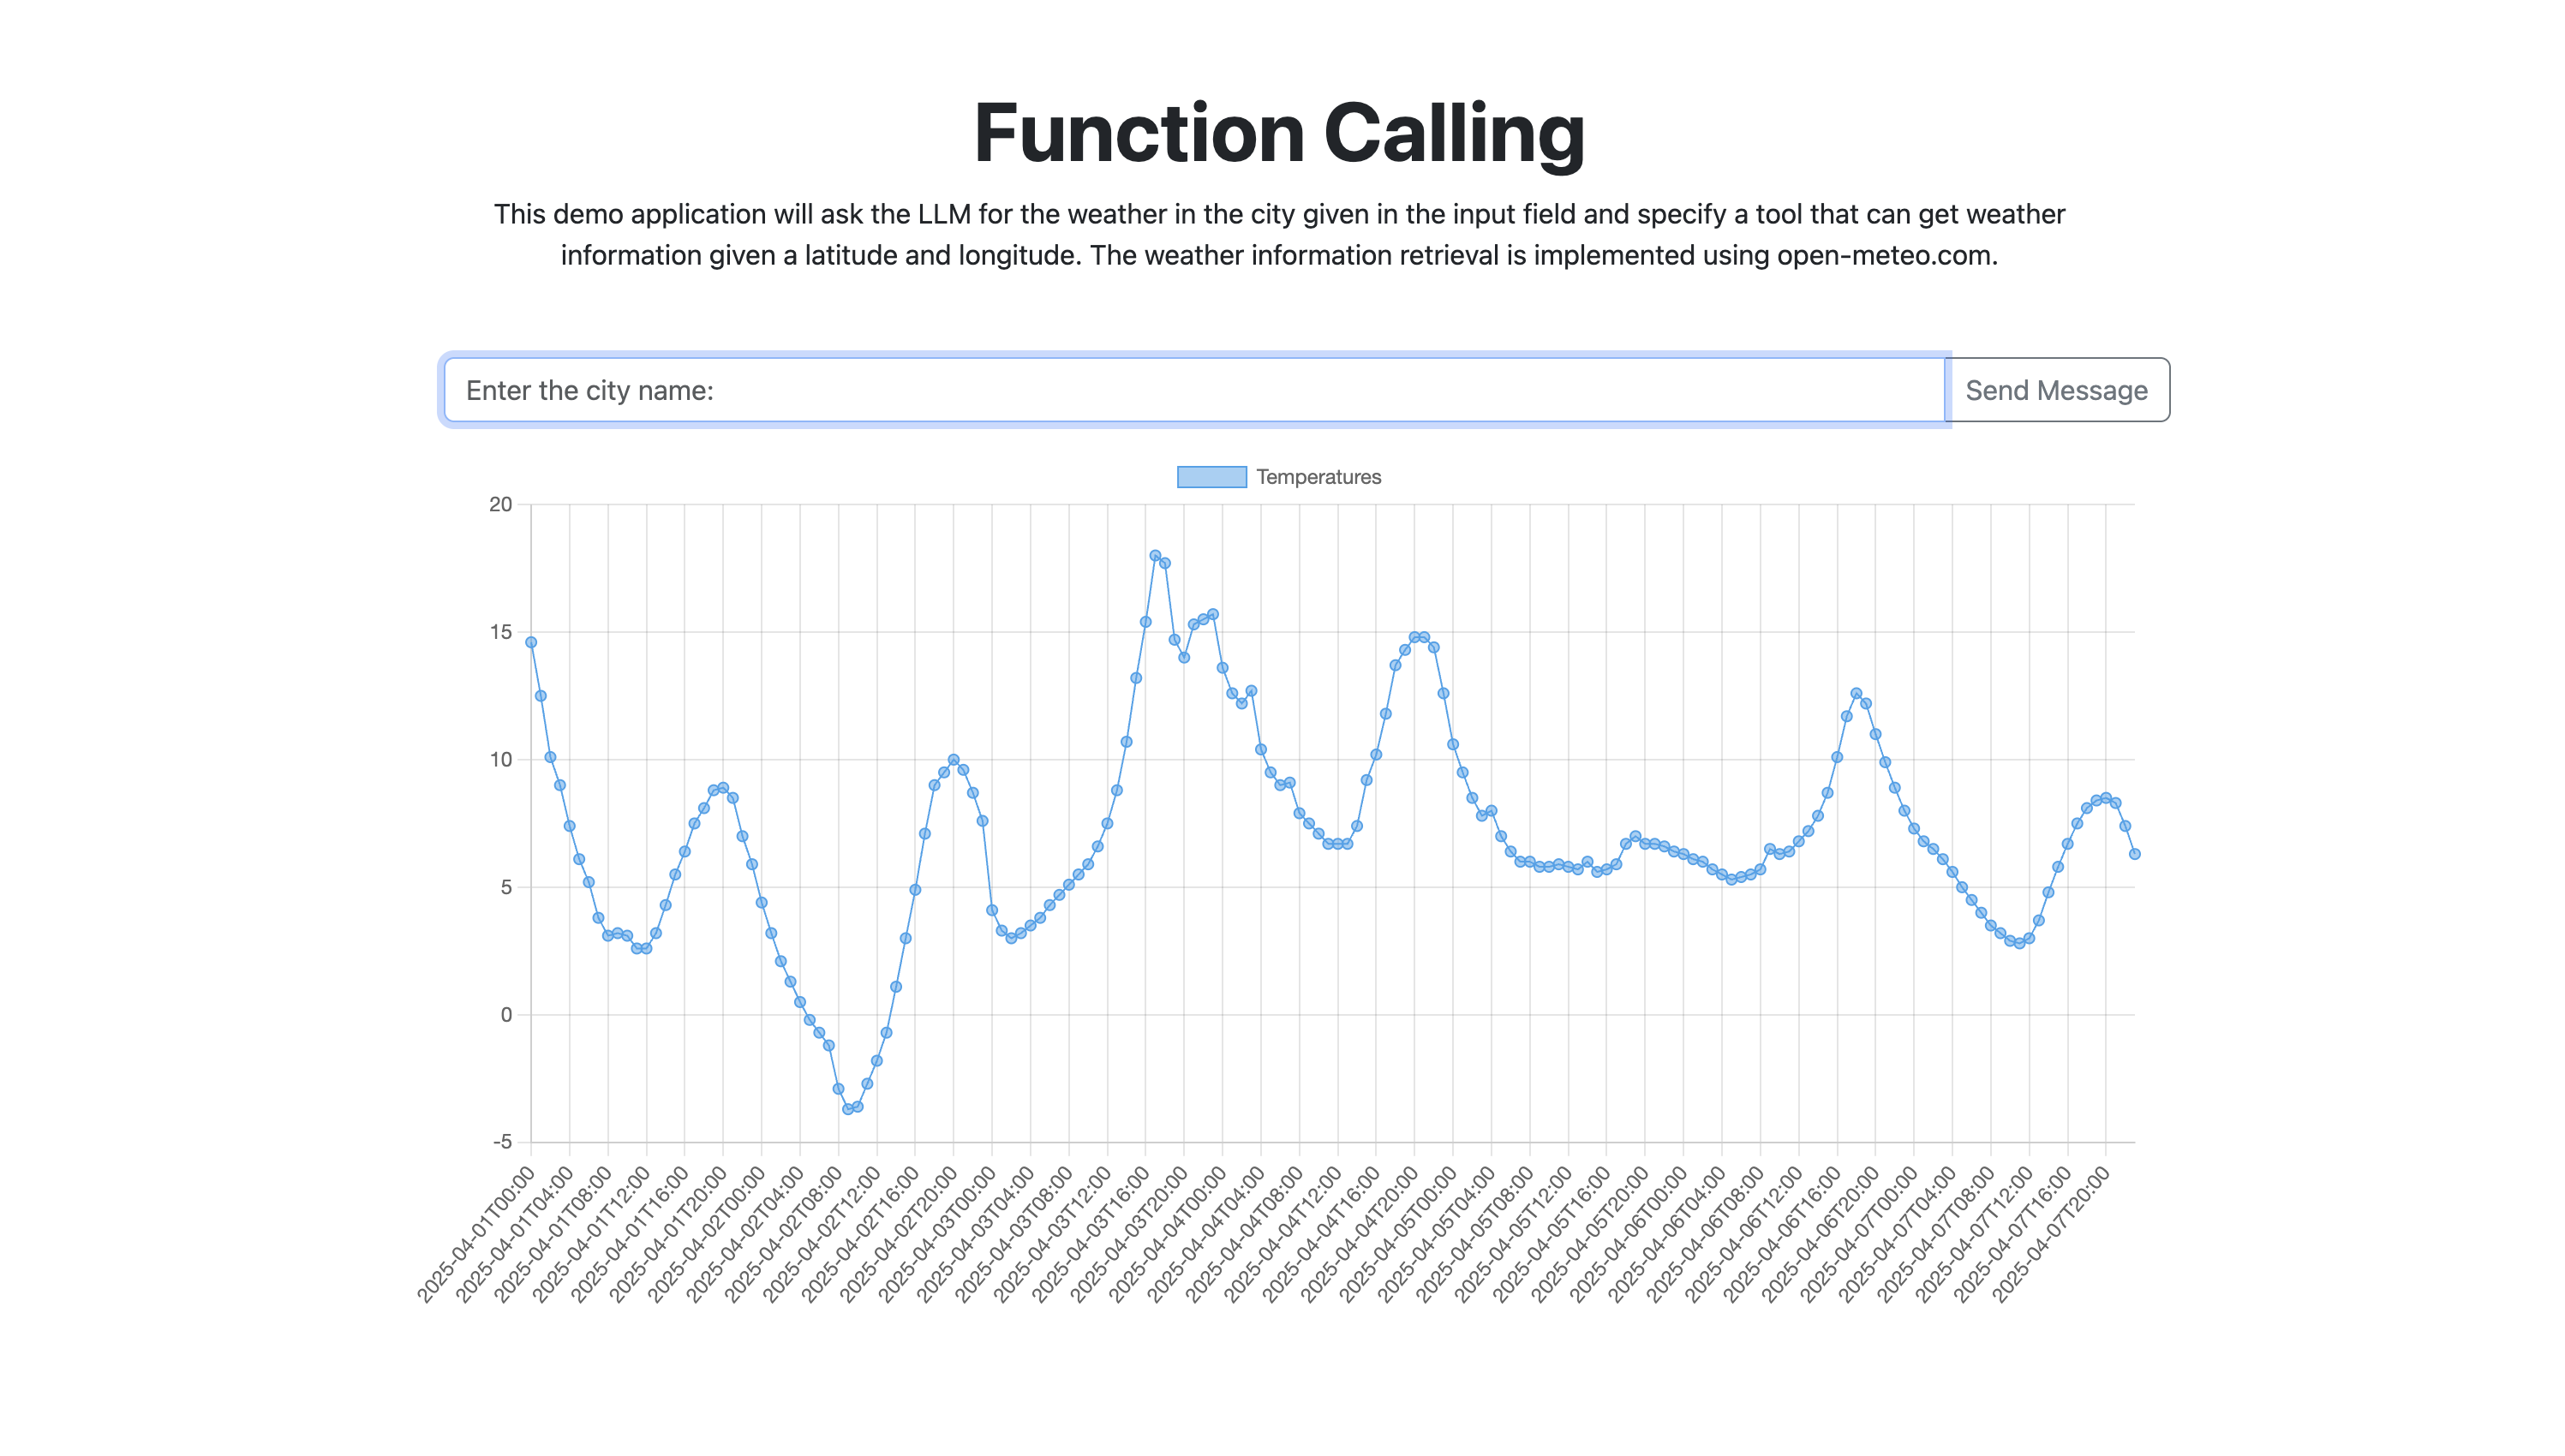
Within the application, you can enter a city to get its weather information, as shown in Figure 8.
Looking at the recipe
Let's break down the components of the application. We'll start by exploring the client-side implementation.
The application front end
Because the front end was pretty simple, I opted to not use any type of framework and stick to just “regular” HTML and JavaScript. It uses some bootstrap for styling, and the chart is created by using the chart.js library.
Below is a truncated version of what the app.js looks like. It highlights only the important parts like sending the data to the server and creating the chart. To see the full front-end code, check it out on GitHub.
function app () {

  sendMessageButton.addEventListener('click', (evt) => {
    messageHander();
  });
  function messageHander() {

    // Send to the server
    sendToServer(userMessageTextValue);
  }
  function createChart(temperatureData) {
    // Create the chart from the data
    if (myLineChart) {
      myLineChart.destroy();
    }
    myLineChart = new Chart(chartCtx, {
      type: 'line',
      data: {
        labels: temperatureData.hourly.time,
        datasets: [{
          label: 'Temperatures',
          data: temperatureData.hourly.temperature_2m,
          borderWidth: 1
        }]
      },
      options: {
      }
    });
  }
  async function sendToServer(city) {
    const result = await fetch('/api/temperatures', {
      method: 'POST',
      headers: {
        'Content-Type': 'application/json',
      },
      body: JSON.stringify({
        city: city
      })
    });
    const jsonResult = await result.json();
    createChart(jsonResult.result);
  }
}
app();=
You can see that when the Send button is clicked, the city is sent to an endpoint on the back end called api/temperature. The data returned will then be used to create our chart. We will see in the next section how we use our LLM to call a function to get the weather data from the open-meteo.com service.
The application back end
The back end is using Fastify to serve our front end and the endpoint it connects to.
Our endpoint looks like this:
import { askQuestion } from '../ai/weather-prompt.mjs';
async function temperatureRoutes (fastify, options) {
  fastify.post('/api/temperatures', async (request, reply) => {
    const city = request.body.city;
    // Call the AI stuff
    const response = await askQuestion(city);
    return {
      result: response
    }
  });
}
export default temperatureRoutes;
This is where we will call our AI code to find the weather data, using the askQuestion function that is imported.
The tool/function
Before we look at the main AI code in the askQuestion function, let's first take a look at the function/tool that we will be using:
import { z } from 'zod';
import { tool } from '@langchain/core/tools';
const weatherSchema = z.object({
  latitude: z.number().describe('The latitude of a place'),
  longitude: z.number().describe('The longitude of a place')
});
const weather = tool(
  async function ({ latitude, longitude }) {
    const response = await fetch(`https://api.open-meteo.com/v1/forecast?latitude=${latitude}&longitude=${longitude}&hourly=temperature_2m`);
    const json = await response.json();
    return json;
  },
  {
    name: 'weather',
    description: 'Get the current weather in a given latitude and longitude.',
    schema: weatherSchema
  }
);
export default weather;
The function/tool that we want the LLM to call is actually pretty simple. To define the tool, we use the tool method that we are importing from @langchain/core/tools. This method takes two arguments. The first argument is the function we want to call and the second is an object with the tools name, description and schema.
We are naming this tool weather and it should Get the current weather in a given latitude and longitude. We are using the zod package for creating our schema, which is defined at the top of the code.
The function itself takes a single object that should include the latitude and longitude as defined by our schema. The function then makes a call out to the open-meteo API with those values. The result of that call is then returned.
Asking the question
Now that we have an idea of what our tool/function looks like, it is time to look at how the askQuestion works and uses our tool/function. The full code is located in this GitHub repository, but let's take a look at some of the important sections below:
import weather from './tools/weather.mjs';
const model_service = process.env.MODEL_ENDPOINT ||
                      'http://localhost:58091';
export async function askQuestion(city) {
  // Wait until the server is running
  const modelServer = await checkingModelService();
  const prompt = ChatPromptTemplate.fromMessages([
    [ 'system',
      'You are a helpful assistant. ' +
      'You can call functions with appropriate input when necessary.'
    ],
    [ 'human', 'What is the weather like in {location}' ]
  ]);
  const tools = [weather];
  const toolNode = new ToolNode(tools);
  let llm;
  try {
    llm = createLLM(modelServer.server);
  } catch (err) {
    console.log(err);
    return {
      err: err
    }
  }
  const llmWithTools = llm.bindTools([weather], {tool_choice: 'weather'});
  const callModel = async function(state) {
    const messages = await prompt.invoke({
      location: state.location
    });
    const response = await llmWithTools.invoke(messages);
    return { messages: [response] };
  }
  // Define the graph state
  // See here for more info: https://langchain-ai.github.io/langgraphjs/how-tos/define-state/
  const StateAnnotation = Annotation.Root({
    ...MessagesAnnotation.spec,
    location: Annotation()
  });
  const workflow = new StateGraph(StateAnnotation)
    .addNode('agent', callModel)
    .addNode('tools', toolNode)
    .addEdge(START, 'agent')
    .addEdge('agent', 'tools')
    .addEdge('tools', END);
  const app = workflow.compile();
  // Use the agent
  const result = await app.invoke(
    {
      location: city
    }
  );
  return JSON.parse(result.messages.at(-1)?.content);
}
The first thing we do is import the tool/function code, which will be used in our askQuestion function. We create our prompt to ask what the weather is like in the location we passed in.
Next, we define a tool with the tool/function we imported. We add our tool to the ToolNode method which runs the tool requested in the last AIMessage. The output will be a list of ToolMessages, one for each tool call. This is important because when talking about what tool/functions are, we learned that the LLM doesn’t actually make the tool call; it only prepares and formats the parameters for the tool, and it is up to the user to make the calls. This method abstracts away all the complexity of actually making the call from the LLM response.
We create our LLM and then bind that tool to the LLM using the bindTools method. We are also setting the tool_choice parameter to tell the LLM to always use this tool. In this scenario, this is okay brcause our application only does this one thing, but in a real-world application, you might leave this out.
Next, we define a function, callModel, that will be responsible for invoking our LLM calls with the prompt and then returning that result.
Because we are using the LangGraph framework, we need to set up a graph workflow. We add two nodes to the graph, callModel and toolNode. We then define our flow by adding in the edges of the graph. Once those are added, we compile it and then invoke it, passing in the location.
The flow looks like this:
- We start by calling the
callModelmethod, which invokes our LLM. - When that is returned, our
toolNodeis then called, which, as mentioned earlier, will use the result from our LLM call and invoke our weather tool/function. - Once that is done, the workflow is ended and the last message in the result, which will be our tool/function result, is then returned to the front-end to be displayed by our chart.
An astute observer might notice that we only pass the LLM a city, but our tool/function takes the latitude and longitude. These values are actually generated by the LLM and then passed into the function.
Wrapping up
Hopefully this post has given you a good introduction to Podman AI Lab and the Node.js function calling recipe. Now you're ready to experiment by extending the recipe to build your own application and package it into containers using the ingredients provided.
If you want to learn more about developing with large language models and Node.js, take a look at Essential AI tools for Node.js developers.
If you want to learn more about what the Red Hat Node.js team is up to in general, check these out:
- Visit our Red Hat Developer topic pages on Node.js and AI for Node.js developers.
- Download the e-book A Developer's Guide to the Node.js Reference Architecture.
- Explore the Node.js Reference Architecture on GitHub.
