This article will take you through the process of getting started with Podman Desktop, creating a Node.js application (you can use your preferred programming language instead, if you like) and building it into a container using Podman Desktop, and configuring a continuous integration (CI) pipeline to build and push your container images to Quay.io using GitHub Actions workflows. In essence this is an introduction to the inner and outer loops of cloud-native development.
To get started, install Podman Desktop. This step is pretty straightforward, owing to the fact that Podman Desktop has a downloads page that supports typical installation flows for Linux, macOS, and Windows and has setup guides for each platform. Once installed, it will look something like this (Figure 1).
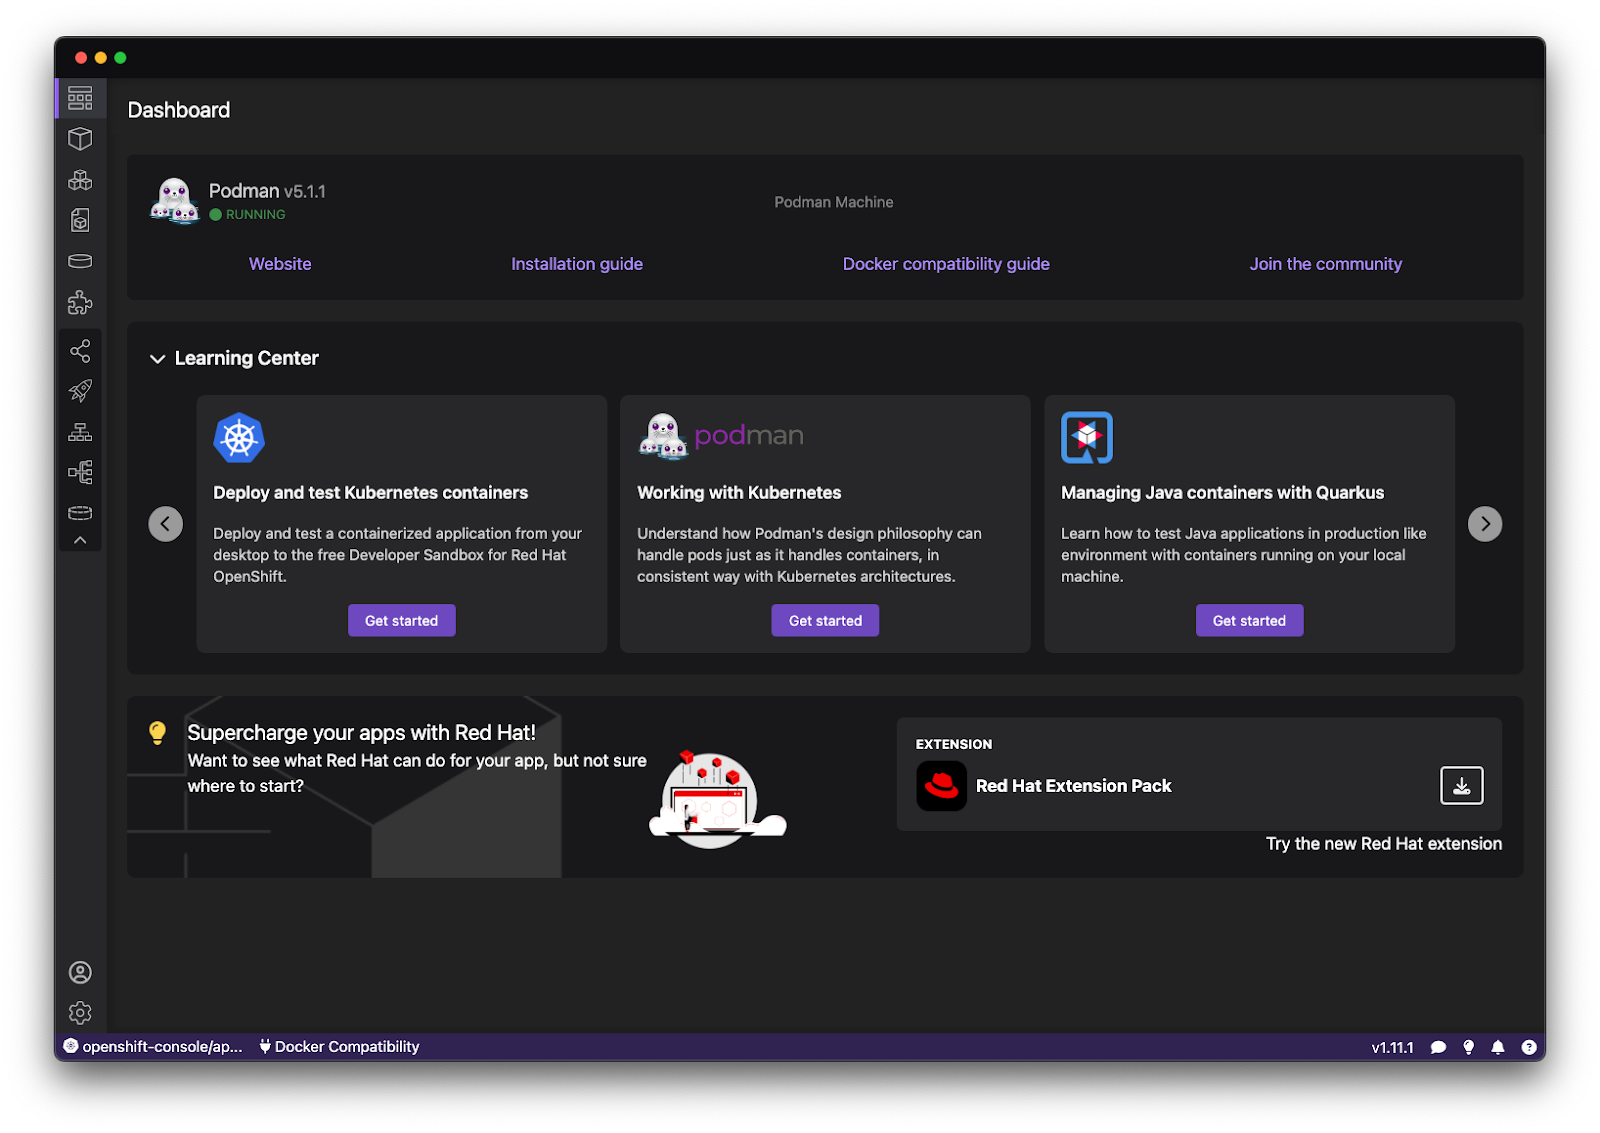
You’ll be prompted to install the Podman binary during the installation if it’s not already present on your system. The Podman binary will also be available in your terminal, allowing you to manage containers using a CLI as well as with the Podman Desktop application.
Create a Node.js application
A simple application will suffice for this article, so I’ve taken the liberty of creating a minimalist Node.js application that tracks the top story on Hacker News over time, and logs it to the console whenever it changes. The complete source code for this application is available in this repository on GitHub. You can validate it locally by following the instructions in the repository’s README.
Build and run a container image
You can use Podman Desktop to build and run a container image of the Node.js application locally. Start by forking the repository to your own GitHub account, then clone it to your local development environment using the Git CLI or GitHub desktop application.
Define a Containerfile (or Dockerfile)
A Containerfile (or Dockerfile) is required to build your application into a deployable container image. The Containerfile for this application contains (see what I did there?) five relatively simple instructions. The inline comments explain what each instruction is doing:
# Use the Red Hat Universal Base image for Node.js v20
FROM registry.access.redhat.com/ubi8/nodejs-20-minimal

# Copy package.json and package-lock.json into the container
COPY package*.json .

# Install production dependencies
RUN npm ci --omit dev

# Copy application code into the container
COPY index.mjs index.mjs

# Define the command that is run when the container starts
CMD ["node", "index.mjs"]
These instructions are all you need to get a working container image that can be used to deploy your Node.js application as a container. The sample application linked above already includes this Containerfile, but if you're using your own application you'll need to add this file to the root of your repository.
It’s worth noting that a Containerfile can become a little more complicated if you’re using TypeScript or JavaScript bundlers, and might need Linux permission adjustments if you plan to deploy on Red Hat OpenShift—don’t worry, you can read more about building Node.js containers in this article.
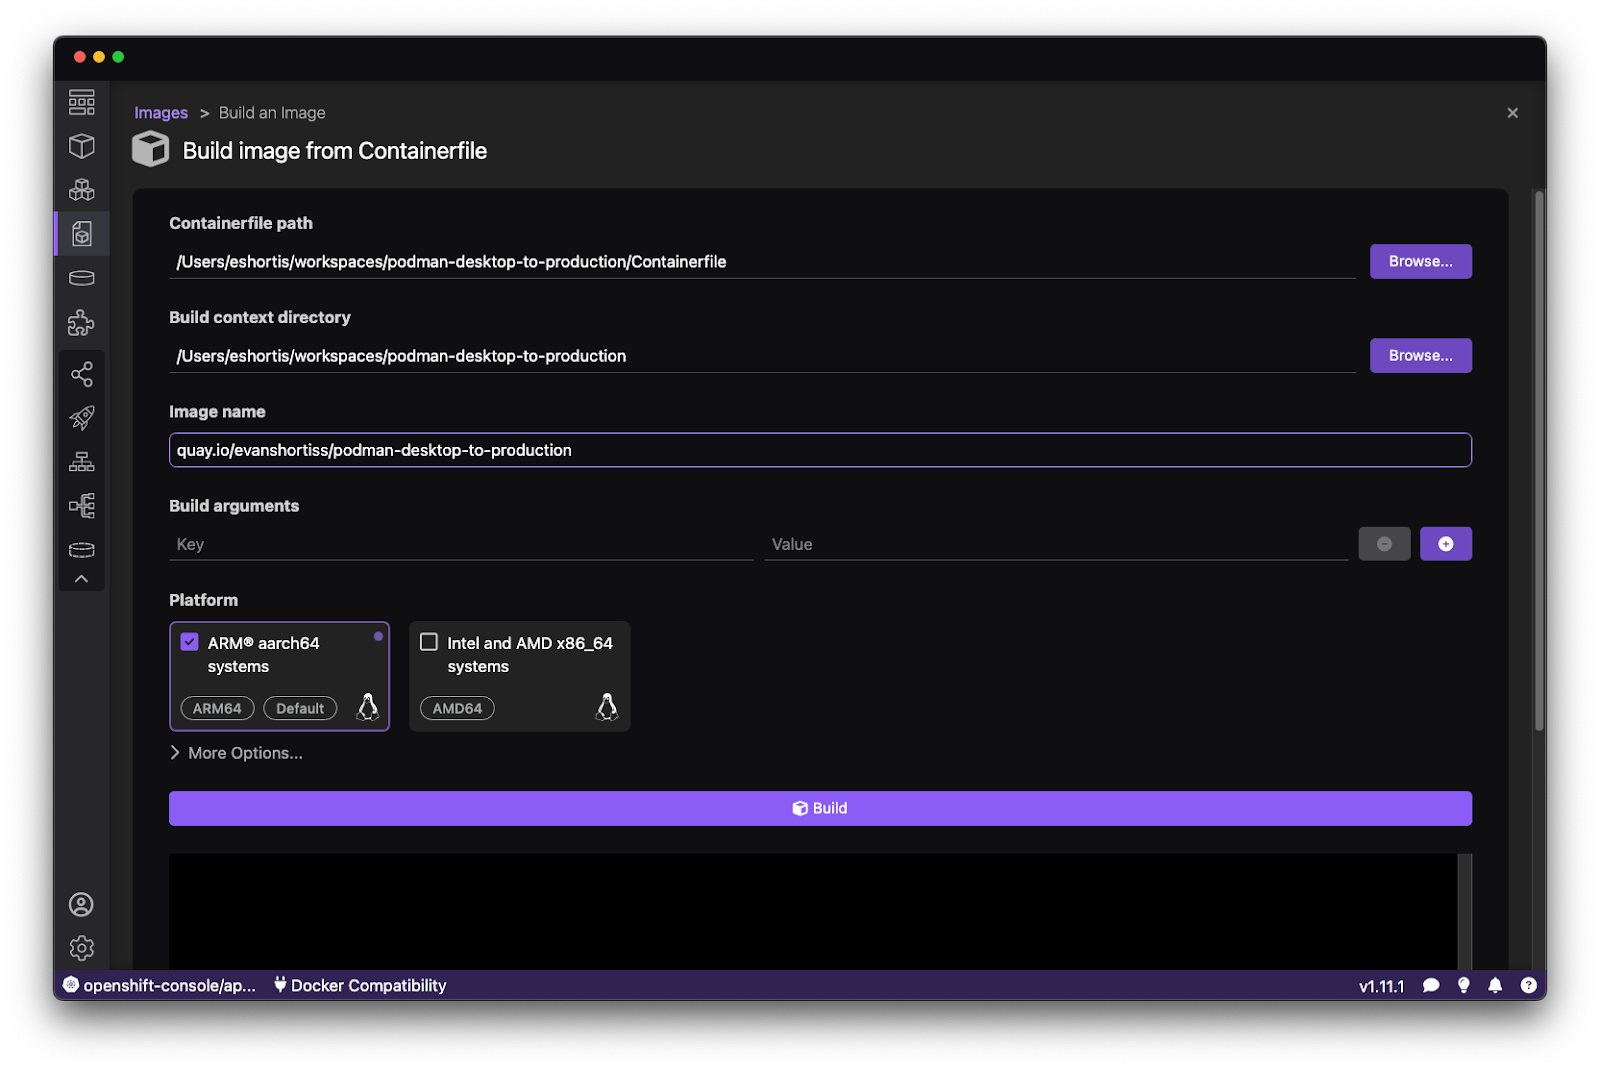
Use Podman Desktop to build the container image
To build the container image, go to the Images screen of Podman Desktop and click the Build button. Select the Containerfile in the repository that you cloned, and enter an image name, e.g., hackernews-tracker. You can also choose a Platform to build against, or create a multi-architecture build by selecting both aarch64 and x86_64—during local development it’s most convenient and fastest to build for the architecture that matches your development machine’s architecture. Click Build, and after a few moments you’ll have a container image (Figure 2).
Run the container image
With a container image in hand, you can now deploy a running container based on that image using Podman Desktop. Visit the Images section of Podman Desktop. Your new container image will be listed, along with the base image it was built from. See Figure 3.

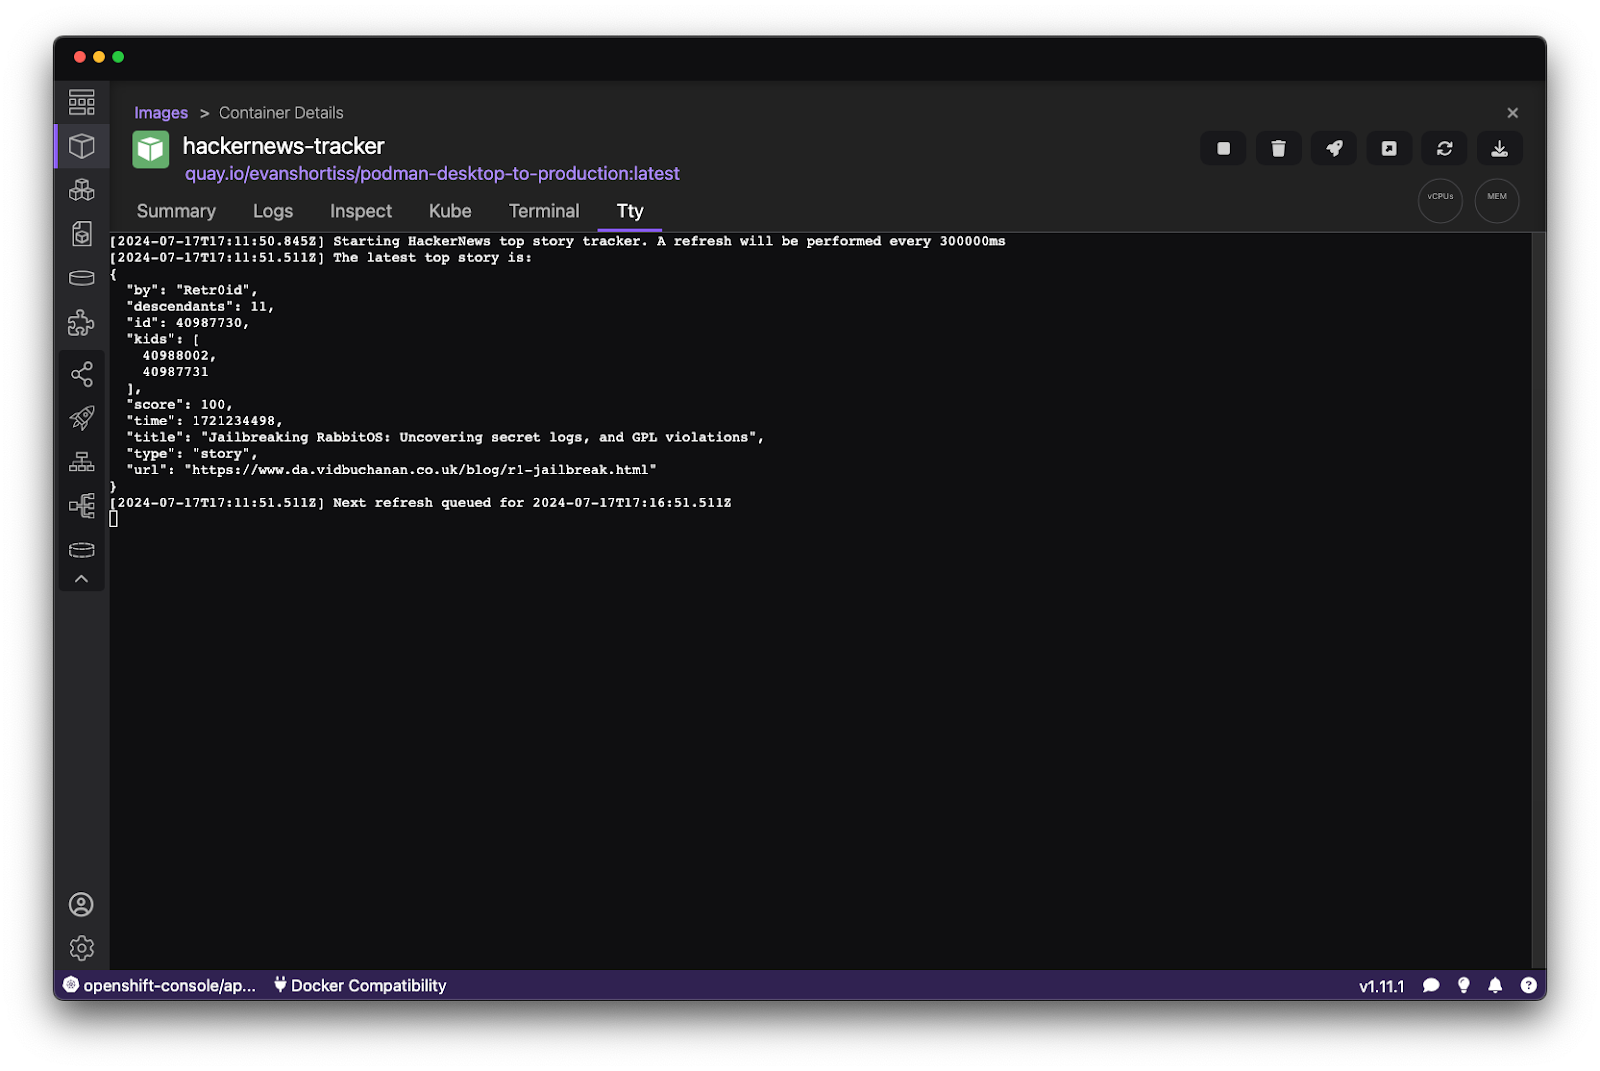
Click the Play icon on the row that corresponds to your new container image, enter a Container Name when prompted, then click the Start Container button. The container will start near instantaneously and should log the current top story on Hacker News. Leave it running and check the logs throughout the day to observe changes to the top story (Figure 4).
Push your image to a container registry
With the help of Podman Desktop, we've been able to validate that our container image is working properly—this is part of the development process's inner loop. We want to be able to quickly build, test and run our containers during the local development of our application.
Once you're satisfied that the application is ready to be deployed, you’ll usually need to push the image to a cloud or self-hosted image registry such as Quay (quay.io), GitHub Container Registry (ghcr.io), or DockerHub (docker.io).
You can push the image using Podman Desktop, but generally speaking it’s best to set up a CI (continuous integration) pipeline to build your images when you push changes to your production branch in Git. You can use this pipeline to run tests, code quality checks, vulnerability scans, and create a unique container image for every commit to your production branch.
Another benefit is that your CI pipeline can efficiently build images for x86-64 infrastructure if your development machine is ARM-based.
I’ll be using GitHub Actions workflows as a CI provider and Quay.io as my container registry in this section, but the instructions are generally applicable.
Select a container registry and obtain authentication credentials
You need to create an image repository, and obtain credentials that your GitHub Actions workflow (or other CI tool) can use to push container images to your image repository on Quay.io.
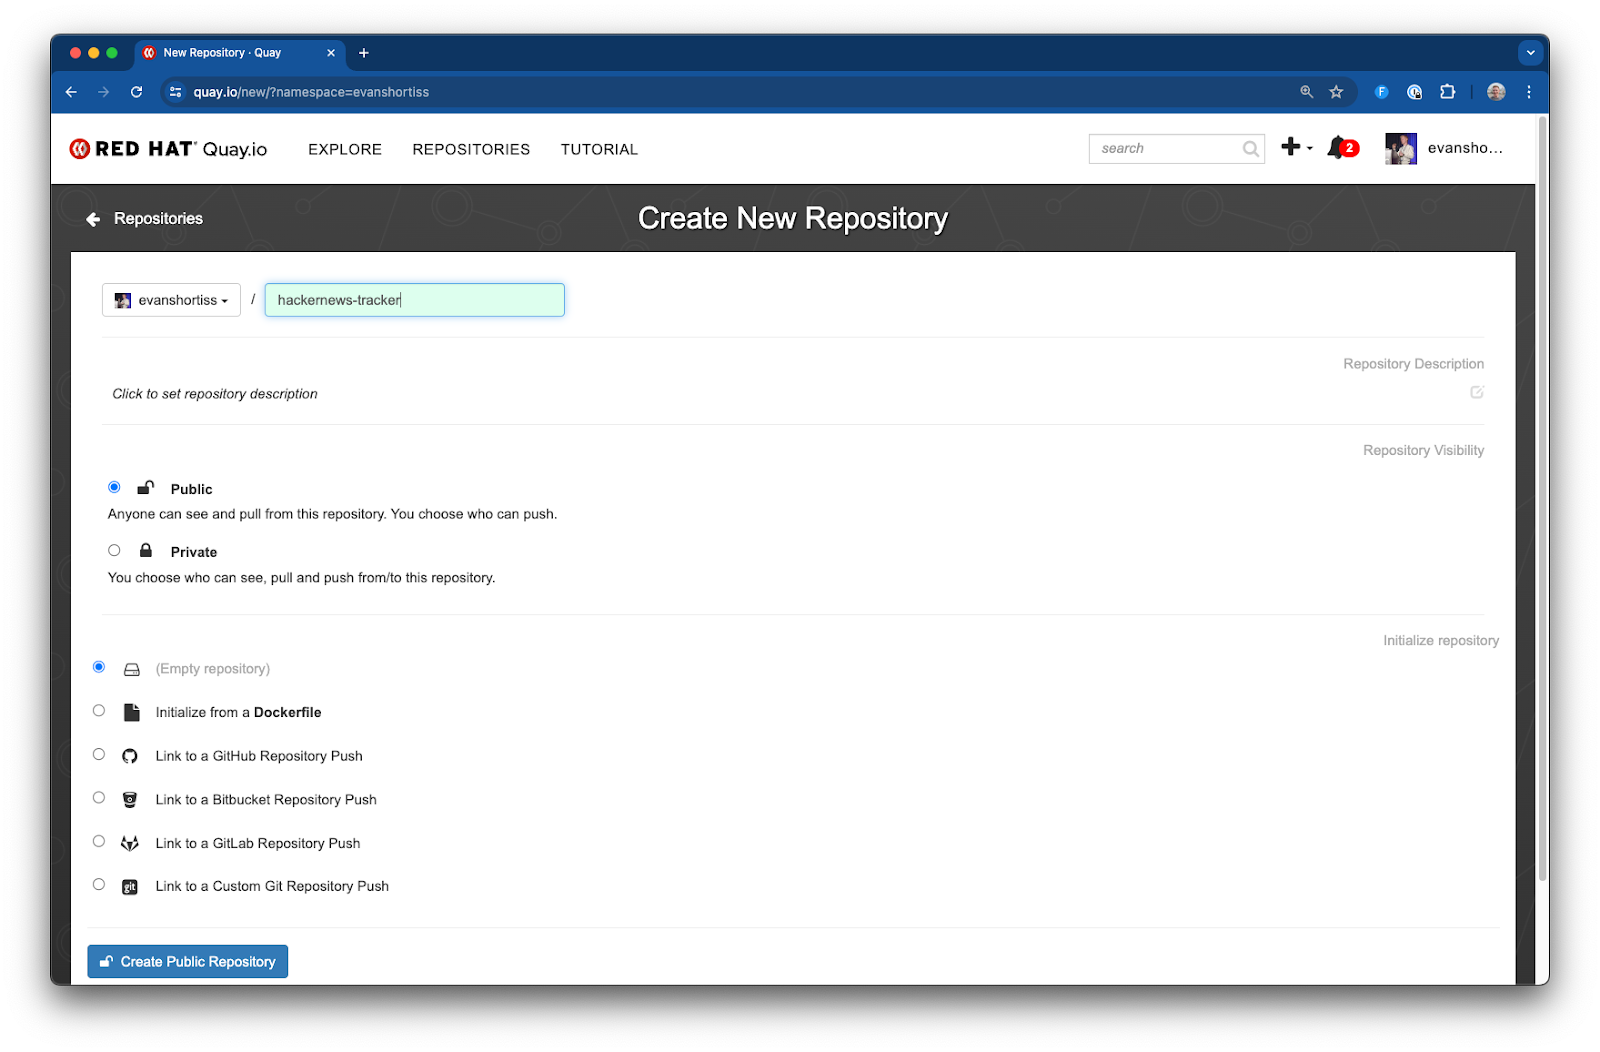
Register and sign into Quay.io, then use the plus icon in the top right hand corner of the page to create a new container image repository named hackernews-tracker. For the sake of simplicity, set the visibility as Public, and select Empty repository as the initialization option (Figure 5).
Next, click your profile picture and select the Account Settings page. Use the Create Robot Account button on the Robot Accounts page to create a new account. Provide write permissions to the hackernews-tracker repository (Figure 6).
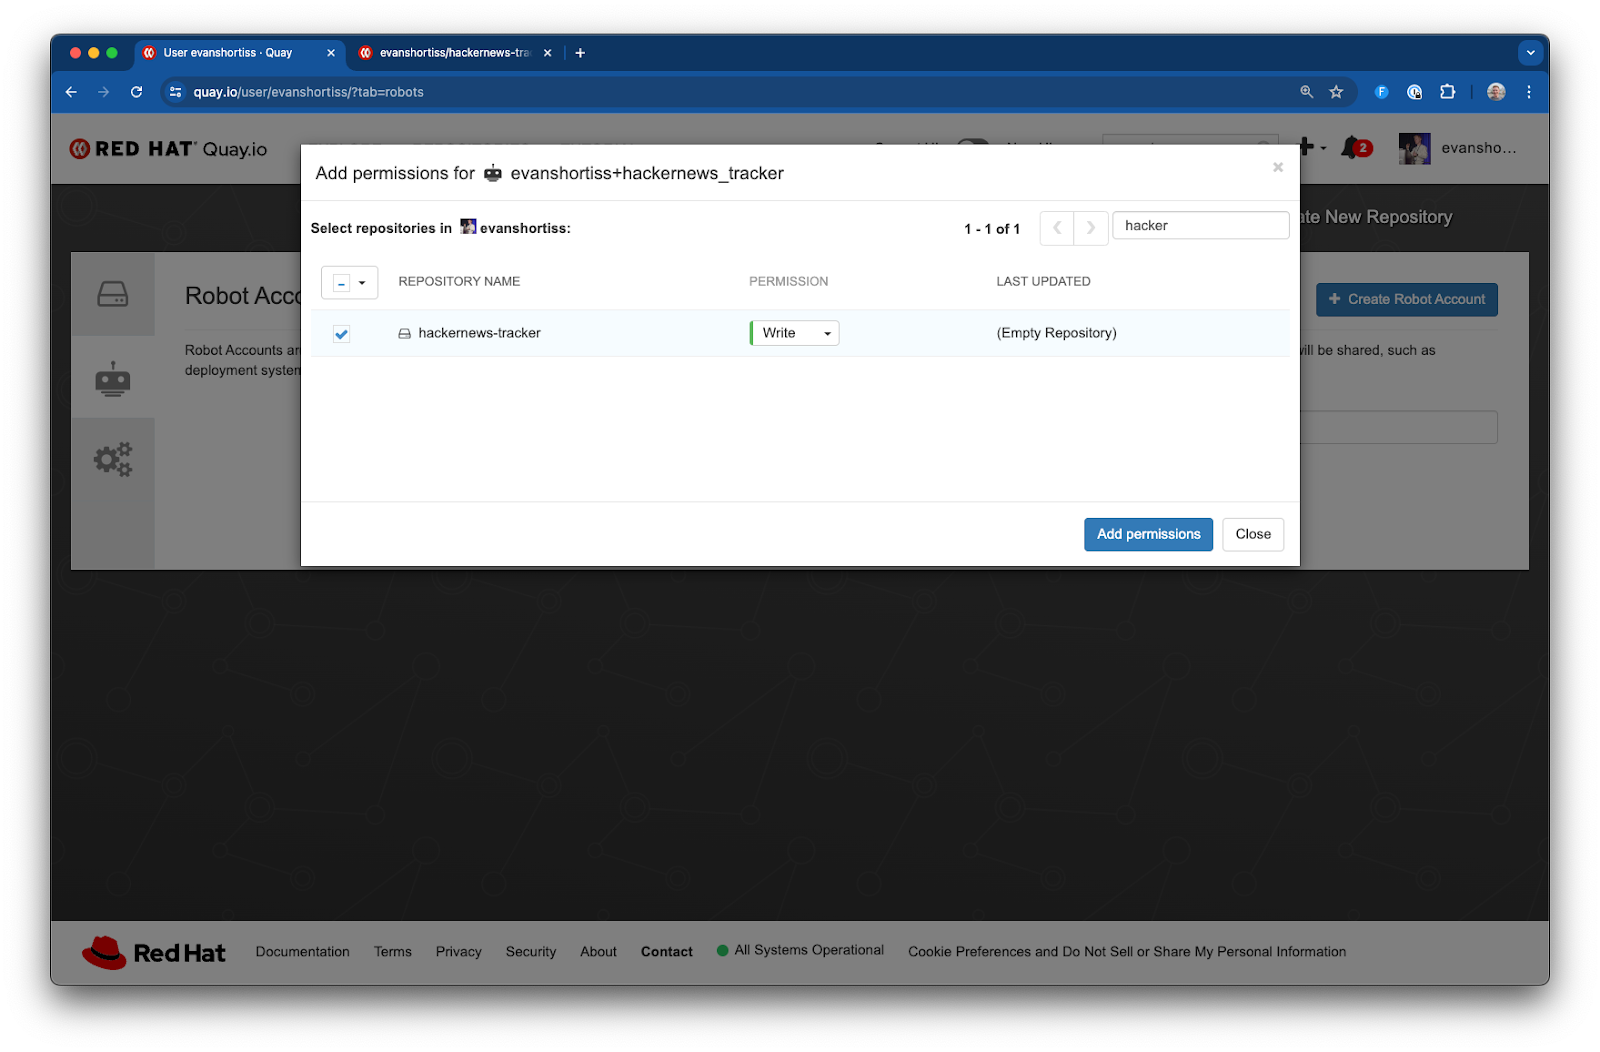
Click the new account in the Robot Accounts list to view the username and password associated with the robot account.
Configure GitHub actions
This section can be summarized as “add variables to the Git repository so it can push images to Quay.io”. Even if it looks like there’s a lot of content, there really isn’t much to it!
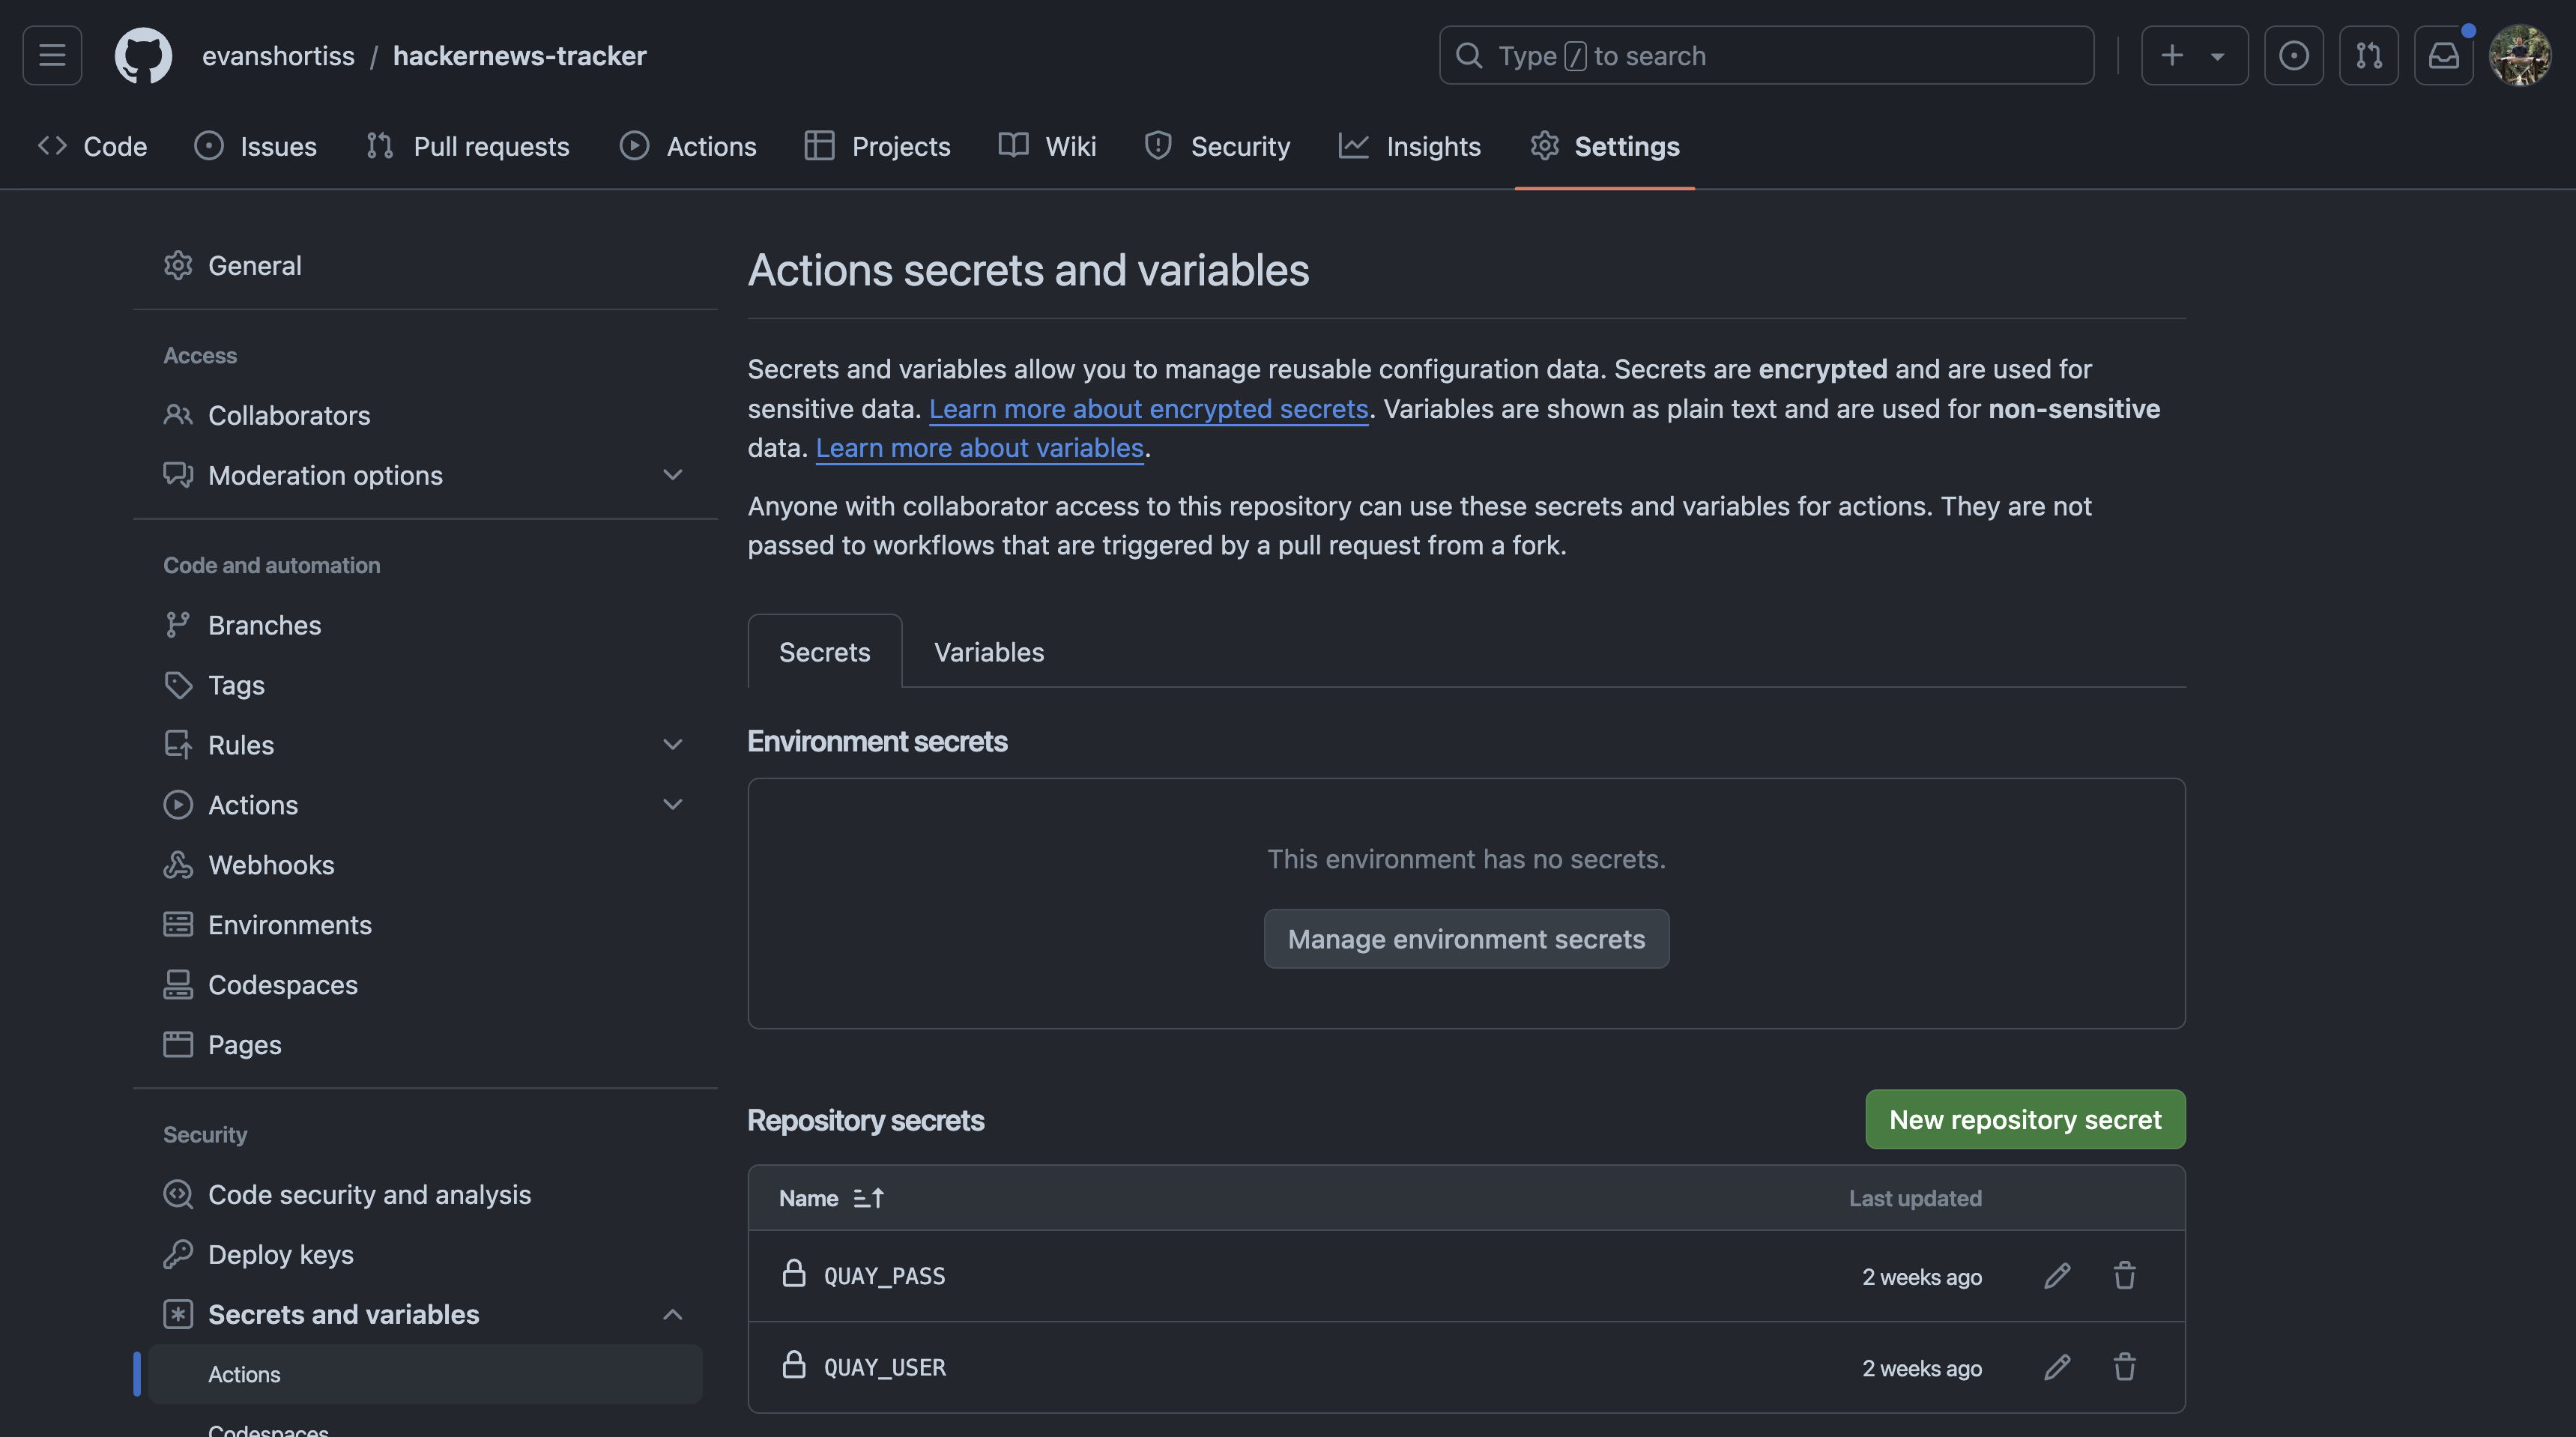
Head over to your fork of the sample application in GitHub and visit the repository Settings screen. Select Actions under the Secrets and variables section, and add two secrets using the New repository secret button:
QUAY_USER: Your Quay.io robot account username.QUAY_PASS: Your Quay.io robot account password.
You’ll also need to add a plaintext variable. Switch from the Secrets to the Variables tab and the New repository variable button. Add a variable named QUAY_ORG and set the value to your Quay.io username, or the name of the organization you want to push the container image to. See Figure 7.
Next, take a look at the build.yaml file in the .github/workflows directory inside the repository. It defines a build job with three steps:
- Log in to Quay.io using redhat-actions/podman-login, and the
QUAY_USERandQUAY_PASS. - Build and tag the image using Buildah (Podman uses Buildah behind the scenes). The
QUAY_ORGvariable is used here, to construct the image URL. - Push the image tags to your container image repository using redhat-actions/push-to-registry.
Everything’s in place to build and push the image, so let’s make it happen.
Push the image to the container registry
To trigger the GitHub Actions workflow (CI pipeline) you can either make a change to the application code and push it to the main branch, or select Actions from the root of GitHub repository then select the Build Node.js Container, and use the Run Workflow button.
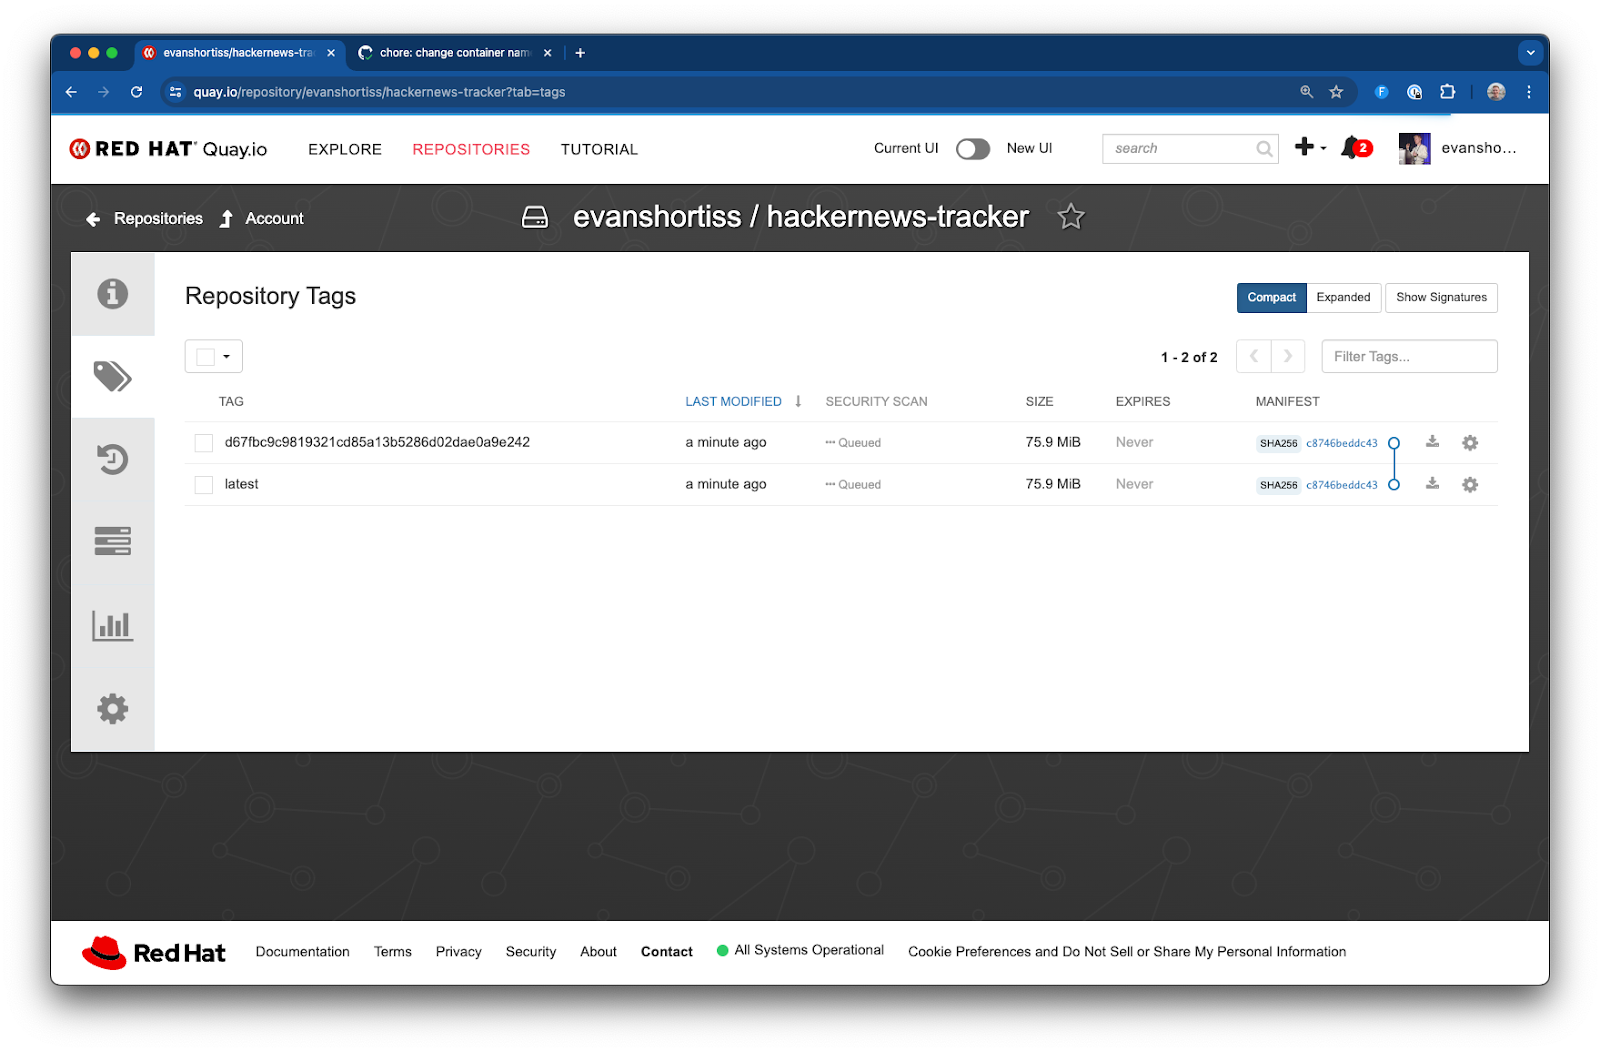
Once the workflow is complete, two new tags will be visible in your repository on Quay.io. One representing the specific commit that the build was generated from, and another representing the latest version of the image. The latest tag will change over time, but the tags for a specific commit will remain unchanged, allowing you to rollback to older versions of the application at any time by referencing the correct tag. See Figure 8. Amazing!
Deploy the container
Congratulations, you can now use Podman (or another container engine) to run your application in a production environment such as a machine running Red Hat Enterprise Linux (or other Linux distribution) or on an Red Hat OpenShift cluster.
If you’d like to deploy your application on OpenShift, you can try it for free using the OpenShift Developer Sandbox. You can use the built-in web-terminal to use the oc new-app command to deploy your container image, followed by the oc logs command to see the latest top story:
oc new-app quay.io/evanshortiss/hackernews-tracker
oc logs -l 'deployment=hackernews-tracker' -f
If you're self-hosting you can use the following command to start your application, and restart it if it stops for any reason other than explicitly issuing a podman stop command:
podman run -d --restart unless-stopped quay.io/evanshortiss/hackernews-trackerConclusion
By using Podman Desktop, you were able to build and validate a containerized application in a local development setting. You then learned how to create a CI flow to test, build, and push your container images to an image registry for production deployment. If you plan to run your container images as Pods in a Kubernetes or OpenShift cluster, be sure to try out the Kind and OpenShift Developer Sandbox extensions for Podman Desktop to streamline your development workflow.