Pedal, is a bike e-commerce platform, from a monolithic application to a modern microservice architecture designed specifically for the hybrid cloud. This setup helps ensure scalability and resilience.
This tutorial guides you through deploying Pedal’s microservice architecture top OpenShift. In this tutorial, we will discuss
- Red Hat’s deployment and management tools overview
- Setup of Pedal’s database
- Setup of environment variables using a configmap
- Deployment of 2 Java microservices to OpenShift and configuring the environment
Red Hat’s deployment and management tools
OpenShift®Microservice architectures, like Pedal’s, require a platform that can handle container orchestration efficiently. Red Hat OpenShift is an enterprise-grade Kubernetes container application platform. It orchestrates containers while automating their deployment, scaling, and management. OpenShift helps developers focus on coding, while Red Hat manages the intricacies of deployment and scaling. You can use the Developer Sandbox for Red Hat OpenShift to follow this tutorial. |
Advanced Cluster Management for KubernetesManaging applications as they grow and spread across multiple cloud environments is challenging. Red Hat Advanced Cluster Management for Kubernetes facilitates scaling Kubernetes clusters. It offers policy-based compliance, application lifecycle management, and cluster lifecycle management. Advanced Cluster Management tools help you manage your Kubernetes clusters from a single control point, ensuring consistency and compliance across environments. |
OpenShift GitOpsRed Hat OpenShift GitOps uses GitOps principles to help deliver and manage applications. It uses Git as a single source of truth for declarative infrastructure and application deployments. Implementing Argo CD as a controller, OpenShift GitOps integrates continuous integration and continuous deployment (CI/CD) processes directly into OpenShift, ensuring that deployments are consistent, traceable, and reproducible. Any application or infrastructure changes are version-controlled in Git, making it straightforward to track and roll them back if necessary. |
Why does OpenShift standout for Pedal’s microservice architecture:
OpenShift supports microservices deployment through:
- Container orchestration with Kubernetes: The Red Hat OpenShift Container Platform is an extended version of Kubernetes, providing an environment for deploying, scaling, and managing containerized applications.
- Integrated developer tools: OpenShift offers integrated CI/CD pipelines to deploy updated microservices efficiently without affecting other services.
- Service discovery and load balancing: Built-in service discovery tools automatically detect new services and containers. Additionally, load balancing mechanisms distribute the traffic load across a service’s multiple instances, making scaling services transparent and efficient.
- Network policies: OpenShift enables defining fine-grained network policies, ensuring secure communication between microservices.
- Logging and monitoring: Integrated tools like Prometheus and Grafana offer insights into microservices’ performance and enable quick troubleshooting.
You can use the following mechanisms to deploy applications on OpenShift:
- Containers: Containers offer isolated, efficient, and scalable deployment. They’re the primary choice on OpenShift, suitable for Pedal’s core microservices. OpenShift deploys containers as pods, the smallest deployable component in Kubernetes.
- Serverless: Serverless applications only consume resources when running. This approach can be cost-effective for services with variable loads, so it’s a good choice for Pedal’s components that experience traffic spikes.
- Virtual machines (VMs): OpenShift supports KubeVirt to run VMs. However, VMs are generally less efficient than containers for microservices. We won’t use them in this tutorial.
Overview of Pedal microservices
- Bike-Service - A Quarkus based service to handle bike-related functions
- User-Service - A Quarkus based service to manage user data and actions
The image below shows the topology view of OpenShift once all our services deployed and ready.
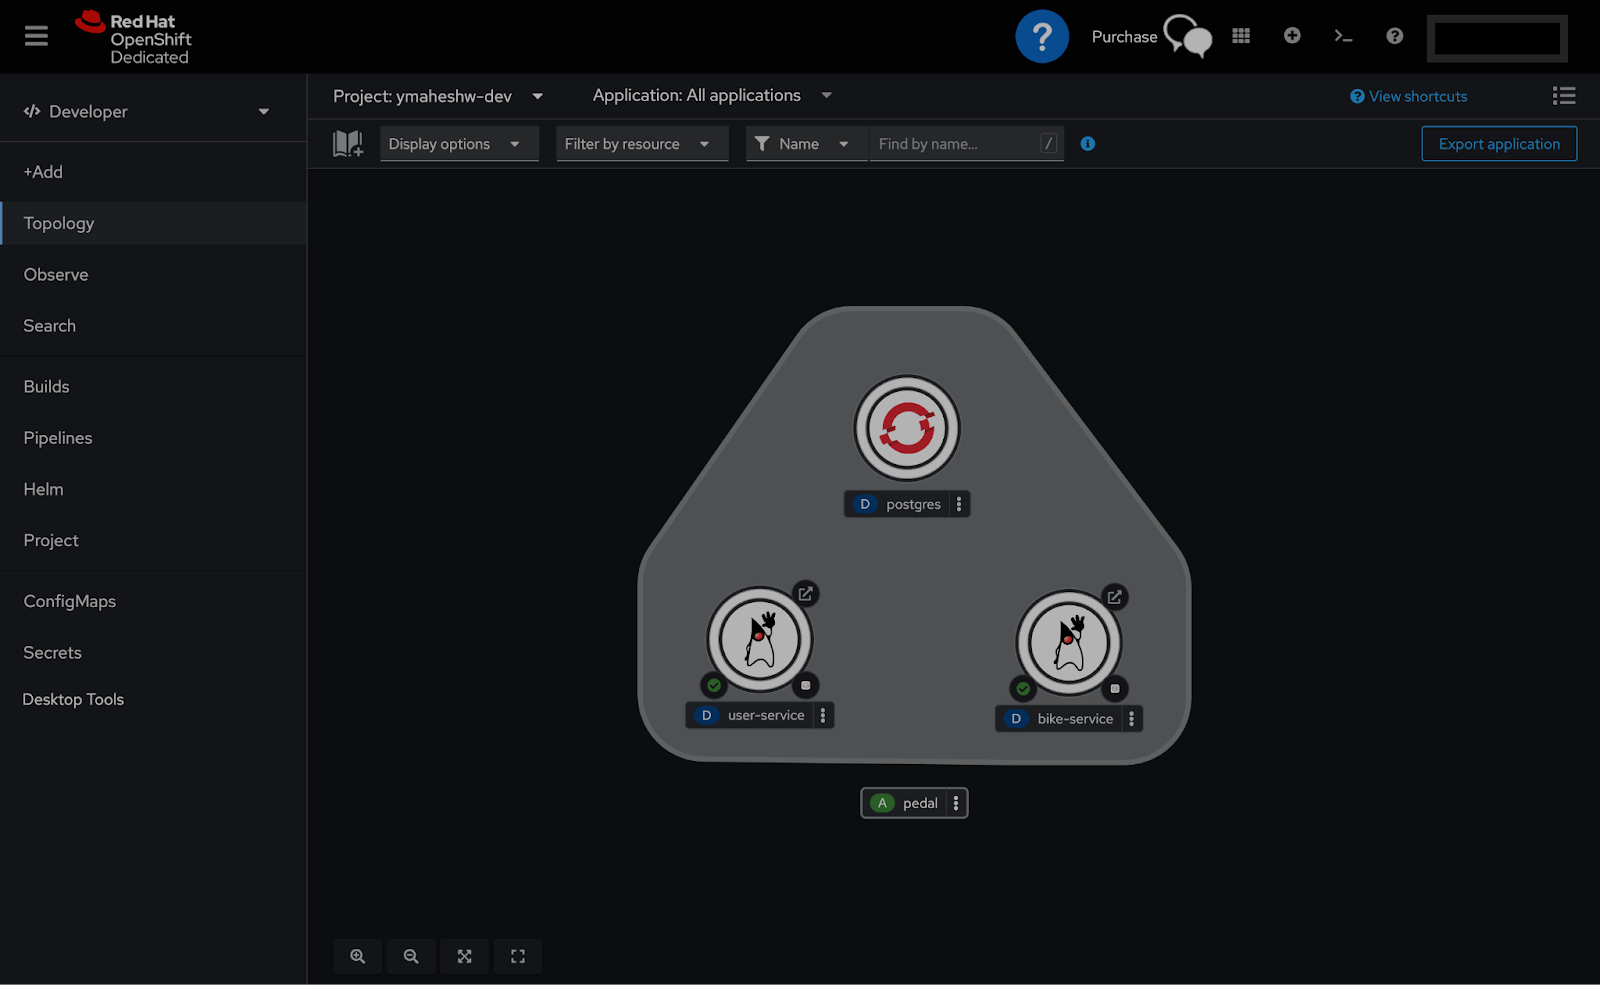
Deploying Pedal Microservices
Setting up the Postgres database on OpenShift
Deploying the database
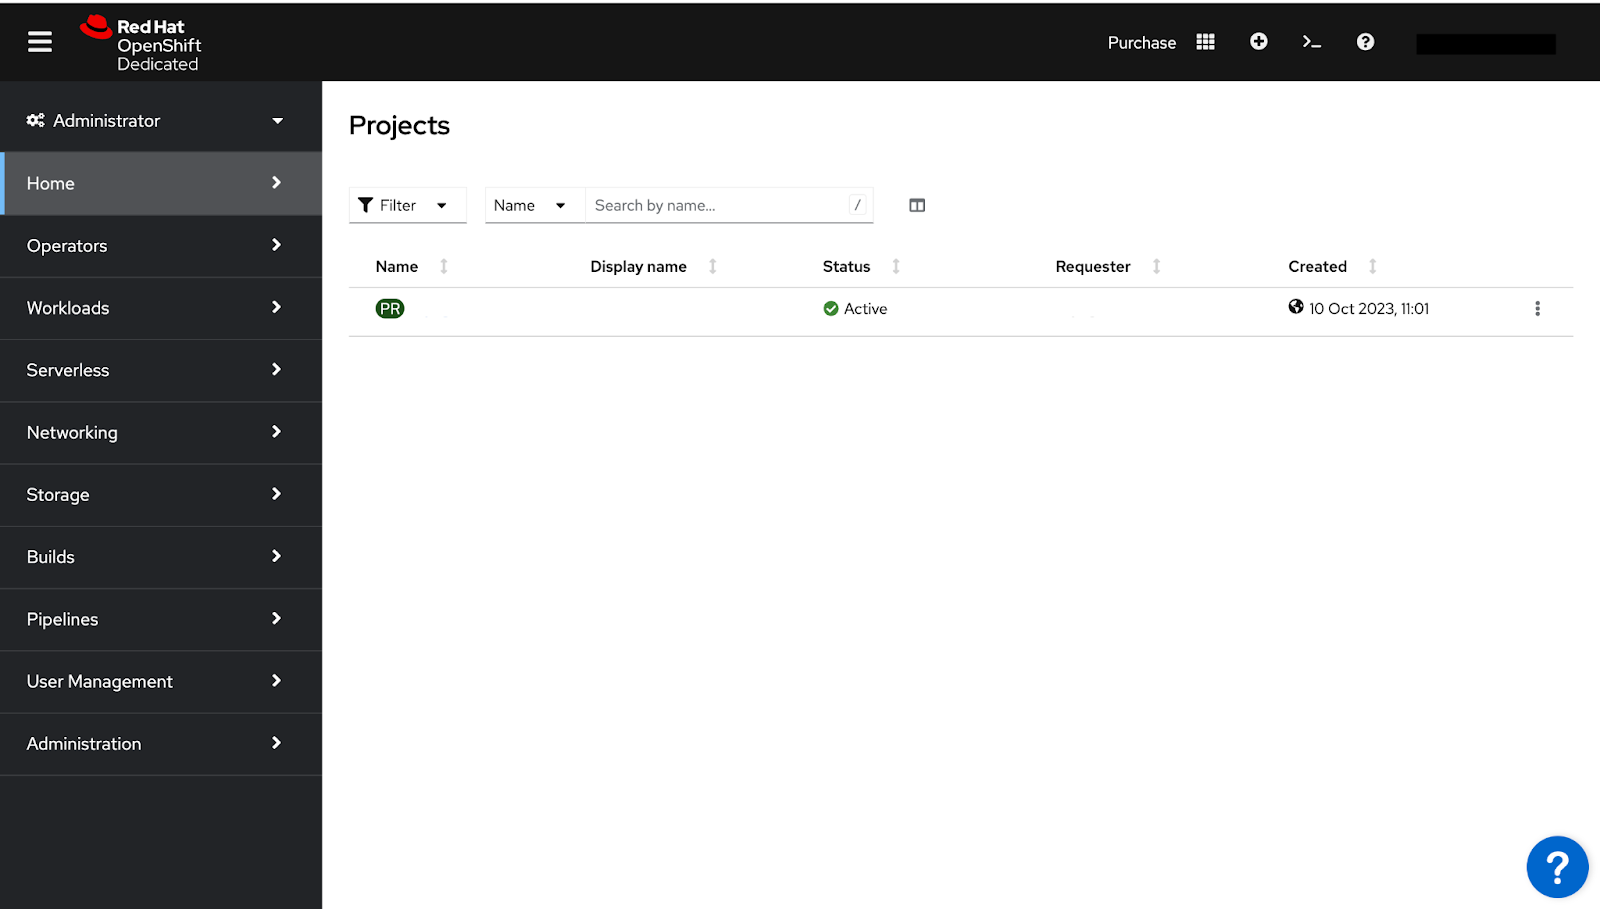
Use a pre-configured YAML file to set up a PostgreSQL deployment directly from the OpenShift console. First, switch to the Administrator view. Then, click + on the top right.
Create a configmap
Select the active project and namespace on the OpenShift console and add the following two YAML files for configuration and deployment. ConfigMap provides configuration for the Postgres instance. Deployment specifies how to run the Postgres container, applying the appropriate configurations from ConfigMap.
Postgres ConfigMap YAML:
apiVersion: v1
kind: ConfigMap
metadata:
  name: postgres-config
  labels:
    app: postgres
data:
  POSTGRES_DB: postgresdb
  POSTGRES_USER: admin
  POSTGRES_PASSWORD: <Your password>
Note: Replace the POSTGRES_PASSWORD placeholder with a password of your choice.
Create a deployment
Navigate to Workloads > Deployments >Create Deployment paste the following YAML to create a deployment
Postgres Deployment YAML:
kind: Deployment
apiVersion: apps/v1
metadata:
  name: postgres
spec:
  replicas: 1
  selector:
    matchLabels:
      app: postgres
  template:
    metadata:
      creationTimestamp: null
      labels:
        app: postgres
    spec:
      volumes:
        - name: postgredb
          emptyDir:
            sizeLimit: 500Mi
      containers:
        - resources: {}
          terminationMessagePath: /dev/termination-log
          name: postgres
          env:
            - name: PGDATA
              value: /var/lib/postgresql/data/pgdata
          ports:
            - containerPort: 5432
              protocol: TCP
          imagePullPolicy: IfNotPresent
          volumeMounts:
            - name: postgredb
              mountPath: /var/lib/postgresql/data
              subPath: pgdata
          terminationMessagePolicy: File
          envFrom:
            - configMapRef:
                name: postgres-config
          image: 'quay.io/enterprisedb/postgresql'
      restartPolicy: Always
      terminationGracePeriodSeconds: 30
      dnsPolicy: ClusterFirst
      securityContext: {}
      schedulerName: default-scheduler
  strategy:
    type: RollingUpdate
    rollingUpdate:
      maxUnavailable: 25%
      maxSurge: 25%
  revisionHistoryLimit: 10
  progressDeadlineSeconds: 600
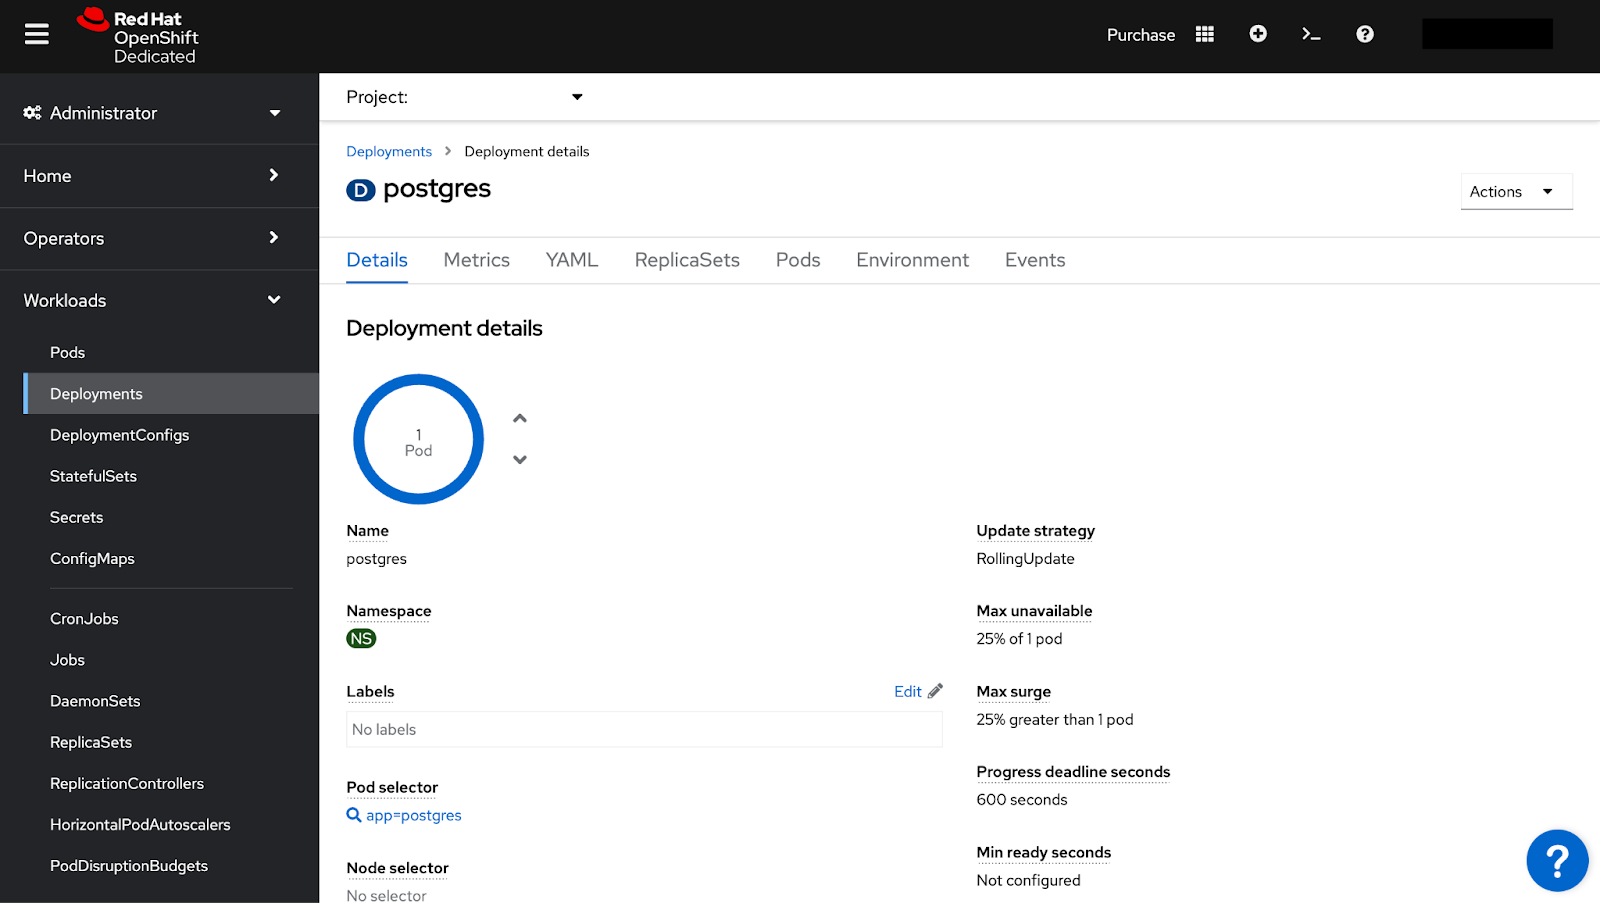
Then, click Create. Navigate to Workloads > Deployments to see your deployments. Click postgres.
Creating a service
Next, create a PostgreSQL service, which lets the microservices communicate with the database. Click + on the top right. Add the following YAML file. Click Create.
apiVersion: v1
kind: Service
metadata:
  name: postgres # Sets service name
  labels:
    app: postgres # Labels and Selectors
spec:
  type: NodePort # Sets service type
  ports:
    - port: 5432 # Sets port to run the postgres application
  selector:
    app: postgres
Any application or pod that wants to communicate with the Postgres database can now connect to the Postgres service on port 5432. The connection string does not need to include this port number, and adding the port number to the fully qualified domain name (FQDN) can cause errors.
This approach abstracts the details of the pod running the database, providing a consistent endpoint for database communication.
To access the service details, navigate to Networking > Services. Click postgres.
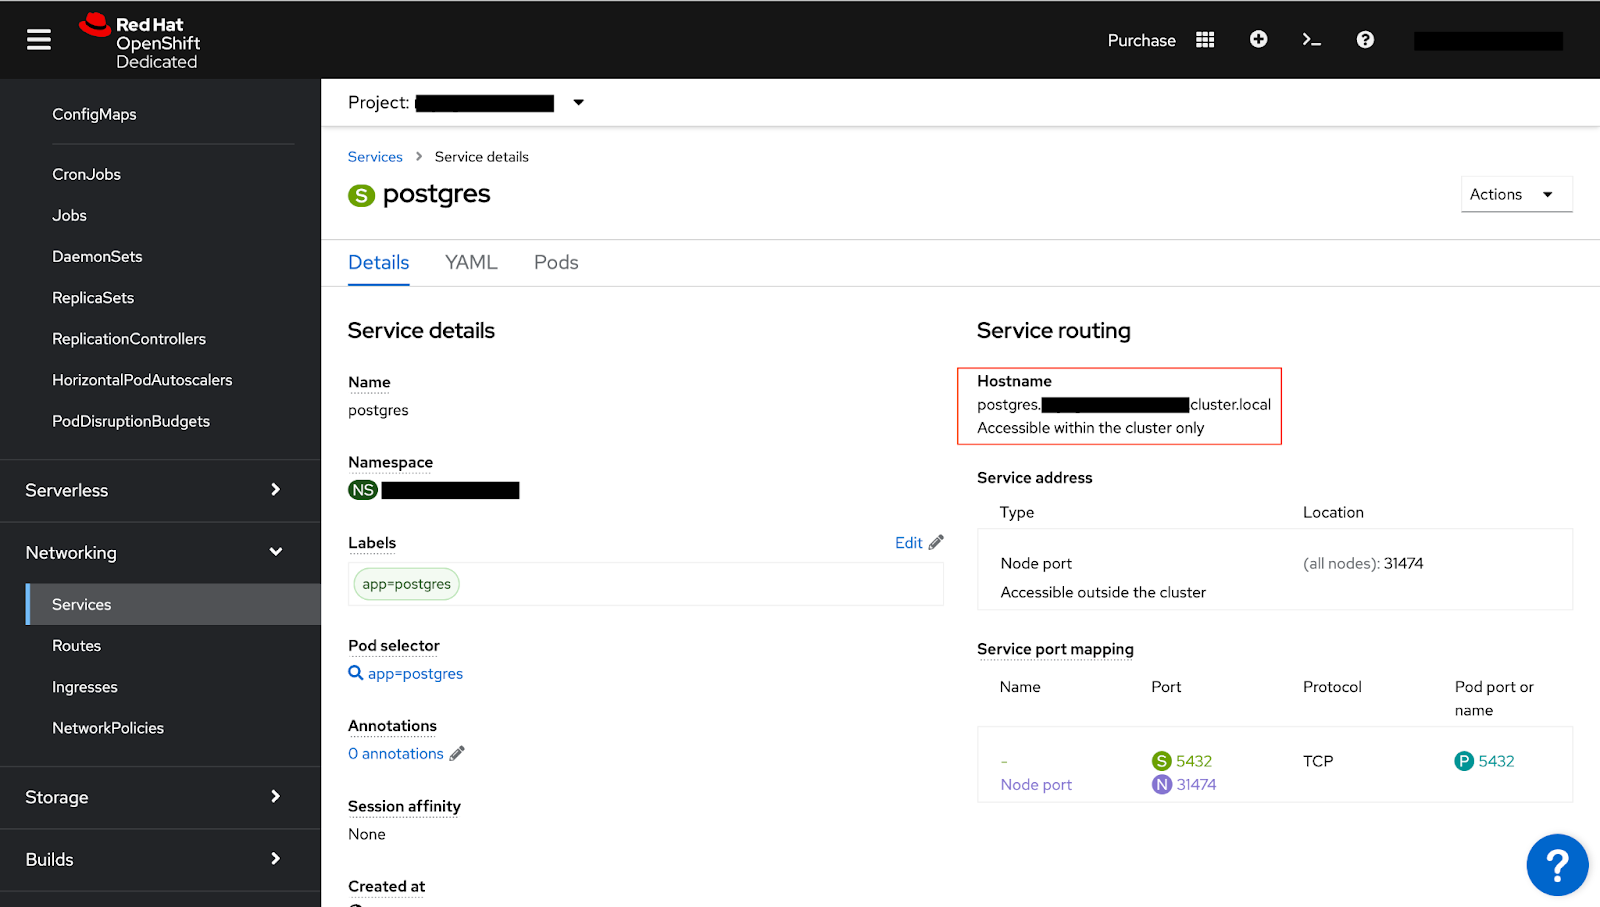
Once the service setup is complete, note the service hostname. You’ll use this hostname when deploying the microservices.
Creating a database user account
Next, set up a user account within the database for secure access to the database. Services use this account to connect and interact with the database.
Navigate to Workloads > Pods. Click the postgres pod and find the Terminal tab.
Use the following psql command in your terminal to initiate a connection with the Postgres database.
psql -h localhost -U admin --password -p 5432 postgresdb
Use the password previously defined in ConfigMap.
After successfully running the command and entering the password, you should be inside the Postgres interactive terminal, postgresdb=#.
In that terminal, execute the following command to create a new user named testdbuser with SUPERUSER rights.
CREATE USER testdbuser SUPERUSER;
Use the following command to assign a password to the new user:
ALTER USER testdbuser WITH PASSWORD 'testpassword';
Finally, create a new database named pedal using the following command:
CREATE DATABASE pedal;
Applications can now connect to the Postgres database using these credentials.
Creating a ConfigMap for dependency injection
In microservices architectures, each service operates as a distinct unit with its own configurations for database connections, messaging queues, external APIs, and service discovery. Instead of hardcoding such configuration within the application code or in container images, leading to scalability and maintenance issues, OpenShift uses ConfigMaps.
Your application’s services must discover and communicate with each other. The configuration helps Bike-Service and User-Service find and connect to the database service.
To create a ConfigMap, first navigate to Workloads > ConfigMaps. Click Create ConfigMap and choose YAML view.
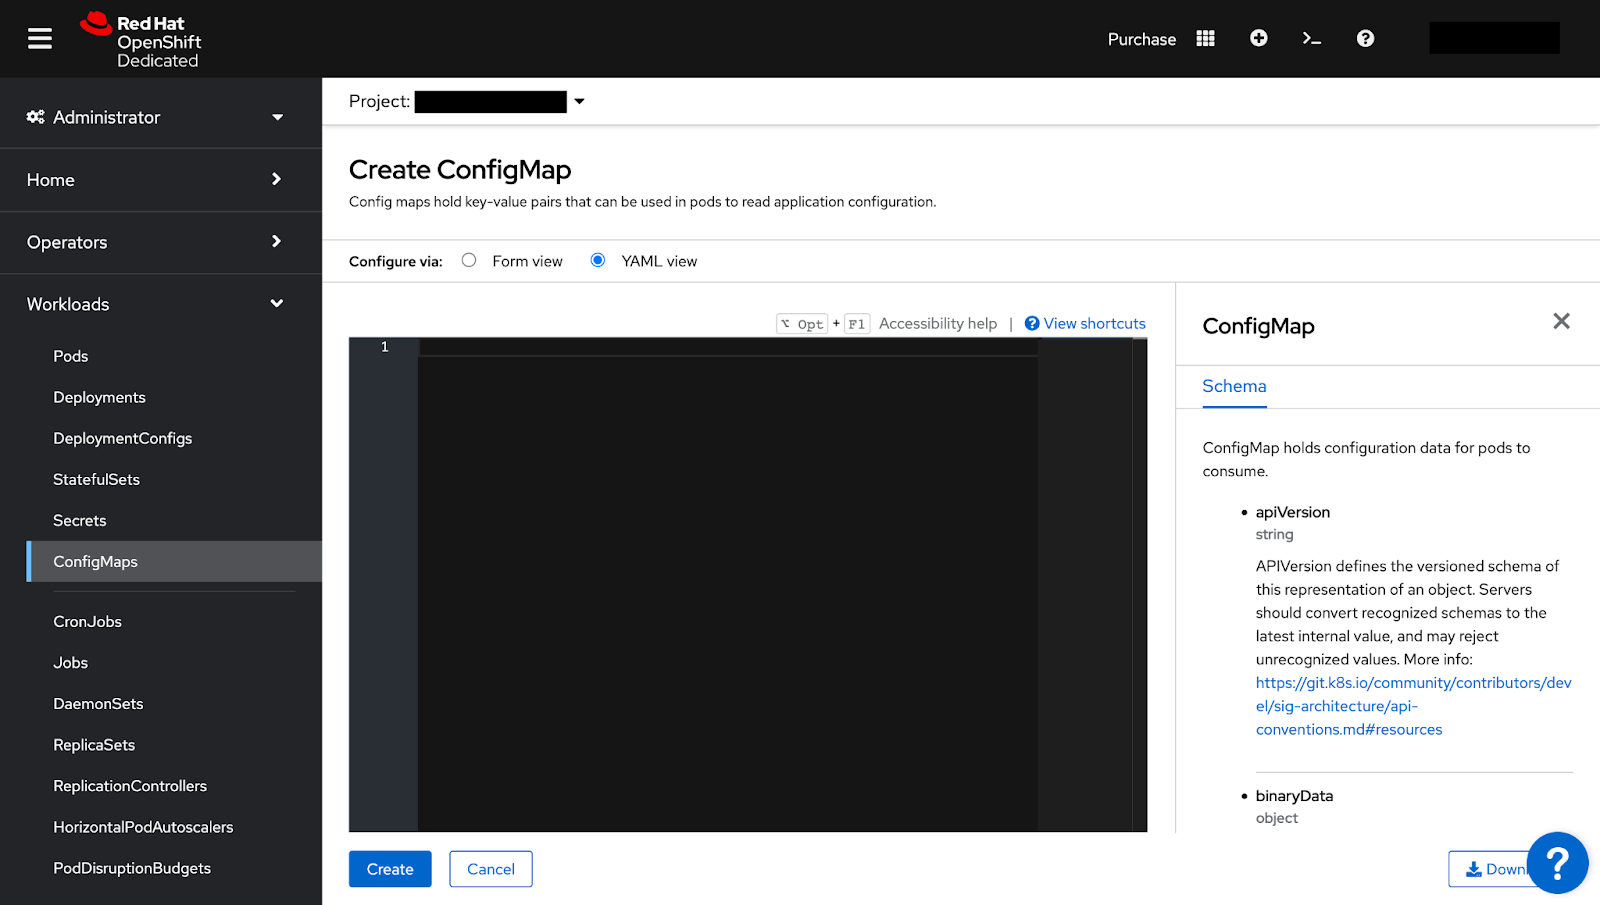
Replace the existing configuration with the YAML template below.
kind: ConfigMap
apiVersion: v1
metadata:
  name: pedal-config-map
data:
  quarkus.datasource.db-kind: postgresql
  quarkus.datasource.jdbc.url: jdbc:postgresql://<Your database service hostname>:5432/pedal
  quarkus.datasource.username: testdbuser
  quarkus.datasource.password: testpassword
  quarkus.hibernate-orm.database.generation: drop-and-create
  quarkus.hibernate-orm.sql-load-script: import.sql
Replace <Your database service hostname> with the Postgres service hostname for connecting to the Postgres database. When using a named service, rather than *.svc.cluster.local, add the port number, in this case, 5432.
Now click Create. You’ll see a new ConfigMap.
Deploying the microservices
Deploying Bike-Service
Bike-Service manages Pedal’s bike-related data. Let’s deploy the Bike-Service microservice so it can register itself with the database.
First, switch to the OpenShift console’s Developer view. In the sidebar, click +Add.
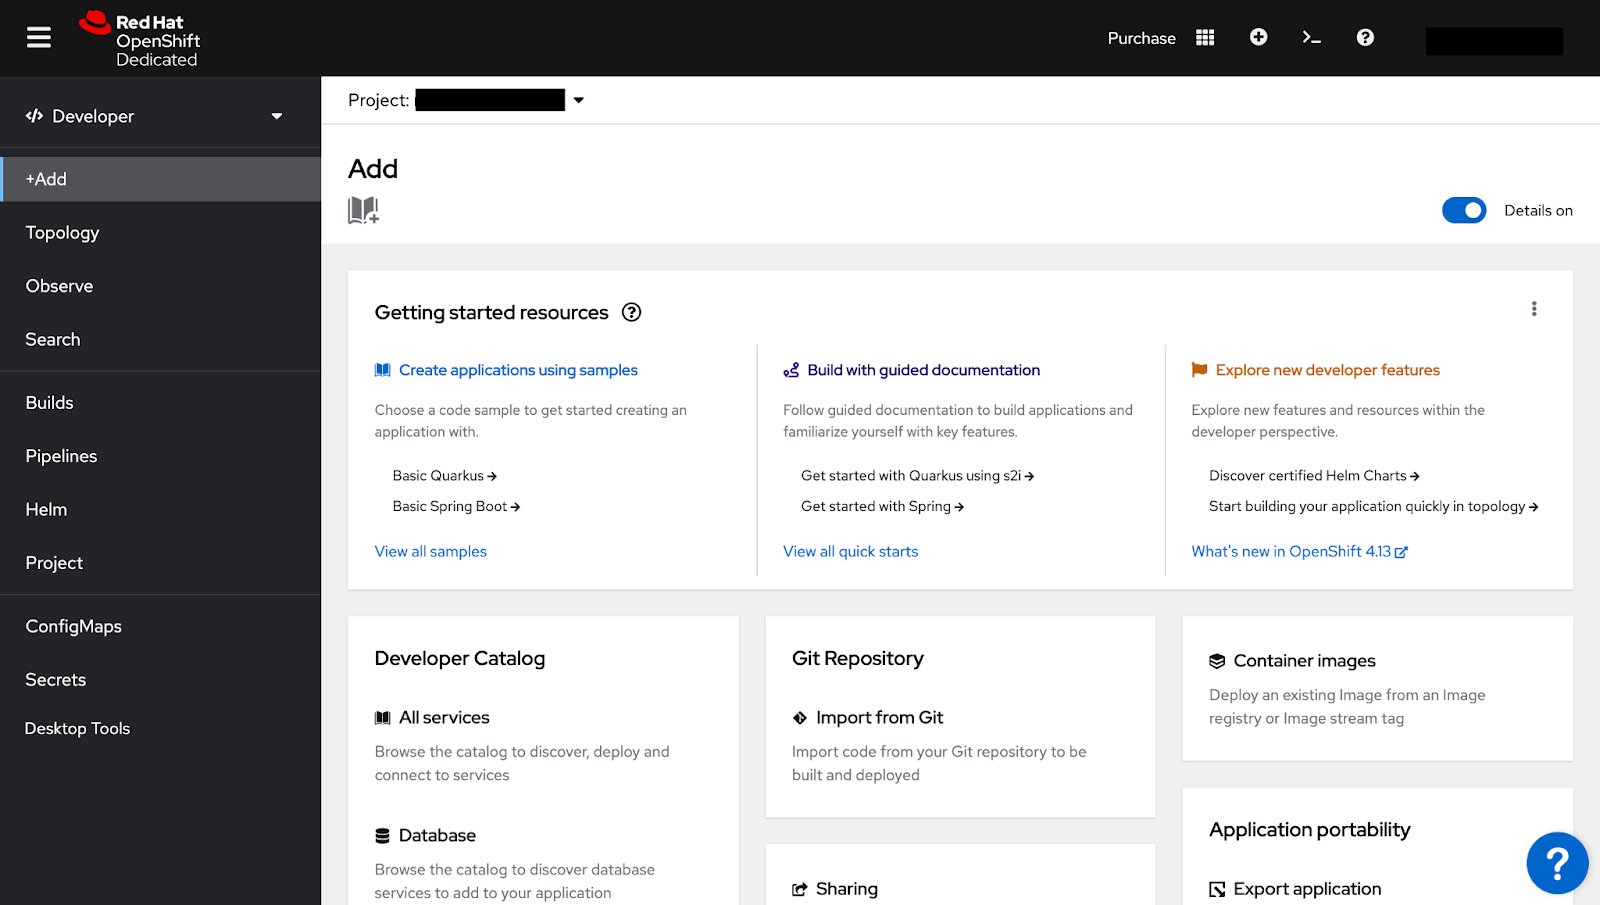
- In the Git Repository card, click Import from Git. Paste the Pedal Git repo URL when prompted (https://github.com/redhat-developer-demos/pedal-bike-service).
- Click Show Advanced Git Options. Type “/” in Context dir. OpenShift should automatically pick up the builder image. If not, choose openjdk-17-ubi8 from the Build Image version dropdown menu.
- In the Application box, type “pedal.” In the Name box, type “bike-service.”
- In Resource Type, select Deployment. In Target port, type “8080” (the port where your service runs). Then, select the Create a route checkbox.
- Finally, click Create. This action triggers the system to begin building the application’s image. Wait for the build process to complete. You can use the option to View Logs to understand what’s happening behind the scene
- Now, click Topology in the side panel. You’ll see a “bike-service” application running.
- Next, switch back to the Administrator view in the side panel. Click Workloads > Pods.
- Once the build is complete, you’ll notice that the bike-service pod encounters an issue. Click the pod and navigate to Logs. It shows exceptions or errors likely due to hardcoded property values in the application.
- The application should reference values from a ConfigMap to resolve this issue. Let’s attach the ConfigMap.Navigate to Workloads > Deployments > bike-service. Click the Environment tab.
- In the section All values from existing ConfigMaps or Secrets (envFrom), select pedal-config-map. Click Save. This action initiates a new deployment, creating a new bike-service pod instance with the correct configurations.
Once the deployment stabilizes, navigate to the bike-service pod and click Logs. The previous exceptions should now be gone, indicating a successful deployment.
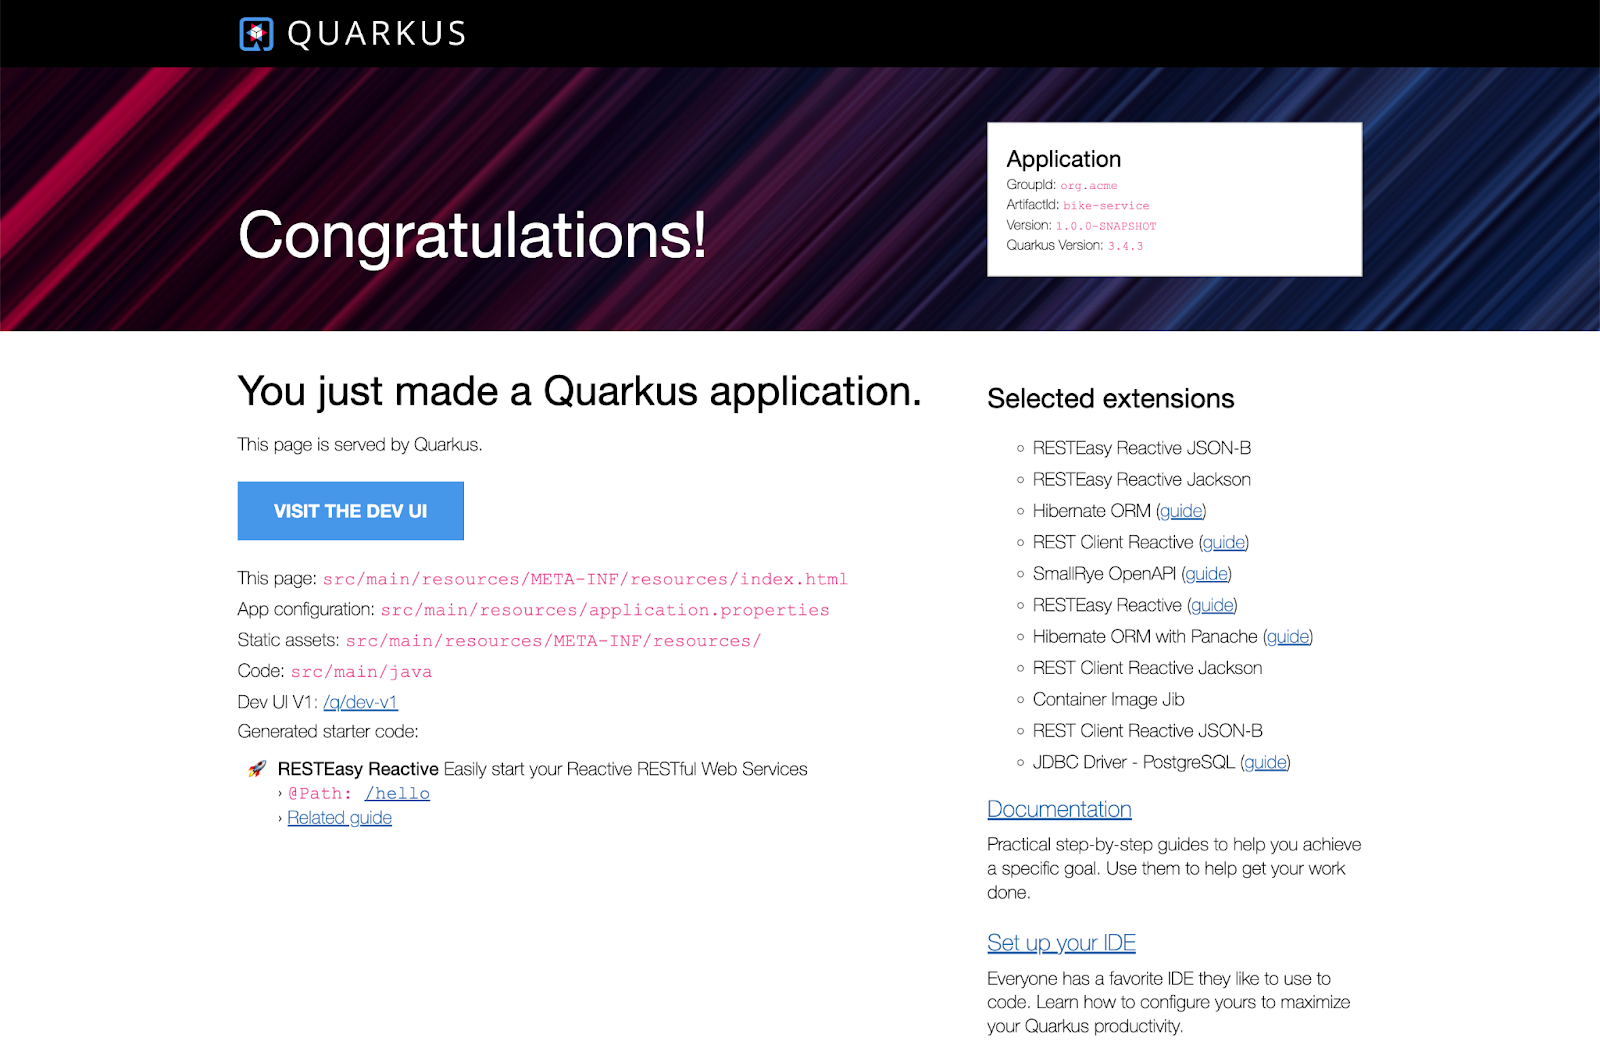
Now, if you open the URL for the app, you can see our service running
Deploying User-Service
Use the same procedure to deploy User-Service but with the following differences.
- Context Directory: /
- Name: user-service
- Advanced Options: port 8080
The user-service pod may also encounter issues due to hardcoded property values, so connect the application to the ConfigMap. Once you redeploy the service, inspect its log. Any earlier exceptions should now be gone, indicating a successful deployment.
To access the User-Service admin console, navigate to Networking > Routes. Click the user-service URL under Location. You’ll view a congratulations screen indicating your application is running successfully.
Summary
We now have 2 microservices, talking to the same PostgreSQL database, running successfully on OpenShift using the free to use Developer Sandbox for Red Hat OpenShift.
Pedal’s shift from a monolithic application to a vibrant microservice architecture makes it effortless to grow and adapt. Yet getting all these pieces to work together smoothly, especially in a hybrid cloud setting, takes the correct tools, including OpenShift and other Red Hat offerings.
Explore the following resources to learn more about deploying microservice architecture and continue transitioning from monolith to microservices with Red Hat.
- Try the Developer Sandbox for Red Hat OpenShift
- Explore the Application Platform - Cloud-Native Application Platform
- Getting started with Quarkus
- Learn more about Red Hat OpenShift Serverless
- Explore Red Hat OpenShift GitOps