There might be occasions where over-provisioning your cluster will provide great benefit. If there are sudden bursts of pods being created in a short amount of time, there can be situations where a new node is spinning up but is not ready. This can cause issues as pods will stuck in a pending phase for about ten minutes whilst waiting for the new node. A solution to this is to over-provision your cluster. This enables a spare node at all times, or pre-emptily create a new node when the workflow starts to pick up.
Use cases
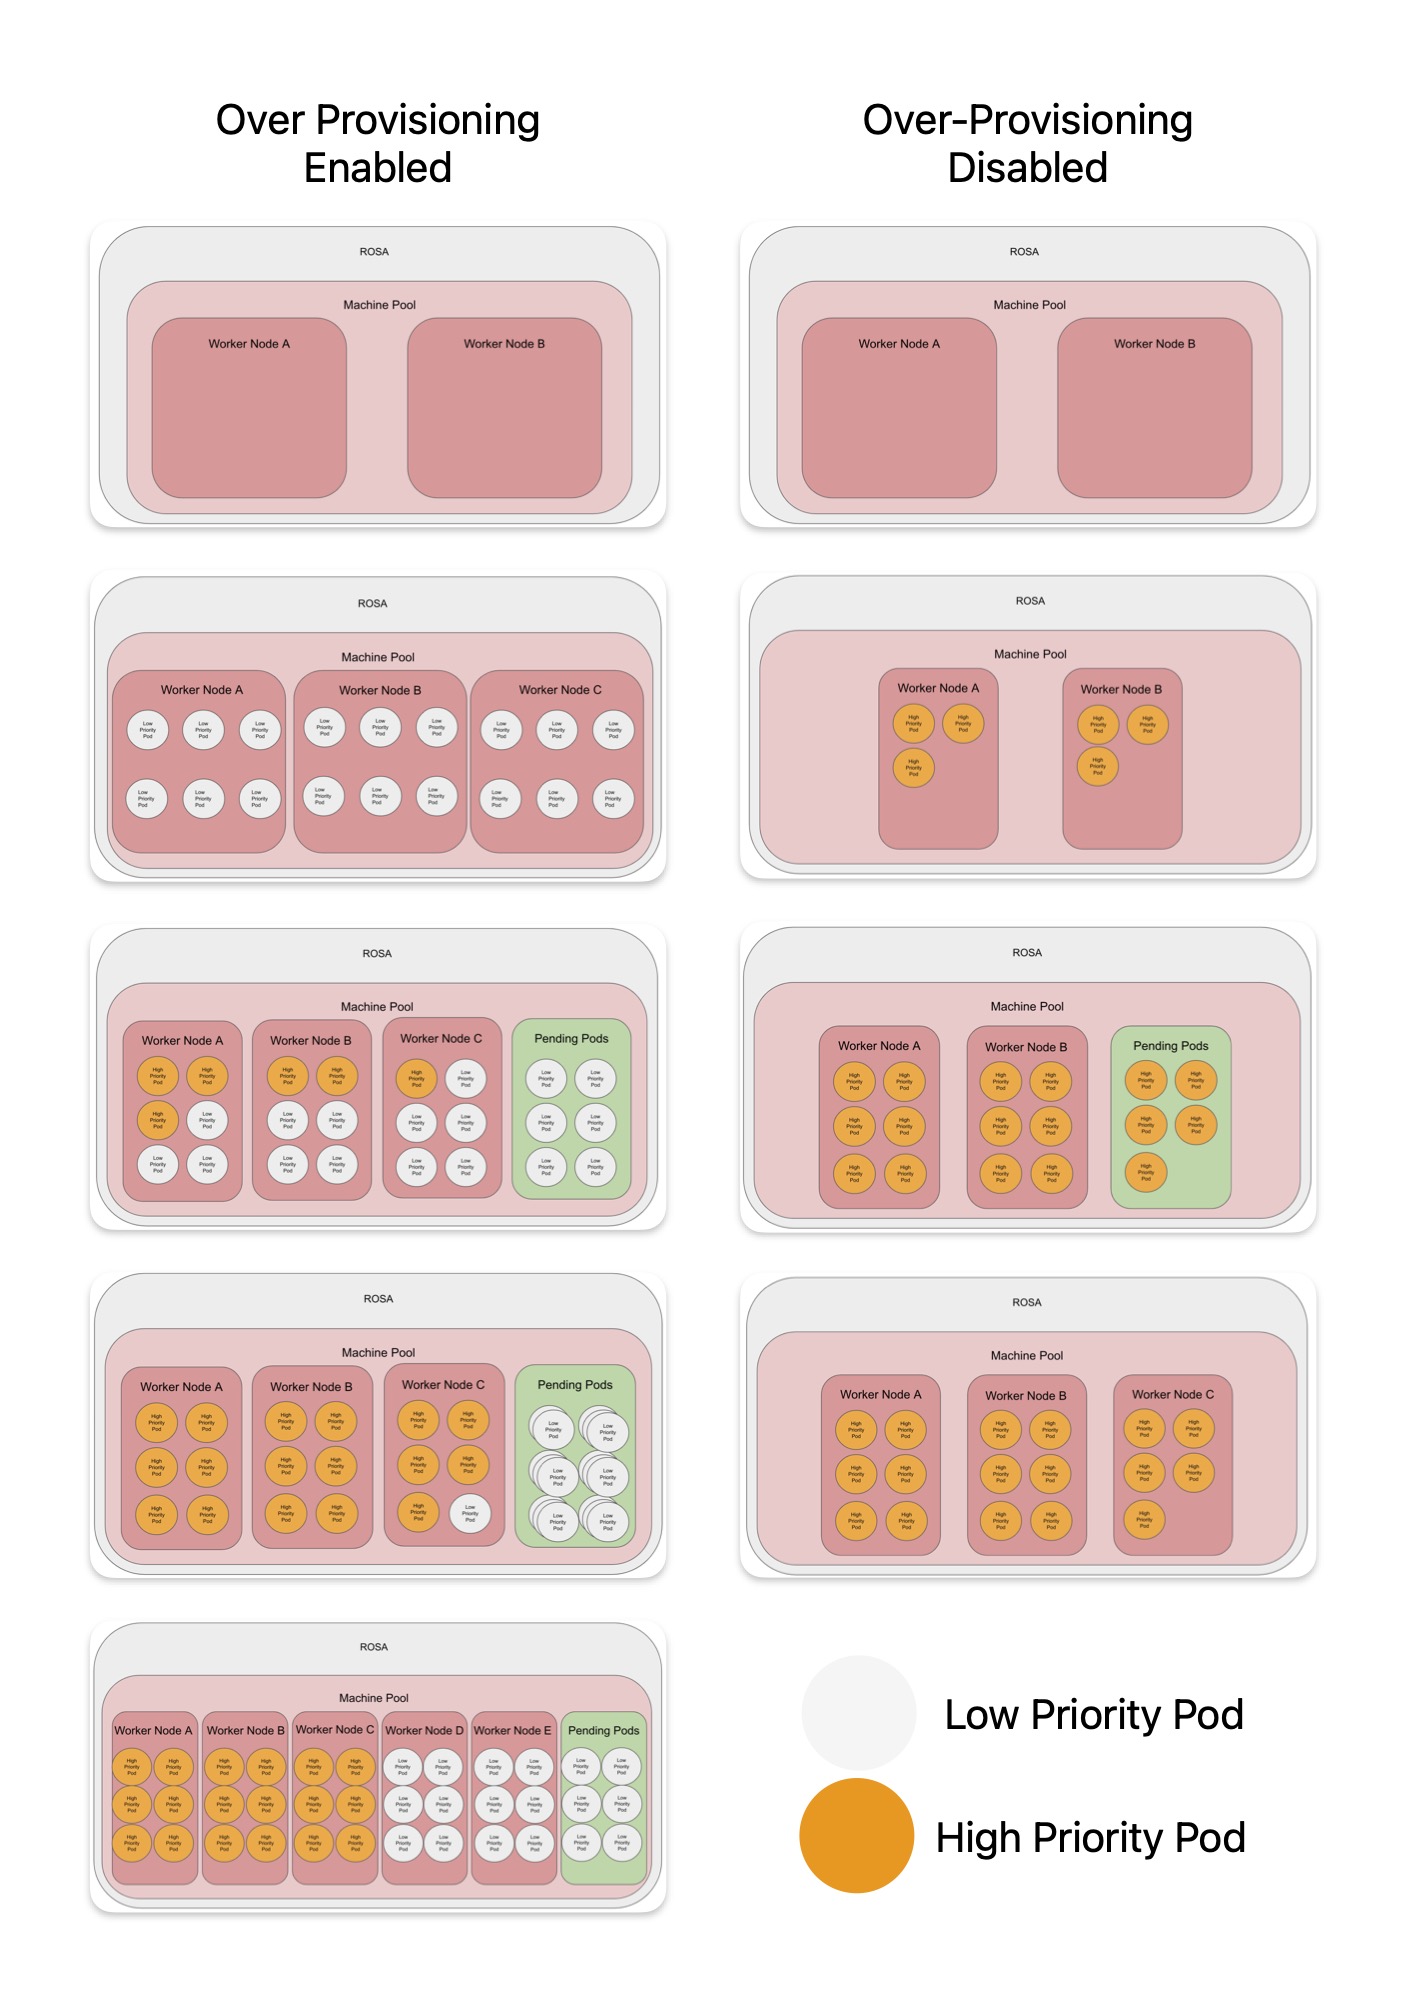
With this solution, pods are created that are considered low priority. When the more important workloads are created, the low priority pods get removed from the nodes. This leaves the low priority pods in a pending state. This forces Red Hat OpenShift to spawn a new node to accommodate the pending pods. Creating capacity for future high-priority pods without waiting for a new node.
Spare node
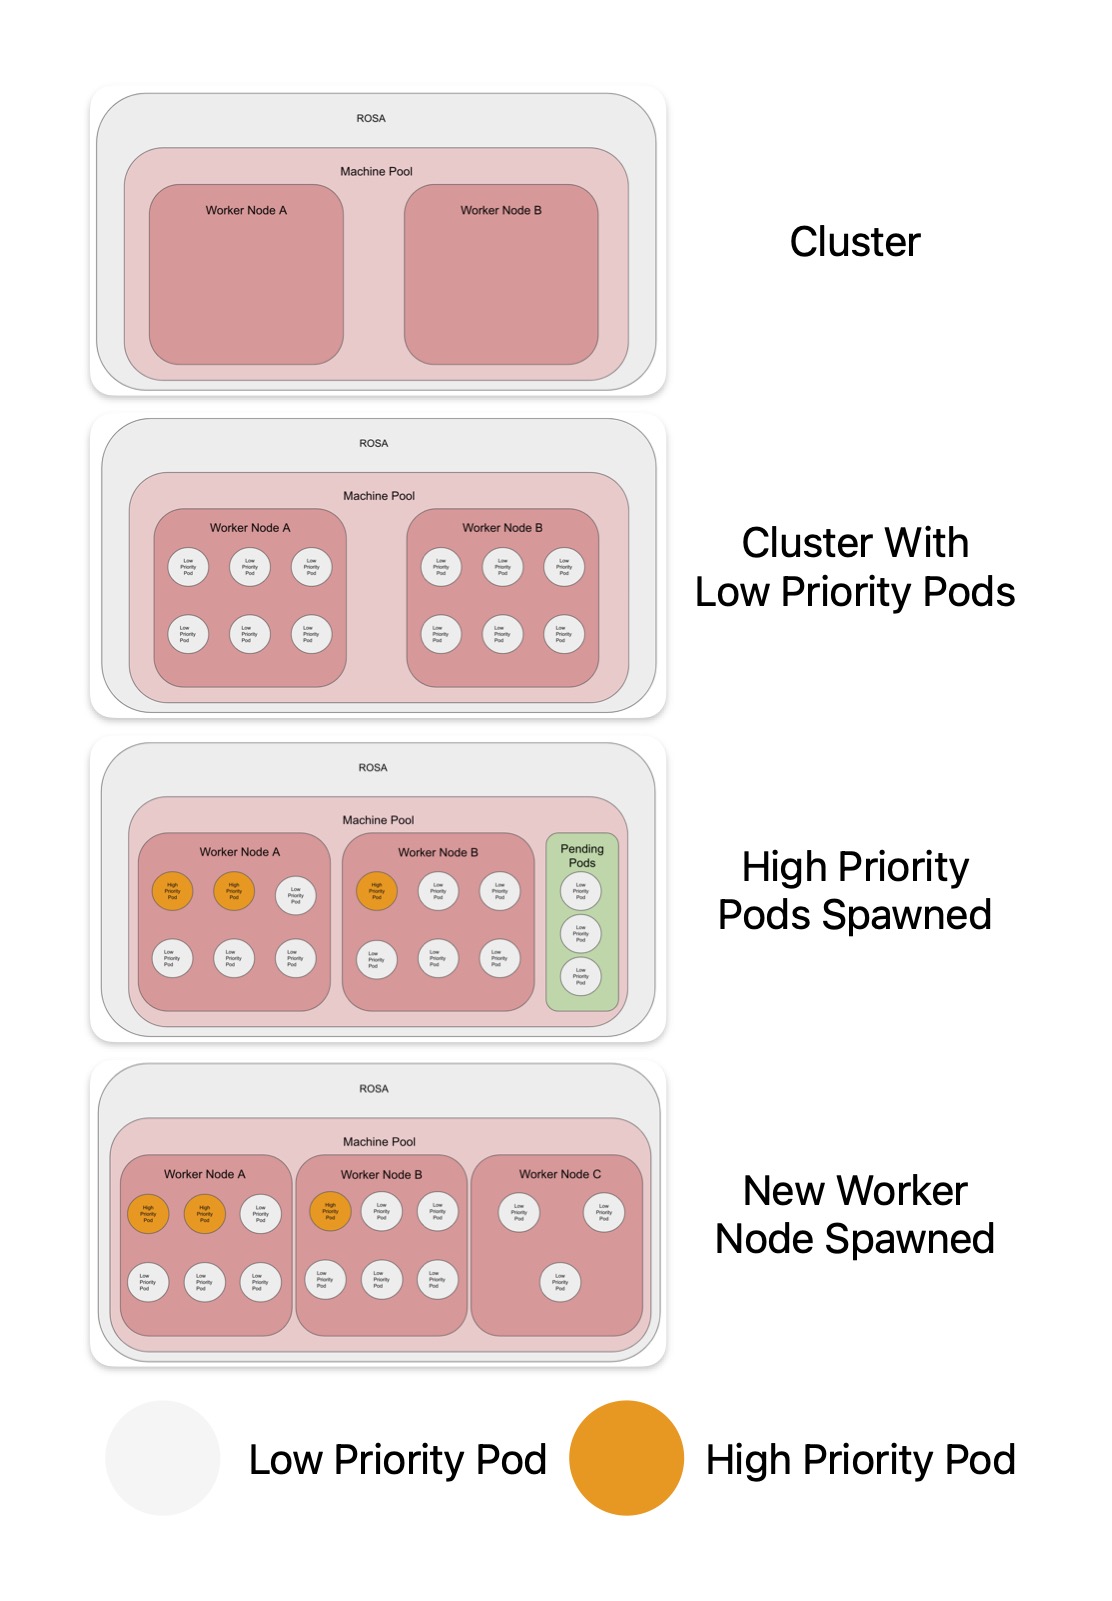
In this use case, the aim is to have spare nodes all the time. Typically, workloads are coming in faster than a node is spawned. An example might be large number of developers logging in the Red Hat OpenShift Dev Spaces at the beginning of their shifts (Figure 1).

At the start there are only two worker nodes. With the spare pod solution, there can be a additional node at all times. This is done by controlling the number of low-priority pod replicas (see controlling the number of replicas below).
When the real/high-priority workload starts, it forces the low-priority pods out of the nodes. The low priority pods are then stuck in pending, as it can't be scheduled. This forces the auto scaler to spin up a new node, giving room for even more workload in the additional nodes.
Figure 2 shows a comparison of the two solutions.
Pick up workflow
This workflow is designed to up the cluster when workloads starts to come in. The workloads might come in a slower, but prefer to have a spare node ready rather than waiting for a new node.
For example let's say you run a batch job which processes foreign payments in parallel, every hour, different currency, every hour. And the duration of that batch job is more than an hour. So initially, each of those low priority pods are evicted and replaced by a first batch. In hour time, another batch gets spawned, but you already created a spare node so it can be scheduled successfully without waiting for a new node to spawn (Figure 3).
There are two nodes when the cluster started. The nodes are then filled with low priority pods. When the real/high-priority workload starts, it forces the low-priority pods out of the nodes. The low priority pods is then stuck in pending, as it can't be scheduled. This forces the auto scaler to spin up a new node, giving room for even more workload in the additional nodes.
Prerequisites
- This article assumes a basic knowledge of the OpenShift command-line interface
oc. - A running instance of OpenShift 4 on Red Hat OpenShift Service on AWS (ROSA) and admin access on the OpenShift cluster.
- Access to the OpenShift web console and access to your cluster on sandbox.redhat.com.
Cluster setup
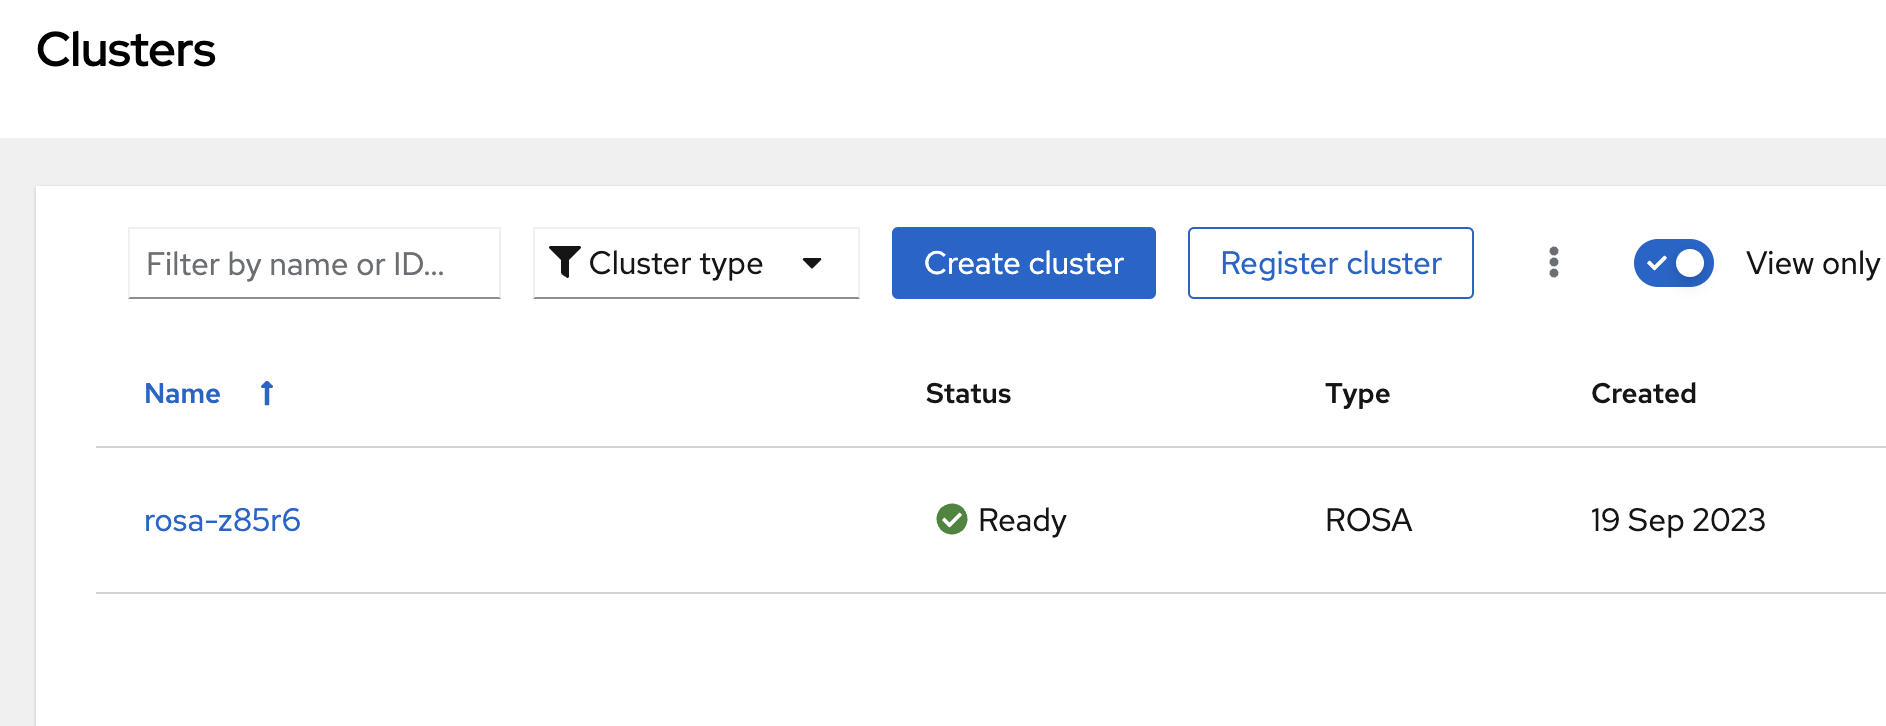
To set up the cluster, log in to sandbox.redhat.com and navigate to the cluster (Figures 3 and 4).
Go to the machine pool tab (Figure 5).
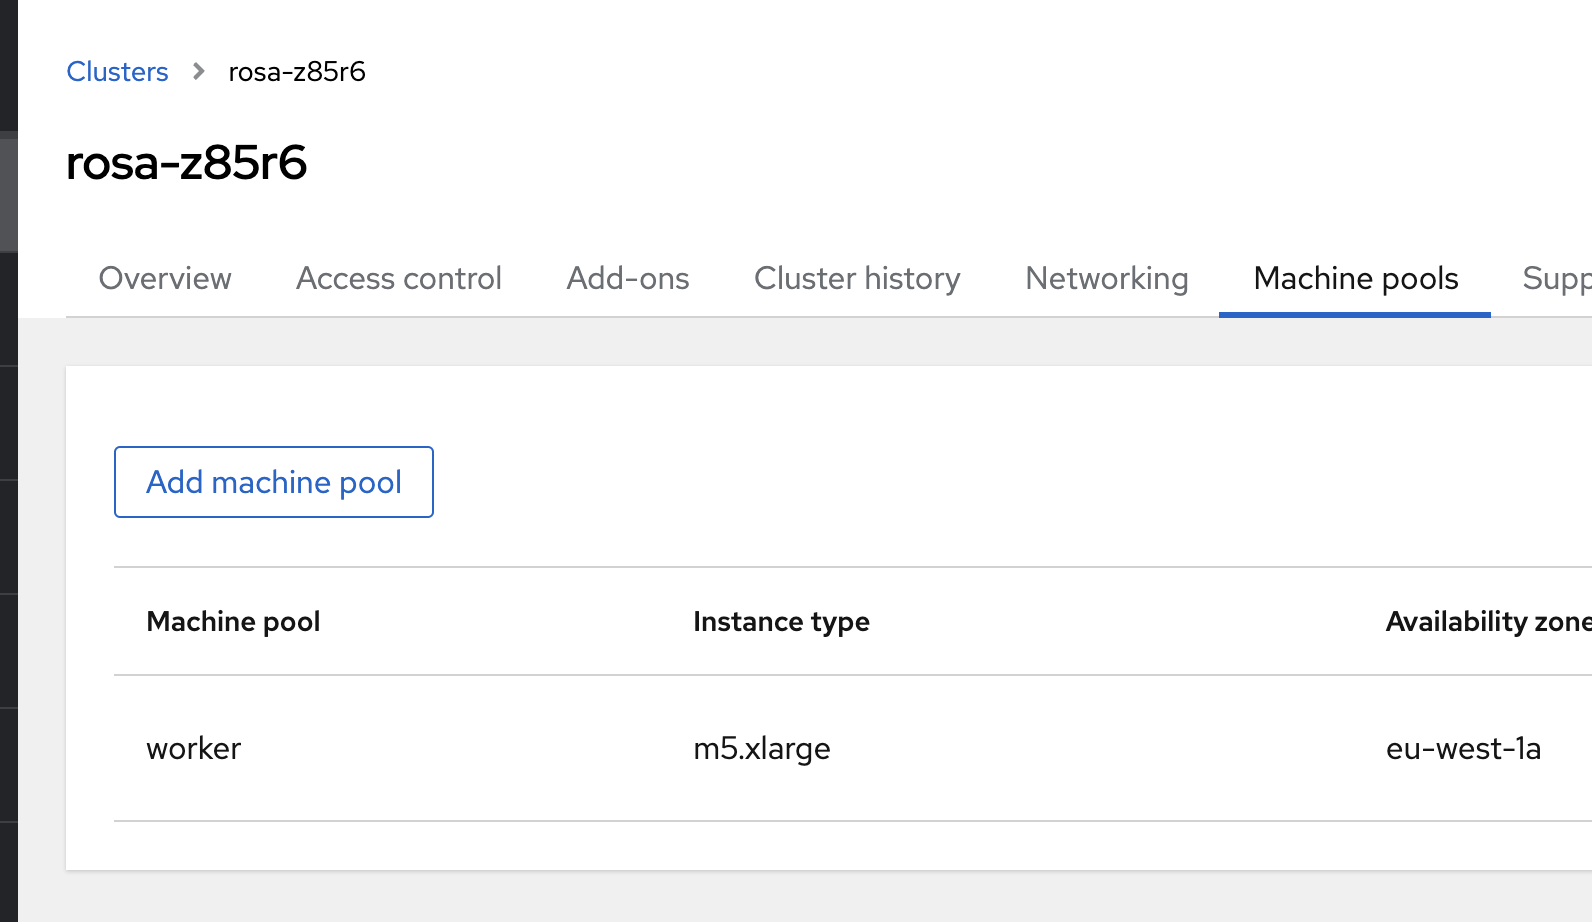
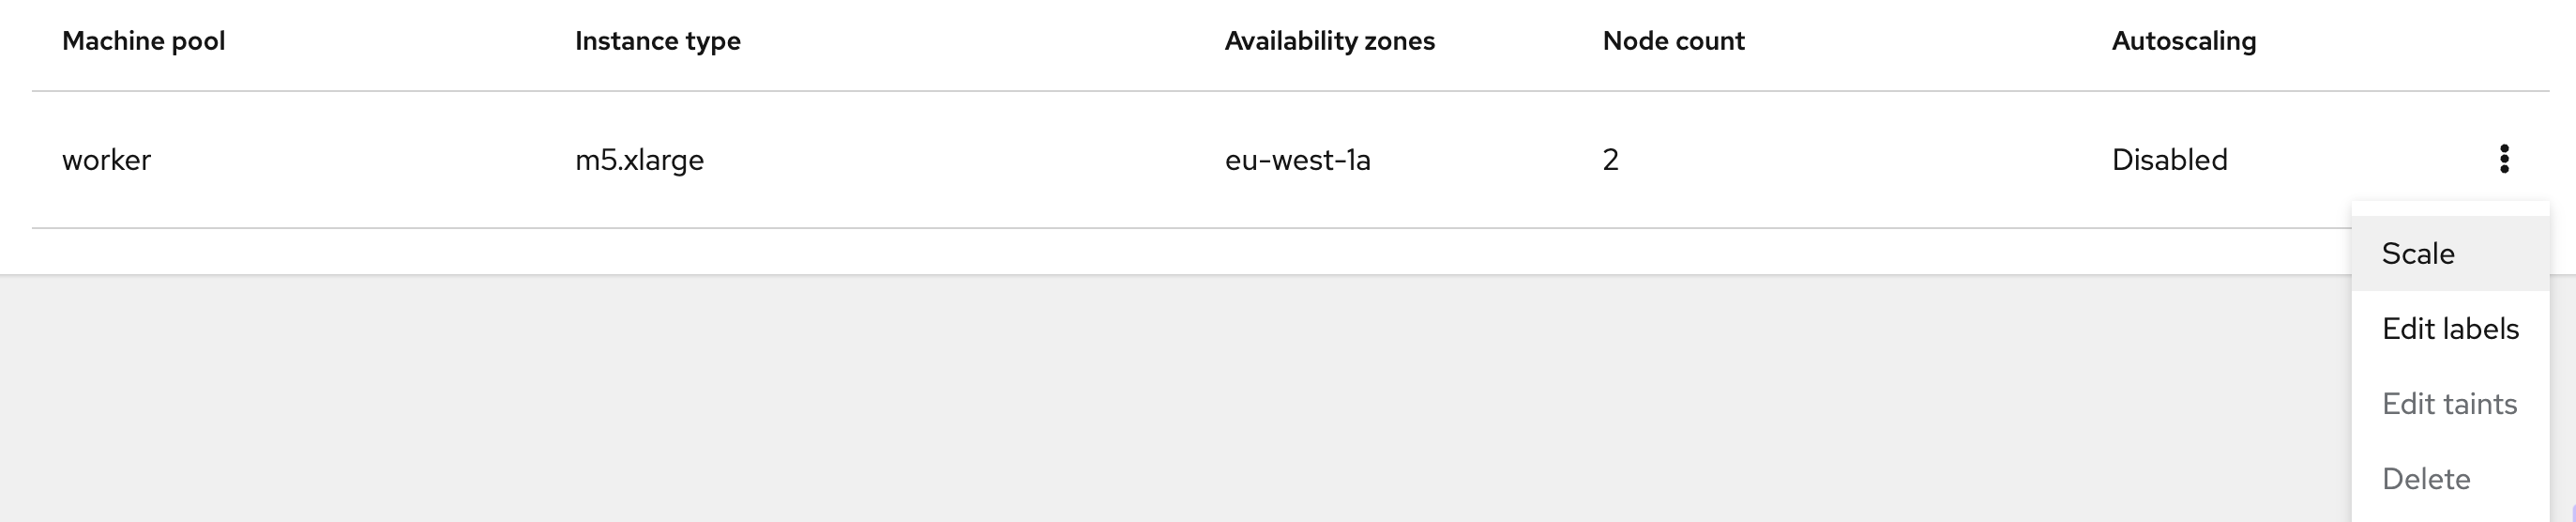
Create a new machine pool (Figure 6) or select a pre-existing machine pool and select scale (Figure 7).
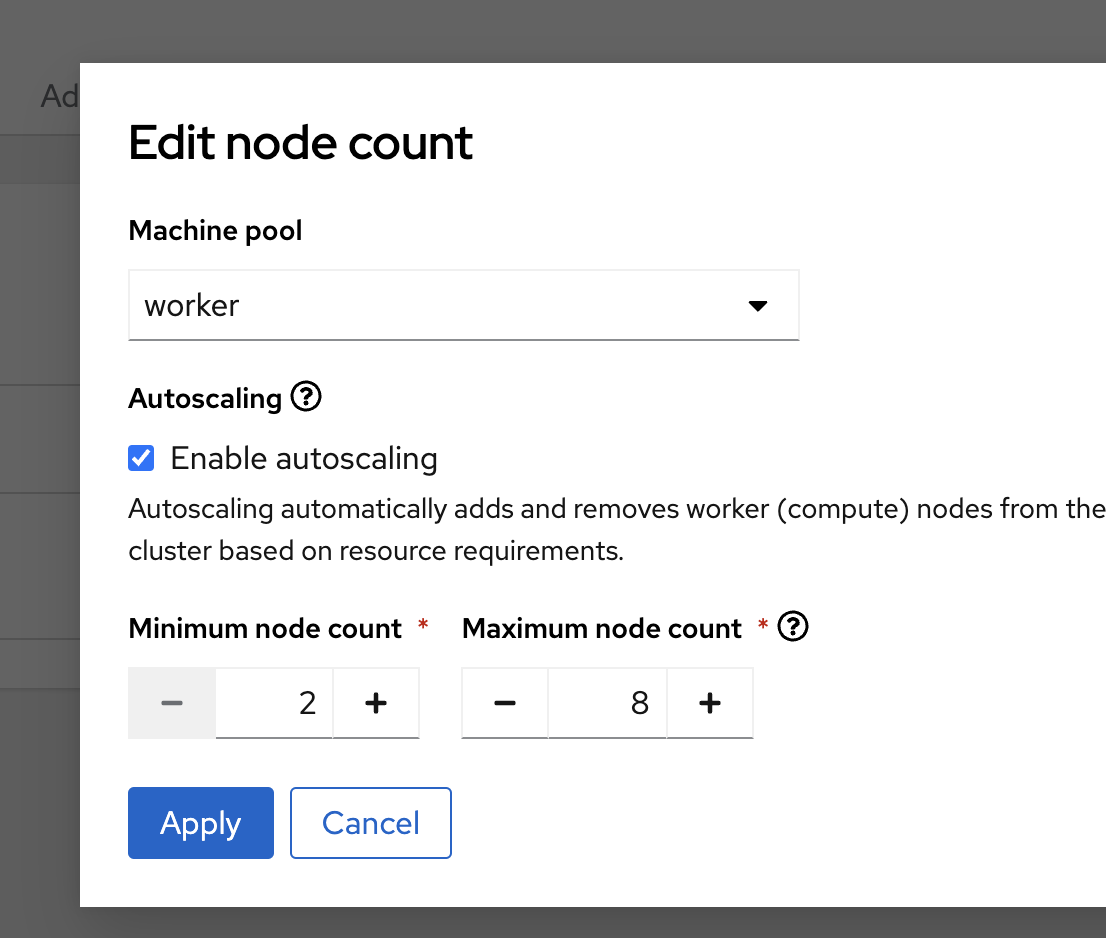
Enable autoscaling on your machine pool.
If using multiple machine pools, consider labelling it so the deployments can be fixed to a certain machine pool.
Create project
Now, you will create a new namespace on OpenShift.
oc new project over-provision
Create a priority class
The priority class dictates how important a pod compared to other pods. A lower priority would cause the scheduler will evict the pods, to allow the schedule of higher priority pods. By default most pods have a priority of 0.
Creating a new priority class allows the pods to be evicted when more important workloads are created.
Create a new priority class on your OpenShift cluster:
apiVersion: scheduling.k8s.io/v1
kind: PriorityClass
metadata:
  name: overprovisioning
value: -10
globalDefault: false
description: "Priority class used by overprovisioning."
Apply priority class using the following:
oc apply -f priority.yaml
Deploy the low priority pods
Create the low-priority pods using this deployment:
apiVersion: apps/v1
kind: Deployment
metadata:
  name: overprovisioning
  namespace: over-provision
spec:
  replicas: 15
  selector:
    matchLabels:
      run: overprovisioning
  template:
    metadata:
      labels:
        run: overprovisioning
    spec:
      priorityClassName: overprovisioning
      terminationGracePeriodSeconds: 0
      nodeSelector:
        scale: "true"
      containers:
        - name: reserve-resources
          image: registry.k8s.io/pause:3.9
          resources:
            requests:
              cpu: "350m"
Apply deployment using:
oc apply -f low-priority-pods.yaml
There are two items that should be changed for your use case, the number of replicas and the CPU requests.
The CPU requests value should be set to an average of your workload CPU requests. This can help provide a estimate for predetermined sudden load.
For example, if your sudden load peak is 10 pods, all consuming ~`350m` CPU, setting the number of replicas and CPU will allow your cluster to have room for the sudden load peak.
Controlling the number of replicas
This is a very important step. The number of replicas is key. There are two options to control it, manually or using autoscaler.
Manual
The easiest method is to manually control the number of replicas. It can be set to a value of a known sudden load or a value where the cluster is forced to create a new node. This can be done using the deployment, or by increasing the number of replicas using the UI or CLI. oc scale deployment overprovisioning -n over-provision --replicas=20
Autoscaler
The other option is to use the cluster-proportional-autoscaler. The autoscaler dynamically controls the number of replicas, using a criteria set with a config map called overprovisioning-autoscaler and the values set in the default-params section. This means that within a set parameter, it will scale accordingly. The autoscaler works in proportion to your cluster, looking at number of CPU cores, number of nodes, etc.
kind: ServiceAccount
apiVersion: v1
metadata:
  name: cluster-proportional-autoscaler-example
  namespace: over-provision
---
kind: ClusterRole
apiVersion: rbac.authorization.k8s.io/v1
metadata:
  name: cluster-proportional-autoscaler-example
rules:
  - apiGroups: [""]
    resources: ["nodes"]
    verbs: ["list", "watch"]
  - apiGroups: [""]
    resources: ["replicationcontrollers/scale"]
    verbs: ["get", "update"]
  - apiGroups: ["extensions","apps"]
    resources: ["deployments/scale", "replicasets/scale"]
    verbs: ["get", "update"]
  - apiGroups: [""]
    resources: ["configmaps"]
    verbs: ["get", "create"]
---
kind: ClusterRoleBinding
apiVersion: rbac.authorization.k8s.io/v1
metadata:
  name: cluster-proportional-autoscaler-example
subjects:
  - kind: ServiceAccount
    name: cluster-proportional-autoscaler-example
    namespace: overprovision
roleRef:
  kind: ClusterRole
  name: cluster-proportional-autoscaler-example
  apiGroup: rbac.authorization.k8s.io
Create the cluster role, cluster role binding, and service account using:
oc apply -f service-account.yaml
apiVersion: apps/v1
kind: Deployment
metadata:
  name: overprovisioning-autoscaler
  namespace: over-provision
  labels:
    app: overprovisioning-autoscaler
spec:
  selector:
    matchLabels:
      app: overprovisioning-autoscaler
  replicas: 1
  template:
    metadata:
      labels:
        app: overprovisioning-autoscaler
    spec:
      containers:
        - image: registry.k8s.io/cluster-proportional-autoscaler-amd64:1.8.1
          name: autoscaler
          command:
            - /cluster-proportional-autoscaler
            - --namespace=overprovision
            - --configmap=overprovisioning-autoscaler
            - --default-params={"linear":{"coresPerReplica":1}}
            - --target=deployment/overprovisioning
            - --logtostderr=true
            - --v=2
      serviceAccountName: cluster-proportional-autoscaler-example
Create the deployment using:
oc apply -f deployment.yaml
The autoscaler creates a config map called overprovisioning-autoscaler with the values set in the default-params section. There are multiple params that can be set including a minimum and maximum number of replicas.
The coresPerReplica is an important value. Leaving it as the default 1 would not allow the cluster autoscaler to scale down. It's best to increase this value to above 1. A great starting place would be 1.2. Combining it with a minimum value allows a spare node to be running at all times, if required.
You can find more information and configuration on GitHub.
Testing
To test the scaling, simply create a deployment:
oc apply -f deployment.yaml
Increase the number of replicas using the UI or running:
oc scale --replicas=15 deployment high-priority-pod
apiVersion: apps/v1
kind: Deployment
metadata:
  labels:
    app: high-priority-pod
  name: high-priority-pod
  namespace: over-provision
spec:
  replicas: 3
  selector:
    matchLabels:
      app: high-priority-pod
  template:
    metadata:
      labels:
        app: high-priority-pod
    spec:
      containers:
        - image: image-registry.openshift-image-registry.svc:5000/openshift/httpd
          name: httpd
          ### Not needed, purely for demo purposes
          resources:
            requests:
              cpu: "350m"
Summary
There are pros and cons to this solution. There will be an increase in costs because there will be more nodes running versus having spare nodes ready to use at any given time.
It might not be for everyone. When the solution was tested, the decreased wait time for Red Hat OpenShift Dev Spaces was beneficial. It would allow for users to log in and start working faster rather than being forced to wait ten minutes for a new node to spin up and be ready. If your workflow is peaky, for example users log in in at 9:00 AM, this solution might benefit your use case. It will require tailoring for your environment and use case, but will hopefully be beneficial.
You can find more information on GitHub.
Last updated: August 28, 2025