In today's rapidly evolving technology landscape, Red Hat Ansible Automation Platform offers a powerful solution for managing network configurations in Amazon Web Services (AWS). In this article, we will explore how you can leverage the capabilities of Ansible Automation Platform to simplify and automate your network configuration tasks in AWS.
We will guide you through the process of setting up the necessary credentials for your AWS account within the Ansible Automation Platform. We will then dive into playbook execution, demonstrating how you can execute playbooks to define and automate your network configurations in AWS. By the end of this article, you will have the knowledge and confidence to use Ansible Automation Platform to manage your network configurations in AWS effectively.
Prerequisites
- Before you can complete any of the following tasks, you must create a registry service account. To log in to SA, open your terminal and type the following commands:
podman login registry.redhat.io
Username: {REGISTRY-SERVICE-ACCOUNT-USERNAME}
Password: {REGISTRY-SERVICE-ACCOUNT-PASSWORD}
Login Succeeded!
Once you log into SA, create a container image by using a Containerfile containing the following context:
FROM registry.redhat.io/ansible-automation-platform-22/ee-supported-rhel8:latest
RUN ansible-galaxy collection install community.aws
RUN ansible-galaxy collection install amazon.aws
To build an image using podman, enter the following command:
podman build -t <image-name>
The image should be pushed into the container image registry. Log in to the private container image registry using the podman login command before pushing.
For this demonstration, we will use quay.io as our registry, but you can use any other container registry.
podman push <image-name>
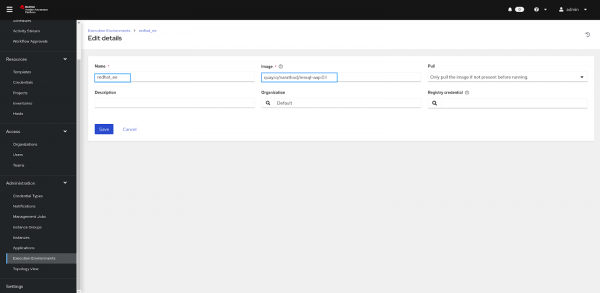
Navigate to Execution Environments under the Administration Tab and click on the Add button.
Add the image name in the execution environment (Figure 1).

- You must have an active AWS account.
- Generate the access key and client secret for AWS.
- Navigate to the Credentials tab, and under the Add button and select Amazon Web Services.
- Add your access key and secret key, then save the credentials (Figure 2).

How to use Ansible to manage network configuration
First, we will create and configure the project by following these steps:
- Navigate to the Projects tab under Resources in the left pane.
- Click on Add to create a new project.
- Enter a name for the project and choose Git as the source control type with URL: https://github.com/decipher07/Manage-SSH-Keys-Ansible in the Source Control URL field (Figure 3).
- Save the changes and wait for the operation to complete successfully.

Next, create and configure the job templates as follows (Figure 4):
- Go to the Templates tab under Resources in the left pane and click on the Add button and select Job template from the options.
- Enter a name for the job you want to create and select the Demo-Inventory or Default inventory in the Inventory section.
- In the Project section, click on the project name you previously created and select the get_sys_data.yml file.
- In the Execution Environment section, click on the execution environment name you previously created.
- In the Credentials section, select the Amazon Web Service category and choose the credentials for AWS.
- Click on the Variables section and add the variables as follows:
---
region: ap-south-1
instance_type: t3.micro
ami: ami-0f9d9a251c1a44858
key_name: ansible-demo
vpc_name: ansible-vpc-test
cidr_block: "10.10.0.0/16"
cidr: "10.10.0.0/24"

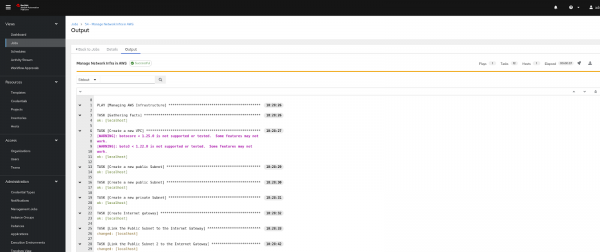
Finally, we can launch the playbooks by clicking on the launch button. You can view the logs of the output as follows (Figure 5):

Continue your automation journey with Ansible
Get started with Ansible Automation Platform by exploring interactive hands-on labs. Download Ansible Automation Platform at no cost and begin your automation journey. You can refer to An IT executive's guide to automation e-book for better understanding of Ansible Automation. Additionally, check out our article series where we explain how to provision AWS infrastructure using the Ansible Automation Platform, empowering you to efficiently manage your cloud resources.
Last updated: January 11, 2024