The ability to develop, build, and test containers on another host is often necessary when your target deployment environment doesn’t match your local development environment. For example, many developers use a MacBook with an ARM64 architecture, but the application they’re developing will be deployed on x86 (AMD64) architecture machines inside containers on a Linux container host. Building a simple Node.js application that targets AMD64 on an M1 MacBook Pro is up to ten times slower than building it on an AMD64-based machine, in my experience!
Another benefit of a remote development machine is that it might have access to resources such as GPUs, cores, bandwidth, and memory that are beyond the capabilities of a typical development machine. Whatever your reasons, let’s dive in!
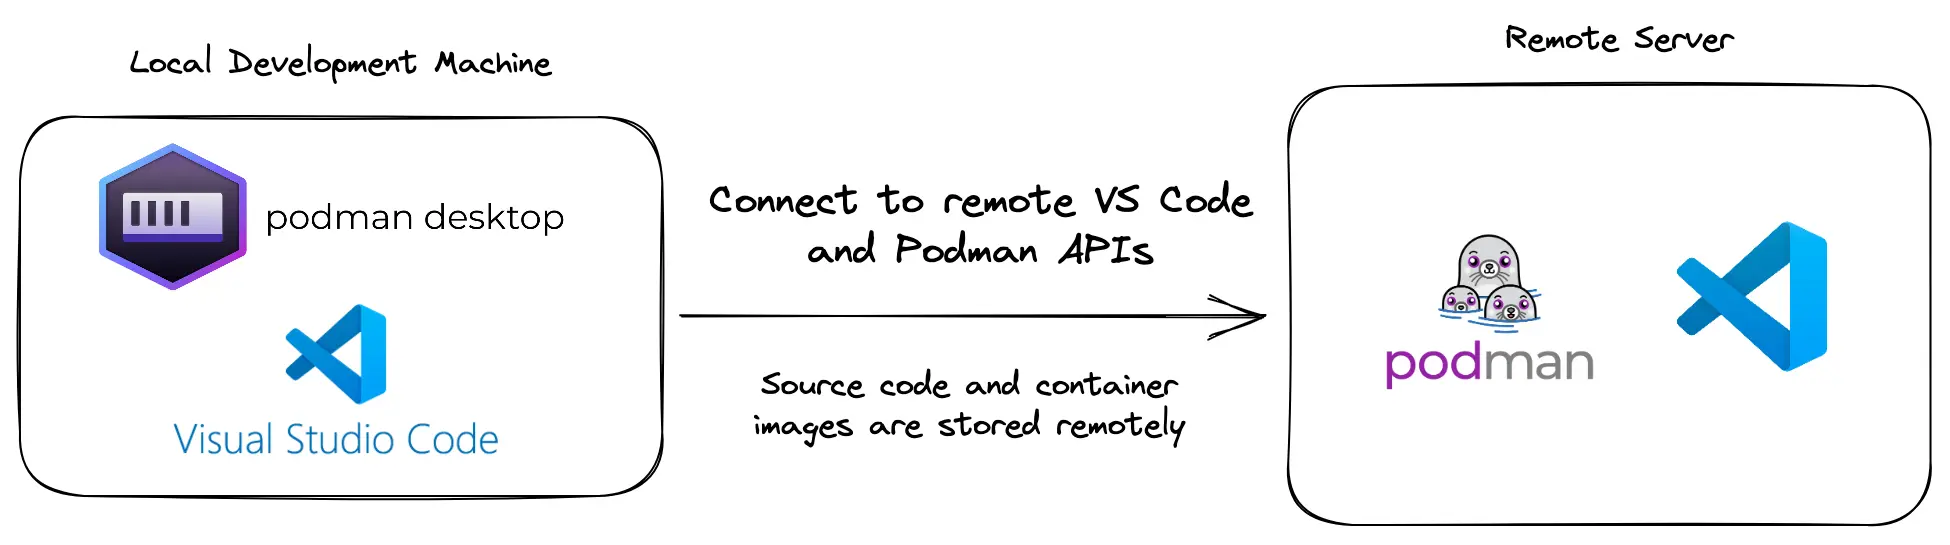
This post will guide you through how to set up a machine as a remote development server with Visual Studio Code Remote Development, Podman, and Podman Desktop (Figure 1).
Install Podman Desktop on the local machine
Download and install Podman Desktop from https://podman-desktop.io/downloads. Podman Desktop might warn that it couldn't find a Podman installation when you first open it (Figure 2). If this happens, go ahead and click the Install button and follow the instructions to configure the Podman CLI tools on your machine.

Open a new terminal session and run the podman version command to verify the Podman CLI is available. It should print output similar to this:
podman version

Client:       Podman Engine
Version:      4.3.1
API Version:  4.3.1
Go Version:   go1.19
Git Commit:   814b7b003cc630bf6ab188274706c383f9fb9915
Built:        Thu Nov 10 06:31:24 2022
OS/Arch:      darwin/arm64

Server:       Podman Engine
Version:      4.3.1
API Version:  4.3.1
Go Version:   go1.19.2
Built:        Fri Nov 11 07:00:31 2022
OS/Arch:      linux/arm64
Configure a remote machine
This guide assumes you have a machine available with Fedora 37 (this version includes Podman 4.3.1) already installed, and SSH access enabled. You can provision a machine using a provider of your choosing, or install Fedora on a machine of your own.
SSH into the Fedora 37 machine as the root user to install Podman:
sudo dnf -y install podman
Still logged in as root, create a new user. This guide assumes the user is named "developer." Configure SSH access for that user; refer to this resource from DigitalOcean for more details.
Login as the new "developer" user and enable the Podman service and socket using the following commands:
podman system service -t 0 &
systemctl enable --now --user podman.socket
Obtain the new user’s ID using the id -u command. Keep note of the ID since you'll need it shortly.
Set up VS Code for Remote Development
Install VS Code on your local development machine, and install the following extensions to enable VS Code Remote Development:
- Remote - SSH
- Remote - SSH: Editing Configuration Files
- Remote Explorer
Figure 3 shows a VS Code instance on macOS with these three extensions installed.

Add your remote Fedora machine to your list of configured VS Code Remote hosts:
- Click the Remote Explorer icon on the left in VS Code.
- Expand the Remote > SSH section, and choose Remote from the dropdown at the top if it’s visible (this is shown depending on the extensions you’ve installed).
- Click the plus icon. A dialog will appear in the top center of the screen.
- Enter the SSH command to connect to your remote host, e.g ssh developer@1.2.3.4.
- Press Enter, then select the SSH configuration to update. Typically you want to update the one in your user's home directory.
- Click the Refresh icon in the Remote Explorer if your new remote is not listed.
- Use the Connect arrow icon to connect to the remote host.
VS Code will take a moment to configure the remote machine with the necessary packages for remote development. It's possible to interact with the remote file system and open a terminal and run commands once the packages are installed. Figure 4 shows a remote terminal session and the file explorer.

Develop on your remote host
Now you’re ready to develop on your remote host and interact with it using Podman on your local machine.
- Connect to your remote machine using the Remote Explorer from the side menu in VS Code.
- Open a terminal using Terminal > New Terminal in the VS Code menu.
- Run
mkdir -p workspaces/podman-remote-exampleto create a new folder on the remote machine. - Change directory into the folder using
cd workspaces/podman-remote-example - Create a Containerfile using the
touch Containerfilecommand.
Use the Open Folder button in VS Code to open the remote folder for development and paste the following content into the Containerfile:
FROM registry.access.redhat.com/ubi8/ubi-minimal

CMD echo "Hello World"
Build this file using the following command in the remote terminal:
podman build . -t hello-world
Congratulations, you built a container image on your remote host!
Configure Podman for remote usage
The Podman CLI supports a --connection option that can be used to specify a host that the commands should be executed on. It's easier to configure this once, and set the remote machine as the default host or specify the host alias instead of tediously supplying the options each time you run a command.
Add the remote machine using podman system connection add command on your local development machine. Replace the variable values below with those appropriate for your setup:
export REMOTE_USER_ID="1000"
export REMOTE_HOSTNAME="1.2.3.4"
export REMOTE_IDENTITY="~/.ssh/id_ed25519"
export REMOTE_NAME="fedora-remote"

podman system connection add $REMOTE_NAME \
--identity $REMOTE_IDENTITY --port 22 \
ssh://developer@$REMOTE_HOSTNAME/run/user/$REMOTE_USER_ID/podman/podman.sock
You can verify that the connection was added using the following command:
podman system connection list
Run container images on your remote host
You can now run commands against the remote host using the Podman CLI, without having to use a remote terminal in VSCode. First list the images on your remote host:
podman -c fedora-remote images --format '{{.ID}} {{.Tag}} \t {{.Repository}}'

52b751d9cb13 latest      localhost/hello-world
35585f3ca6c6 latest      registry.access.redhat.com/ubi8/ubi-minimal
Notice that the list contains the image you just built, and the base image on the remote host. Run the image you just built:
podman -c fedora-remote run localhost/hello-world
Hello World
Conclusion
Congratulations! You have successfully installed Podman Desktop and configured the Podman CLI on your local machine to execute commands on a remote Fedora host running Podman and the Podman API. You’ve also configured VS Code for remote development against the same Fedora machine.
Last updated: August 14, 2023