Red Hat OpenShift Container Platform 4.12 provides several enhancements based on customer requests and usability improvements to the Red Hat OpenShift console.
The improvements include the following:
- The Helm page now has a dedicated Repositories tab allowing users to manage Helm chart repositories.
- When using OpenShift Serverless, workloads created by Import from Git and Deploy image default to serverless.
- When using OpenShift Pipelines:
- Users now have quick access to the parameter values used during a Pipeline Run in the Parameters tab of the PipelineRun details page.
- Users can now choose to either Cancel or Stop a running PipelineRun, providing more granular control of the running tasks of the PipelineRun.
- Cluster Administrators now have a form-based experience to customize areas of the OpenShift console from Cluster Settings. Although developers cannot use this feature, it provides the ability for admins to provide an improved developer experience. Be on the lookout for an in-depth article about console customization coming soon.
This article will dive into what’s new for developers.
3 improvements to OpenShift 4.12
Let’s go into more detail about the improvements in three key areas.
1. User preferences updates
The Applications tab of User Preferences provides default settings that are used in the import from Git and deploy image flows (Figure 1). In addition to security defaults, developers can now set the default workload type in the Resource type section. When using OpenShift Serverless, this default is set to serverless. Otherwise, it is set to deployment.

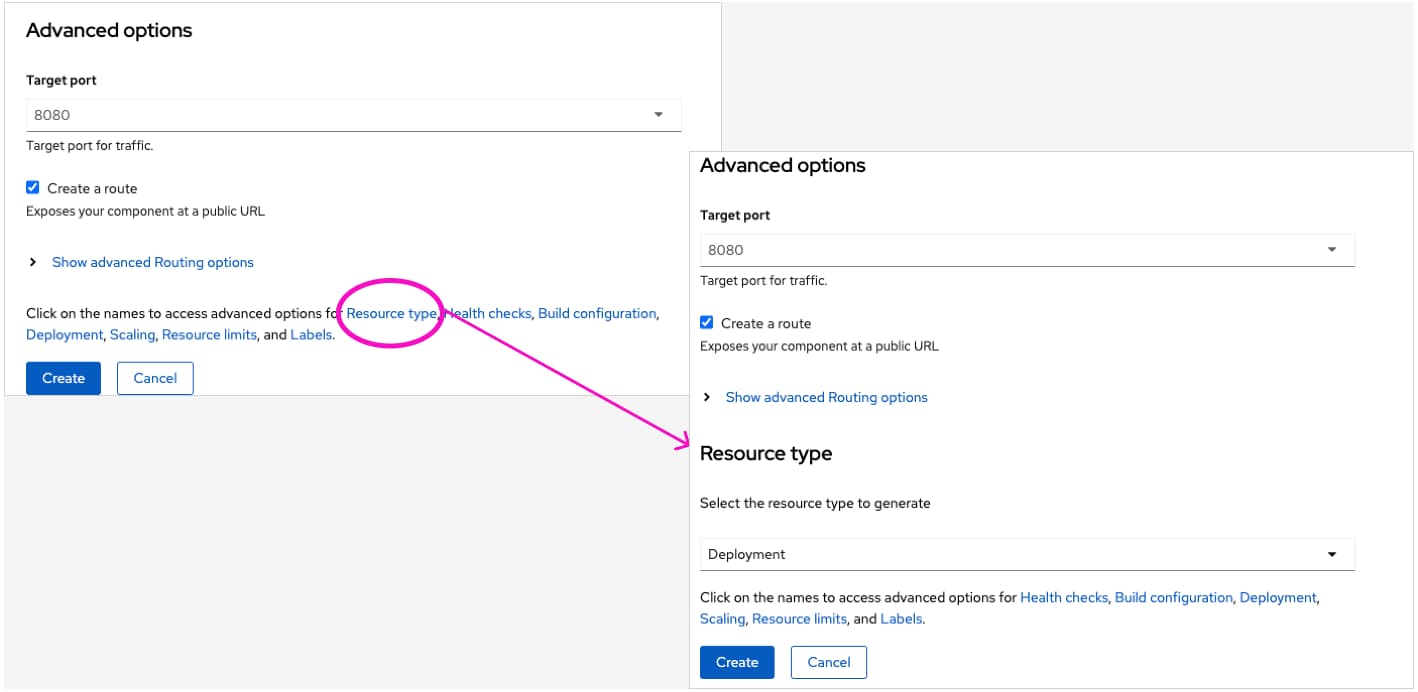
Now let’s look at how this affects the Import from Git and Deploy Image flows. Previously, resource type section was prominent in those user flows. We learned from users that resource type was not something that is typically changed. So once their default was set properly, they didn’t update it frequently. Because of this, we have added the ability to set the default in User Preferences and also moved the Resource type section of our Import from Git and Deploy Image forms to the Advanced options section (see Figure 2).
2. Improved display of limits and quotas issues
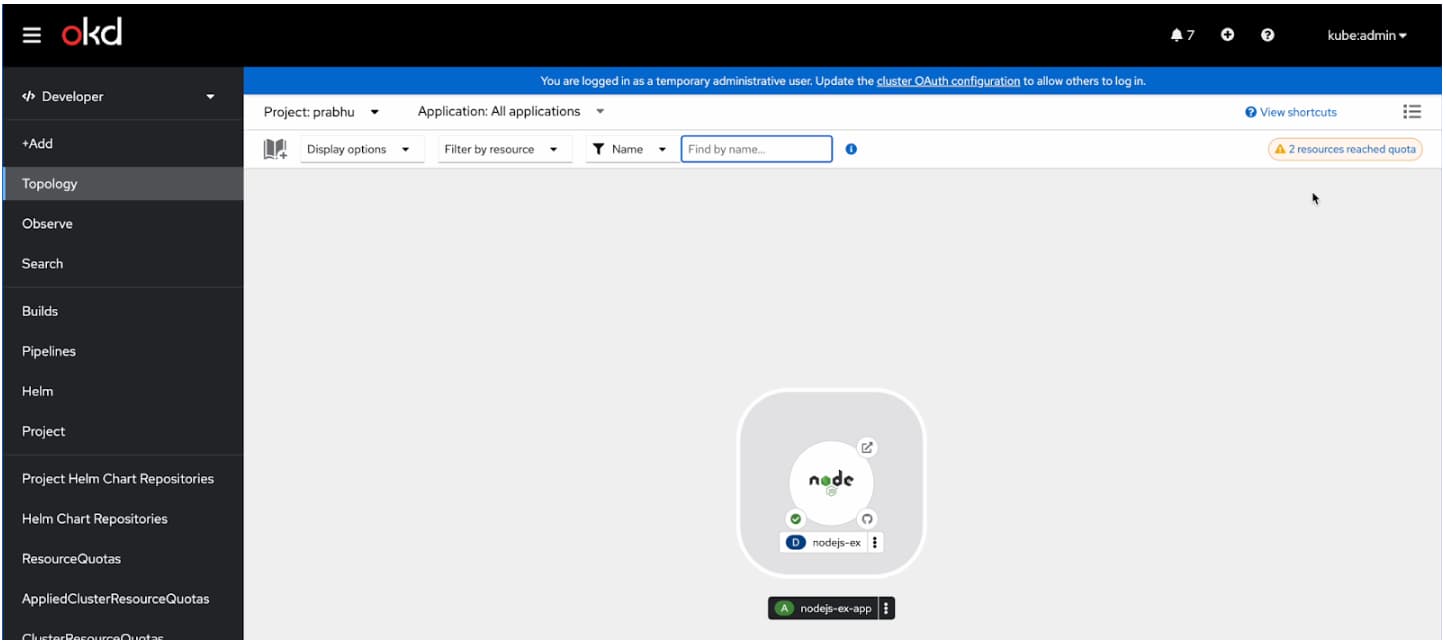
To improve awareness of project limits and quota issues, developers will see a warning label on the top of the Add and Topology page when any project limits and quotas are detected. Figure 3 shows an example of the label on the Topology page, which indicates the number of quotas that have been reached. Developers can click the label to get additional data to detect the issue.
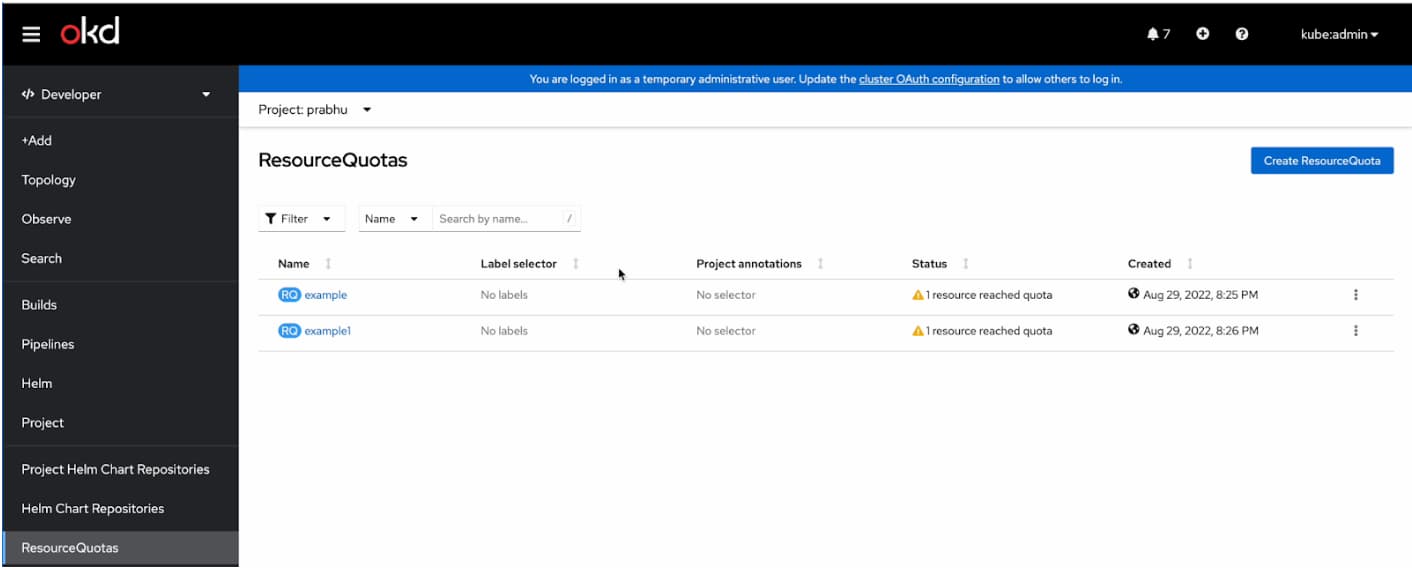
When multiple quotas have been reached, the user is brought to the list page of Resource Quotas (see Figure 4). Otherwise, users will be redirected to the details page of that specific resource quota.
Taking this a step further, additional visual indicators are shown in Topology on resources that have surpassed limits or quotas. Figure 5 illustrates an example of how developers can identify these issues at different zoom levels. Developers can gain additional information about the detected problem by clicking on the node and viewing the information in the side panel. An in-context link is provided, allowing the developer to navigate to the specific flow to fix the issue. In this case, it would allow them to edit the resource limits of the deployment.

This is one of my favorite features of the release. Currently, when limits and quotas are reached, developers have to go to the Project Details page to get information. We now inform the user as soon as the issue is detected. Additionally, we provide them with one-click access to either get more information or resolve the issue (Figure 6).

3. End-to-end KafkaSink support
Receive and store CloudEvents from Source/Subscription/Trigger on a Kafka topic without writing custom code as follows:
When the CR for knativeKafka is created with sink enabled, developers can create a KafkaSink from the Event Sink Catalog. Users will have a form-based experience to create a KafkaSink (Figure 7). Once created, a KafkaSink can be added as subscriber, trigger, and event-source sink targets. Developers can accomplish by using drag-and-drop or the action buttons.

How to get started with OpenShift 4.12
Ready to try these new features for yourself? Get started with OpenShift 4.12 today on the Developer Sandbox.
Check out the following resources to learn more about the new OpenShift 4.12 release:
- What's New in OpenShift 4.12 [Developer Edition]
- Red Hat Developer YouTube channel
- Try Red Hat OpenShift
If you have questions, feel free to comment below or reach out to us. Community feedback helps us to continually improve the OpenShift developer experience. Tweet me @serenamarie125 or join the OpenShift Developer Experience Google group to share your feedback.
Last updated: September 19, 2023